

Look, I already know what you’re thinking. “Beet wine? Is she crazy? That sounds terrible.”
Of course, beet wine. Maybe a little. And no, it’s quite wonderful actually.
But it’s quite wonderful with a couple of caveats. I can tell you right now that if you prefer a sweet wine, you’re not going to like this, so instead make a batch of this gorgeous blueberry basil mead.
If, however, you enjoy a nice dry red, I highly recommend making a batch of this humble little country wine.
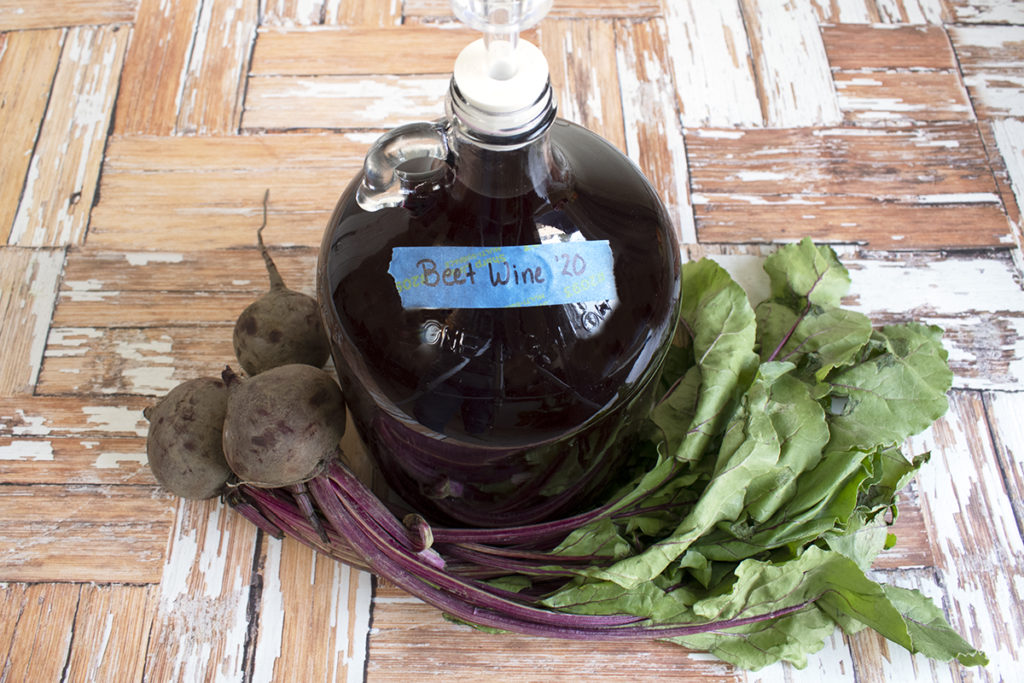
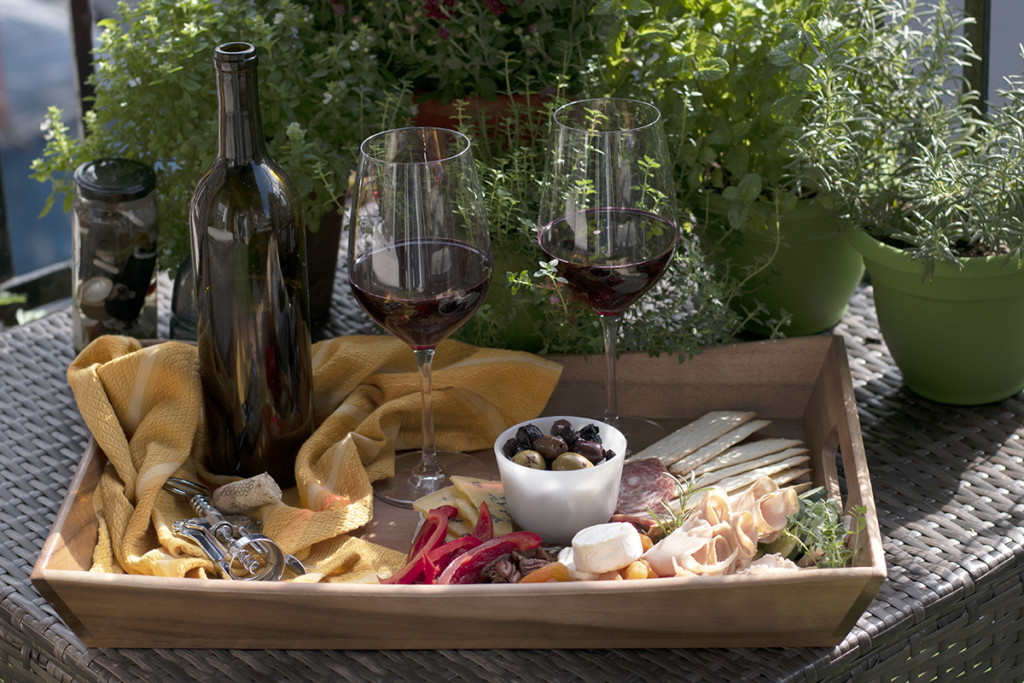
Given a chance to bottle-age for a few months or even a year or two, you’ll uncork a beautifully colored, dry red wine.
It could easily be mistaken for a French Bordeaux or a pinot noir. With a velvety mouth-feel and tons of body, you’d be hard-pressed to identify what you’re drinking if you didn’t already know it was beet wine.
If you’re sensitive to the sulfites that are so often found in commercially-made red wines, you need to give this recipe a go.
One thing I always try to adhere to when making wine is to keep it as additive-free as possible. Now, don’t get me wrong; some chemicals and nutrients are necessary to many brewing and winemaking processes. But I’ve found that when it comes to homemade fruit (or in this case vegetable) wines, keeping it simple gives the best flavor.
And of course, this means there are fewer special ingredients you’ll need to purchase to make a batch.
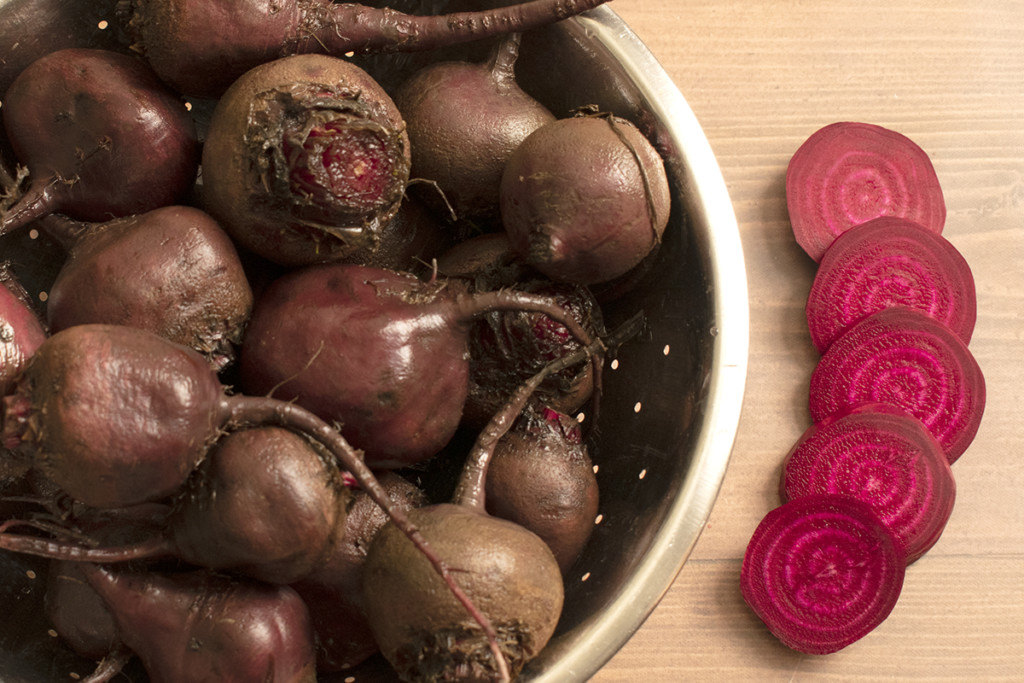
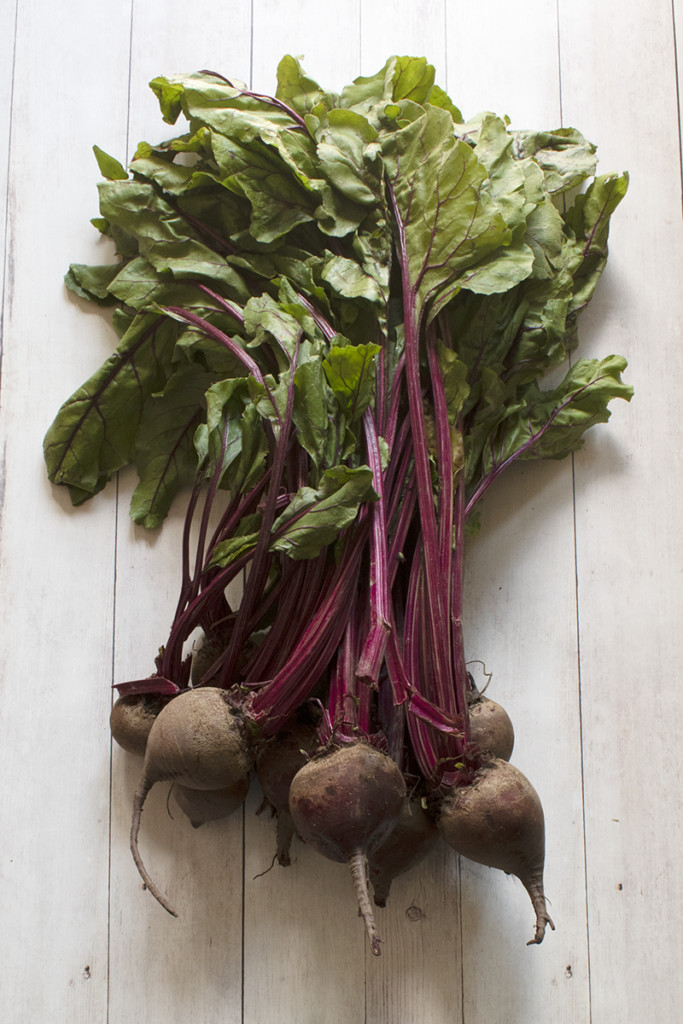
Let’s be honest with each other; there are only so many jars of Harvard beets or pickled beets you can make before you literally see red, and you need to do something different with that bumper crop of beets.
And if you still have more beets after this wine, here’s 33 Brilliant Recipes Using Beets.
So, grab your winemaking equipment…what’s that? Don’t you have winemaking equipment?
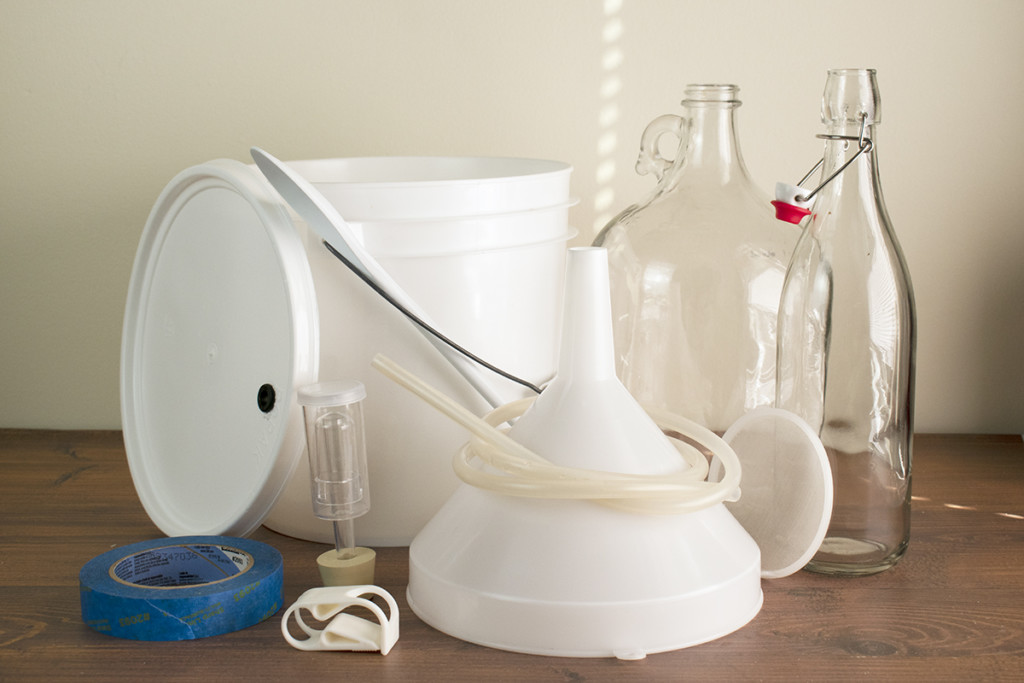
Well, lucky for you, the good folks over at Midwest Supplies have put together an inexpensive winemaking kit that has everything you’ll need to make this wine.
The only thing you’ll need beyond their kit are bottles, corks, a corker, and a tubing clamp. And you’ve got plenty of time to round those up.
For those of you that already own brewing or winemaking equipment, here’s a list of what you’ll need.
Equipment:
- 2-gallon brew bucket with a drilled lid
- One-gallon glass carboy
- Straining bag
- Tubing and clamp
- Airlock
- #6 or #6.5 drilled stopper
- Sanitizer (I prefer the ease of Star San)
- One packet of Lalvin Bourgovin RC 212 yeast
- Bottles, corks, and corker
Non-Winemaking Equipment:
- Stockpot
- Slotted skimmer spoon
- Long-handled wooden or plastic spoon
As always, when you’re making your tipple at home, start with cleaned and sanitized equipment every time you use it, and wash your hands thoroughly. You only want the Lalvin Bourgovin RC 212 yeast growing in there.
Beet Wine Ingredients:
- 3 pounds of beets, the fresher, the better
- 2.5 pounds of white sugar
- 3 oranges, zested and juiced
- 10 raisins
- 15 whole peppercorns
- 1 cup of cooled black tea
- 1 gallon of water
A Note About Water
Water quality is essential when making wine. If you don’t like the taste of your tap water, you won’t like your finished wine. Use either filtered water that’s been boiled and cooled, or purchase a gallon of spring water.
The zest, orange juice, and raisins provide the yeast with the nutrients it needs to thrive and survive the long ferment. And the black tea is used to give a little astringency that would otherwise be provided by the tannins found in grape skins. The peppercorns will give the wine a little bite to balance out the earthy finish.
All of these flavors will mellow and come to bare when the wine has aged for a bit. Beet wine is best when the bottle is good and dusty.
Let’s make some fancy-pants beet wine, shall we?
Rinse your beets well to remove as much dirt as possible. Remove the tops and save them to eat; they can be eaten raw or cooked like chard or kale.
Now that your beets aren’t a muddy mess, peel them and roughly chop them. You can even run them through the grating attachment of a food processor if you want a nice, even pulp. Give them one more thorough rinse with cold water to remove any remaining dirt.
In a large stockpot, add the gallon of water and the beets.
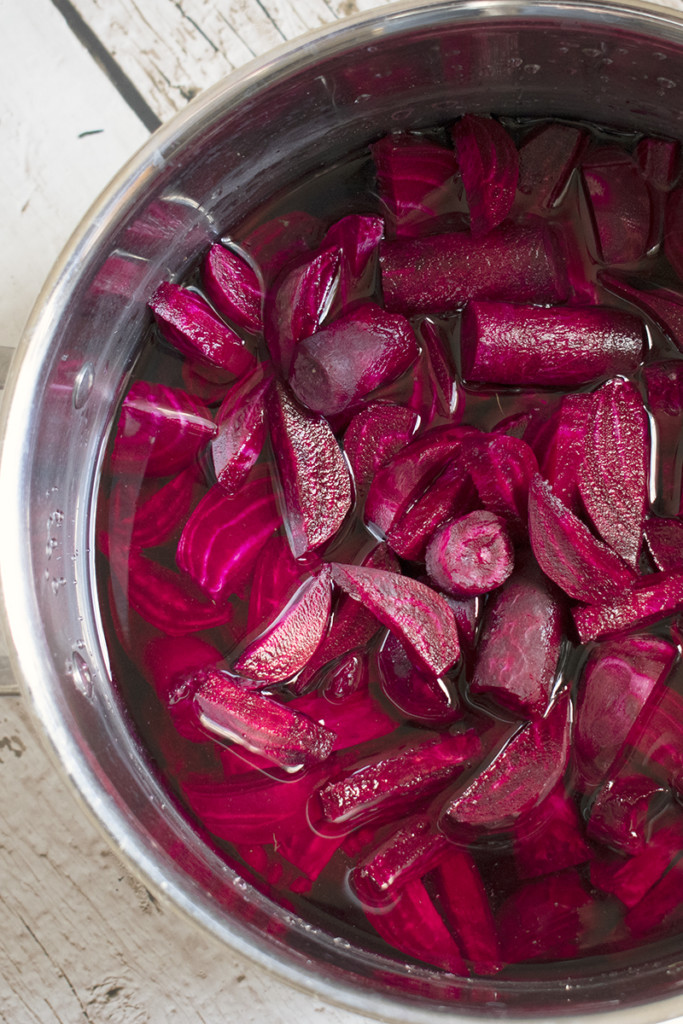
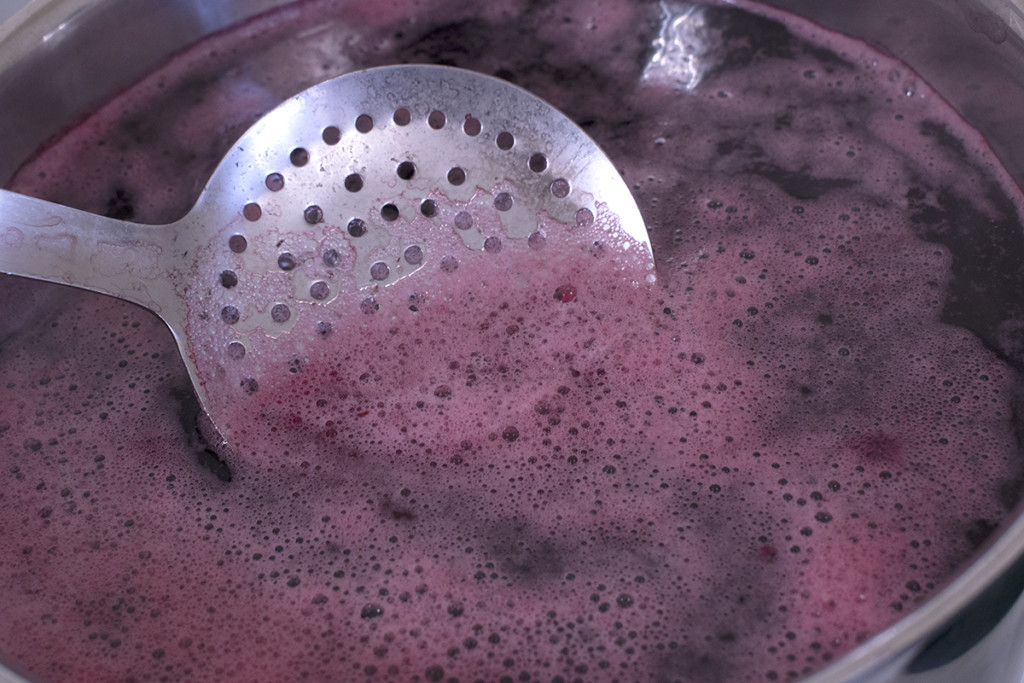
Slowly bring the beets and water to a simmer, but don’t let it boil. Keep the beets simmering for 45 minutes. Use the skimmer spoon to remove the foam that rises to the surface.
While the beets are simmering, pour the cooled tea and orange juice into the bucket.
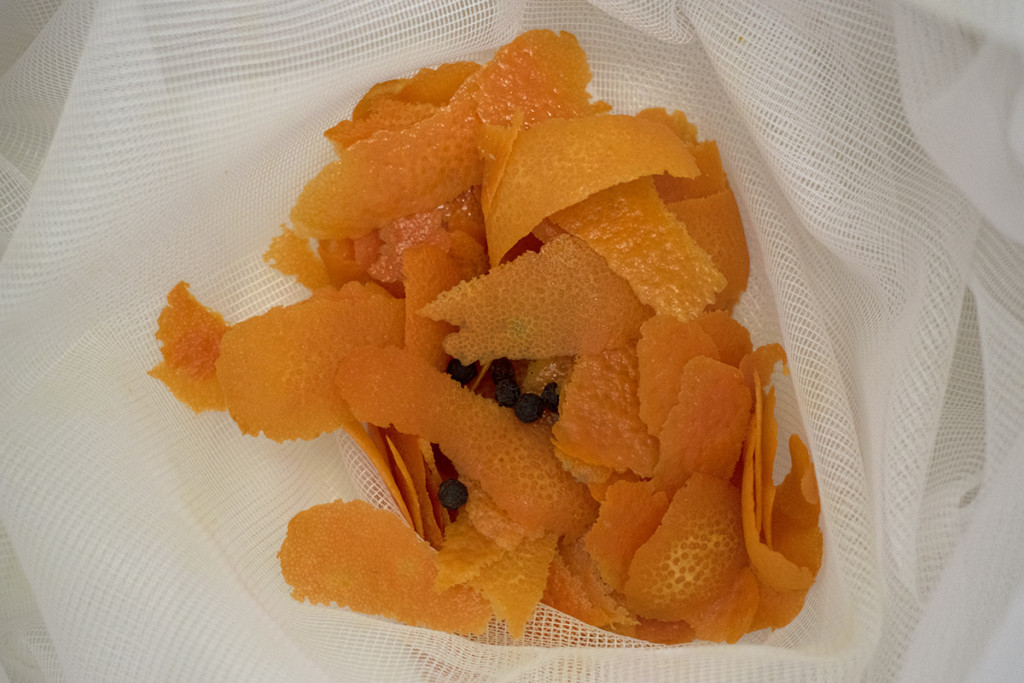
Put the orange zest, raisins, and peppercorns into the strainer bag. Place the strainer bag into the brew bucket. Depending on the size of your strainer bag, you may be able to fold it over the outside edge of the bucket as you would a garbage bag.
Once the beets have finished cooking, use the skimmer spoon to transfer them into the strainer bag in the bucket carefully. If the bag you’re using isn’t wide enough to fold over the lip of the bucket, go ahead and tie a knot in it.
Skim off any remaining foam from the beet water. At this point, you’ll need to reserve about four cups of the beet liquid to use for topping up.
Add the sugar to the beet liquid in the stockpot and bring back up to a simmer. Let the mixture simmer for 10 minutes, or until the sugar is dissolved. Turn the heat off and pour the sweetened beet water into the bucket.
Check to see if you’ve got a full gallon. If you lift the straining bag, the bucket should be half full. If you need too, top up the mixture with the reserved beet water. It’s always best to have a little more than a gallon as you’ll lose a bit when you transfer it into the glass jug later.
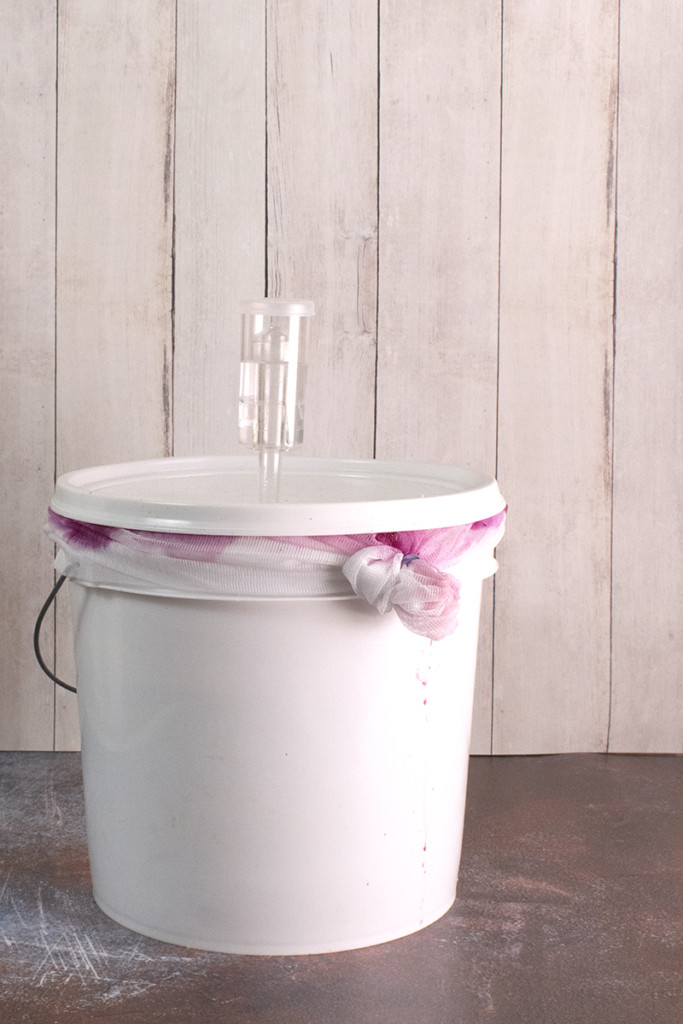
Now that we have everything in the bucket, place the lid back on firmly and attach the airlock in the grommeted hole of the lid.
After 24 hours have passed, remove the lid and sprinkle the packet of yeast into the liquid. Using a clean and sanitized spoon, stir the yeast in vigorously. Don’t be shy about it; give it a good stir. You want to mix in a lot of air to get the yeast going.
Recover the bucket with the lid, being sure the lid is attached tightly.
You’re going to open the bucket each day and give everything a good stir for the next twelve days. I wrap my stirring spoon up in clean paper towels, so I don’t have to keep cleaning and sanitizing it every day.
When you’re stirring the must (that’s winemaker talk for the beet mixture you’ve just made), you should hear a light hiss or fizzing. That would be the sound of your happy little yeasties hard at work turning sugar into alcohol.
It’s a good sound, isn’t it?
After twelve days, open the bucket and lift out the straining bag, letting it drain back into the bucket.
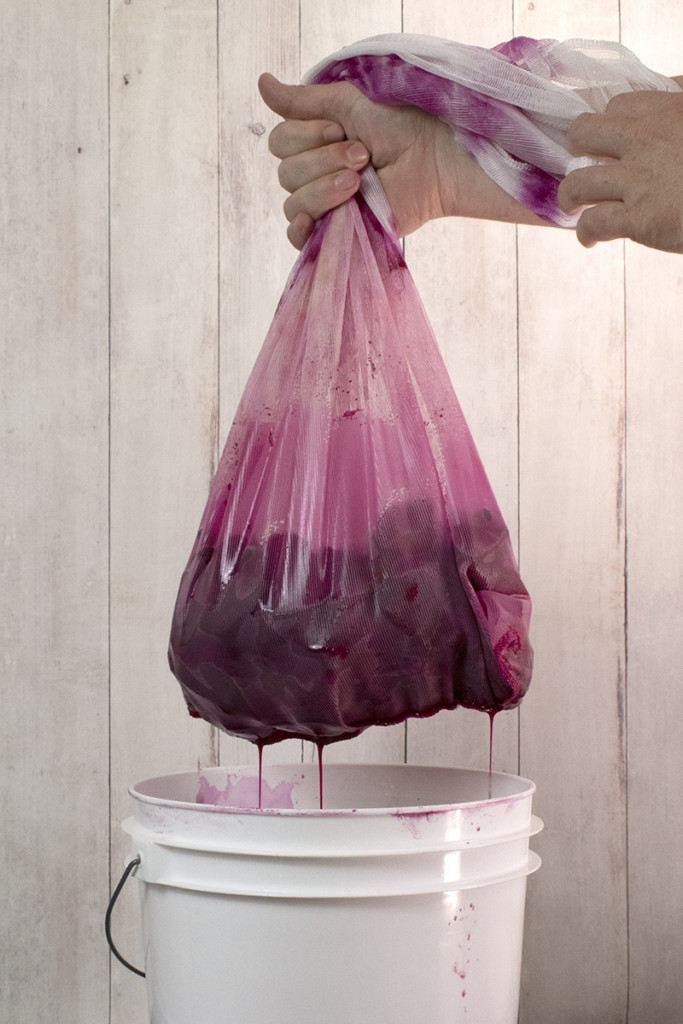
Don’t squeeze it; just hang out for a couple of minutes and let it drain. Now take that bag full of lovely fermented beet goodness and put it in your compost.
As for the bucket of beet wine, you’re going to transfer it – or rack it – into the glass jug using the tubing.
Put the bucket on the counter or a table, and place the jug below it on a chair. Place one end of the tubing into the bucket and hold it steady, suck on the other end to begin the flow of wine, and then put that end into the jug. If it’s helpful, you can put the clamp on the tubing so you can stop the flow once you get it going.

There will be a layer of sediment on the bottom, try not to transfer too much of it to the gallon jug.
You’ll be able to tell when you’re getting sediment as the liquid in the tubing will become cloudy and opaque. You may have to tilt the bucket (gently and slowly) to be able to pick up most of the clear wine.
Fill the glass jug until it reaches the neck. Put the rubber stopper into it and put the airlock into the hole in the stopper.
You can add that sediment to your compost pile too, just put a little water in the bucket and slosh it around well.
Let your wine sit, undisturbed on the counter for 24 hours.
If, after 24 hours, you have a lot of sediment still on the bottom of your jug, more than half a centimeter, rack it back into the bucket (cleaned and sanitized, of course), being careful not to pick up any of the sediment. This process will be easier to do now that you can see where the tubing is in relation to the sediment.
Rinse the jug and sediment out well with hot water and pour the wine back in. You can use a funnel if you have one, be sure to sanitize it first. You don’t have to use the tubing this time. Replace the stopper and airlock.
And Now We Wait
Really, this is the easy part. Time has a way of slipping by pretty quickly. For the most part, you won’t need to do anything for about six months.
Just check your airlock occasionally. If the water line in the airlock is getting low, add more water to it.
Keep an eye on the sediment on the bottom of the jug; that’s the yeast slowly dying off. In winemaking, this layer is called the lees. If the lees get to be too thick, more than half a centimeter, rack the wine into the bucket again and back into the jug as you did before, leaving behind the sediment.
After about six months, fermentation should be complete.
Use a flashlight and shine the light into the side of the jug. You’re looking for teeny, tiny bubbles rising to the surface. Give the jar a hard rap with your knuckle.
Also, look at the wine in the neck of the jug and look for bubbles there. You shouldn’t see any still coming up to the surface. If you do, let the wine continue to ferment and recheck it in a month or two.
If your wine doesn’t have any more bubbles, you’re ready to bottle.
Bottling Your Beet Wine
I don’t think I’ve ever bought wine bottles, but you may want to if you don’t want to deal with scrubbing out used bottles or removing the label.
I always save my bottles or ask friends to save wine bottles for me, or sometimes I’ll scavenge some from the local recycling drop off. Yes, I’m that weirdo who’s always elbows deep in the glass bin when you’re dropping off your recyclables.
You want bottles that were corked, not screw tops. Screw top wine bottles are made of thinner glass and can shatter when you’re corking them.
The only downside to acquiring wine bottles this way is the labels.
There’s nothing in the rulebook that says you have to remove the label from an empty wine bottle, but many folks choose to. A hot soak in soapy water and a thorough application of elbow grease is needed (scraping and scrubbing), but in the end, you’ll end up with shiny, clean label-free bottles.
And of course, they’ll need to be…you guessed it, cleaned and sanitized. I find pouring some uncooked rice in the bottom of the bottle with a little hot water, and a good shake does the trick.
For this wine, I recommend using green wine bottles as it will preserve the color. If you use clear wine bottles, the gorgeous burgundy color can fade into more of a fawn color. It will still taste good; it just won’t be as pretty.
One gallon will give you five bottles of wine.
Put a Cork In It
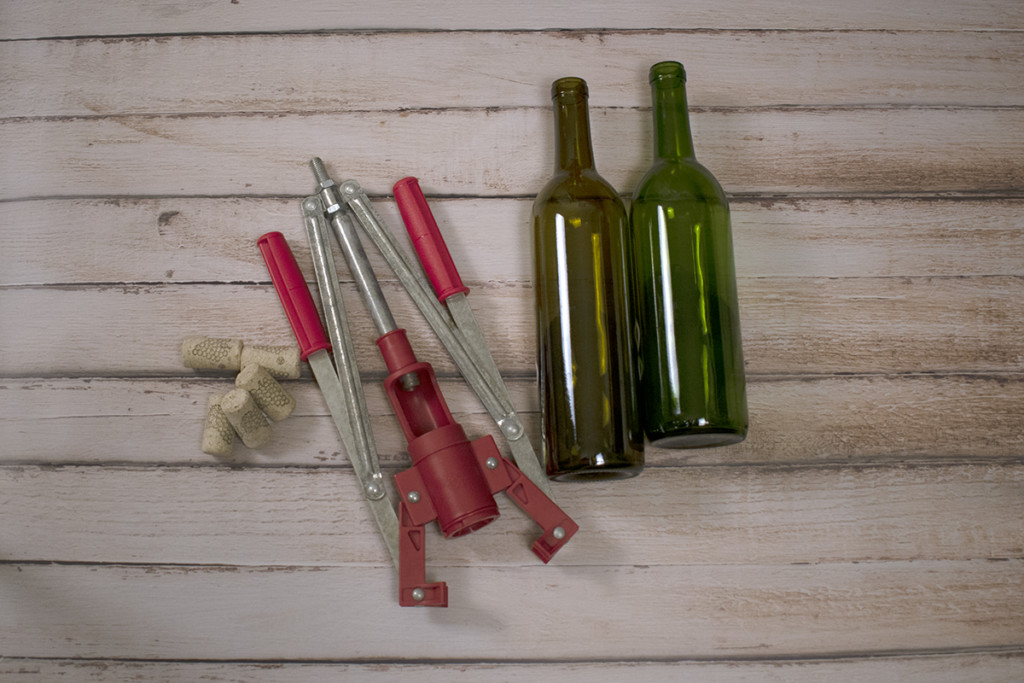
If you’re just getting into winemaking, I suggest picking up a double-lever wine-corker. There are more expensive floor set-up corkers. However, for the odd five bottles now and then, this is all you’ll need. And it’s much easier to use than the super cheap, all-plastic corkers often included in beginner kits.
As far as corks go – don’t be overwhelmed by the choices and numbers you’ll see.
It’s simple – how long do you want your wine to last in a bottle? Different sized corks will keep wine fresher longer. I usually stick to a #9 cork as the wine will last up to three years. Most country wines made from fruits and vegetables are best consumed within the first three years of making them anyway.
On to Bottling Day
Get your cleaned and sanitized bottles ready. And for today, the only equipment you’ll need to sanitize is the tubing.
I find it’s easiest to put the jug up on the counter and line my bottles up, plus a tasting glass, on a chair directly below it.
Important
If in the process of moving your jug to the counter, you stir up the sediment, leave it for several hours to resettle. You don’t want any of that sediment in your bottles as it can affect the flavor.
Attach the tubing clamp about 6” up on one end of the tubing; this will be the end you use for filling the bottles.
Soaking the Corks
To make corking easier, you’ll need to soak the corks for a bit.
Begin by bringing a couple of inches of water to boil in a small saucepan. Turn the heat off and add the corks to the pan, put a mug or small saucer in the pan to keep the corks submerged, and let them soak for about 20 minutes.
I always soak one more cork than I need because I’m clumsy and usually end up dropping one on the dirty floor or corking a bottle funny. This way, I always have an extra if I need it.
Start the flow of beet wine as before, filling the bottles and leaving an inch plus the length of your cork in the neck. Squeeze the clamp shut once you’ve reached the desired level and carefully move on to the next bottle. Continue until all the bottles are filled, being careful not to pick up sediment from the jug. If there’s wine left, put some of it in the tasting glass.
Cork them up using your corker and stick a label on them, so you know what’s in the bottle and when it was bottled. It’s always best to age wine on its side, so the wine keeps the cork wet and prevents it from shrinking.
Tasting Your Finished Beet Wine
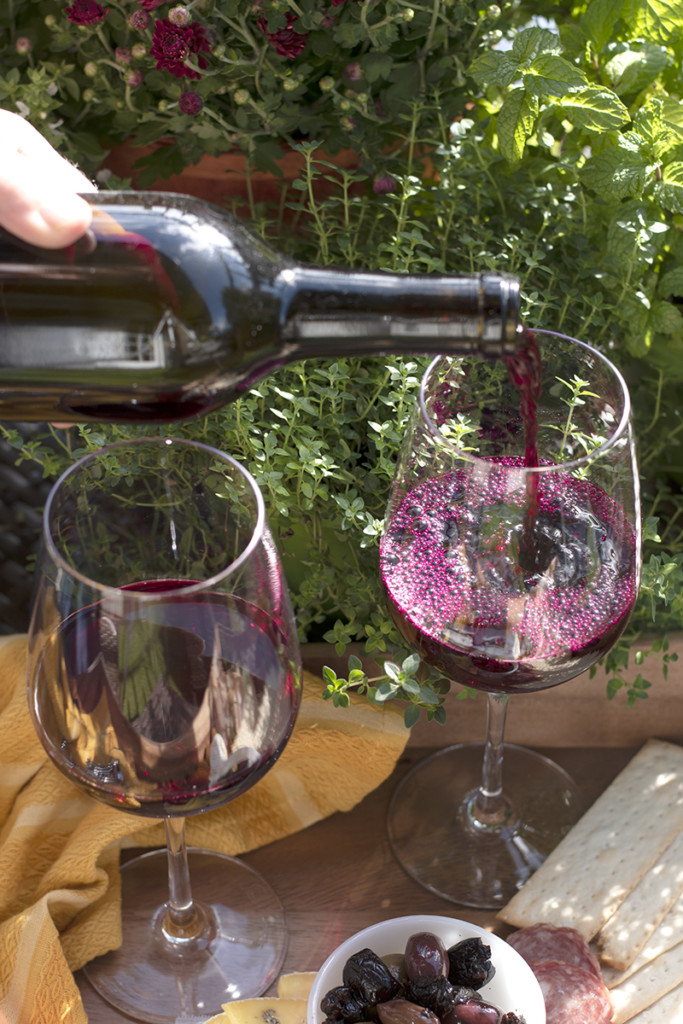
It’s always fun to taste the wine throughout the process. I’m always amazed at how the flavor of a wine will change over a matter of months.
The wine you taste today will taste entirely different three months from now and then again six months from now. This is part of the fun of making your wine at home.
This past year I made a mead using nothing but buckwheat honey –very strong-tasting honey. At the first racking, I was convinced I had made a gallon of swill that was only good for rocket fuel. But I let it keep fermenting, and when I eventually bottled it, it wasn’t terrible.
It’s been bottled for five months now, and I recently tasted it, expecting the worst – it’s buttery smooth, mellow, and full of warm buckwheat and vanilla notes. It’s probably my favorite thing I’ve brewed all year.
I’m telling you this, so you don’t give up when you taste your wine along the way, and it’s very harsh.
Wine is a lot like us – it gets more body and mellows as it ages.
And if you can stand the temptation, always try to stick at least one bottle aside for a couple of years. You may be pleasantly surprised to find that those dirty little beets you yanked out of the ground have aged into a smooth and classy red.

Get the famous Rural Sprout newsletter delivered to your inbox.
Join the 50,000+ gardeners who get timely gardening tutorials, tips and tasks delivered direct to their inbox.