


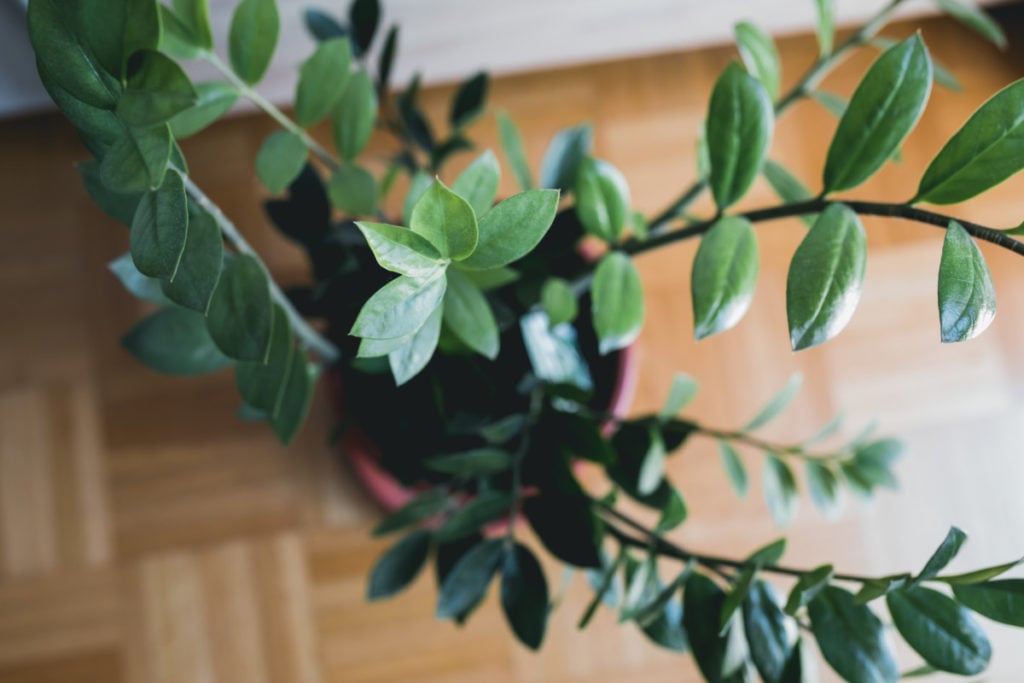
It all starts with one plant.
It’s a gift from someone or a plant that catches your eye when you’re out and about. You take care of your new friend and find that you enjoy having this little plant in your home. And hey, you haven’t killed it yet.
Then, that one plant becomes two.
And then another plant shows up from somewhere.
Shortly after, the other members of your abode begin raising an eyebrow each time you walk in with a new plant.
“What?” you say defensively.
“Oh, nothing,” they say.
Before you know it, you’re living in an indoor jungle, there’s a bottle of plant fertilizer on your kitchen sink, a plant mister on your coffee table, and you have rows of tiny jars filled with cuttings on every sunny windowsill.

You’ve officially become a collector.
You’ll get no judgment from me, my friend.
But you’ll find in this newfound passion that purchasing a full-sized version of every plant on our wish list becomes rather spendy. So, we houseplant lovers quickly turn to propagation.
Propagating new plants from a leaf or stem cutting is the least expensive way to grow your plant collection, and depending on the plant species, it can also be quite simple to do. You may be surprised by how many of these plants will propagate new plants for you without you doing anything!
I’ve put together a list of the easiest houseplants to propagate.
With a little patience and plenty of space on your windowsill, you’ll be well on your way to the indoor jungle of your dreams.
Propagation Tips
Keep It Clean
When taking a cutting, whether it’s a leaf, stem or node cutting, it’s incredibly important to use clean and sterile tools. Getting a healthy cutting makes propagating easier, and you wouldn’t want to open up the parent plant to disease, especially if you’re getting a cutting from a friend’s plant.
A cotton ball and a little rubbing alcohol are all it takes to clean your tools before and after you take a cutting.
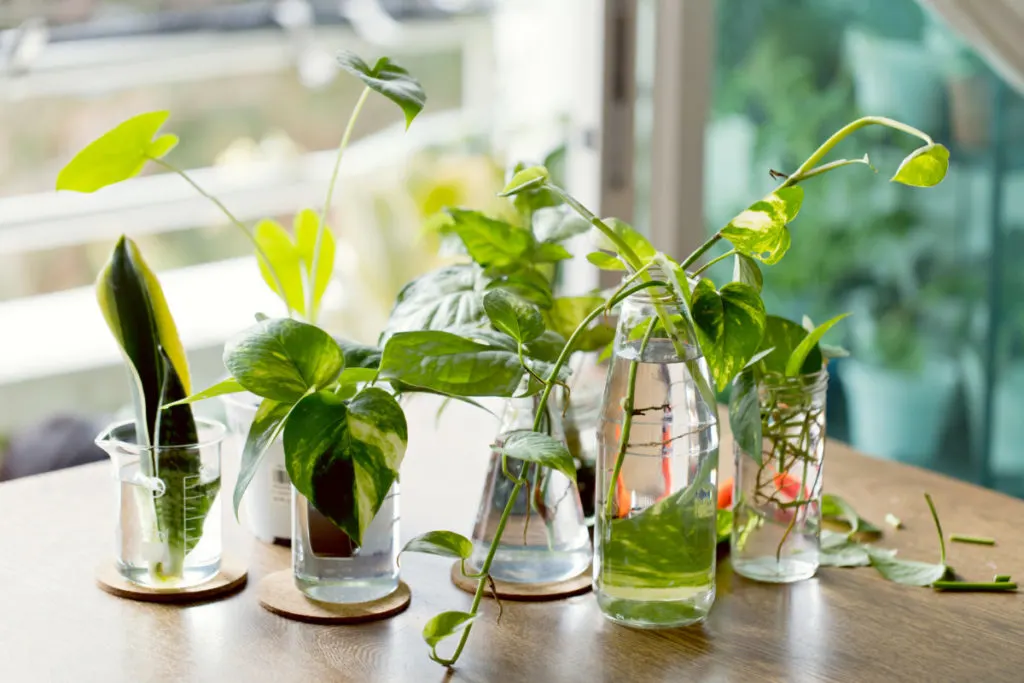
Propagation Vessels


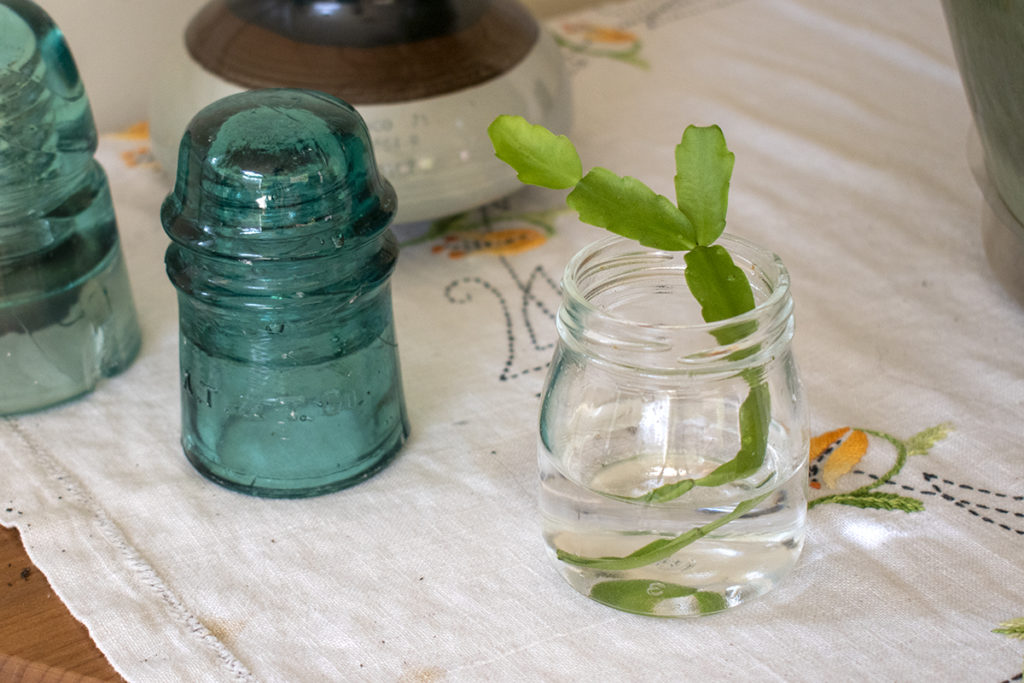
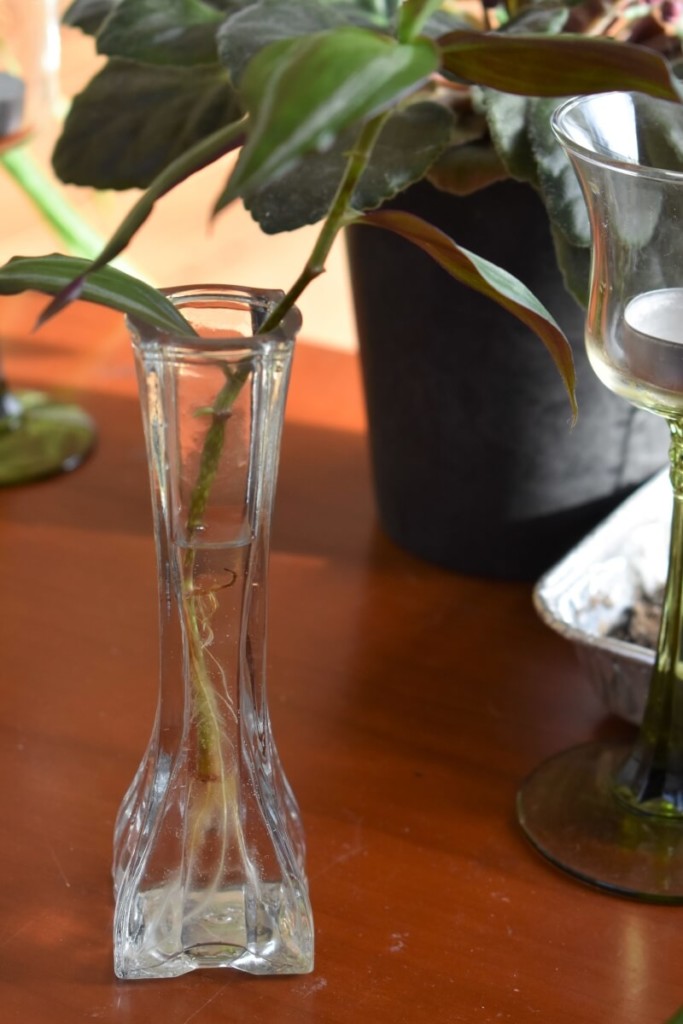
You can use any vessel that will hold water and the cutting you’re propagating. Using empty and clean jars of various sizes works well and is a great way to reuse glass jars.
(In fact, it’s #19 on our list of 21 Brilliant Ways To Reuse Glass Jars.)
If you want propagation vessels that are both beautiful and functional, you may want to consider purchasing a propagation station. Here’s a list of beautiful propagation stations to choose from.
13 Plant Propagation Stations To Grow New Plants In Style
Leaf, Stem or Node?
When it comes to propagation through cuttings, it’s important to cut the right part of the plant. Some plants will only root if you’ve included a node on the cutting. Other plants can only be propagated via leaf cuttings. Some do better if you use a stem cutting.
I’ll be sure to let you know what part of each of the plants on our list is needed for successful propagation.
Water or Soil?

Quite a few plants can be propagated through cuttings by rooting them in water or soil. And for many folks, the obvious question is which is better. In nearly all cases, it all comes down to personal preference.
Do you enjoy seeing the roots develop? Then water rooting is the way to go.
Do you want the easiest (and often quickest) method for rooting a plant? Then you’ll probably want to poke your cuttings directly in the dirt.
When propagating in water, it’s important to change the water every week to prevent mold from growing. You should wait for water-propagated cuttings to develop roots over an inch long before planting them in a well-draining potting mix.
If you’re propagating in soil, it’s important to maintain a high level of humidity and sunlight while the plant puts out new roots. You may want to cover the container with a clear plastic bag.
Some cuttings you need to do one way rather than the other, and I’ll cover those specifically below.
Be Patient
Propagating a new plant requires time. It’s the trade-off for not buying a full-sized plant. I’ve often found that rooting a plant follows that age-old adage of a watched pot never boils. A watched cutting never roots.
This is why many folks prefer water propagation; you can see when new roots are developing. If you decide to root directly in the soil, be patient and resist the urge to dig up your cutting and see if it has new roots.
Now, let’s make some new plant babies!
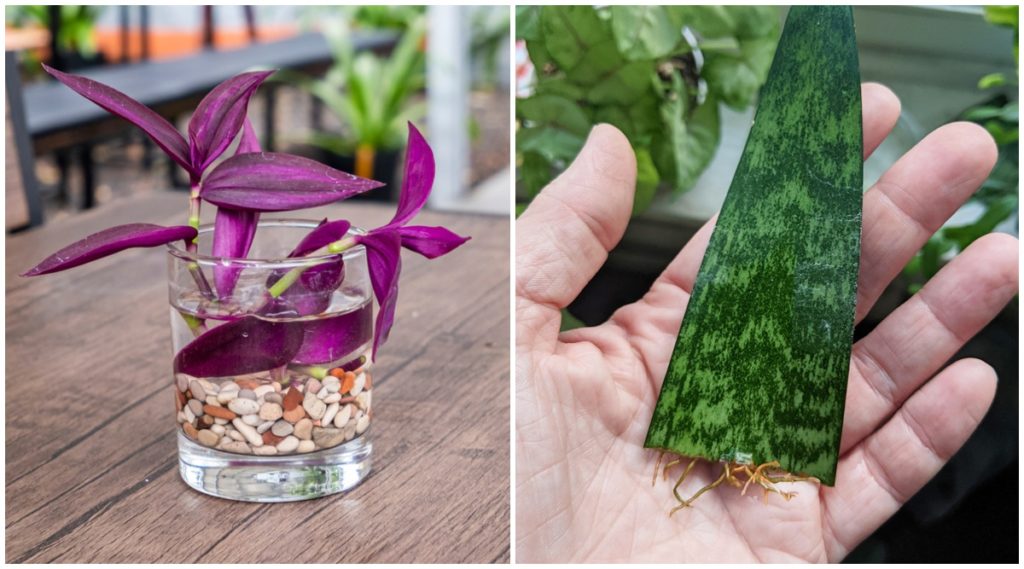
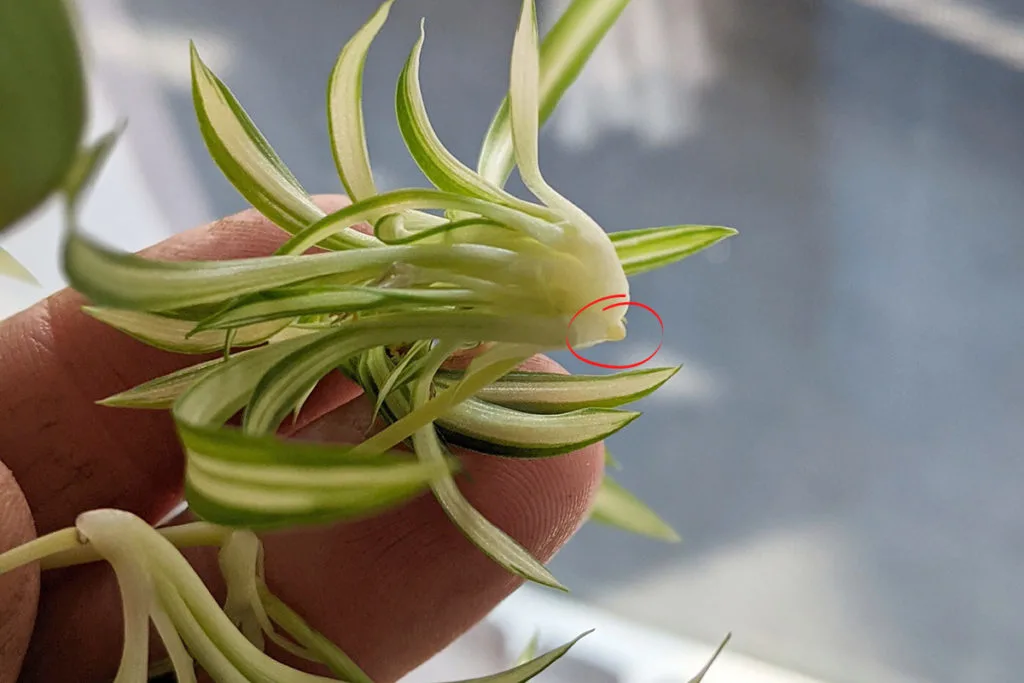
1. Tradescantia or Inch Plant
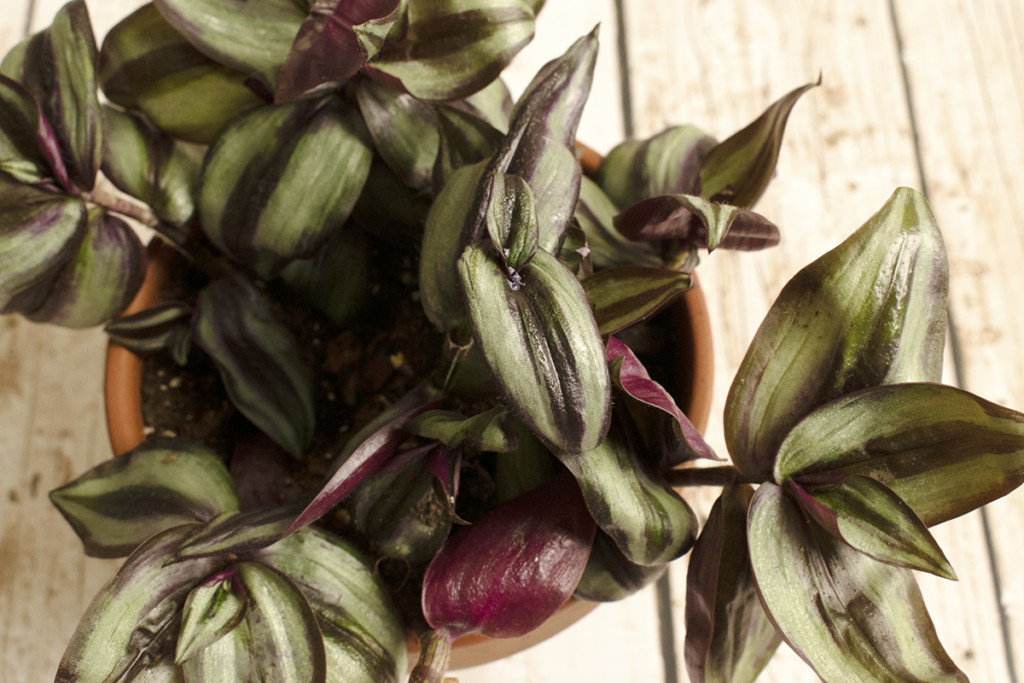

These are some of the easiest plants out there to propagate. Heck, if you’ve got a large bushy plant, it’s most likely already propagating itself right in the pot.
Tradescantia is also called spiderwort, and there are tons of different varieties. The most popular variety is the tradescantia zebrina, with its glossy striped leaves.
Some of the more interesting types are Tradescantia ‘Hijau Baru’, also known as Teddy Bear tradescantia, with its soft and fuzzy leaves. I love the delicate Bridal Veil tradescantia, Tradescantia multiflora, with its spindly stems and tiny delicate white flowers.
What makes Inch Plant so easy to propagate are the leaf nodes which grow on the stem. You’ll notice a joint on the stem about every inch or so, which gives us this plant’s nickname – inch plant. Each one of these joints contains cells that will produce roots.

If you look at a tradescantia closely, sometimes you can see new roots growing from these joints. If they make contact with the dirt, they will happily start producing more roots and eventually a larger plant.
Cut several stems, making sure you have at least 2-3 of the jointed nodes on each cutting. You can either root the stems in water before planting them in potting soil or plant the stems directly in potting soil.
If you choose to put your cuttings in potting mix, make sure at least two of those jointed nodes are below the soil. That’s where the roots will grow.
To learn more about tradescantia care and for full propagation instructions, be sure to read:
2. Snake Plants

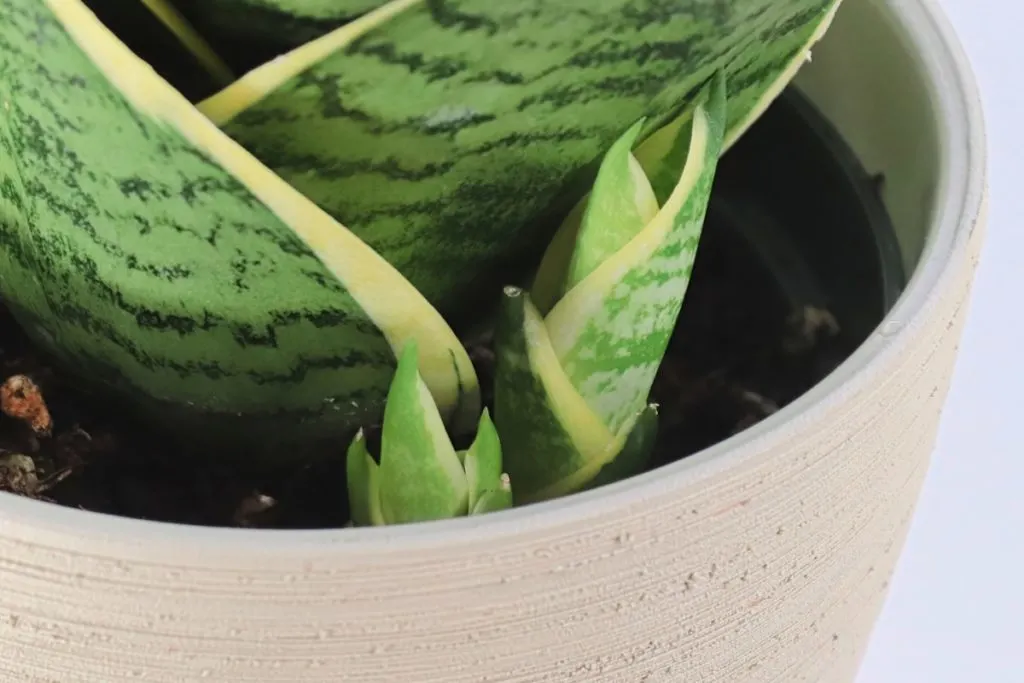
Snake plants are super easy to grow and a favorite among us who forget to water our houseplants. They are nearly impossible to kill and will grow in even low-light conditions.
Sword plant, devil’s tongue, mother-in-law’s tongue, whatever you want to call it, snake plants are a great choice if you want a visually striking plant.
They are also ridiculously easy to propagate. Why? Because half the time, they propagate all by themselves.
If you’ve got a happy and healthy snake plant, it will put out pups. Pups are tiny little snake plants that grow at the base of the parent plant.
To propagate them, you’ll need to cut them off of the main plant. You can even do this without disturbing the parent plant. Once cut, rinse the soil off of the pup, and let it scab over for a day or two. Plant the pup in a quality cactus potting mix.

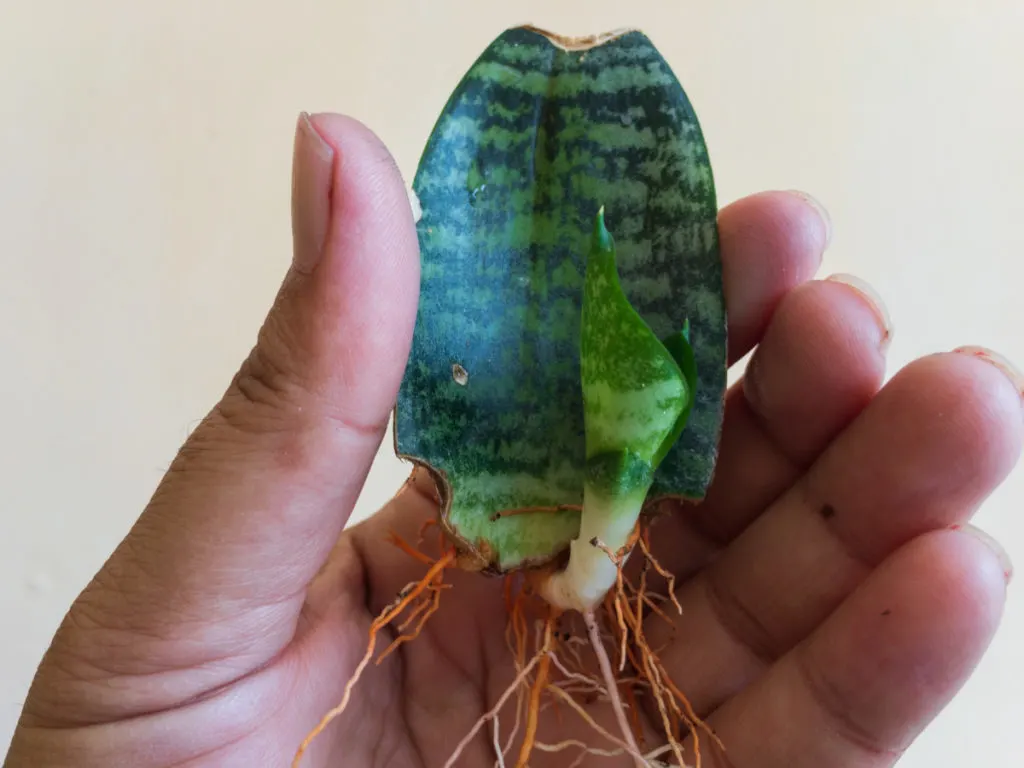
If you don’t have pups, you can propagate snake plants by taking one of the long leaves and cutting it into smaller sections. Each section can be rooted to make new plants either in water or soil.
I’ve written an entire post that walks you through how to propagate snake plants with detailed instructions for each method.
Check it out below.
3. Aloe Vera

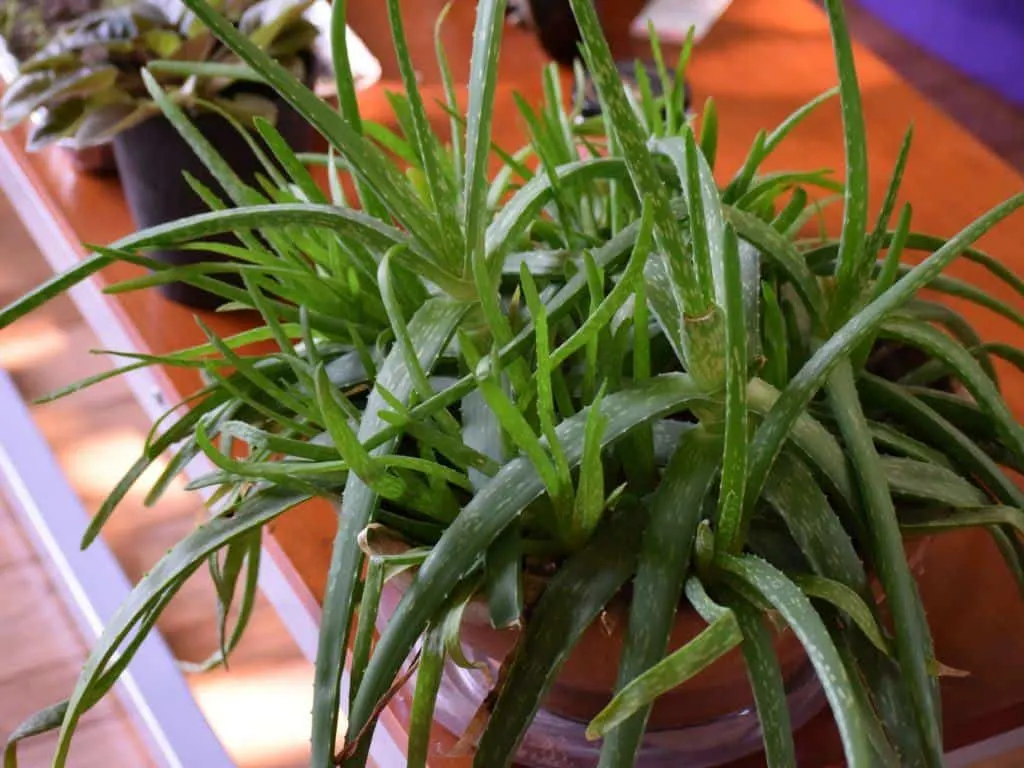
Much like the snake plant, aloe vera made our list of easy-to-propagate plants because it tends to put out new pups all the time.
If you’ve got a large, healthy aloe plant, take a close look around the base, and I’ll bet you’ll find tiny little fingers of aloe poking up out of the soil. These new “pups” can be removed and propagated into a whole new aloe plant.

Because it’s a succulent, you’ll need to let the pups scab over for a day or two before you pot them up in their new homes. Choose a good succulent potting mix, such as Miracle-Gro Succulent Mix.
If you want full instructions for propagating aloe pups, you can read my article:
How to Propagate Aloe Vera By Transplanting Aloe Vera Pups
And while you’re propagating your aloe, you might want to harvest some of the aloe vera too. It’s simple to do.
Aloe Vera Gel: How To Harvest It and 20 Ways To Use It
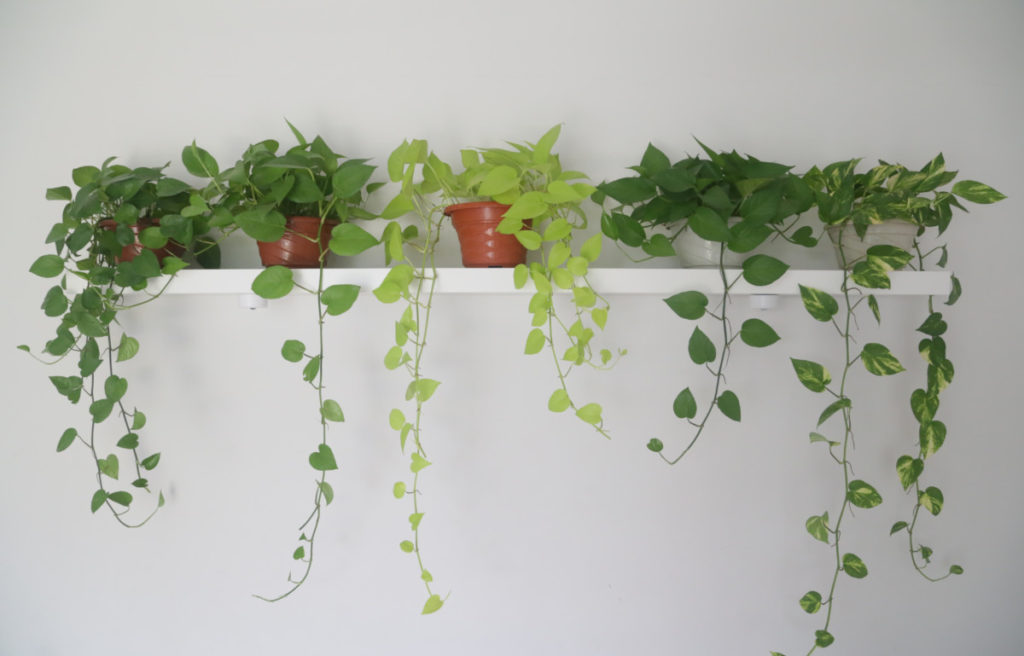
4. Pothos

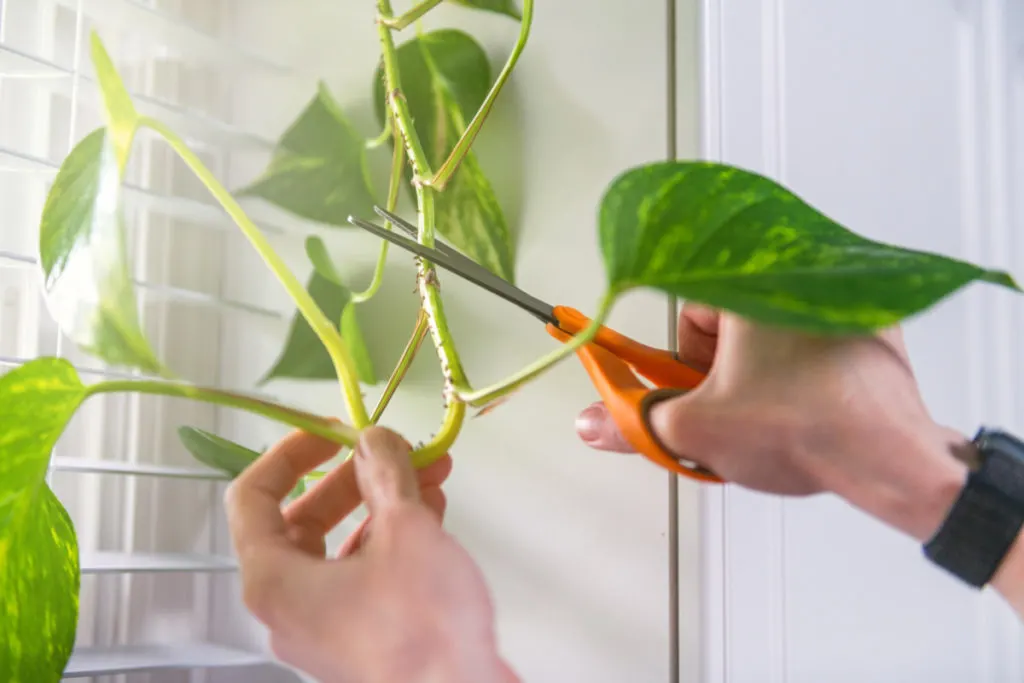
Pothos are wildly popular houseplants. You can train them to climb or grow them as a hanging plant. You can trim them to grow bushy and compact. They’re a satisfying plant to keep because they grow so quickly, which means it only takes a couple of years to have long tendrils hanging from your favorite pothos in the window.
They’re simple to care for, and there are so many different varieties, each more beautiful than the last. Add in the fact that they’re easy to propagate, and pothos is probably one of the most commonly traded houseplant cuttings.
I’ll give you a cutting from my golden pothos if I can have a cutting from your marble queen.
Is that a neon pothos? Can I have a cutting?
Oh my gosh, you’ve got a satin pothos? When can I have a cutting?

Pothos do best when rooted in water, although you can propagate them in soil too.
To propagate a pothos, you need to take a stem cutting right below a leaf node. Leaf nodes are where the leaf meets the stem. Often, small ariel nodes can be seen beginning to grow at these sections.
Ensure your stem cutting is at least 4″ long and remove the lower leaves from your cutting before placing it in water. In a few weeks, your pothos will begin to put out roots and be ready for planting.
Check out 3 Steps To Propagate Pothos & 7 Mistakes Most People Make for detailed instructions.
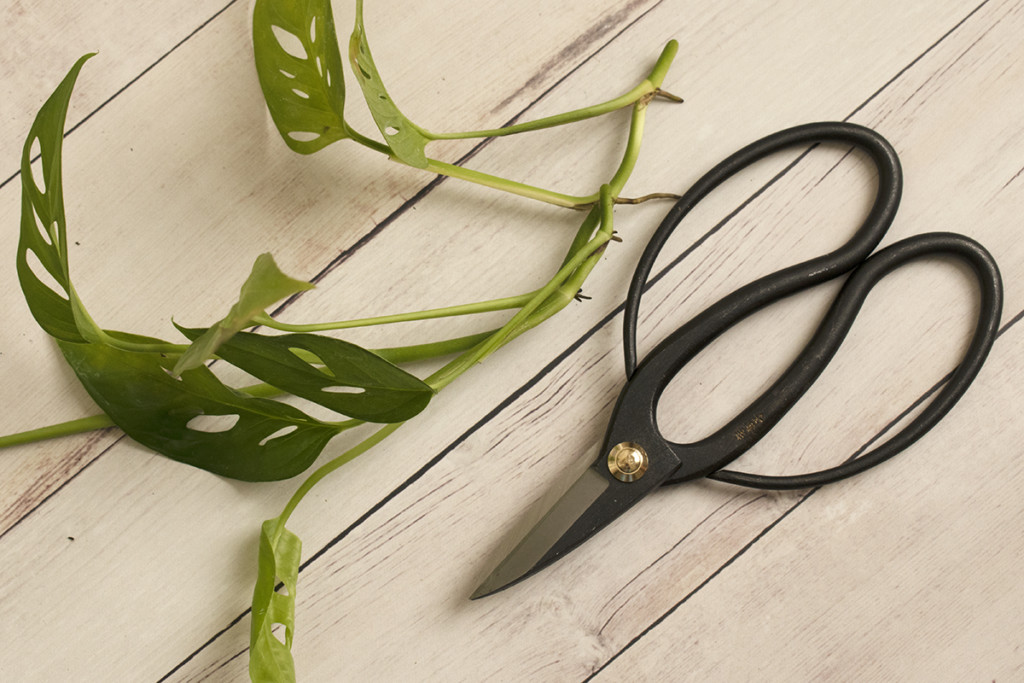
All other philodendrons can be propagated in the same way, including monstera.
5. Christmas Cactus
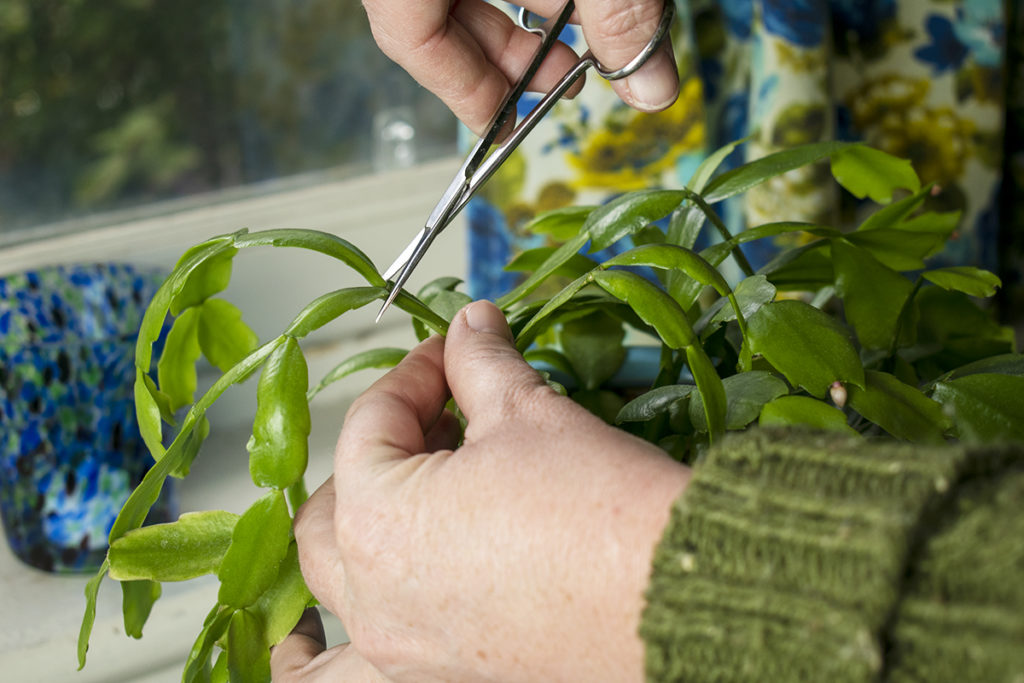

Despite their name, Christmas cactuses are succulents and just as easy to propagate. All you need are a few segments from the parent plant to get started.
You’ll notice that Christmas cactus, or any other holiday cactus, don’t have typical leaves but rather individual segments. And where each segment joins to the next is where the plant’s reproductive cells lay. This is where new growth occurs every year.
To propagate schlumbergera, take several cuttings, ensuring you have at least 3-4 segments on each cutting. Place the cuttings in the soil to cover one to two joints on the segment. Mist the plant regularly and keep it moist. Before you know it, you’ll have a healthy new plant.

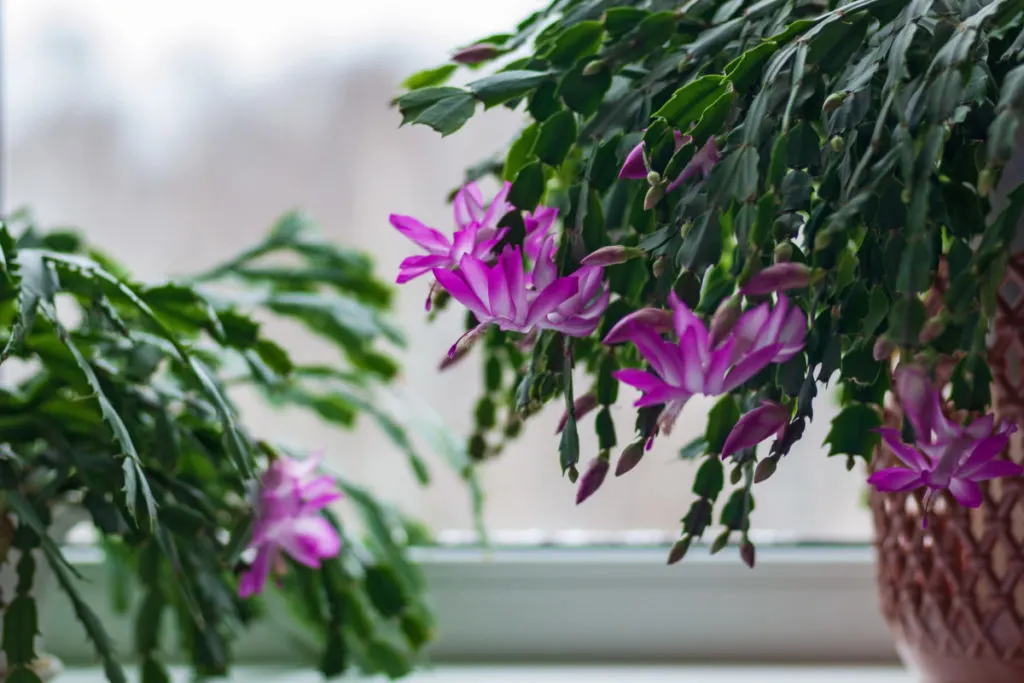
And that’s a good thing if you have a true Christmas cactus, as all of your friends will be wanting cuttings when they realize their Christmas cactus is a Thanksgiving cactus.
You can read my article How to Propagate Christmas Cactus + 2 Secrets To Big, Blooming Plants where I walk you through the entire propagation process.
And if I’ve got you wondering if you’ve got a true Christmas cactus, a Thanksgiving cactus, or even an Easter cactus, check out my complete Holiday Cactus grow guide to find out.
Christmas Cactus Care: More Blooms, Propagate & Identify Holiday Cacti
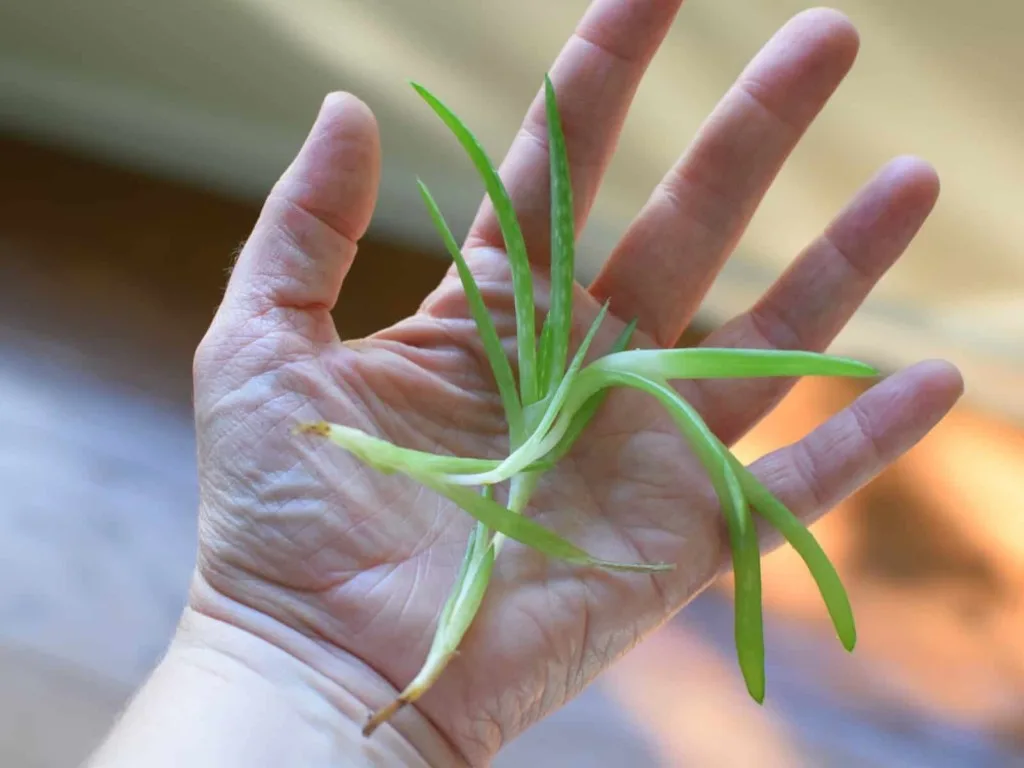
6. Spider Plants

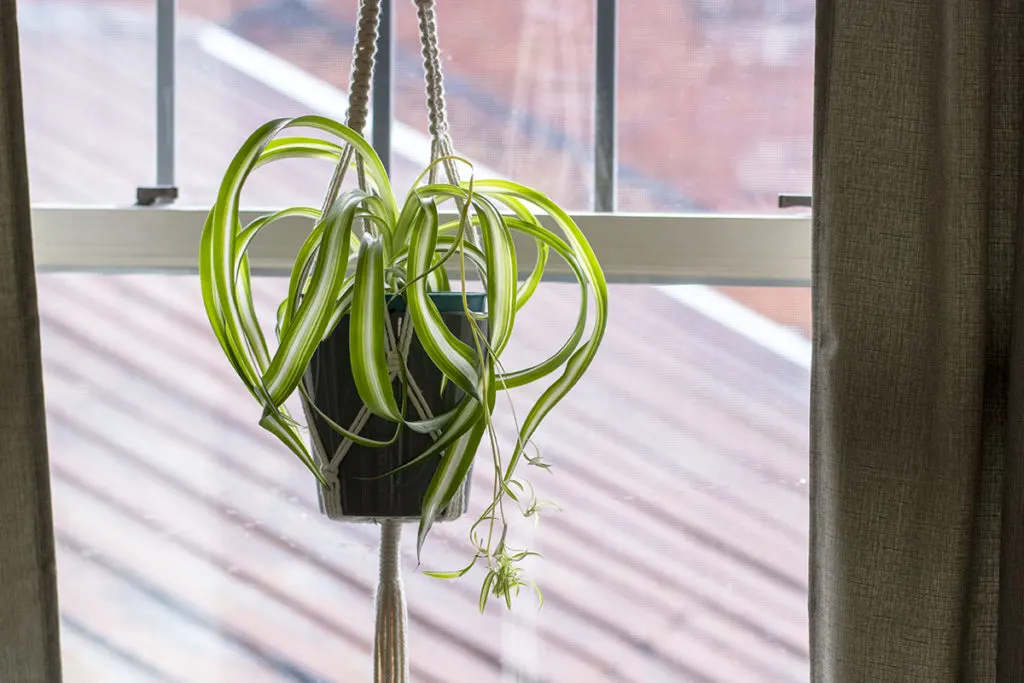
Spider plants are yet another plant that does all of the propagating for you. These guys are some of the best air-scrubbers you can grow, and when they’re happy, they put out miniature versions of themselves called spiderettes.
The cool part is you don’t even have to remove them from the plant to propagate them. You can tuck the tiny spiderette into the soil and let it root and grow right there with the parent plant.
Of course, that only works if you want a bigger, bushier plant. If you want new plants, though, it’s just as easy. Once the spiderette has developed a node on the bottom, it can be snipped off the parent plant and rooted in water or soil.

And yes, we have an article detailing the whole process. Check it out:
How To Propagate Spider Plants – With and Without Spiderettes
7. Succulents

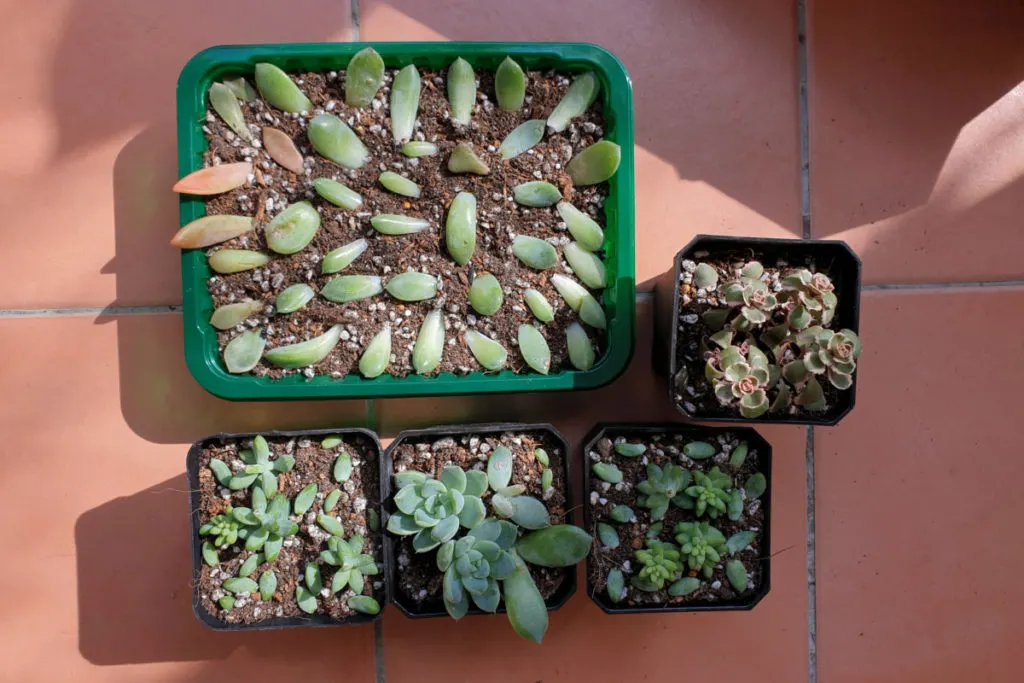
Succulents are astonishingly easy to propagate. So much so that we have a permanent succulent nursery. Anytime one of us knocks a piece off a succulent, it gets set in the succulent nursery to scab over and put out roots.
These plants just want to propagate, and given the opportunity, they will put out new roots and a new plant by doing nothing more than laying a piece of your chosen succulent on top of the soil.
If you’re passionate about these charming little plants, you’ll want to get all the details on propagating succulents:
3 Ways To Propagate Succulents From Leaf, Stem Or Branch Cuttings
8. African Violets


These beautiful flowering plants are easy to propagate, although the process does take some time. The results are well worth the wait, though.
African violets can be propagated through leaf cuttings. An entire new plant will grow out of single leaf cutting. It’s pretty cool, and if you have an African violet, I highly suggest you try it at least once.
Take a leaf cutting, making sure you cut the leaf at a 45-degree angle. Place the cutting in moist potting soil and keep it moist and humid. Reuse a plastic clamshell container as a mini hothouse for propagating African violets.
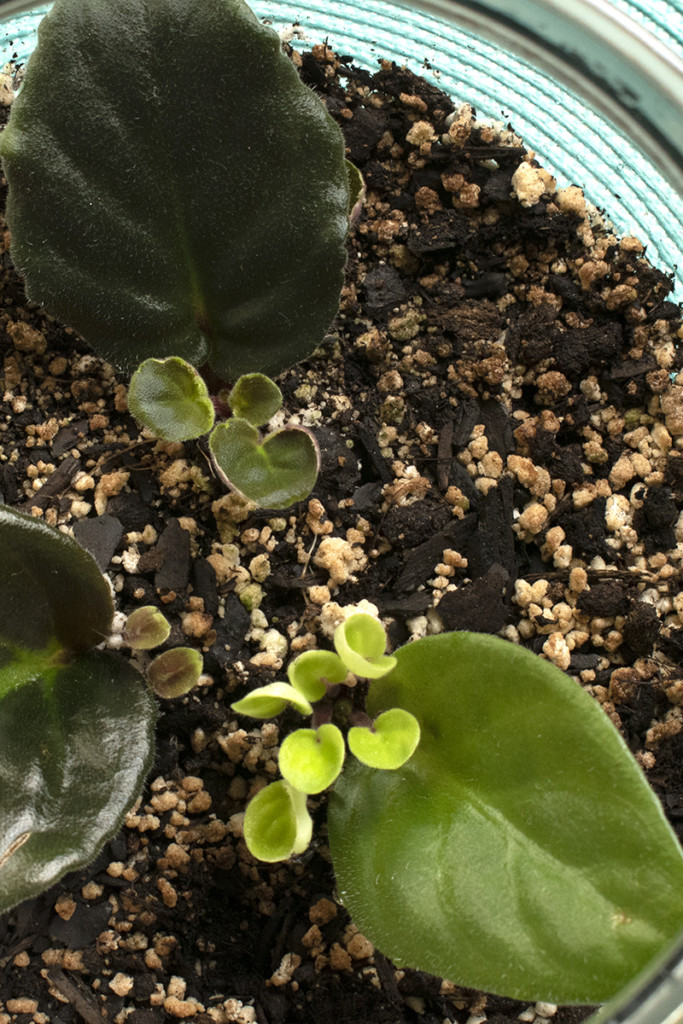
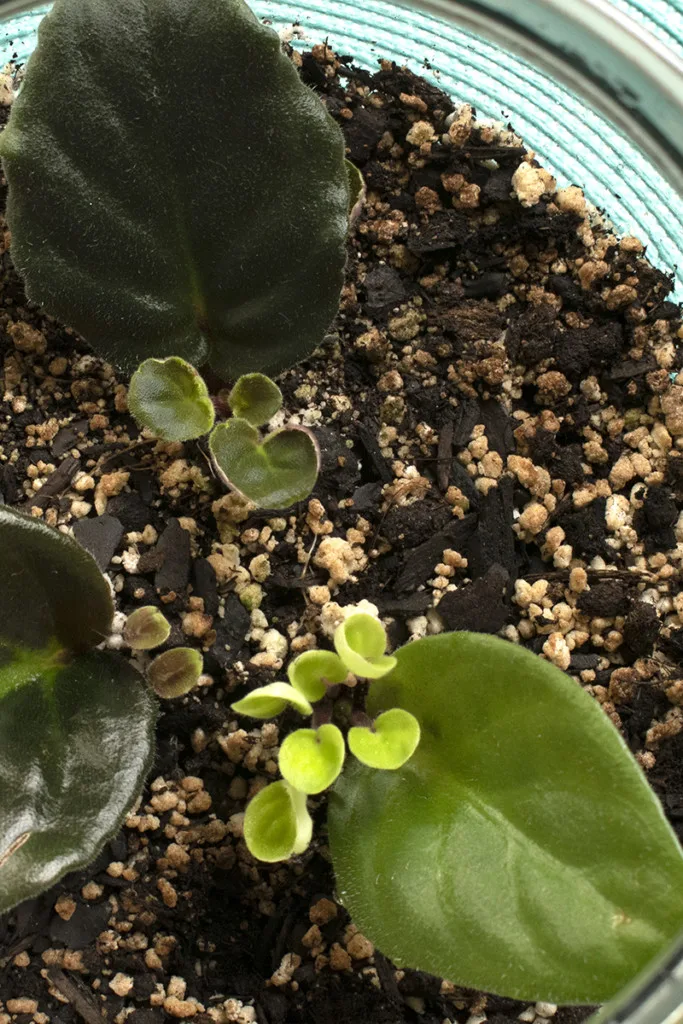
After a few weeks, new, teeny-tiny leaves will pop up out of the soil. Once you’ve got between 4-6 new leaves, the new plant can be gently pulled from the soil and repotted in a more permanent container.
I’ve detailed how to do this in my African violet care guide:
African Violets: How To Care, Get More Blooms & Propagate
And for full details on how to propagate African violets from a leaf cutting – and in two more ways – read our guide here: How To Propagate African Violets – Easy As 1, 2, 3.
9. ZZ Plant

ZZ’s are fun plants because it seems like they’re always putting out new leaves. And they’re just an easy plant to take care of. They come in at #1 on our list of 9 Low Maintenance Houseplants For The Busy Green Thumb
Naturally, such an easy-care plant is also easy to propagate.
ZZ plants, or Zamioculcas, have a tuber-like rhizome at the base of each stem where the roots grow. To propagate a ZZ plant, you’ll need to take a stem cutting and place it in water in a sunny location. It takes around 3-4 weeks for the stem to grow a new bulbous rhizome at its base and start putting out roots.
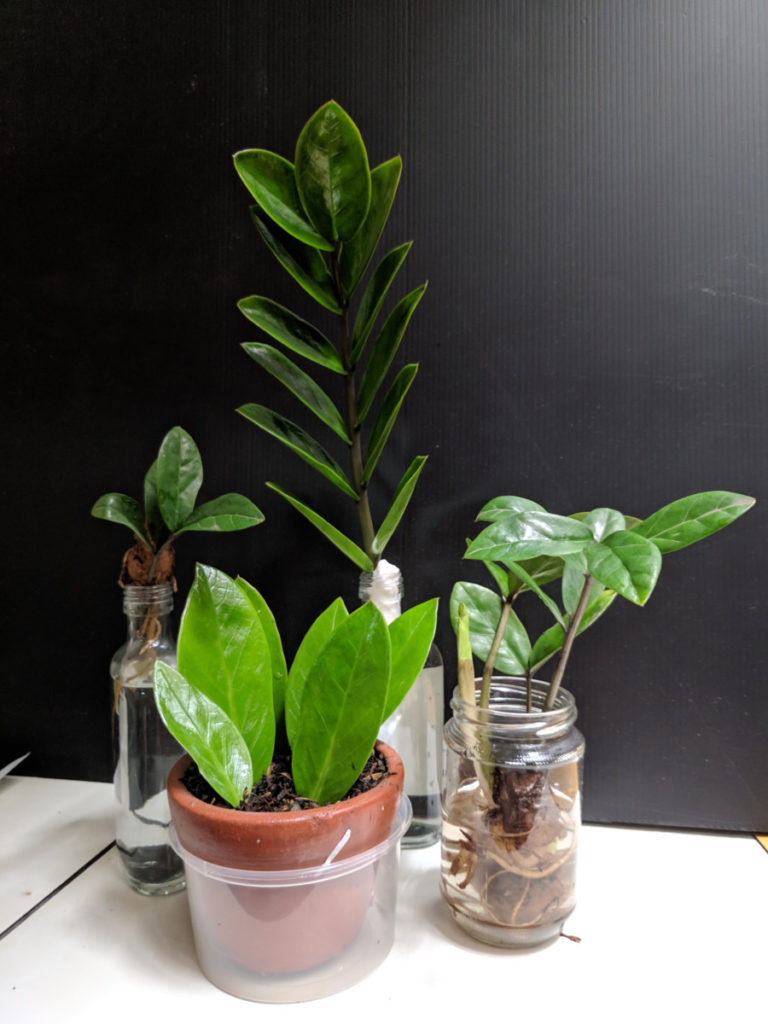

Once you’ve got a new rhizome on the bottom of the cutting and the roots are over an inch long, your baby ZZ plant is ready to be potted up in a well-draining potting mix.
Now that you know how easy it is to propagate so many popular houseplants, you’re going to need bigger windowsills. Get snipping those cuttings and start propagating! You and your friends and family will have plenty of lush, green plants to beautify your home.

Get the famous Rural Sprout newsletter delivered to your inbox.
Including Sunday ramblings from our editor, Tracey, as well as “What’s Up Wednesday” our roundup of what’s in season and new article updates and alerts.