

Sprouts are tasty little bites of freshly germinated seeds that enrich your health in a myriad of ways.
They are rich in fiber, low in calories and full of essential micro-nutrients that contribute to our energy levels and well-being.
You can buy sprouts from certain grocery stores, though it is far better to grow your own.
All it takes is a jar, some seeds and a few days of very limited attention. We all have some spare moments in the day to dedicate to growing food, right?
For the sake of diversifying your diet and increasing your homesteading skills, germinating sprouts may just be the new thing you are looking for.
What can you sprout?
Seeds, beans and grains of all sorts can be sprouted, for reasons which we will list below.
Before you jump right in, it is good to know what works, and what doesn’t. That is, what kinds of seeds are the most rewarding to sprout in just a few days, with very little effort on your part.
That being said, you’ll also want to purchase seeds for sprouting from reputable organic production – not just any seeds (for planting, not to mention those that are chemically treated) which come in a seed packet.
Seeds should be harvested specifically for this purpose alone. They may even be sanitized to prevent bacterial contamination.
Naturally, the seeds you choose for sprouting can come from your own backyard garden too, seeds which you have lovingly saved yourself.
These seeds are among the most commonly sprouted ones:
Try them all, though not all at once, for they all have a unique flavor. Experiment and see which ones are easiest for you to sprout.
Reasons to grow sprouts at home
If you are looking to include extra vitamins and minerals in your diet, sprouts are a great way to introduce them as you reap the health benefits that they have to offer.
Save money
Store-bought sprouts don’t cost an arm and a leg, like some so called superfoods do, yet when you grow them at home, in the safety and convenience of your counter/windowsill, the savings do add up!
Adding, soaking and rinsing (multiple times) just a few tablespoons of seeds in a jar, can result in the entire container being filled with plenty of nutritious bites.
In 3 days the sprouts will have quadrupled their size and more. On the 4th, and following day they will keep on growing.
If you purchase sprouts from the store, you are buying into the convenience factor of prepared food, spending up to 20x as much as it costs to grow them at home.
Plus, you are learning a new homesteading skill that you can share with your family and with others – including your chickens. Chickens love sprouts!
Sprouts diversify your diet
Once your seeds begin to germinate, you can eat them at any stage of development. They are a powerhouse of antioxidants, minerals, vitamins and enzymes that fight free radicals.
Not to mention that they are the ultimate choice in locally grown food, especially if you are sprouting your own seeds – no transportation or packaging required.
It’s so easy!
Sprouts are one of the easiest foods to be cultivated indoors and they can be grown all throughout the year, on any counter, in any kitchen, in any climate.
All you need is a jar, the ability to strain water off the seeds, and of course, the seeds themselves.
Follow the steps below to start sprouting your own seeds, starting today!
Ingredients and supplies to grow broccoli sprouts
Broccoli is one of the easiest seeds to sprout.
They grow so fast, you can even hear them!
After they soak for 6-8 hours the first day, the water is then strained from the seeds. During the night, if you listen closely, the hulls of the seeds will start to pop, like miniature popcorn.
If you lay a jar on its side, be aware that some seeds may jump out, that is of course, unless you have a stainless steel sprouting lid to keep them at bay.
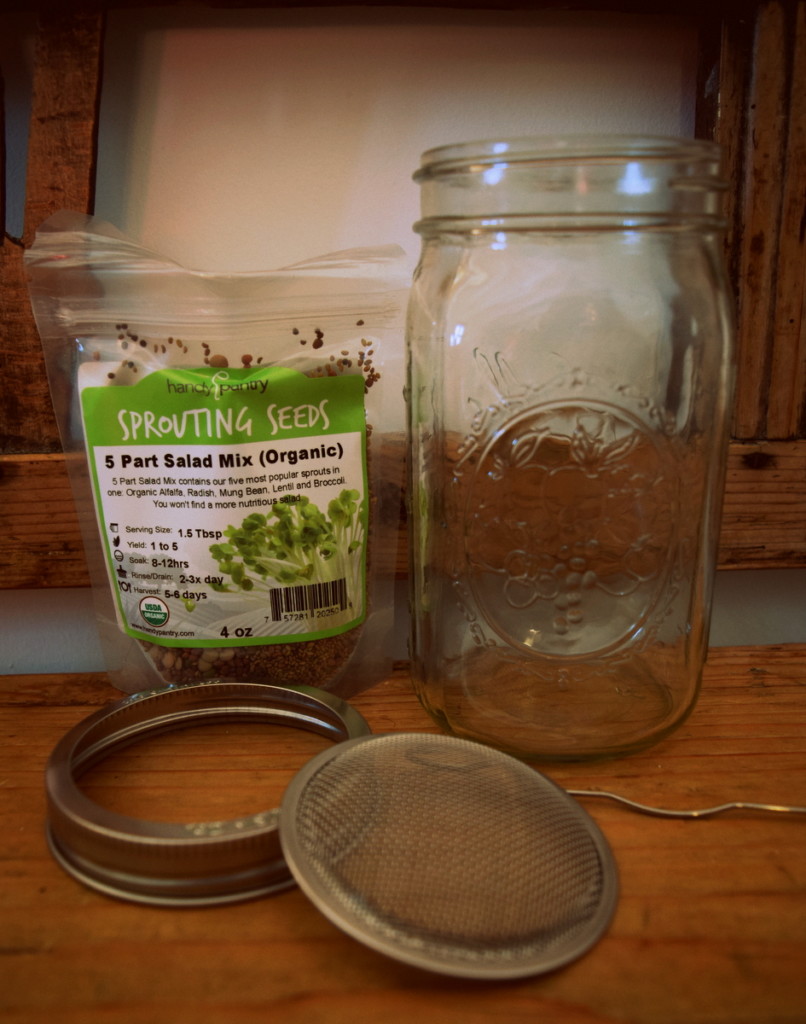
To get started with your broccoli sprouts, you will need:
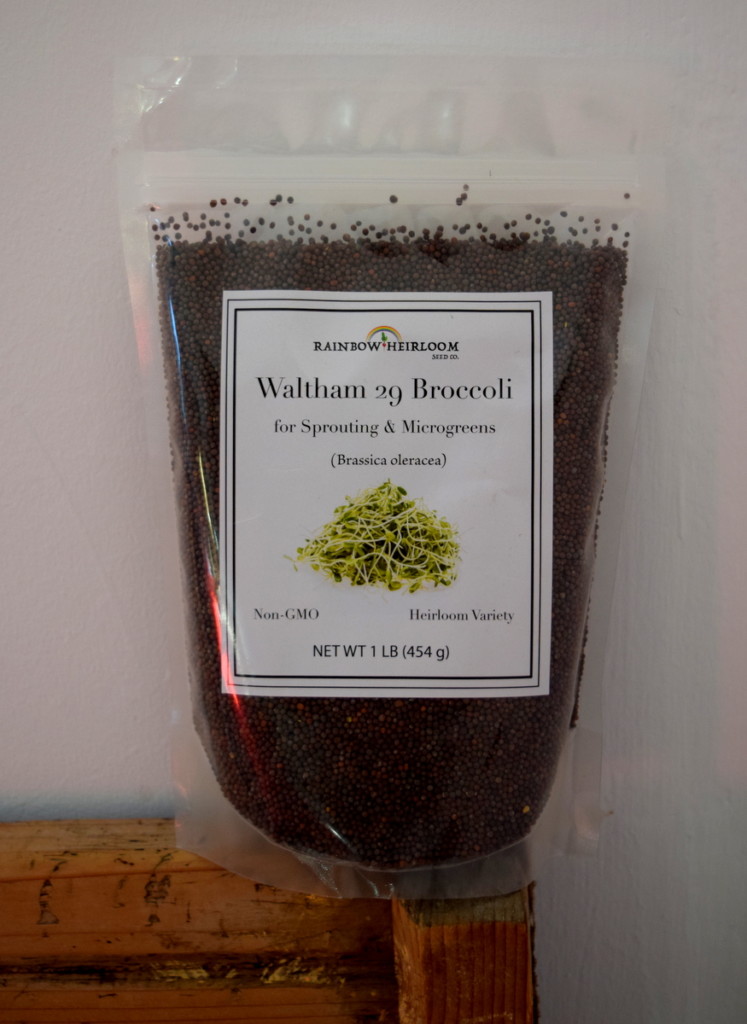
- Heirloom broccoli seeds: a 1 lb. bag will last a long time!
- Mason jars: perfect, if you start more than one kind of seed at once
- Sprouting lids: for efficient draining
- A sprouting kit: (optional) with strainer, stand and sprouting seeds
Sprouting instructions:
The standard process for sprouting vegetable seeds takes very few steps and only a few days to watch the magic happen.
Step #1
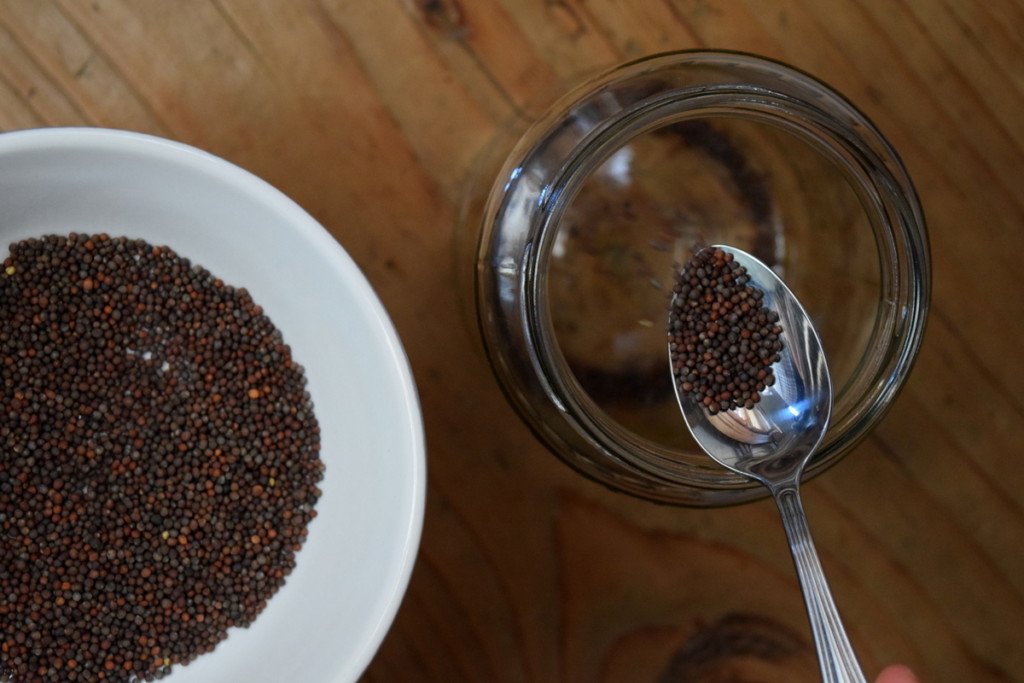
Add 2 tablespoons of broccoli seeds into a jar. Cover the seeds with an inch of filtered water and let everything sit for 6-8 hours.
Start this process in the morning, and drain the water in the evening. Then let the seeds sit overnight on the kitchen counter.
Step #2
The next morning, your seeds will be in need of a light refreshment. Add enough water to cover them, let it sit a few minutes, then strain using the stainless steel lid.
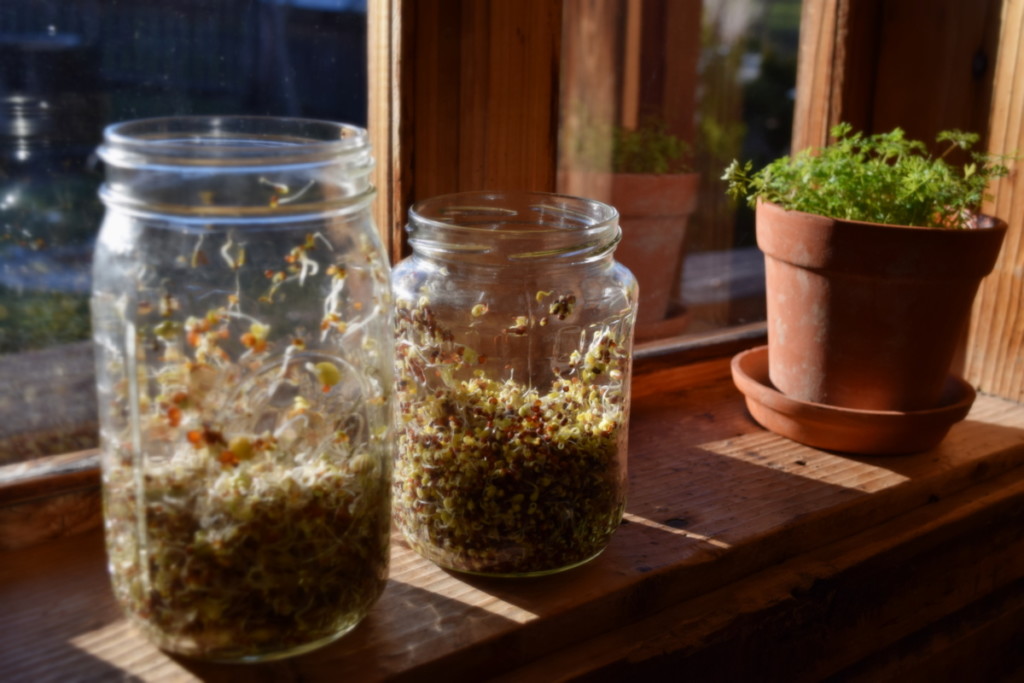
All the while, make sure that the jar of sprouts is in a warm (not hot or cold) place, and out of direct sunlight.
Step #3
Using a sprouting jar holder, or a bowl, turn the jar upside down so that the water can slowly continue to drain. Broccoli seeds will put out their root germ in a matter of hours.
Step #4
Rinse the sprouts 2 times a day, maximum 3 times.
Too much water has a detrimental effect and can lead to the presence of soggy sprouts and/or mold. Good air circulation is necessary for a successful crop.
Step #5
At what stage you eat the sprouts, is up to you. About 4 days is sufficient for broccoli sprouts.
Continue rinsing them twice a day until they are not quite an inch long, then place them in a windowsill with indirect sunlight. This will green the newly emerging leaves in no time at tall.
Step #6
Many sprouts will take about a week from seed to consumption. If you start a new batch every few days, you’ll have a constant supply of sprouts.
Other sprouting advice to consider
It takes some time to get the process of growing sprouts to run smoothly as there are several factors to include:
- how many people will be eating sprouts?
- exactly how many jars fit on the counter?
- what amount of space can you dedicate to growing sprouts?
- how much can you (or do you want to) eat at once?
- and what sprout cravings do you, or your family, have?
Once you’ve tried broccoli sprouts, try sprouting other seeds, even a mixture of them!
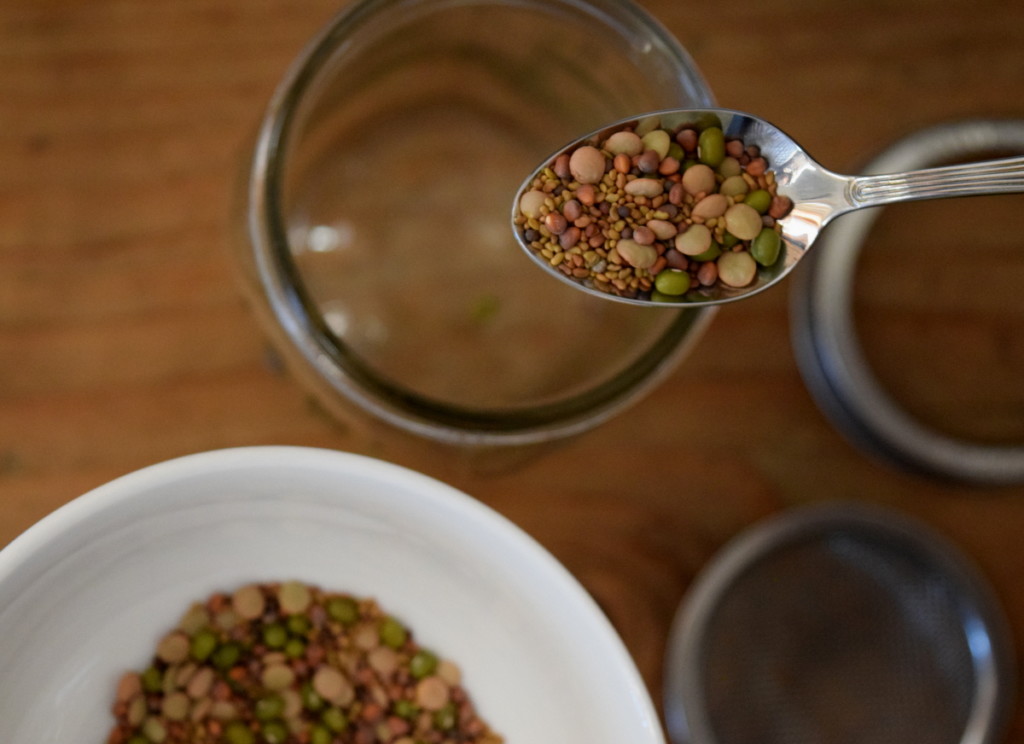
If you choose to buy a sprouting kit for a foray into natural health, this is the one to try first, from Trellis + Co.
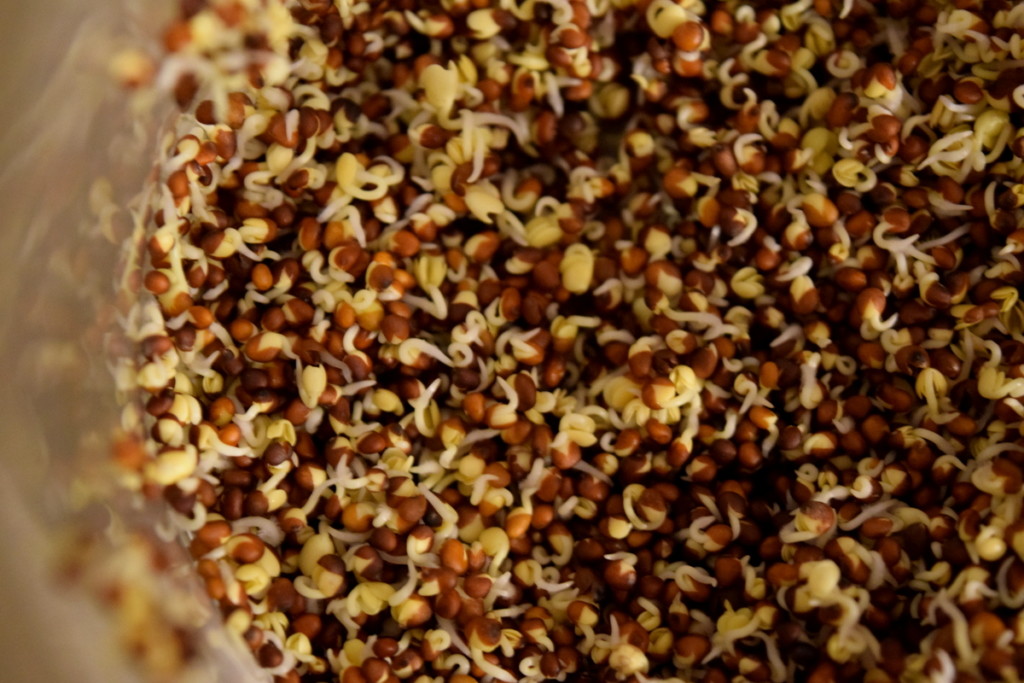
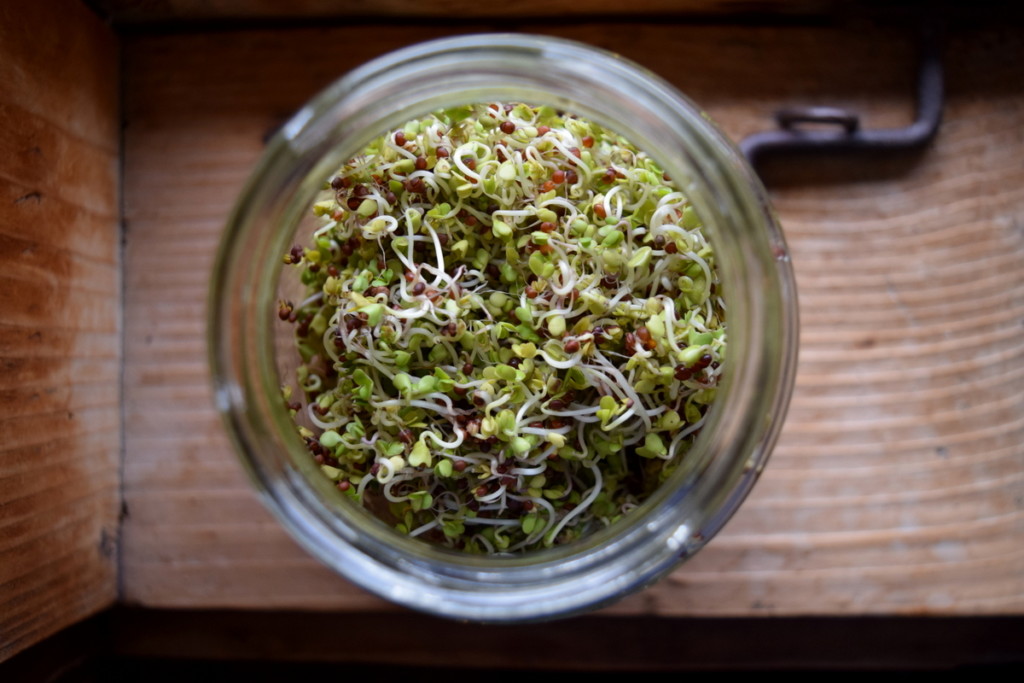
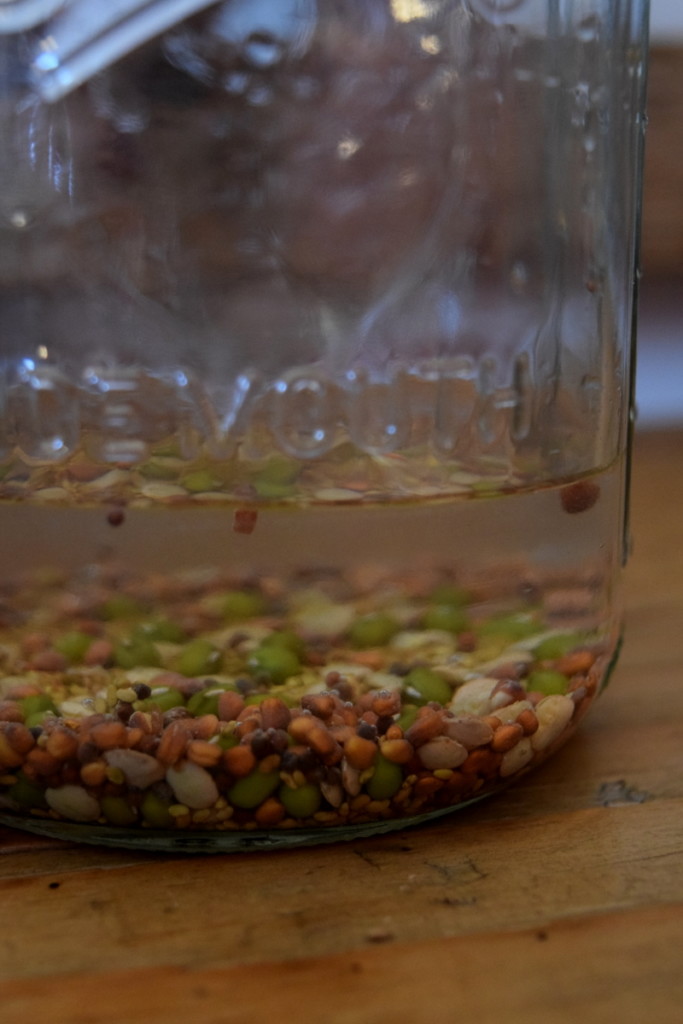
Follow the instructions for sprouting broccoli, only using the 5-part salad mix included, and in less than a week your seeds will go from this:
to this…
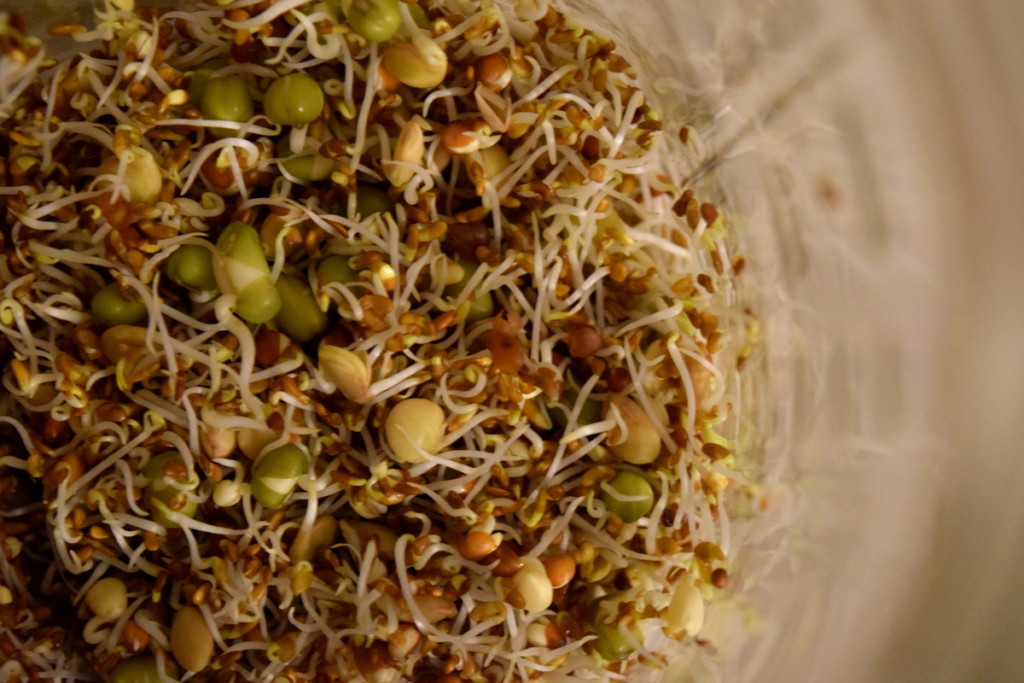
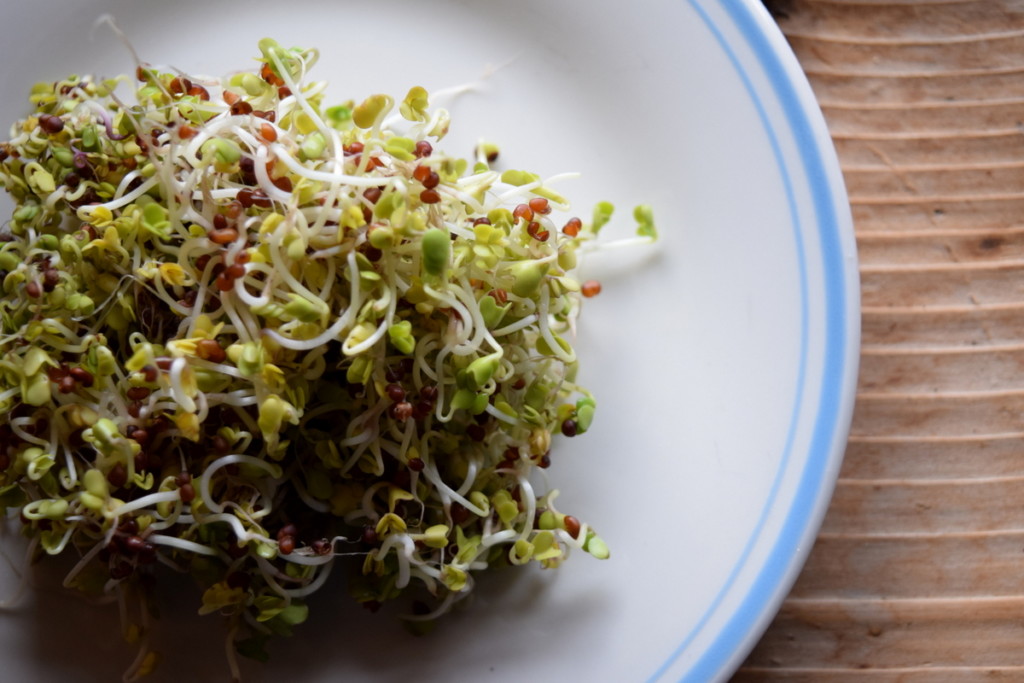
and finally, you’ll be able to dig into an entire jar of sprouts!
The whole process is incredibly simple, and enjoyably nutritious.
How do you know if sprouts have gone bad?
If you have purchased quality sprouting seeds, used a clean jar and provided adequate air circulation, mold should not even be an issue, not even in the most humid environments.
Sometimes the root hairs can be mistaken for mold, as they are fuzzy when young. But mold? You’ll be able to smell it.
If your sprouts smell off in any way, do not eat them. Simply throw them on the compost pile, out of reach from your backyard chickens.
Sprouts do not come with a health warning on a label, but there are some situations to be aware of. Very rarely they can be contaminated with E. coli and Salmonella, two situations that can be very uncomfortable indeed.
Although many sprouts are best eaten fresh, if you have a compromised immune system, cooking sprouts is perhaps the best way to consume them.
Sprouting and storing advice
Once you have successfully transformed a tablespoon of seeds into a jarful of sprouts, there is only one thing left to do.
Consume them. Quickly.
After all, they are living, breathing plants that need both fresh air and water before you get to enjoy them.
Sprouts will last for about a week in the fridge, provided that you follow a couple of rules.
First of all, never store wet sprouts in the fridge. To increase the shelf-life of your sprouts, store them dry. Pat them dry with a clean paper towel, or use a small spin dryer to remove excess moisture.
You’ll also want to make sure not to suffocate them. Refrain from using a container with an airtight seal, opting instead for keeping your sprouts in a bowl with a holey “lid”.
Add them to soups, salads, stews, stir fries or sandwiches. Eat them with cheese and crackers, or pinch a small handful from the entangled bunch and greedily eat them on their own – they taste amazing!
If you master the art of sprouting, why not try growing microgreens next?

Get the famous Rural Sprout newsletter delivered to your inbox.
Join the 50,000+ gardeners who get timely gardening tutorials, tips and tasks delivered direct to their inbox.