

Row covers are useful items to have in your garden. You could, of course, buy a row cover. But why do that when you can make your own, using branches from your property and a little natural twine?
In this article, I’ll show you how you can make your own row cover frame from branches.
This is a great alternative to all those articles out there that show you how to make one with plastic piping. Using branches rather than reclaimed plastic piping is great for those who want a more natural and eco-friendly solution. If you’re trying to reduce plastic use, this is a great simple project for you.
The Benefits of a Row Cover
Before we delve into the process of making a row cover frame, let’s take a quick look at why we may want one in the first place.
A row cover can be used to:
- Extend your growing season so you can grow early in the season and towards the end of the year. Perhaps even to allow you to grow food all winter long.
- Grow more tender or heat-loving plants in a cooler temperate climate.
- Provide shade cover in summer in hotter climes.
- Protect plants (and soil) from heavy rain and extreme weather events.
- Protect plants from a range of different pests.
When and How To Use a Row Cover
How and when you plan to use your row cover will also have a bearing on the exact design you use. A row cover for use in winter, for example, will usually have to be a lot sturdier and stronger. While one used only for shorter periods during the spring and summer months can generally be of much lighter construction.
Using a Row Cover in Spring
In spring, placing a row cover with a clear or sheer covering over your growing areas allows you to warm an area for planting. As soon as the weather begins to warm, using a row cover allows you to transplant seedlings from indoors, or from a greenhouse sooner. You can transplant seedlings into a covered area like this at least a couple of weeks earlier than you could if you were growing them outdoors without any protection.
Using a Row Cover in Summer
A row cover will also continue to protect your plants from pests over the summer months. Mesh or chicken wire could be used to cover the structure and provide pest protection.
Keep in mind that row covers for use in summer may need to be somewhat larger. It will likely have to be big enough to accommodate fully mature plants.
Different covers can be used on summer row covers. A clear or sheer cover can give a little extra heat to warmth-loving plants that cannot usually be grown outdoors in your area. While a somewhat opaque covering can exclude sunlight and provide shade. This can stop plants from bolting in hot conditions and help conserve water by reducing evaporation.
Using a Row Cover in Fall
In the fall, a row cover can be employed once more to provide extra protection against the coming cold. Summer crops like tomatoes that are still fruiting, for example, can be covered in order to prolong the harvesting period. Covering your crops can help you ripen green tomatoes, so you get a higher yield overall before the winter arrives.
Using a Row Cover in Winter
But with a row cover, the start of winter doesn’t necessarily mean the end of outdoor gardening. A row cover can allow you to create a sheltered environment for hardy crops. It allows you to overwinter a range of plants to give you food from your garden all winter long.
For example, you might grow some green winter vegetables like Brussels sprouts, cabbages and kale without fear that they will be damaged by snow or winter storms. Depending on where you live, you might also be able to overwinter root crops, like leeks, and onions, as well as autumn planting varieties of fava beans and peas.
Which Types of Wood To Use
One of the great things about this project is that it can easily be adapted to make use of whatever branches you have. A wide range of branches, from different trees or shrubs can be used.
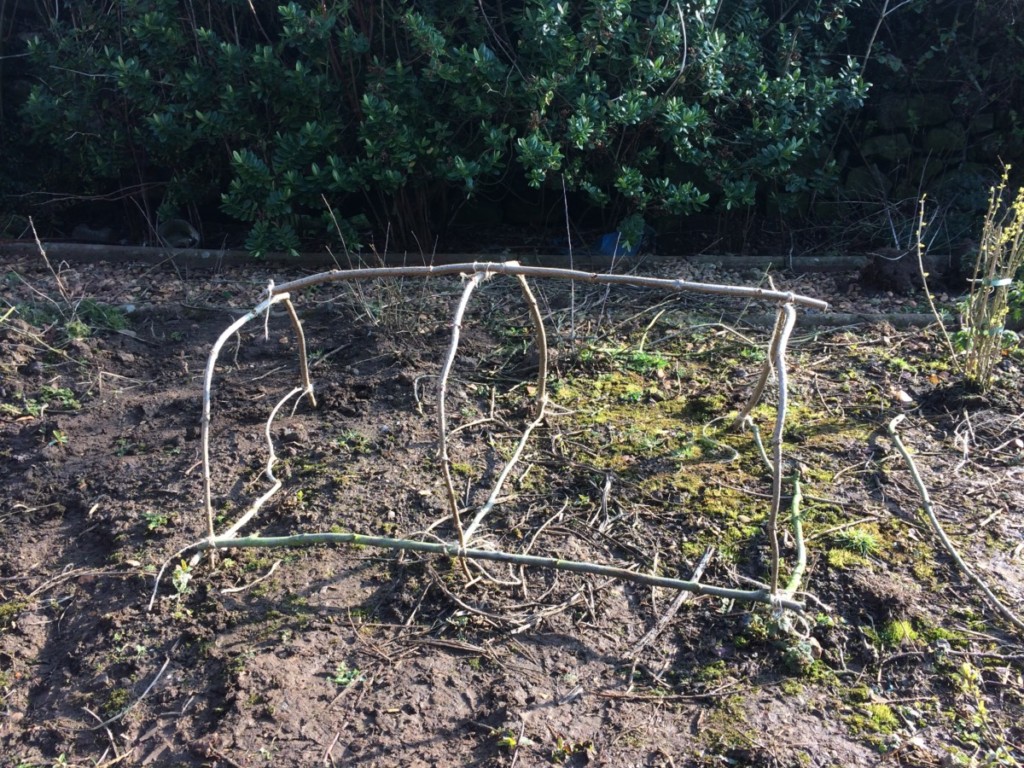
Longer, bendier, more pliable branches can be bent into curved shapes to make a low hoop-house or tunnel-style row cover. While shorter and less flexible branches can be shaped to form low rectangular or sturdier A-frame structures.
Of course, thicker branches will be more suitable for a heavier row cover frame for fall and winter use. While thinner branches will be perfect for a lightweight spring or summer structure.
In the instructions towards the end of this article, you will discover a step-by-step guide to creating a hoop-house type row cover frame from branches. But the idea can be adapted to make different designs depending on what you can find around you.
Deciding on a Shape for Your Row Cover
Which shape you decide on will largely be dictated by the materials that are readily available to you. It is always better to make use of what you have and shape your plans around that.
Fit your plans to available materials, rather than the other way round.
Of course, there may also be practical considerations to take into account. For example, if you plan to use your row cover in winter, and get snow where you live, a flat top structure won’t be practical. A curving or slope-sided frame will make it easier for the snow to slip off.
Deciding The Dimensions of Your Row Cover
While we are referring to one of these structures as a ‘row cover’, it need not necessarily be long and thin to cover a row of plants. It could be made in a range of shapes and sizes, to suit your own garden beds or growing areas.
I made a hoop frame to cover a rectangular garden bed. But you may choose to make a square frame or a low, teepee-like structure for a circular bed. The ideas in this article can be adapted to create frames in a range of different sizes, as well as shapes.
Begin by measuring the area you wish to cover, then adapt and create plans based on your requirements, and the materials that are available.
How To Make Your Row Cover
Materials:
To make your row cover you will need:
- Branches:
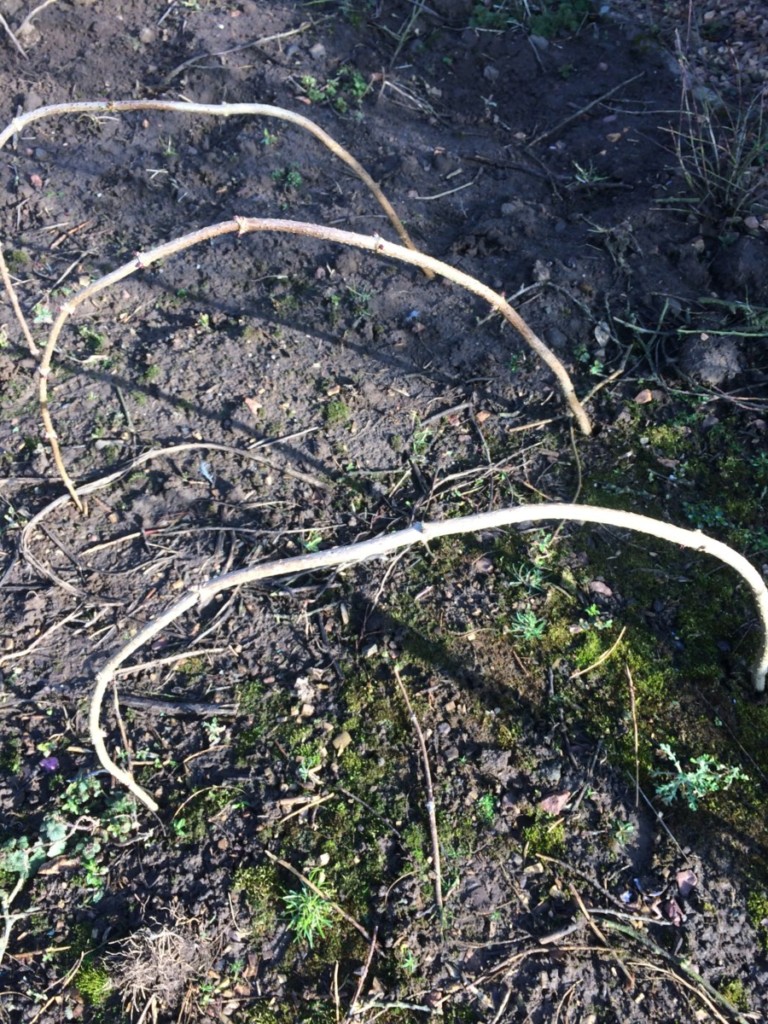
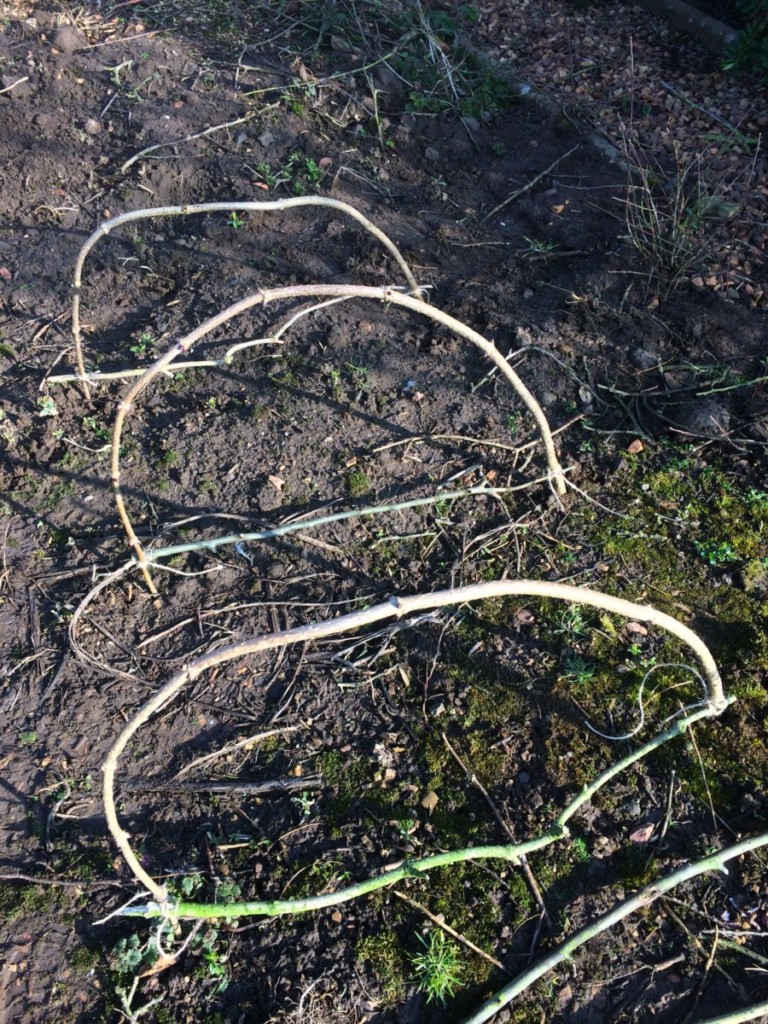
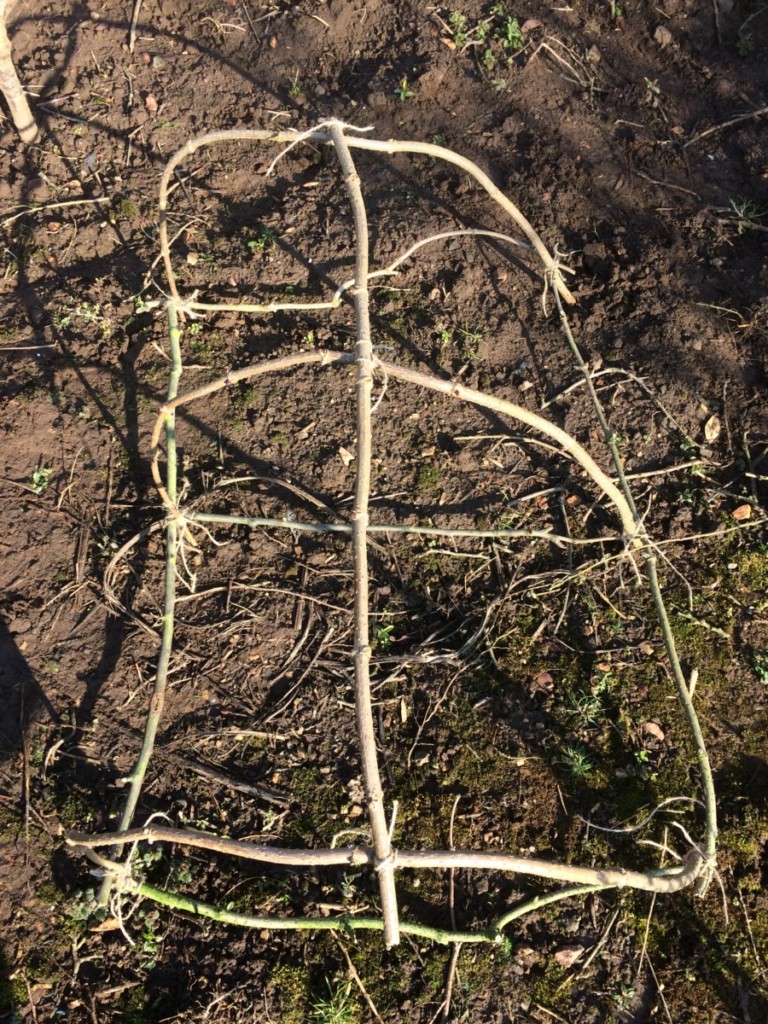
- Source three long, straight branches that will run the length of the structure.
- Find three (or more) bendy branches, that can be bent into semi-circles to form the arches of the structure. (Be sure to choose branches long enough to create a tunnel of the required height. Remember that this design involves burying the first couple of inches of each end of the branch in the soil. Take that into account when choosing your branches.)
Tip: If you cannot find branches that are long enough or quite bendy enough, you could also use two somewhat bendy branches to form each arch.
- Select a cross-brace long enough to go across close to the base of each arch and hold them in place. (One for each of the three or more arches.)
Note: these are not necessarily required if you don’t plan to move the structure, as the soil should hold the arch ends in place. But creating these cross braces will allow you to move the structure later if you wish.
- Shears or secateurs (or a saw for thicker branches) to cut them to the required lengths.
- Natural twine
- Scissors or something else to cut the twine.
Method:
Here are my instructions for creating a tunnel style row cover frame for your garden:
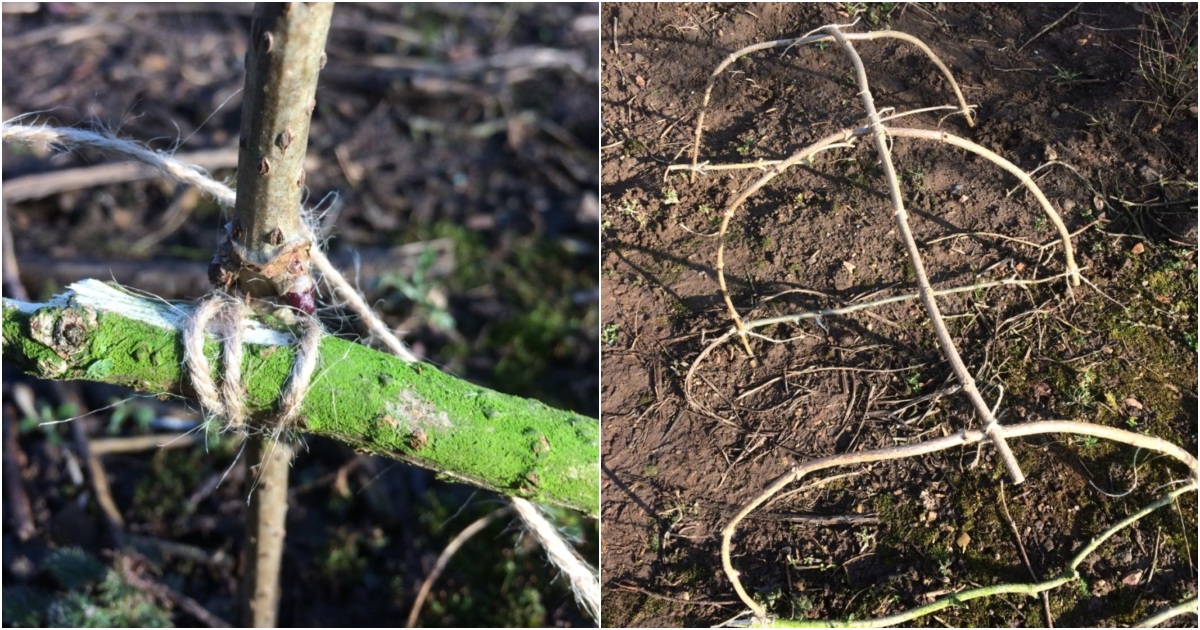
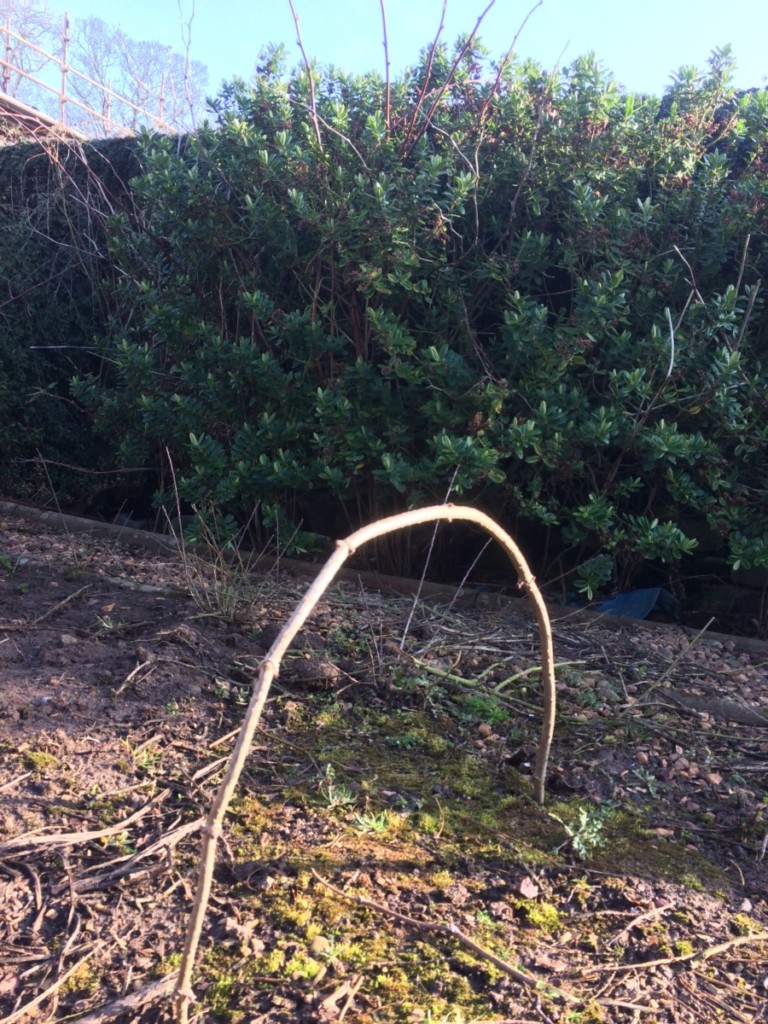
- Take one of the bendy branches and push the ends into the edges of your growing area.
- Using your twine, tie a cross brace between the two bottom ends of your arch, close to the ground. Secure it tightly, making sure that the ends of the arch are vertical and the center has a nice curve to it.
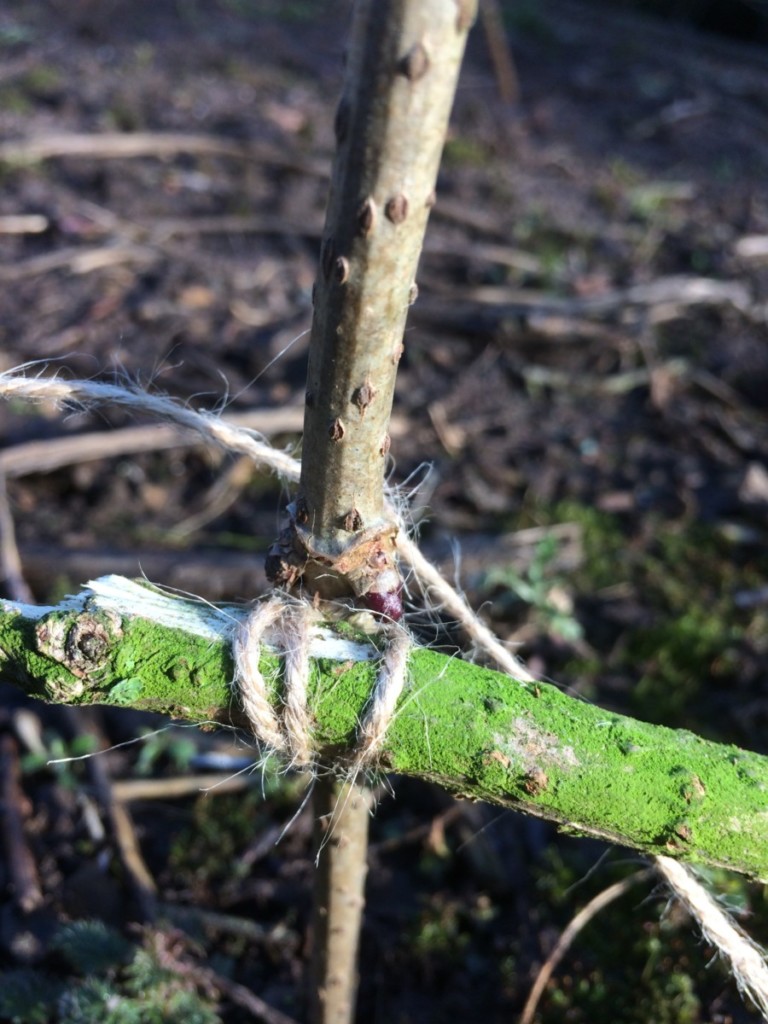
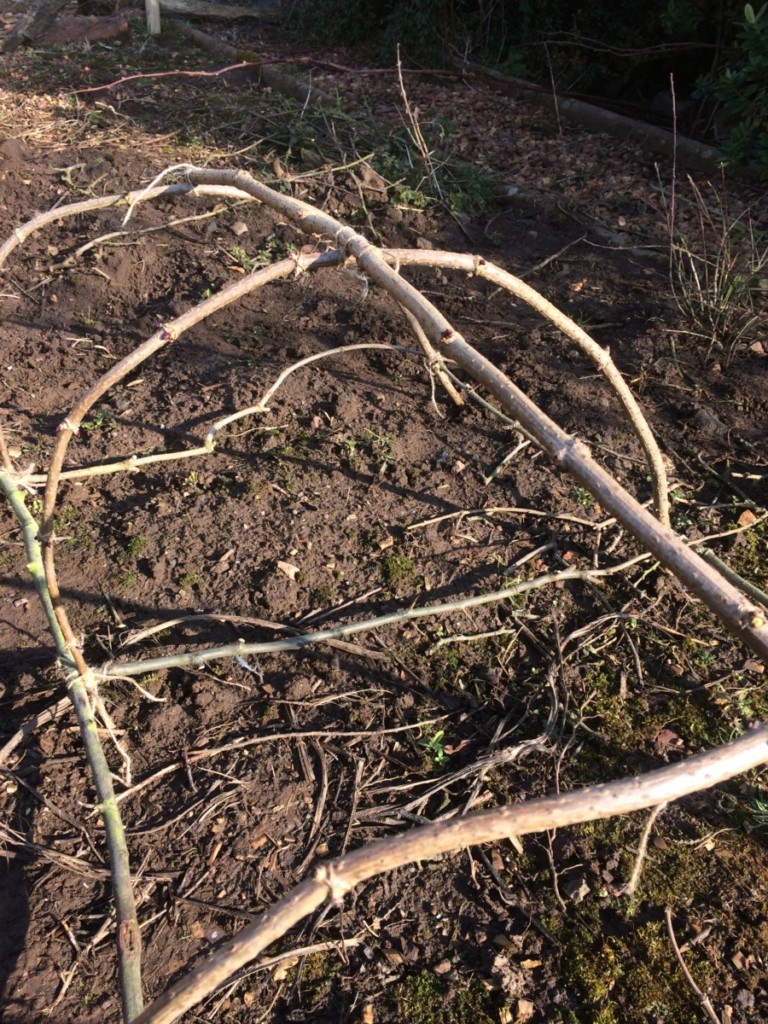
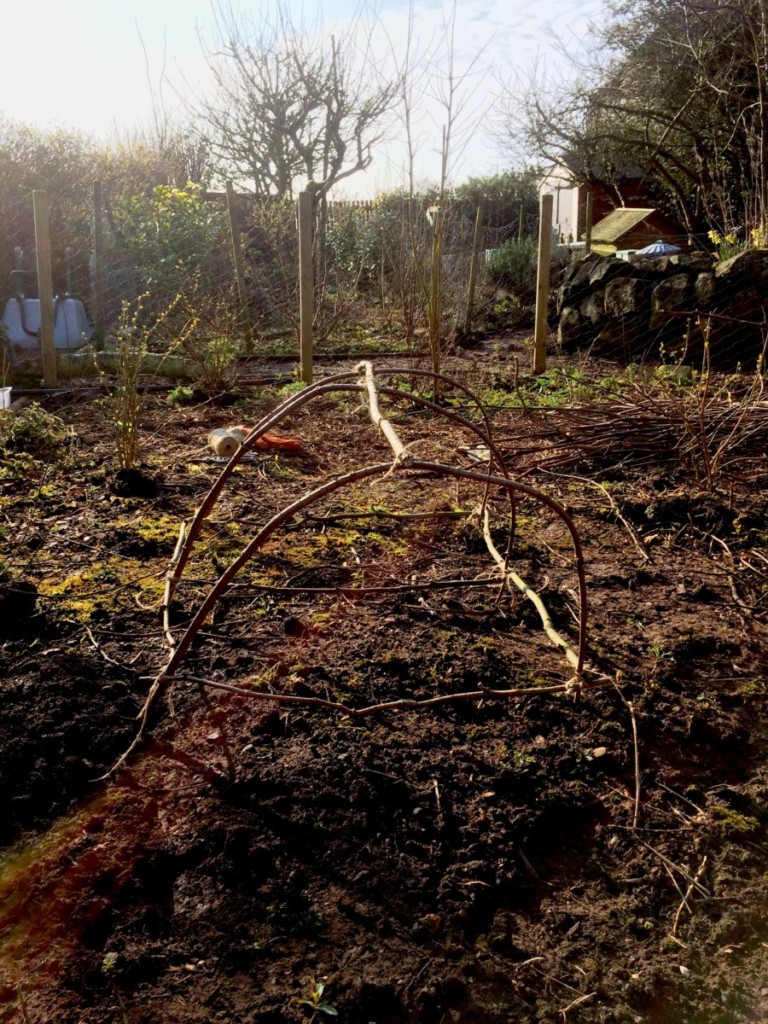
- Repeat this process with the rest of your arches, positioning them at regular intervals along the bed that you wish to cover. Make sure all the arch ends are spaced at the same width as the first one, and that the ends of the arches are stuck at least a couple of inches into the ground. (Don’t worry if your arches won’t stand upright on their own at this stage. You will be fastening them together shortly.)
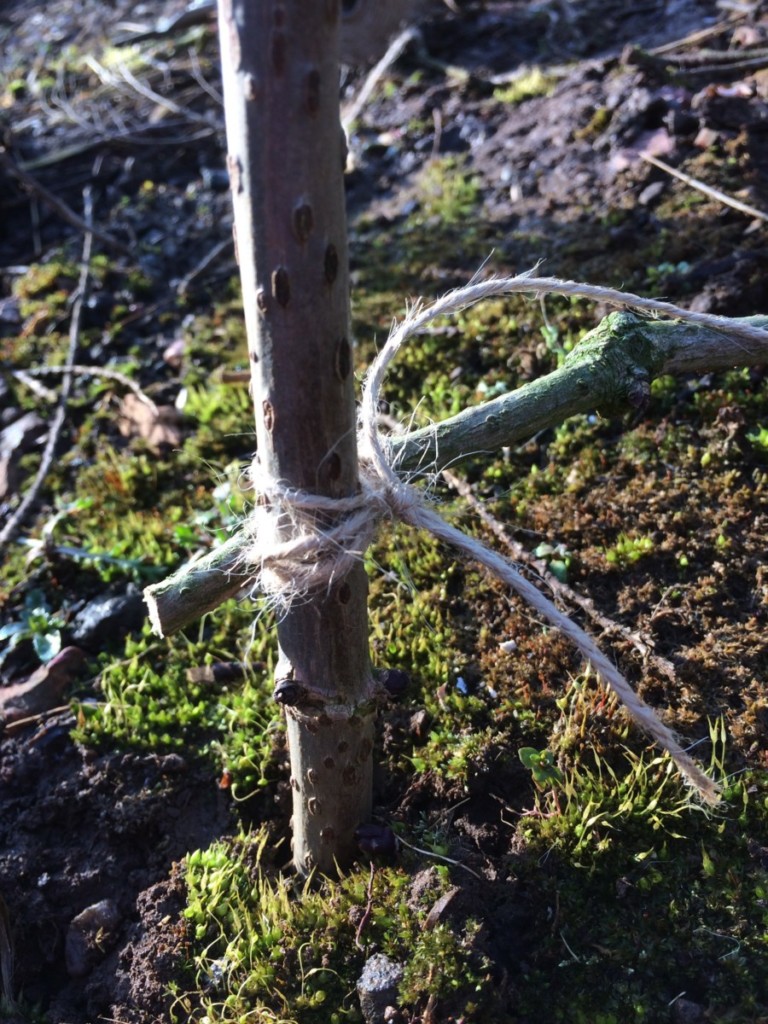
- Take one of your long, straight branches and tie it securely to the center top of each arch.
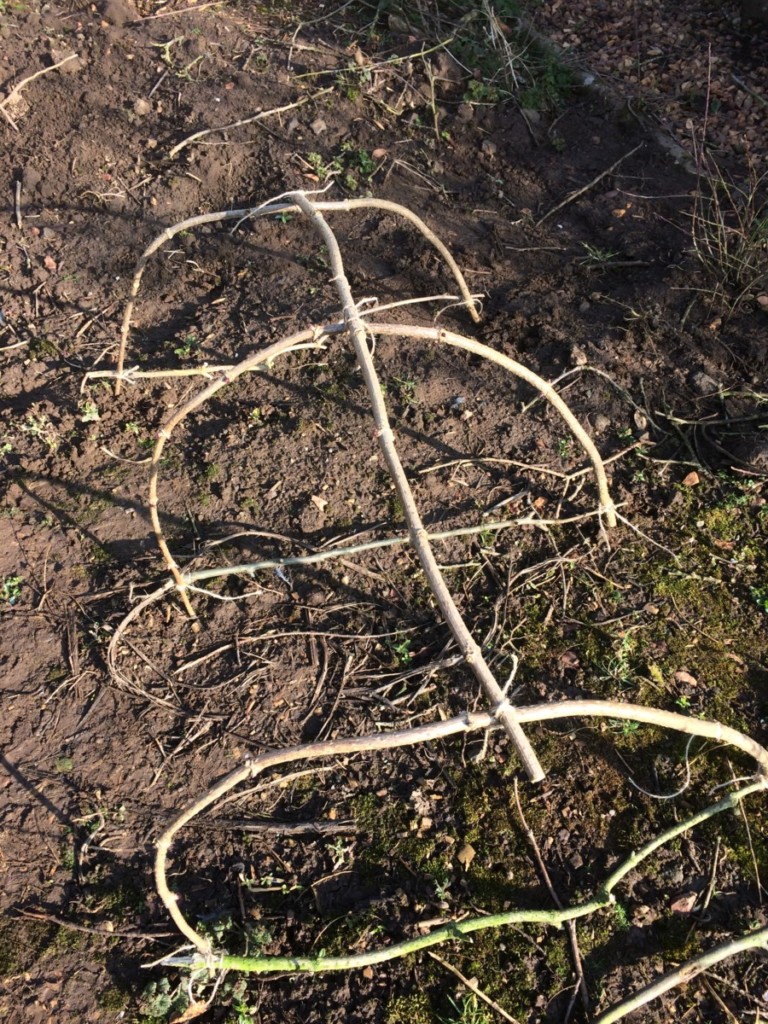
- Next, take the other two long straight branches and tie these close to the bases of the arches along either side, just above ground level.
The structure should now be secure enough to hold whichever cover you choose. It should also be sturdy enough to move out of the way when no longer required. The frame can be stored, for example, after spring is done, then brought back out and placed on the bed again in the fall.
Choosing a Cover For Your Branch Structure
Now that you have made your row cover frame from branches, all that remains is to choose a cover for the structure. Here are a few different options to consider:
To keep things as eco-friendly as possible, if you do use plastic, you should use reclaimed materials rather than buying your cover material new. For example, you might use:
- Reclaimed plastic sheeting (for example, from an old polytunnel). Check online to see if anyone is giving away plastic from a torn hoop house or greenhouse online, for example.
- Bubble wrap from parcels you have received through the post.
- Nylon and other synthetic fabrics from an old tent (such as an old inner sheet or fly netting).
- Old de-tangled fishing nets. (Which you might even find on a local shoreline.)
Reclaimed fabrics could also be put to good use. For example, you might use:
- Old net curtains.
- Old bed sheets.
- Old clothing sown together to make larger sheets.
To keep off pests but allow plenty of light and air in, you can choose to use a reclaimed metal mesh. (Sourced, for example, from old fencing, etc..)
These are just a few ideas to consider to cover your new creation. Whichever cover you choose, you should find that your branch row cover frame is a useful and versatile addition to your garden.

Get the famous Rural Sprout newsletter delivered to your inbox.
Join the 50,000+ gardeners who get timely gardening tutorials, tips and tasks delivered direct to their inbox.