

Repotting a monstera is one thing when they’re still small; repotting them once they’ve been staked and growing up a support is another. But it’s not difficult; it just takes a little extra time and patience.
Monstera deliciosa are a favorite among plant enthusiasts for their extra-large, windowed leaves. But many plant parents are guilty of letting their monstera sit far too long in a pot that’s too small because they’re intimidated by the thought of repotting them – stake and all.
How Do You Know Your Monstera Needs to be Repotted
The good news about repotting Monstera deliciosa is that these tropical plants prefer to be a little on the pot-bound side, so ideally, you should only need to repot them once every few years.
You know it’s time to repot your monstera when you can see roots growing above the surface of the potting soil or out of the bottom of the pot.
While they enjoy being snug in their pots, they will stop growing if they become too rootbound. If your monstera has stopped putting out new leaves, it might be time for a bigger pot.
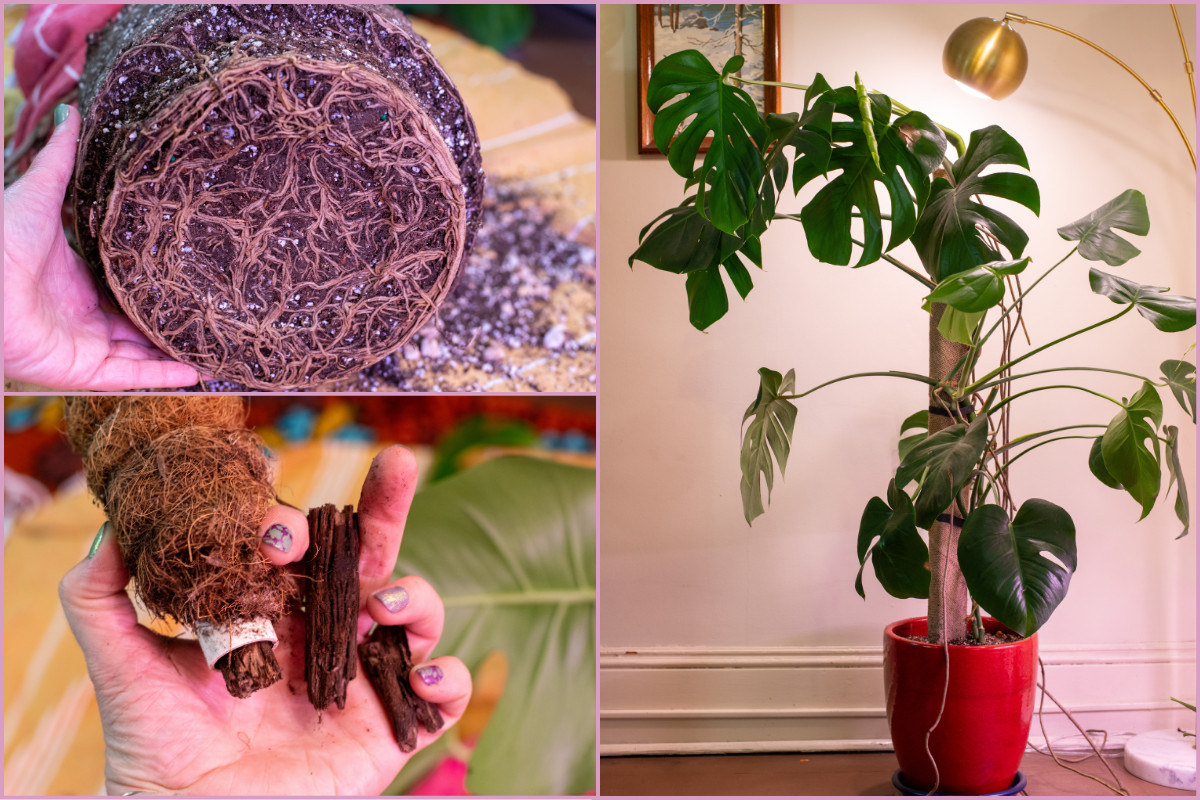
Here’s what you’ll need to repot your monstera
A new pot
Clay pots are great for monsteras as they tend to be heavier, making them much less likely to tip over. But if you have a large plant and want it to be extra secure, I highly recommend making a DIY Monstera Planter with an Embedded Stake. This bad boy isn’t going to tip over anytime soon!
Aroid potting mix
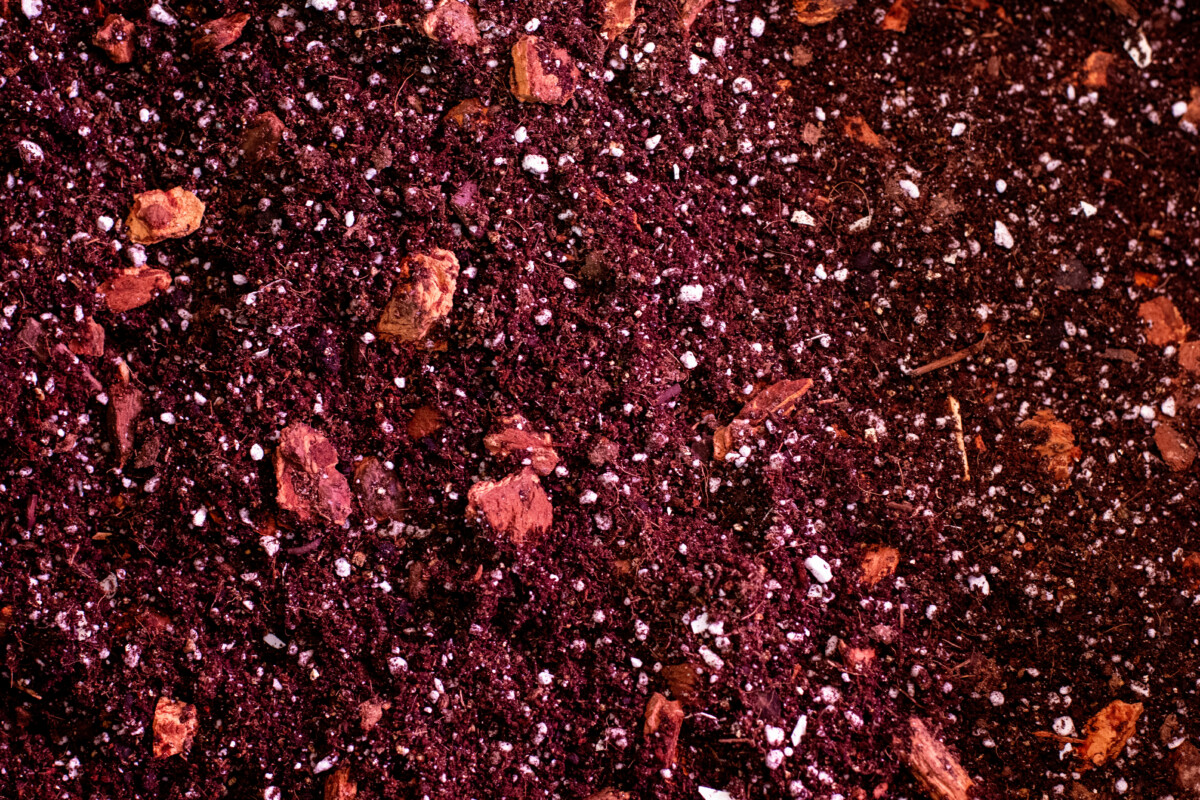
Because monstera are epiphytes, you’ll want to use a potting media made for aroids. If all you can find is all-purpose potting mix, add plenty of perlite to it. Orchid bark is a great addition, too, if you can find it.
A couple of sheets or large towels
We’ll be tipping the plant on its side to remove it from the pot; you’ll want to cover your work area to make cleanup easier. If you have a large plant, you may also want to wrap it snuggly before tipping it on its side to protect the leaves, stems and aerial roots from snapping.
Pruning shears
Now is a great time to remove damaged or discolored leaves. Always use clean and sterilized pruning shears.
A damp, soft cloth
Tend to another oft-neglected task and wipe down those beautiful green leaves after repotting your monstera.
Support stake
If your Monstera is staked, you’ll need a new support stake or coconut coir pole to place in the new pot. It’s a good idea to check the wood base periodically once your plant is repotted.
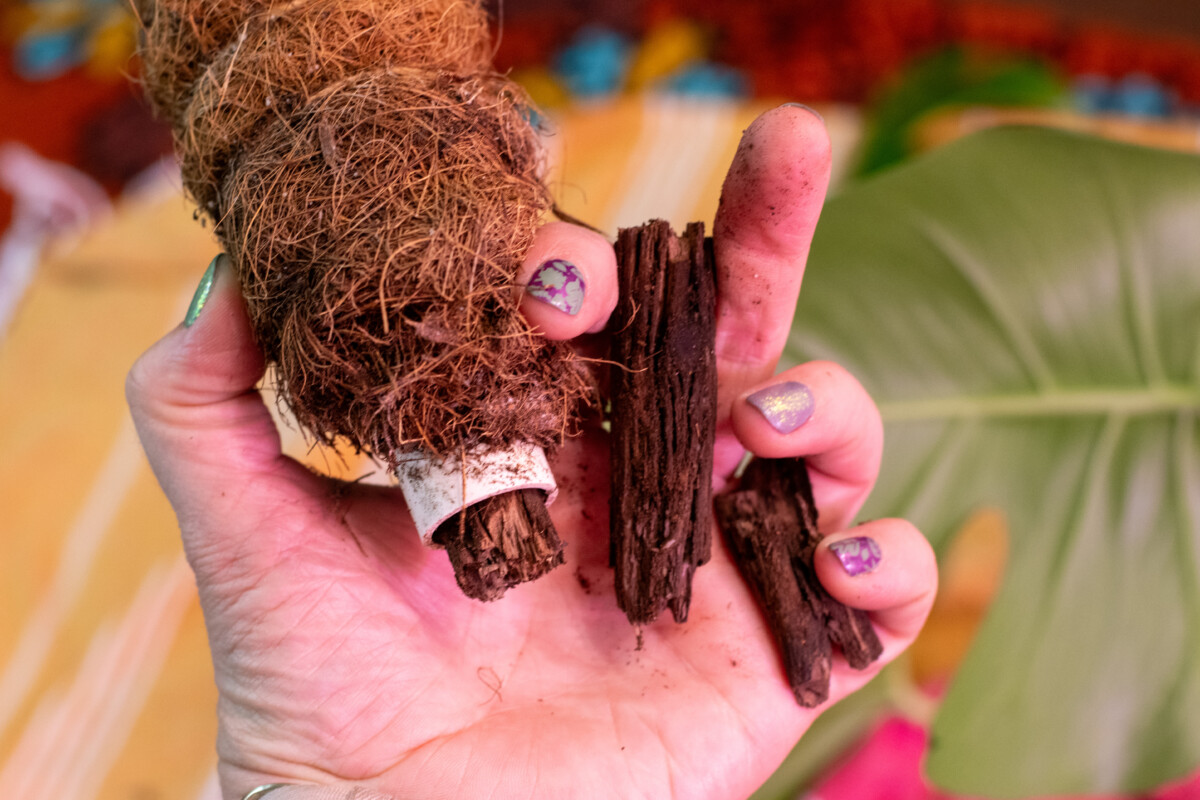
As you can see, after a couple of years of watering, the wood was completely rotted. This could have been disastrous!
If you make my DIY monstera pot, you never have to worry about flimsy supports again.
Repotting Your Staked Monstera
If you remember ahead of time, water your monstera a couple of days before you plan to repot it. The water will help hold the soil around the root ball. If you forget, it’s no big deal.
Lay a towel on the floor to protect your work area before you begin.

Prep your new pot by adding a layer of new potting mix to the bottom. You want to fill it to the point where the root ball can sit on top of the soil so the plant’s crown sits about an inch or two below the lip of the planter.
Okay, now comes the intimidating part. As long as you go slowly and have a little patience, you should be able to do this without damaging your plant. Having an extra set of hands doesn’t hurt, either.
Starting at the base of the plant, gently wrap a towel around the plant, snugging stems and aerial roots close to the plant.
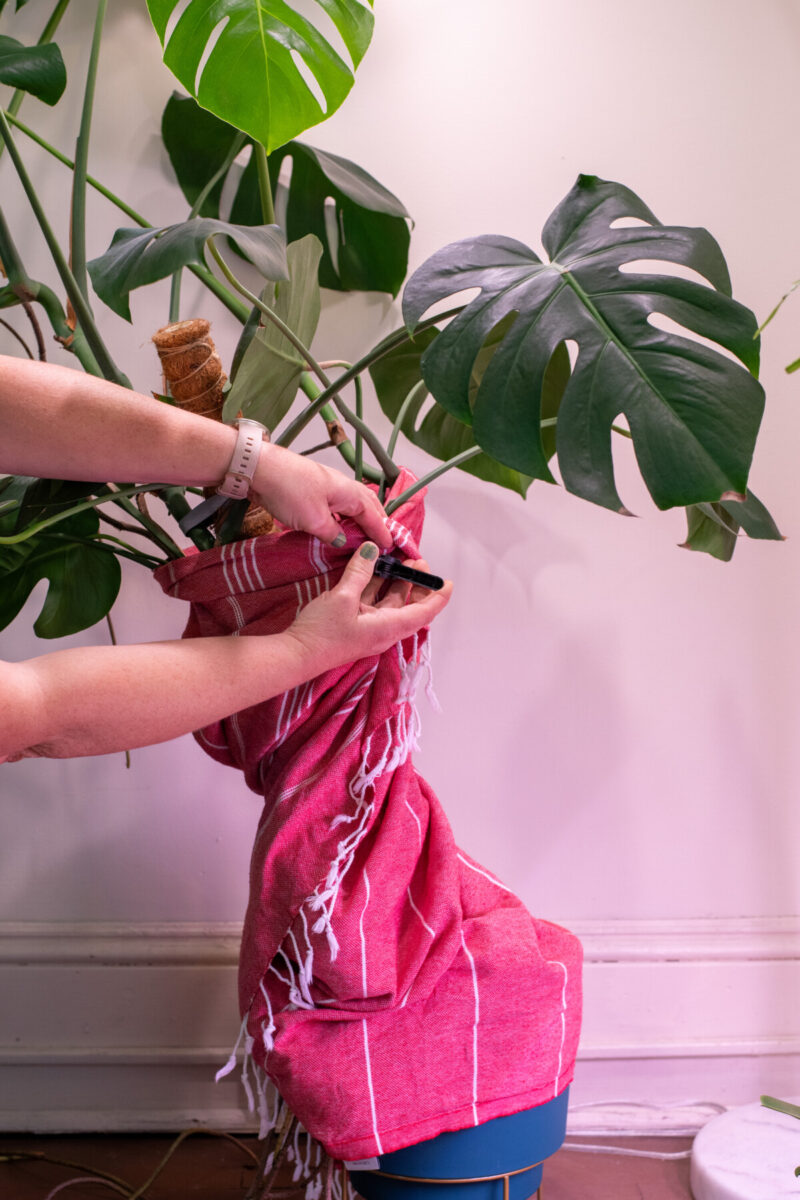
Be sure you keep aerial roots pointing in the right direction of their natural growth so you don’t accidentally snap any.
Use a clip to hold the towel in place. Now, gently tip the plant over on its side. Carefully loosen the plant from the old pot. If it’s plastic, it helps to squeeze the sides a bit. For clay pots, you may need to use a trowel and ease it down the sides of the pot, gently wiggling it to pry the plant out.
Go slowly and use gentle traction rather than tugging on the plant. Pull the pot away from the plant rather than vice versa.
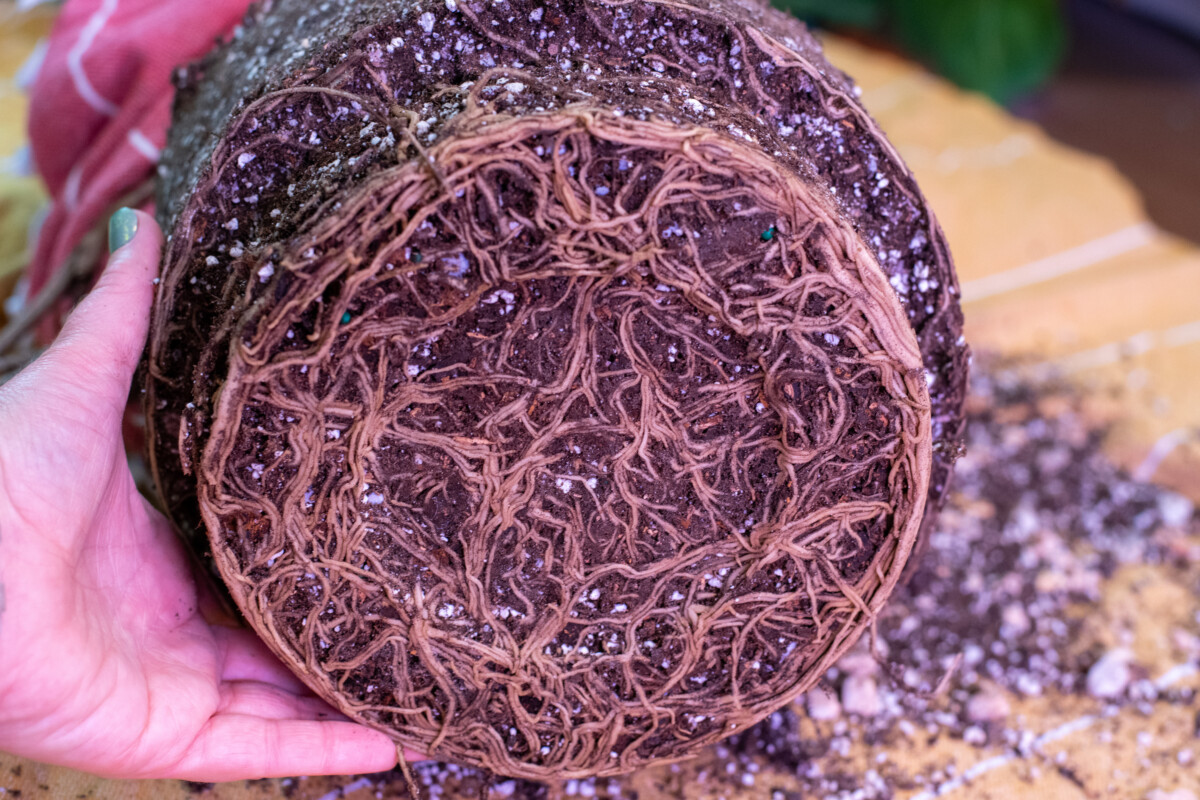
Check the roots
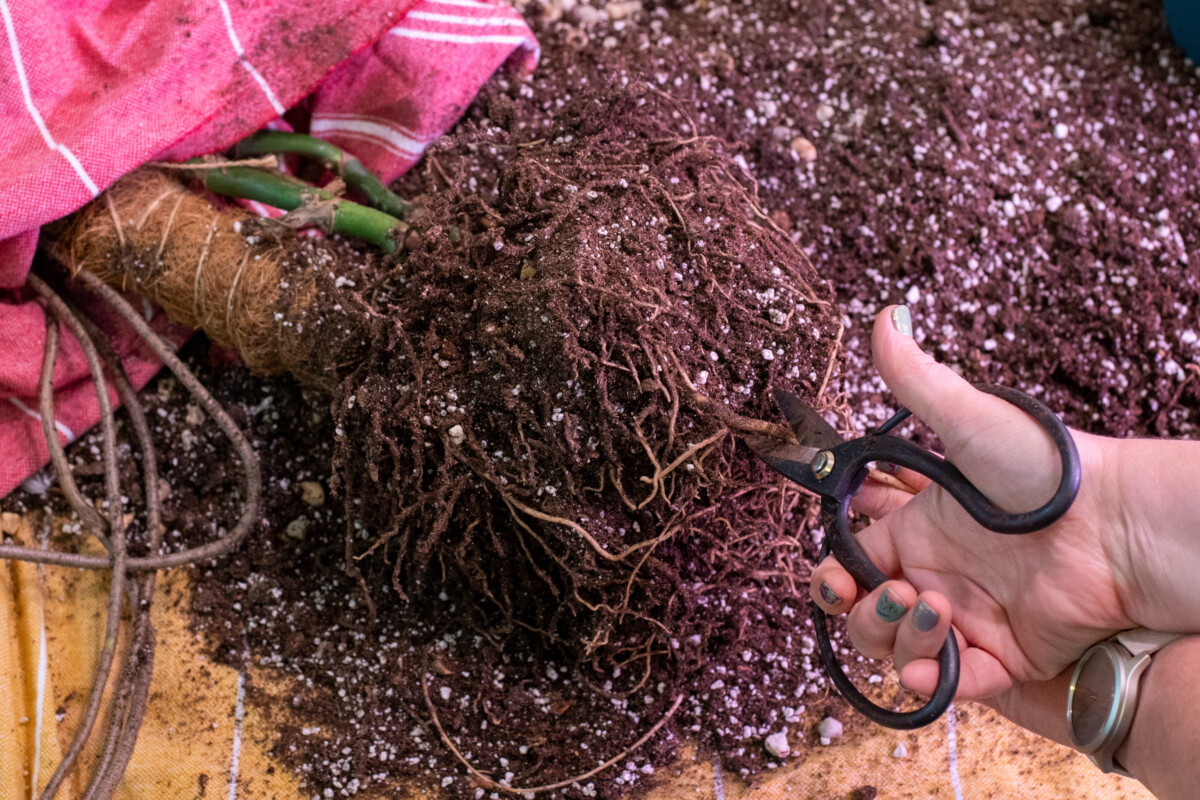
Remove any damaged or rotting roots with clean pruning shears. If the plant is quite rootbound, gently loosen and trim the roots.
Replace the Stake and Repot
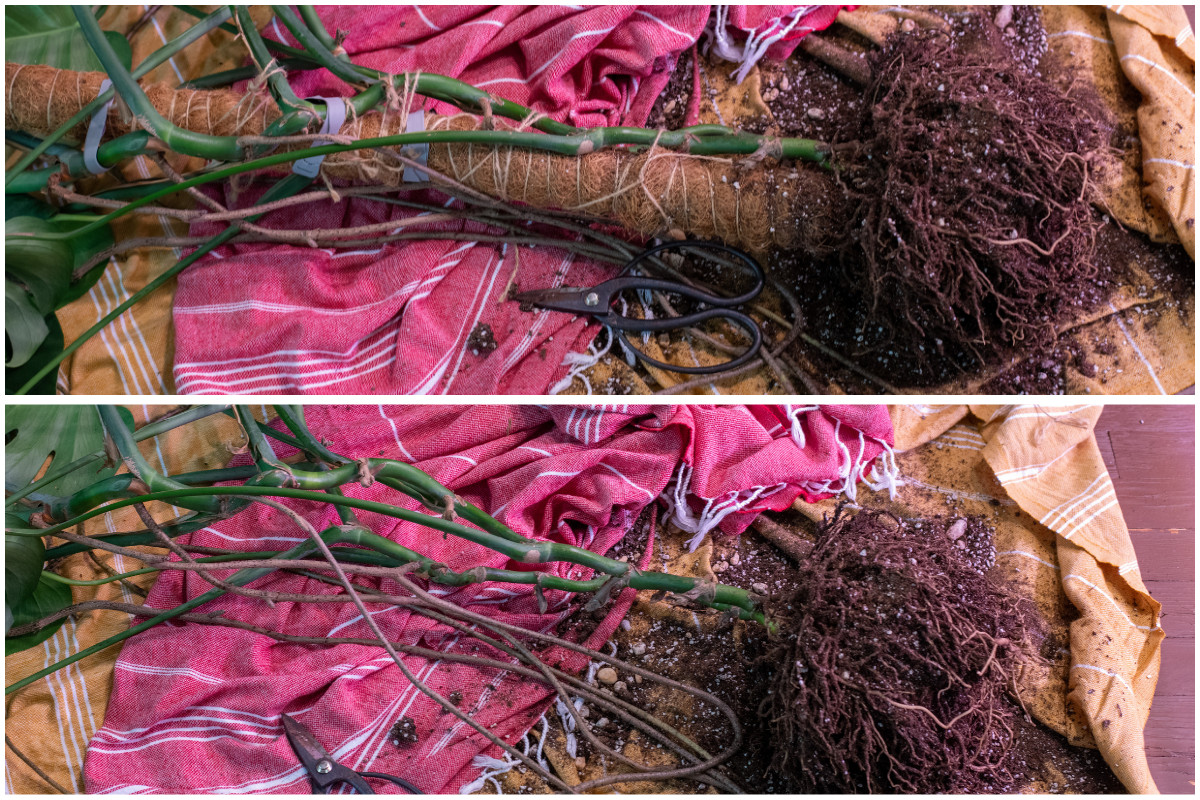
While the plant is on its side, cut away anything securing the plant to the old stake and remove the stake. Carefully place the root ball into the pot while supporting the bulk of the plant. Gently lay the plant to the side of the pot.
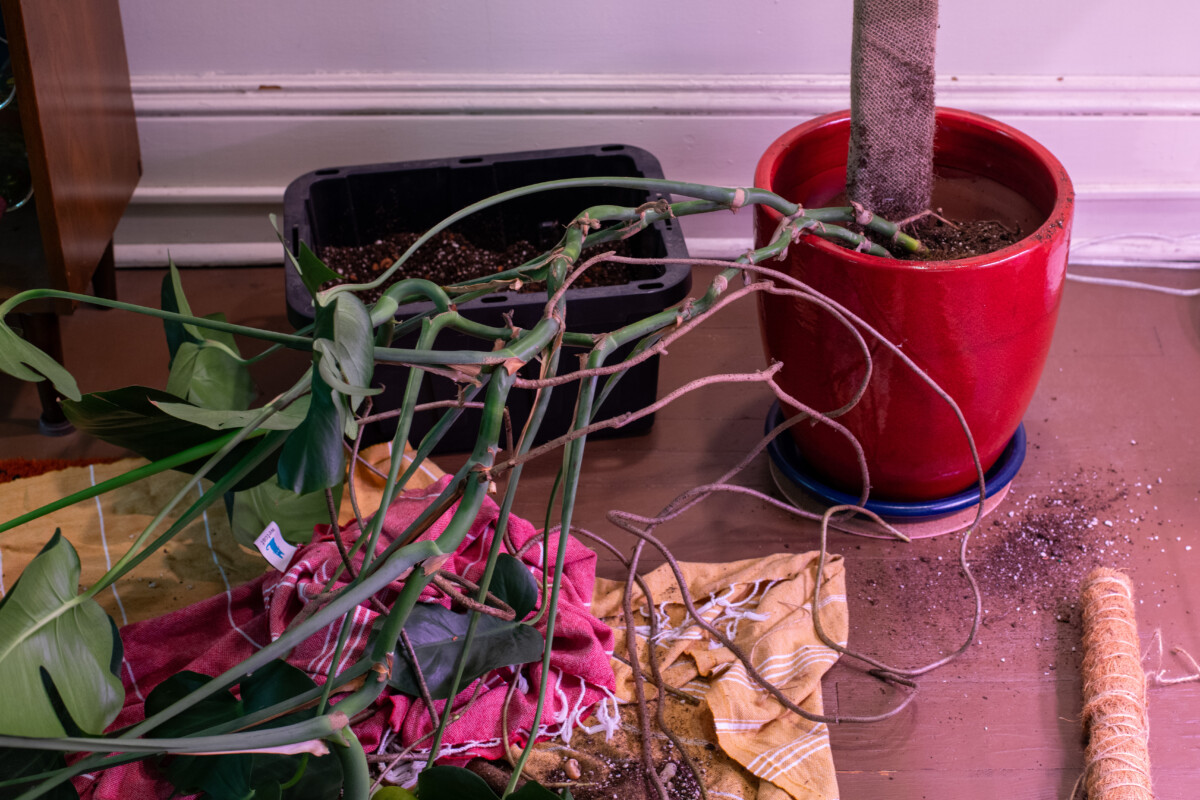
Fill the pot with more potting mix, gently pressing it down to eliminate air pockets. Leave about an inch of space at the top of the planter. Insert your new stake in the pot, pushing it deeply into the soil.
Now carefully lift the plant up, one section at a time and begin securing it to the new support. This is where you’re most likely to damage the plant, but if you take your time, you’ll do just fine. If you do end up snapping something, don’t sweat it; it happens to all of us. Trim the damaged stem off.

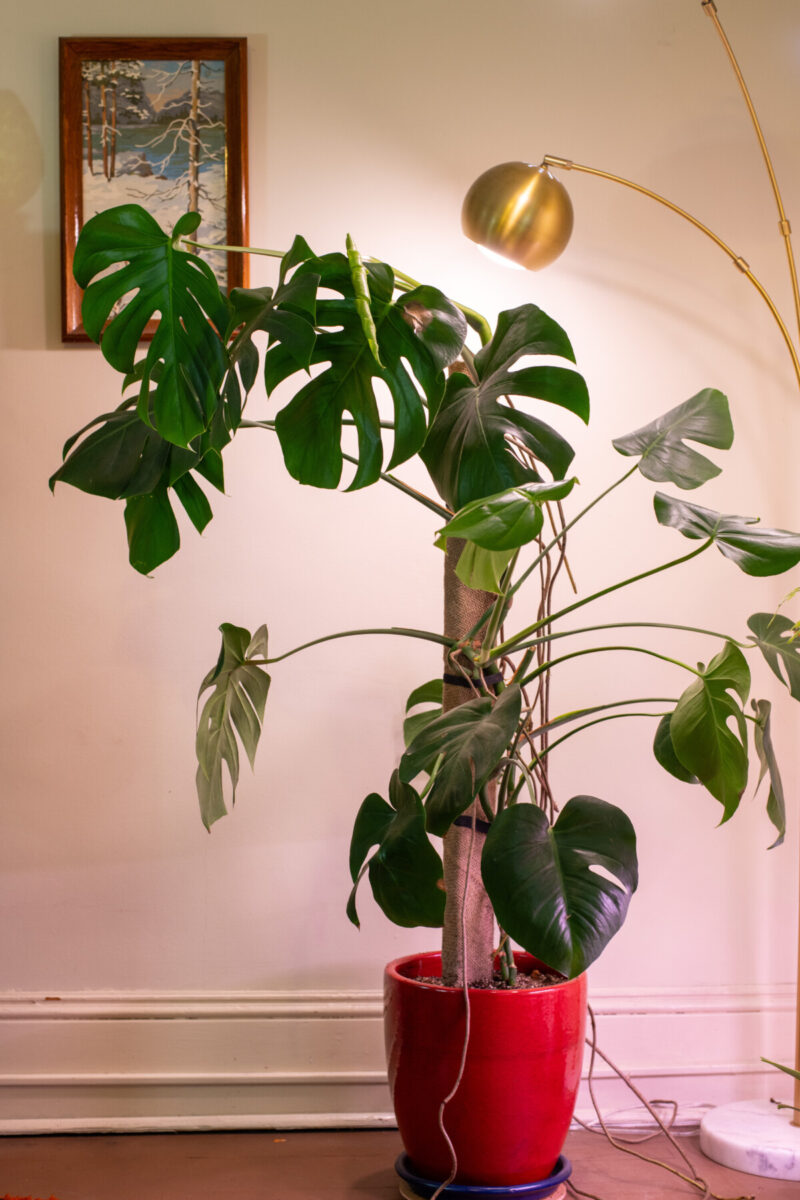
Once your monstera is secured to the new stake, water in your plant.
Newly repotted monsteras always look a bit wonky in a new pot. After about a week, your plant will begin to right itself and settle in. Don’t be surprised if it experiences a sudden growth spurt after being repotted.
Now breathe easy; you don’t have to do this again for at least another three years.

Get the famous Rural Sprout newsletter delivered to your inbox.
Join the 50,000+ gardeners who get timely gardening tutorials, tips and tasks delivered direct to their inbox.