


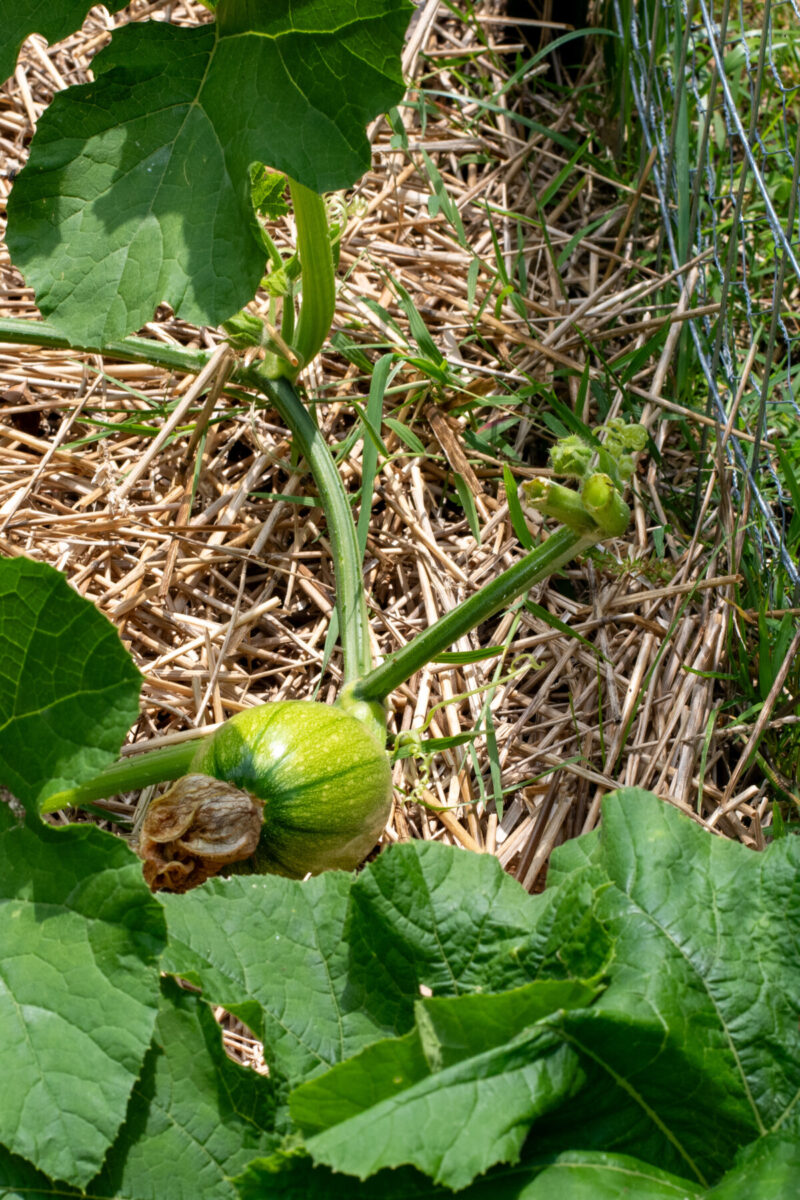
I love growing pumpkins. It’s fun to watch them start as tiny little orbs beneath a yellow flower and grow into orange wheels for baking. I especially enjoy seeing the carving pumpkins double in size after a good rain.
What I don’t enjoy is finding a surprise pumpkin growing amid my tomatoes or their creeping tendrils snaking their way into the onions halfway across the garden.
If you’re longing to grow them but are afraid of a full garden takeover, fear not. I’ll show you how to tame pumpkins.
Pumpkins – Total Garden Domination
Pumpkins are the sibling who likes to inch their fingers onto your side of the backseat during long car rides to mess with you.
“Mom! Connecticut Field Pumpkin is on my side again.”
“Keep your tendrils to yourself, or so help me, I’ll turn this garden around!”
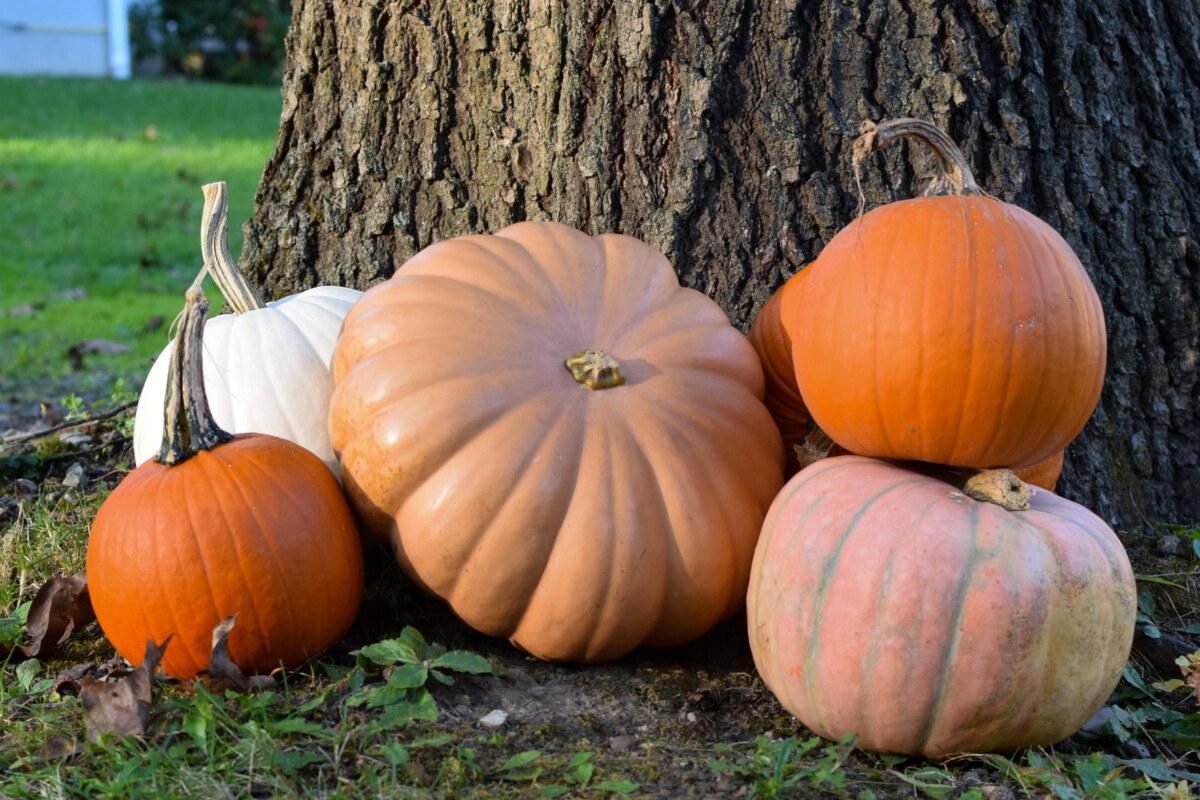
No matter what type of pumpkin you’re growing, whether small pie pumpkins or cauldron-shaped gourds destined for a candle-lit face at Halloween, these cucurbits like to sprawl. And I do mean sprawl; if left to their own devices, they would happily wrap their creeping tendrils around every plant in the garden and grow right over them.
Total garden domination is in their nature.
But you can bring these unruly gourds to heel, even in a smaller garden. All it takes is a little extra attention and a plan.
Be Realistic About Space Requirements

Before you get your hopes up, it’s time for a reality check. The title of this article is “How to Grow Pumpkins Without Them Taking Over Your Garden,” not “How to Grow a Whack of Pumpkins in One Square Foot of Soil.”
Pumpkins need space.
With this method, you can decrease the space needed to roughly 4’ x 4’ per plant.
But you’ll likely only harvest two large pumpkins or four smaller pie pumpkins per plant, depending on the variety.
I know; we all like to pretend that our garden holds magical powers that bend the limits of physical space, and those silly suggestions on the back of the seed packet don’t apply to us. But if you want to grow pumpkins successfully, as in having actual pumpkins to pick come fall, you need to be realistic about the space you’re working with.
Can you grow a seven-hundred-pound pumpkin in your raised bed? Probably not. Can you grow a few pie pumpkins or a couple of big carving pumpkins in a 4’ x 4’ bed? You bet.
So How Much Space Do I Need?
If you’re looking to grow several larger pumpkins, such as pumpkins for jack-o-lanterns or cheese wheel pumpkins (a personal favorite), then you need to have room to grow them on the ground. Very few vertical garden structures can support the weight of a twenty-plus pound pumpkin, let alone several of them.
Most pumpkins can be trained to grow within a much smaller space, roughly 4’ by 4’ per plant, but it takes work.
(And that’s okay, not everything is supposed to be easy.) However, it’s important to plant each one at least 4’ apart. The more space you can put between each plant, the better.
Choose Your Pumpkins Wisely – the Key to Growing Pumpkins in a Small Area
If you limit the space your pumpkins are allowed to inhabit, you have to play favorites.
It’s fine to let pumpkins go a little wild initially as the plant puts down roots and starts growing vines outward. At this point, concentrate on getting a nice healthy plant started. Gently redirect vines in the right direction if they’ve started to grow out of bounds.
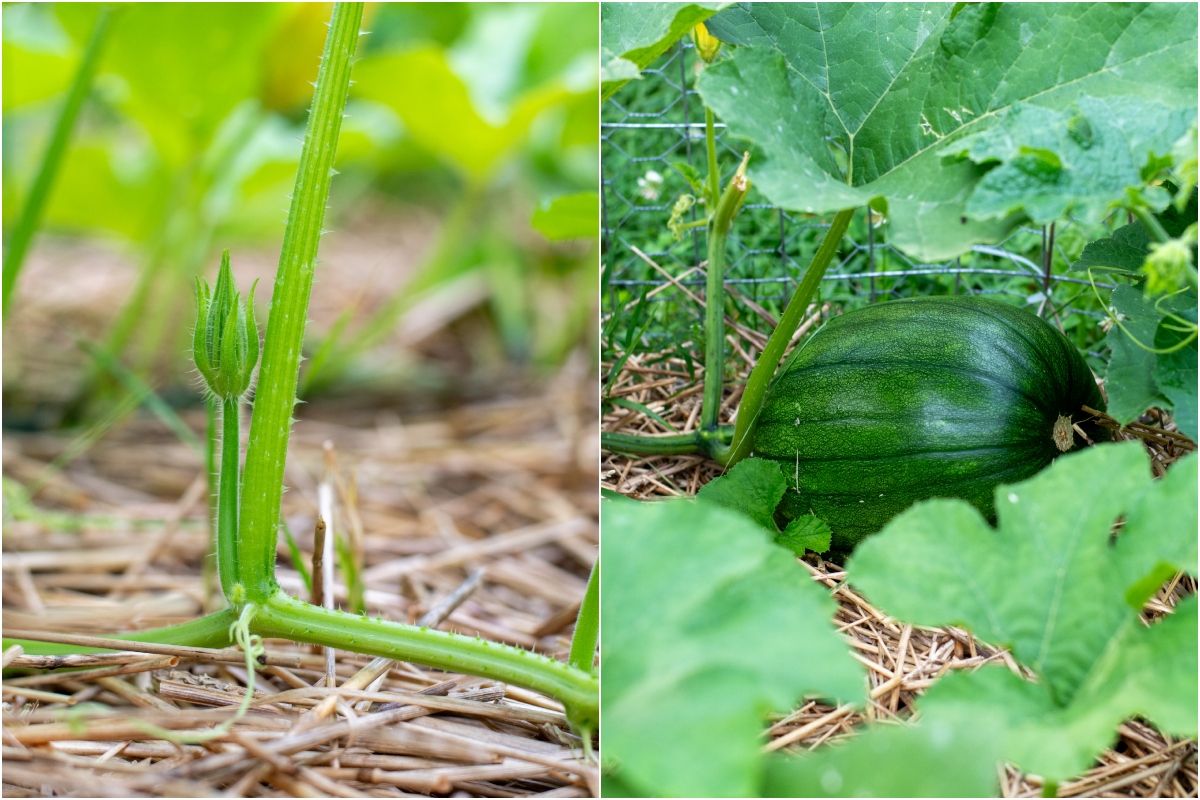
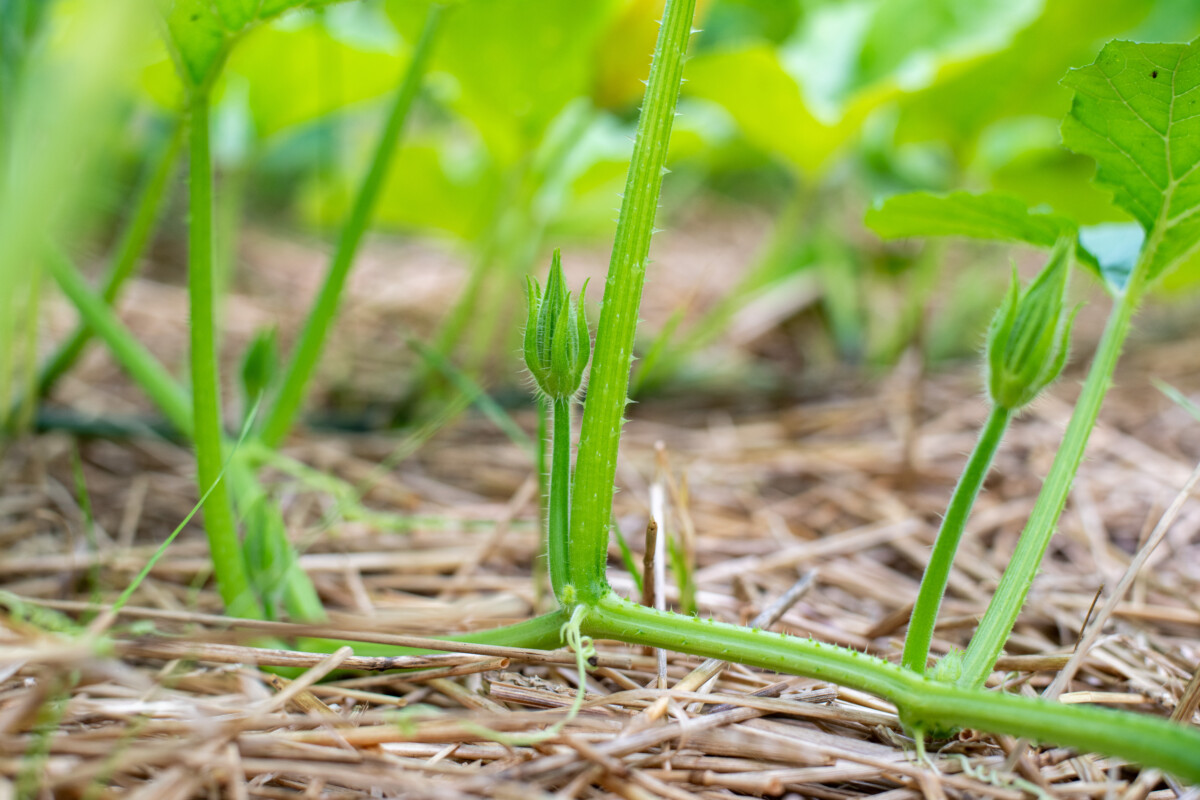
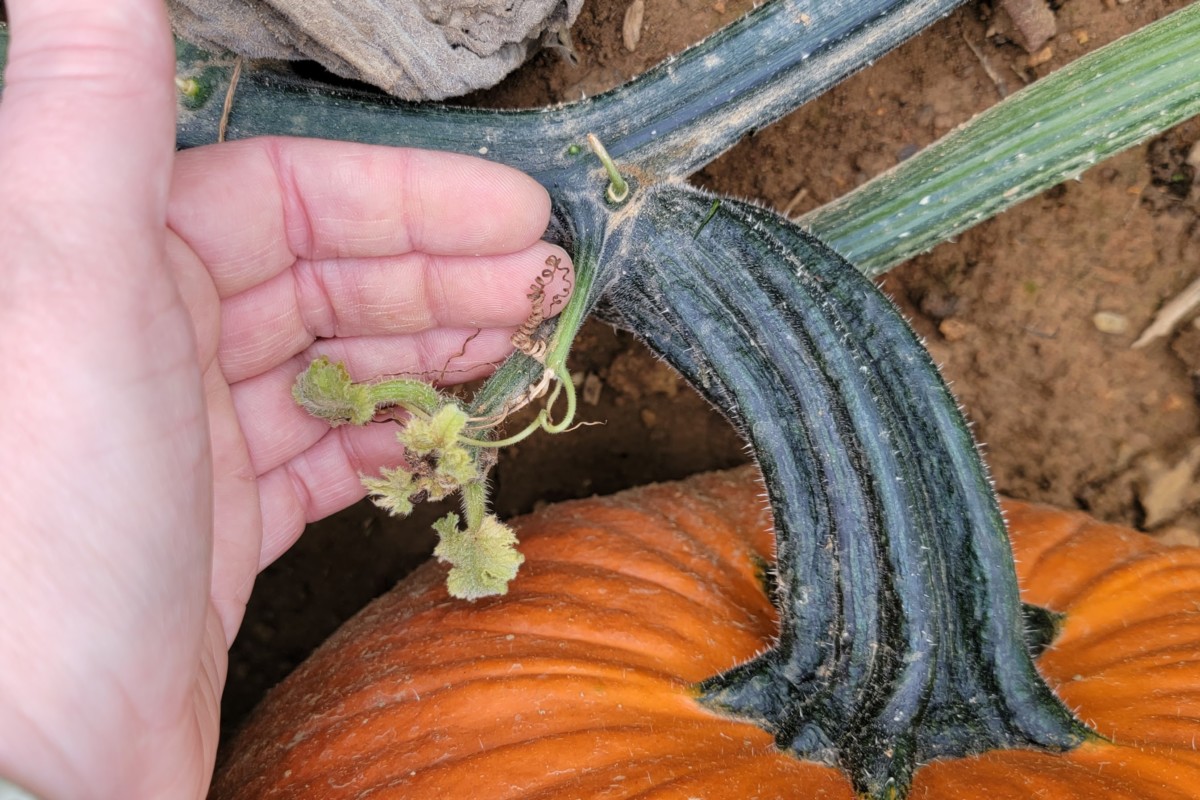
But, once you notice female flowers (the ones with the small orb below them), decisions must be made.
You will pick several pumpkins to pollinate and keep, then prevent the plant from growing any but these.
Err on the side of losing a couple of pumpkins per plant. For example, if you’re growing a larger variety of pumpkin, keep and pollinate four. As they grow and you’re sure they’re doing well, you can pinch one or two of the smaller ones off. Likewise, for smaller pie pumpkins, if you want to keep 4-6 per plant, start with 6-8.
Since we’re tightly confining the plants, I find it easiest to self-pollinate female flowers to ensure I get the pumpkins I want where I want them on each vine.

Pick a male flower – these are the ones atop a long slender stem, then peel back the petals to reveal the pollen-covered anther. Gently rub this inside the female flower, around the stamen. In a few days, you should notice the bulb below the female flower starting to grow. Ta-dah! You’ve successfully pollinated your pumpkin.
Once you’ve got your chosen pumpkins growing nicely, you follow these rules.
Prune, Pinch and Repeat
These three words are the key to growing pumpkins that stay in their lane. If you’re growing pumpkins in a small space, as well, then they’re even more important.
1. Prune
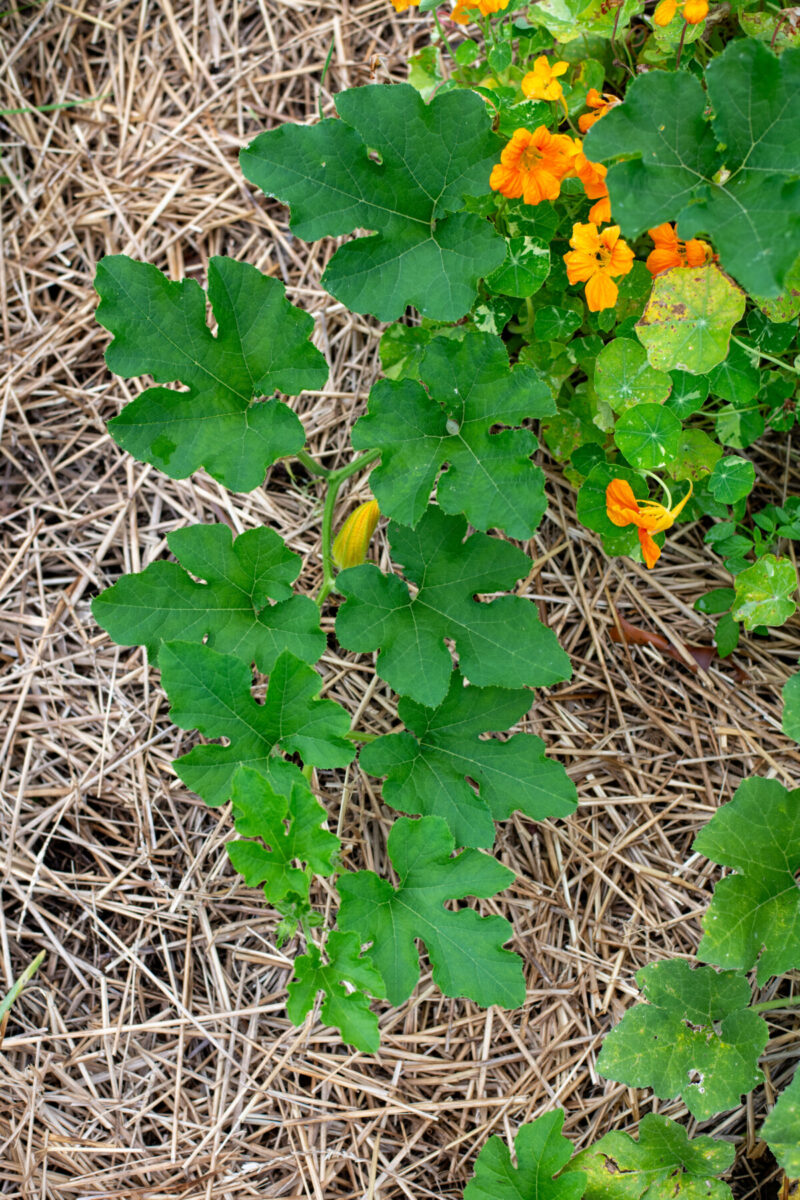
Pumpkin vines must be pruned regularly to keep them within their allotted area. However, it’s important not to prune them too hard. Think of each leaf as a solar panel that provides the necessary energy for the plant to grow big, flavorful pumpkins. If you take off too many leaves, the plant cannot produce the energy it needs. Prune vines, but don’t take leaves from the portion you’re leaving.
Most of the pumpkins will grow from the main stem.
You’ll want to let that grow, redirecting it when it grows out of bounds. Look for secondary vines growing from the main stem. While they can produce pumpkins, your bigger gourds will come from the main stem.
Remove secondary vine growth to keep your plant in check and encourage fruit on the main stem. Once your chosen pumpkins and their understudies are growing well, you can pinch back the main stem. Keeping the pumpkins maintained and pruned regularly also reduces the risk of powdery mildew.
2. Pinch
You’ve let your pumpkin plants grow and pollinated your favorites. These will be the pumpkins you nurture and tend until you pick them in the fall.
Pinch off any new pumpkins found growing on vines to ensure your chosen pumpkins receive enough nutrients and energy to grow. Regular pruning means less pinching. When looking over your pumpkins, check under leaves and along the stems to find new growth and female flowers to pinch off.
3. Repeat
Pruning and pinching redirects the plant’s energy back into the pumpkins you’re keeping. As we’re taking a naturally sprawling plant and forcing it to grow in a small area with a specific number of pumpkins, you want to avoid nutrient drain from extra vines and pumpkins.
The goal is to get your plant to funnel all of its available resources into “the chosen ones.”
Give your pumpkins the prune, pinch and repeat treatment once a week. Pay careful attention to your plants after heavy rain, as they will likely have a growth spurt.
Tips For Growing Gorgeous Pumpkins
Many Works Better Than One
From my experience, if you have space for more than one plant, it’s best to grow several in that space rather than growing one and letting it take up all the allotted space for your pumpkins.
For example, say you’ve allotted 4’ x 16’ for pumpkins. It’s better to grow four individual plants in that space than to grow one plant with this method.
If you only have one pumpkin plant and end up with diseases or pests, you lose all your pumpkins in one go. Keeping tabs on only one plant may be less work, but you have a better chance at a bigger yield with several well-attended plants.
Water
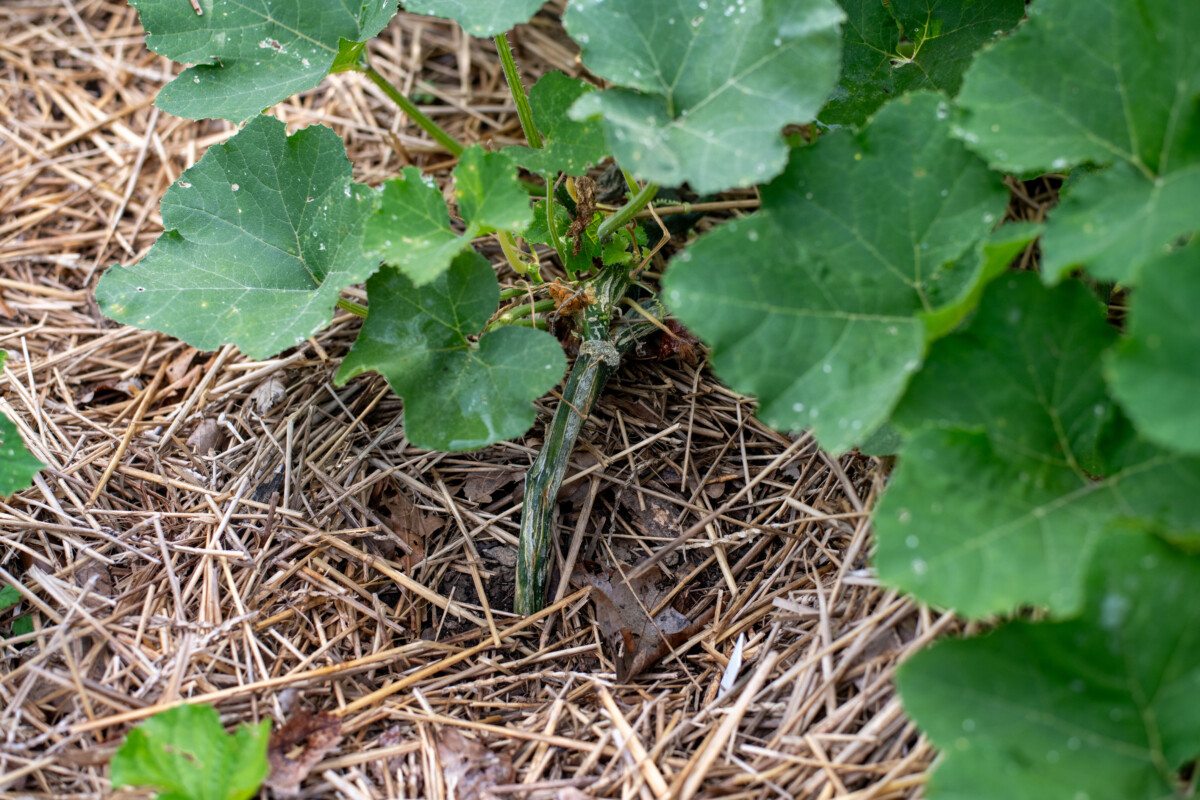
Pumpkins will put out adventitious roots anywhere the stem touches the ground. These little contact points allow the plant to hold fast and take up water and nutrients from more than one location on the plant. Because we’re limiting their vining ability, we’re also limiting their ability to create more root systems. This means where the pumpkin grows from the ground is its main water source.
Pumpkins are 94% water, which is saying something when you consider how hefty they are.
Pumpkins need to be watered regularly to grow nice and big. They need about an inch of water per week. Since we’re growing them from one main stem, it’s easy to water them by hand right where they need it. Water them deeply first thing in the morning and avoid getting the leaves and fruit wet.
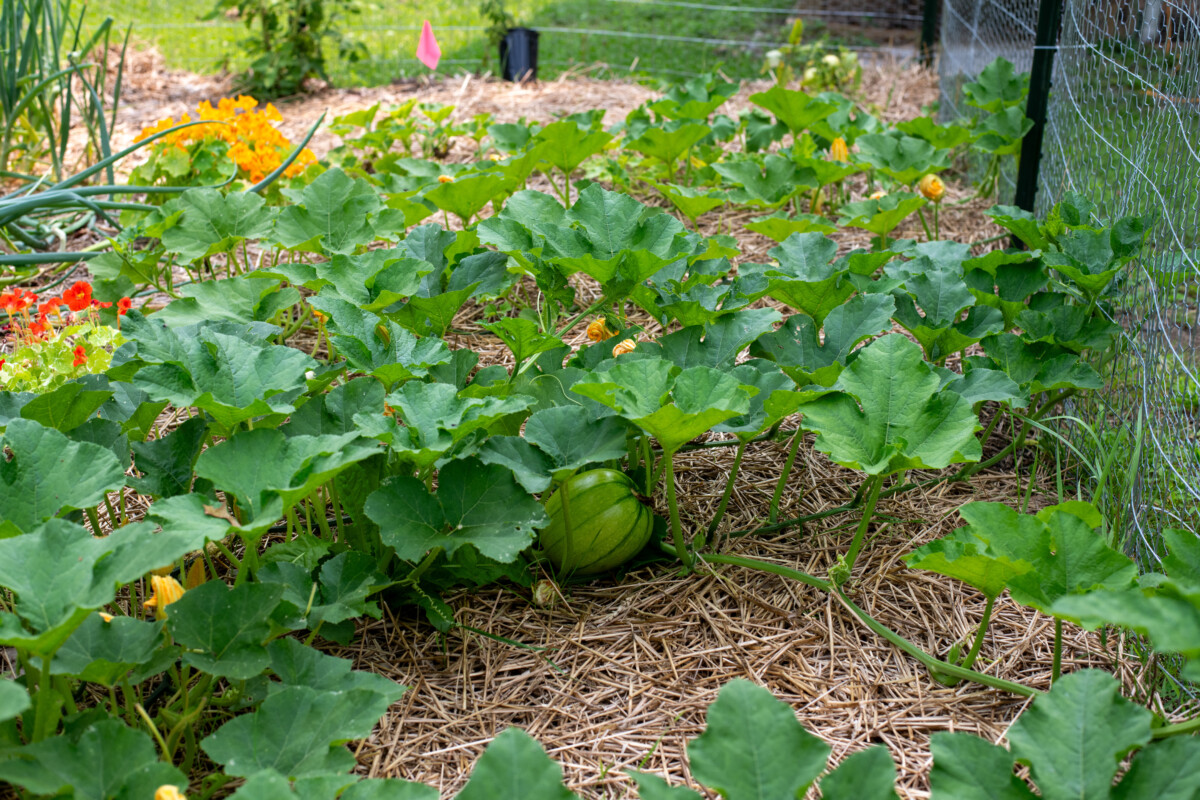
Mulch

Don’t let weeds compete with your pumpkins. Mulch the area your pumpkins are allowed to grow in. This will keep the weeds at bay, so pumpkins don’t have to search for nutrients in other parts of your garden.
Growing pumpkins on a bed of mulch also reduces the risk of rot and soilborne diseases.
Fertilize
Fertilizing needs often leave gardeners confused. But fertilizing fruiting-bearing plants is easy once you learn to fertilize by stage. Look at how the nutrient ratios are listed on any fertilizer. It’s always NPK – nitrogen, phosphorous and potassium.
Guess what? That’s the order in which fruiting plants need those nutrients over the growing season.
Nitrogen – Needed at the beginning of the season while growing roots, stems and leaves. Blood meal is a great natural option for nitrogen.
Phosphorous – As soon as the plant begins to flower, it will need phosphorous. Flowers = phosphorous; they’re spelled differently, but the sound is the same. Chicken manure and bone meal are good sources of potassium.
Potassium – Potassium feeds fruit. While the plant is actively growing fruit, it will need more potassium, as this nutrient plays a direct role in producing sugars (flavor) and moving water within the plant cells. Kelp meal and wood ash are excellent for adding potassium to the soil.
Fertilize your pumpkins every couple of weeks, adjusting the fertilizer based on what stage of development the plant is in.
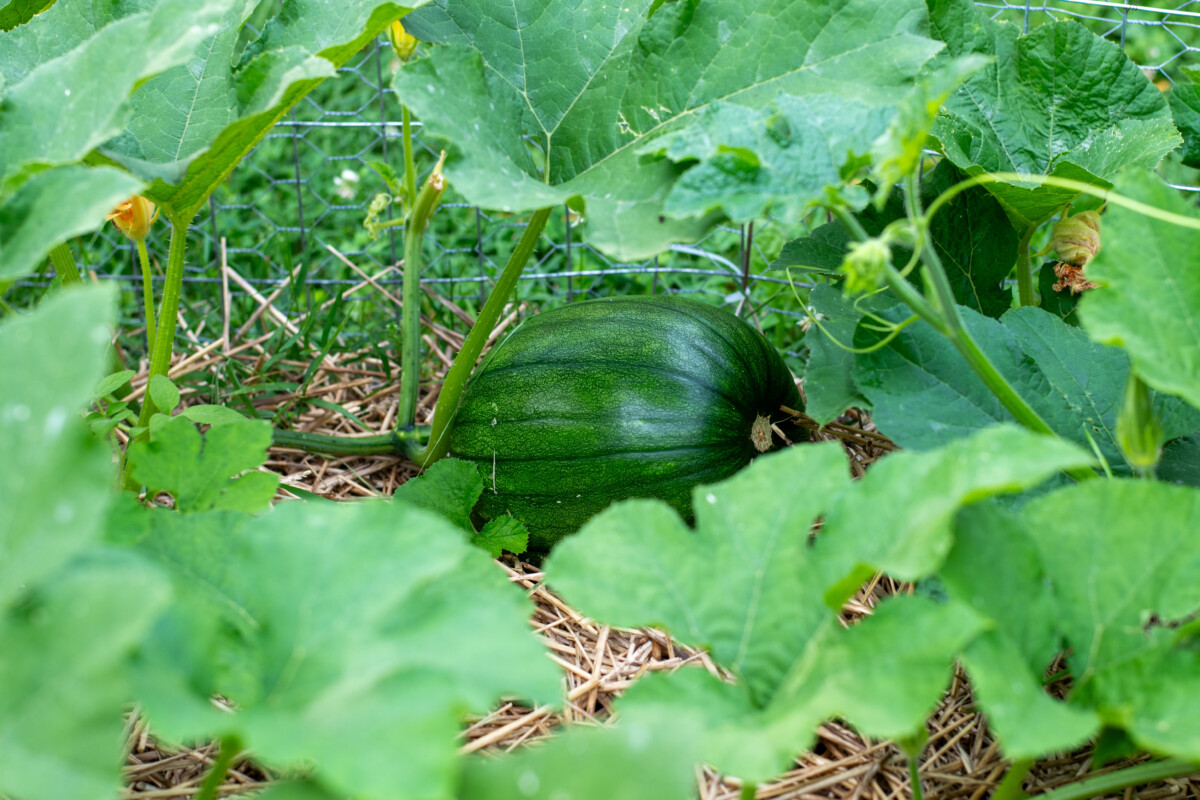
Knowing when to harvest your pumpkins is easy if you follow this guide.
Growing Pumpkins in Very Small Spaces
Can you grow pumpkins vertically or in very small spaces? As with all things, just because you can do something doesn’t mean you should.
If you want pumpkins and have small beds or only a couple of raised beds, the better question is, “What else could I do with this space that would get me more veggies?” A lot.
So, while you can grow pumpkins in a very small setup with this method, it may not be worth it. If you’ve still got your heart set on growing pumpkins, keep reading.
Growing Vertically
Growing pumpkins vertically is the best option if you have very limited space. However, you’re also limited to smaller varieties of pumpkins. New England Sugar Pie pumpkins are a good choice for growing vertically, as they top out around 4-5 pounds each.
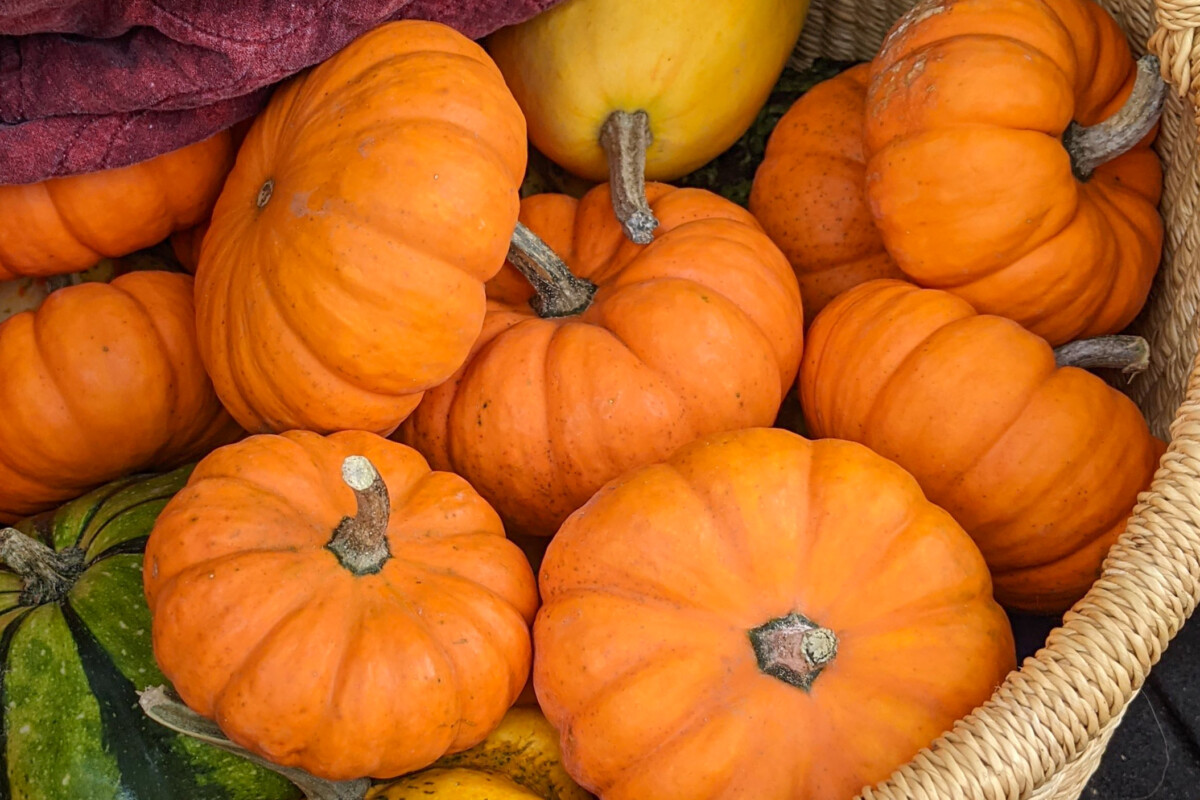
Another fun pumpkin to grow vertically are the Jack-Be-Little pumpkins. They’re ridiculously cute and fantastic for fall decorating. Most people don’t bother with eating them, but they’re perfect personal-sized pumpkins for roasting. Grown vertically, they need minimal support if the vine is staked and trellised well.
To grow pumpkins vertically, you will need sturdy poles to train the main vine up and some sort of trellising. If you want to get really fancy, you can put up a metal arch and grow them overhead.

If pounding a sturdy pole into the ground isn’t an option, use a simpler method that can be reused each year for other veggies.
Pick up a 5-gallon bucket, a bag of Quikrete and a 10ft length of rebar. Mix the Quikrete in the bucket and add your rebar to the middle. Let it set up, and voila, you have a sturdy garden stake for growing pumpkins vertically.
Two or three of these will provide you with the vertical space and strength needed to train pumpkins up, rather than out. Fit them with chicken wire or garden fencing between each stake to add stability and give the pumpkins something to climb.
If you already have a similar setup in your garden via a fence, you’re ahead of the game.
To grow pumpkins vertically, you’ll follow the same method detailed earlier. However, you’ll need to be diligent about pinching them back once they reach the top of the structure. You will also need to encourage them to grow across the netting or wire between the supports.
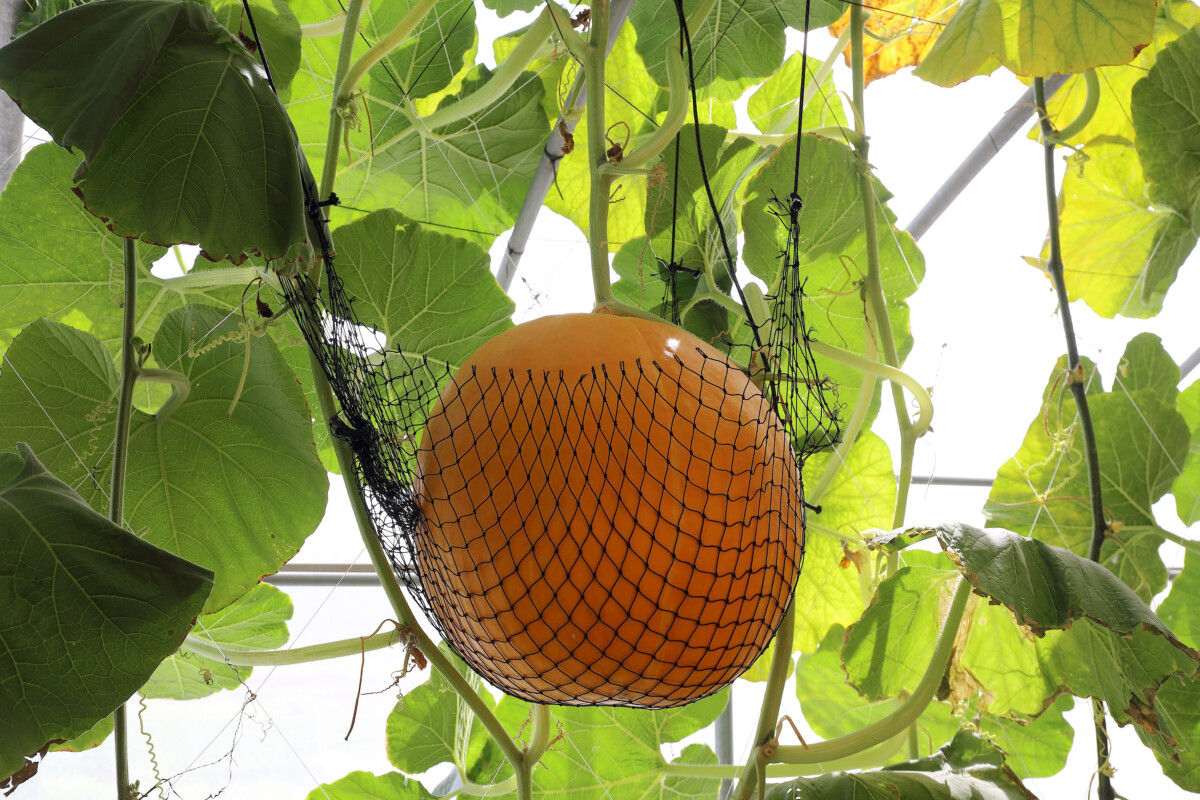
As pumpkins grow bigger, you’ll need to support their weight so it doesn’t pull the vine down. A brilliant trick to support growing pumpkins is to place them in the toe of a pair of pantyhose and tie the leg of the pantyhose to the pole or wire fencing. When the pumpkins are ready to harvest, you simply remove them from their stockings and cut them from the vine.
Now you can grow pumpkins, even if you don’t have several acres, and you don’t have to worry about them taking over your whole garden. You’re well on your way to a batch of spicy gingered pumpkin chutney and other delightful pumpkin treats.

Get the famous Rural Sprout newsletter delivered to your inbox.
Join the 50,000+ gardeners who get timely gardening tutorials, tips and tasks delivered direct to their inbox.