

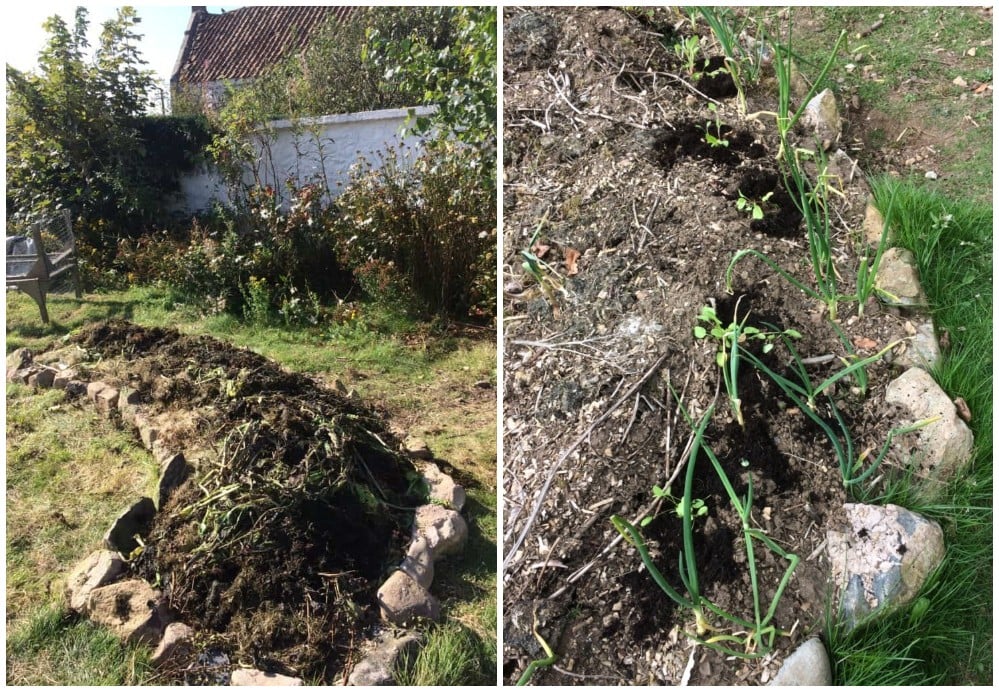
Last fall, I created a new hugelkultur bed in a part of my garden. You can see my step-by-step tutorial here.
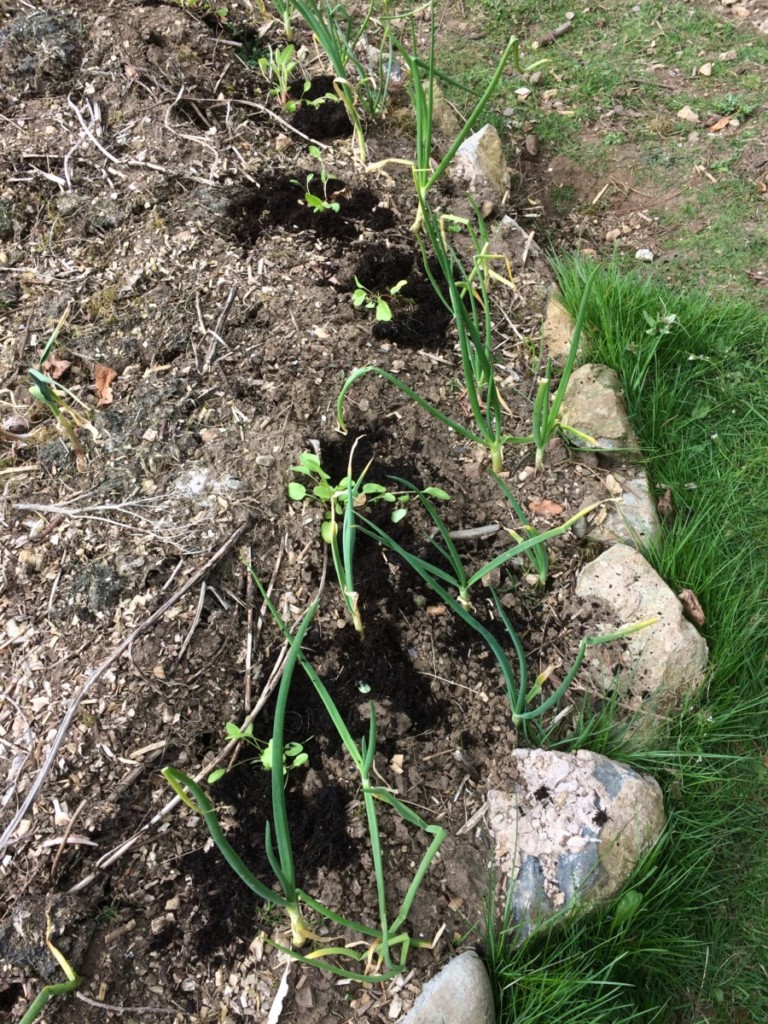
At the time, I planted onion and garlic sets around the edges. These overwintered in the bed and are now growing strong.
But now spring has sprung, it is a good time to further populate this growing area. I’ve put together this new article to share my experiences and help others learn how to plant up a hugelkultur bed.
The Basics of Planting Up a Hugelkultur Bed
The first thing to mention is that you do not have to wait before planting into a hugelkultur mound that you have created. I only waited to fully plant up in this instance because I undertook the work in fall.
If you want to create new growing areas where you live, spring is the perfect time to get started. You could build your new bed or beds right now, and plant them up immediately for a harvest later in the year.
Understanding a hugelkultur planting method involves understanding the benefits of this growing system.
One of the benefits is that a mound created in the way described in my previous article is that it is great at storing water and nutrients. Another benefit is that it will allow you to create a range of different habitats/ growing conditions in just one bed.
It is important to understand the different conditions that will prevail on different parts of the hilled growing area. All hugelkultur mounds, no matter their shape and size, will have:
- A sunnier and drier slope (on the south-facing side in the northern hemisphere).
- A shadier and moister slope (on the north-facing side in the northern hemisphere).
The top of the mound will be much drier, and provide more depth for deeper rooted plants. The base at the sides (especially on the shadier side) will be better for more moisture-loving plants.
It is important to understand the climate and microclimate conditions where you live when deciding what to plant on your new mounded growing area. And environmental conditions will also help you determine exactly which plants to grow.
The Plants I Chose For My Hugelkultur Bed
I decided last fall that I would use this bed to grow alliums, brassicas and herbs this season. As in other annual growing areas in my garden, I chose to create a polyculture.
Polycultures are beneficial in a garden. Growing a range of different plants and increasing biodiversity in your garden is a great idea. It will help with pest and disease control. And boost resilience by increasing the number of beneficial interactions between plants, and between plants and animal species.
The South Facing Slopes
On the sunnier south facing slopes of my curved hugelkultur mound, I have planted:
- Garlic (for culinary use, and pest control.)
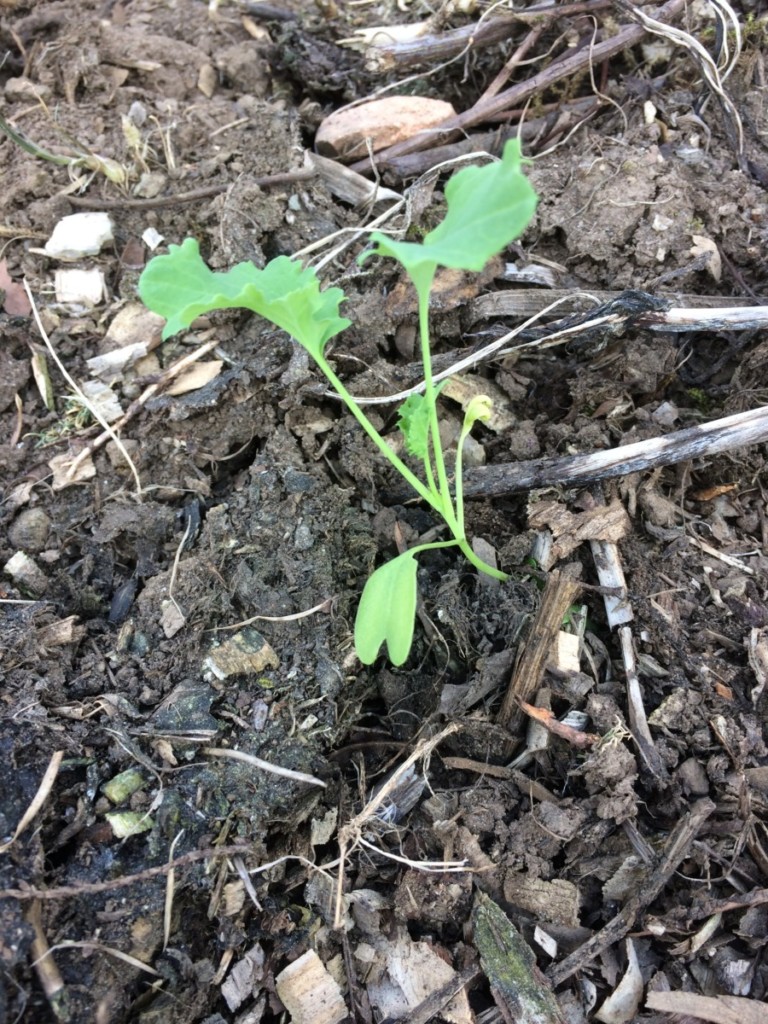
- Kale (a hardy variety (Borecole), good for this fairly exposed spot. This is a good crop for my area.)
Later, when the weather warms a little more, I will also companion plant between the kale with:
- Borage (primarily for pollinators and for edible flowers.)
The North Facing Slopes
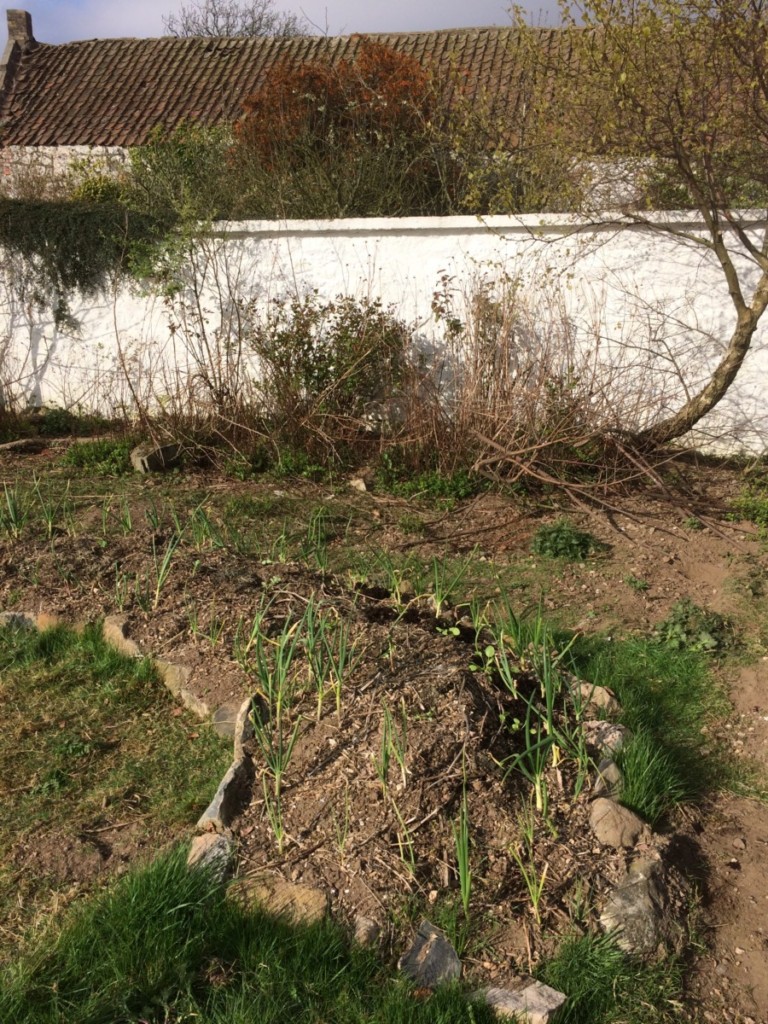
Onions are already growing strong around the edges of the hugelkultur bed.
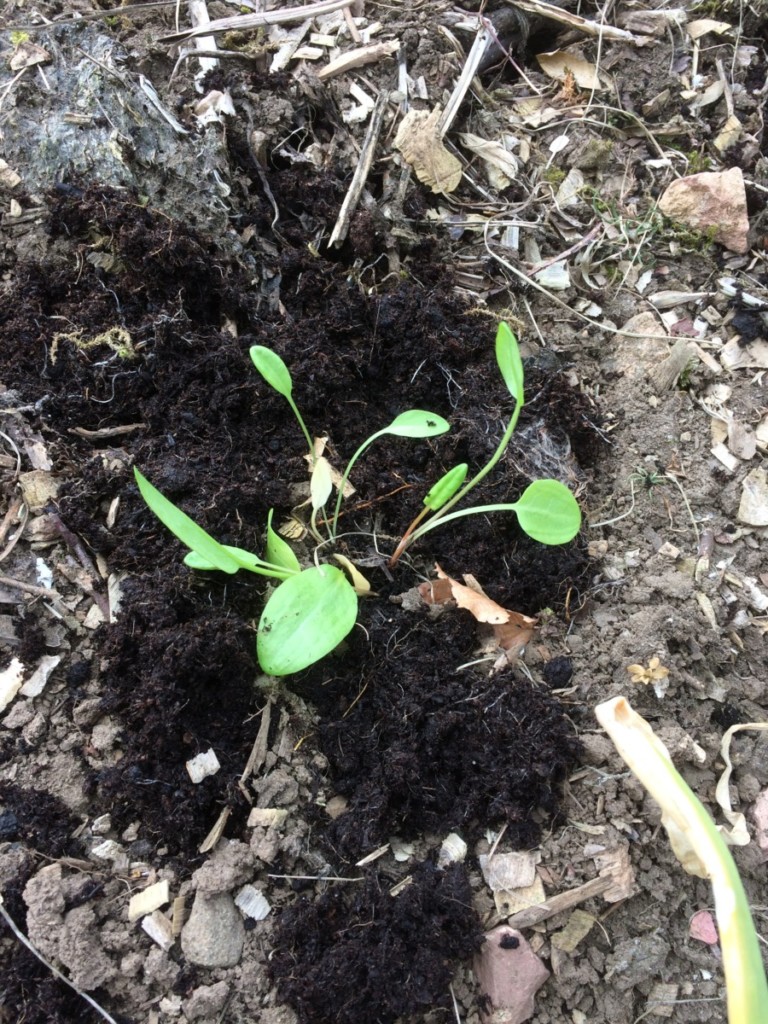
Towards the base of the slope, on its northern side, I have now also planted some Belleville sorrel. This classic French culinary ingredient is very cold hardy, and so can thrive in this location.
As a perennial, it will also remain in place once the alliums and kale have been harvested. This sorrel can be harvested and eaten in moderation as a salad crop, or used as a pot herb.
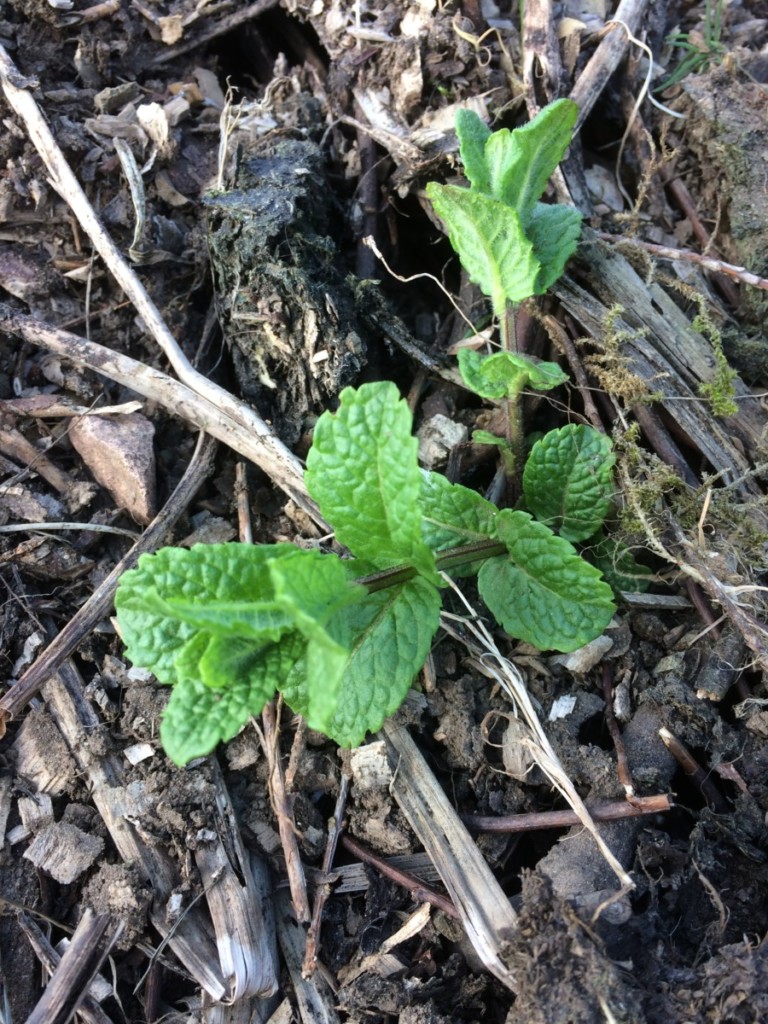
I have also placed a few mint plants on the northern fringes of the bed. This will spread and create ground cover over the bed over time. In addition to being used as a culinary herb, the mint will also help to repel or distract certain pest species.
Why I Chose a Mixture of Perennial and Annual Crops
In order to make the most of my growing areas, I choose to grow a mixture of perennial crops between and among my annual crops. This means that the beds can always provide something – even during the bleakest and least productive portions of the year.
Perennial crops also help to anchor the soil, and keep moisture and nutrients around.
A good mix of diverse plants also means that it is easier to control pests and disease, and to garden organically.
Planting Out Into a Hugelkultur Bed
If you have created your hugelkultur bed correctly, there should be a thin layer of compost/ soil on top of the other organic materials within the structure. You can simply plant into this layer as you would plant into any other raised bed.
You can also direct sow seeds into your new growing area. However, where I live, I find that I have more success with transplanting than I do with direct sowing. Rodents such as voles often eat seeds before they get the chance to germinate, and birds can also be a problem.
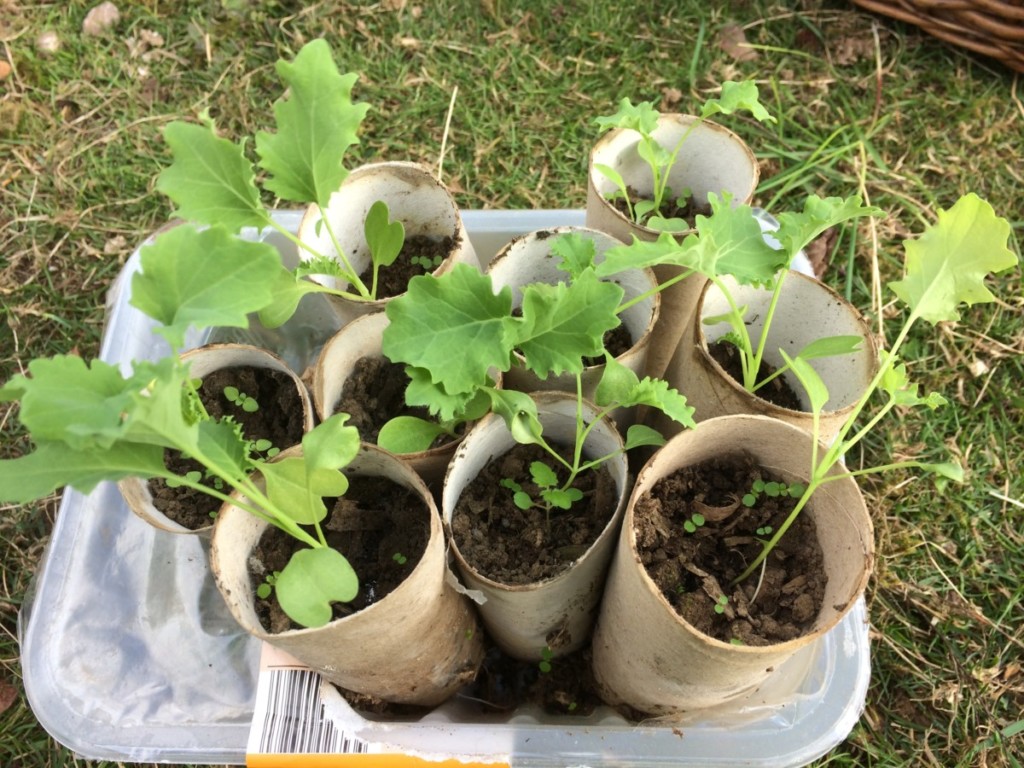
I started off brassica seedlings around 4-6 weeks ago, in a range of different containers. As you can see, I used toilet roll tubes for some of the seedlings.
Now they are ready to plant out, I simply peeled the toilet roll tube away around the tops, and placed the seedlings in the base of the cardboard tubes into the mound.
The reason that I peel away the tops of these biodegradable containers is that, when placed in the ground, any cardboard protruding above the surface of the growing medium wicks water out and away from the plants.
I gently made a hole into the mound then placed each seedling, in the base of its biodegradable container, into the structure. I then firmed it into place and, since the weather has been very dry, watered it in.
The sorrel and the mint were already growing elsewhere on my property. So I simply uprooted these with small amounts of the surrounding soil. I made more holes for these in the hugelkultur mound, then firmed them into place.
As I planted out these new additions, I was careful not to disturb the alliums already growing in the bed.
What Comes Next
After I have harvested my summer brassicas, onions and garlic, I will replenish the bed with a top dressing of compost. I will then sow a cover crop of overwintering field beans (Vicia faba) in the structure. These nitrogen fixers will help to replenish nitrogen and maintain fertility over time. And they will be hardy enough to overwinter in my garden in my climate zone.
In spring next year, the cycle of planting will begin again. I plan to follow the brassicas and alliums then field beans in rotation with spring-sown peas, and swiss chard/ other leafy greens.
Of course, the perennial crops – sorrel, mint – will remain in place. The sorrel will continue to provide a few leaves even in winter where I live. The mint will die back before coming into growth again in spring. Borage, though annual, is likely to self-seed. I will allow it to do so in this bed.
After sowing peas and leafy greens successionally throughout next year, I will then continue to sow other, different crops, continuing with crop rotation for annuals and maintaining the perennial crops in this bed.
Planting Up a Hugelkultur Mound Where You Live
You can grow almost anything that you would grow in the ground or in a more traditional raised bed in a hugelkultur mound. Just be sure to think about the climate and local conditions where you live.
As I mentioned above, my hugelkultur bed is located in a somewhat exposed location in my garden. This bed is the first step in a project to overhaul this section of my property – currently an open area next to a road, outside the wall to our fruit orchard.
This curved bed is one of four curved beds I plan to make, surrounding one central bed. We also plan, over the summer months, to create a new stone wall (using reclaimed stone from our barn conversion project) between this area and the road.
Before we create this new stone wall, and planting bed along it for a windbreak hedge, the area is exposed to prevailing winds. This somewhat limits the number of crops I can currently grow in this bed.
However, in a more sheltered spot, such a mound could be much more versatile. Depending on where you live, it could also be used to grow a much wider range of crops.
For example, a hugelkultur mound in the right position could be ideal for growing tomatoes (on the sunnier side) and their companion plants. You could also grow squash or pumpkins, corn and beans (the three sisters), or other warm weather crops in the summer months.
Hugelkultur mounds are not ideal for growing larger root crops, or tubers like potatoes. Since these will disrupt the structure too much. But you need not be too limited, since there are a huge range of perennial and annual crops you could grow in such a structure.
So why not take some time in your garden to build your own hugelkultur mound? Plant it up with a polyculture, and see your garden flourish and grow. You might be amazed by how productive these growing areas can be.
And if you need that hugelkultur bed tutorial again, here it is.

Get the famous Rural Sprout newsletter delivered to your inbox.
Join the 50,000+ gardeners who get timely gardening tutorials, tips and tasks delivered direct to their inbox.