


Christmas is coming.
I don’t know about the goose getting fat, but I sure am. Cooler days and long nights mean I slow down and eat heavier foods. One has to stay warm, after all. So, I decided to get out into the woods and walk for a bit.
I ended up coming home with a basketful of pine cones. (Yes, another one, I can’t help myself.) You can check out some of the more practical things I did with the first basket and learn some cool ways to use pine cones around the home and garden.
I got thinking about all of the beautiful Christmas decorations I could whip up with my basket of little evergreen cast-offs. And so, I took to the internet in search of ideas.
I resurfaced three hours later. You know how it goes.
I’ve got the scoop on some cute, glamorous, natural, cheery, bright, easy, impressive Christmas décor all using pine cones.
So many of these are great activities to do with the kids.
Get out the glue and the craft paints, put on the Christmas carols and make some hot cocoa, and get creating. These crafts will keep small hands busy on your next rainy (or snowy) afternoon stuck inside. And you’ll get a jump on gifts for the grandparents.
Sometimes, what you need is a glass of red wine and a glue gun after the kids have gone to bed. I’ve got a few of those types of crafts lined up for you as well.
These projects pair exceptionally well with Christmas movies, too, just sayin’.
Sourcing Pine Cones
I love evergreens – pine, spruce, fir, hemlock, you name it. If it smells like the mountains or you can hang an ornament on it, I’m probably out in the woods somewhere sticking my nose in it and gathering needles or cones from it. You’d be amazed at all the things you can do with pine needles.
If they made a balsam needle-stuffed mattress, I’d buy it. (If this is a thing, hit me up with a link, and I’ll love you forever.)
Needless to say, over the years, I’ve become adept at identifying my favorite evergreens.
True pine cones, at least, the ones we want for our purposes, only come from pine trees. I know, that seems kind of obvious, but if you’re looking for pine cones out in the wild, it helps to know what trees you should be looking for.
The easiest way to tell a pine tree from other evergreens is by looking at the needles. Pine needles always grow in a cluster. There are generally two to three needles growing from the same spot on the tree.
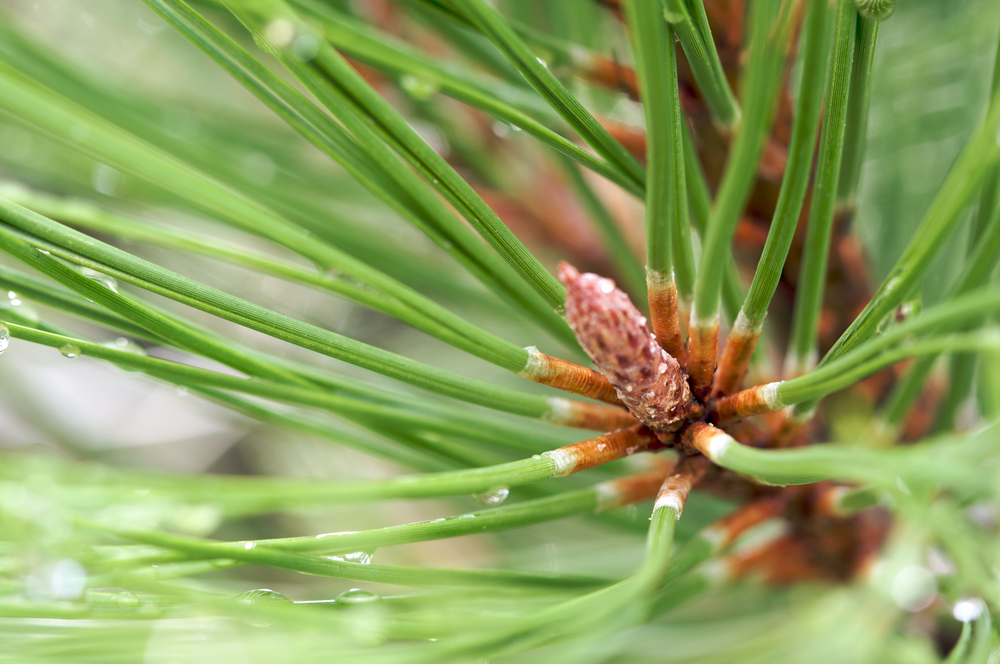
Whereas spruce and fir trees, the needles are attached individually to the branch. However, once you’re that close, you’ll either see pine cones on the ground, or you won’t.
The easiest way to identify pines from other evergreens from far off is by their general shape and the way their branches hang. Spruces and firs have that classic conical Christmas tree shape. Pine trees tend to be rounder and less symmetrical (kind of like me). Pine tree branches usually grow upwards, and there are fewer branches compared to spruce and fir trees.
Debugging and Getting Closed Pine Cones to Open
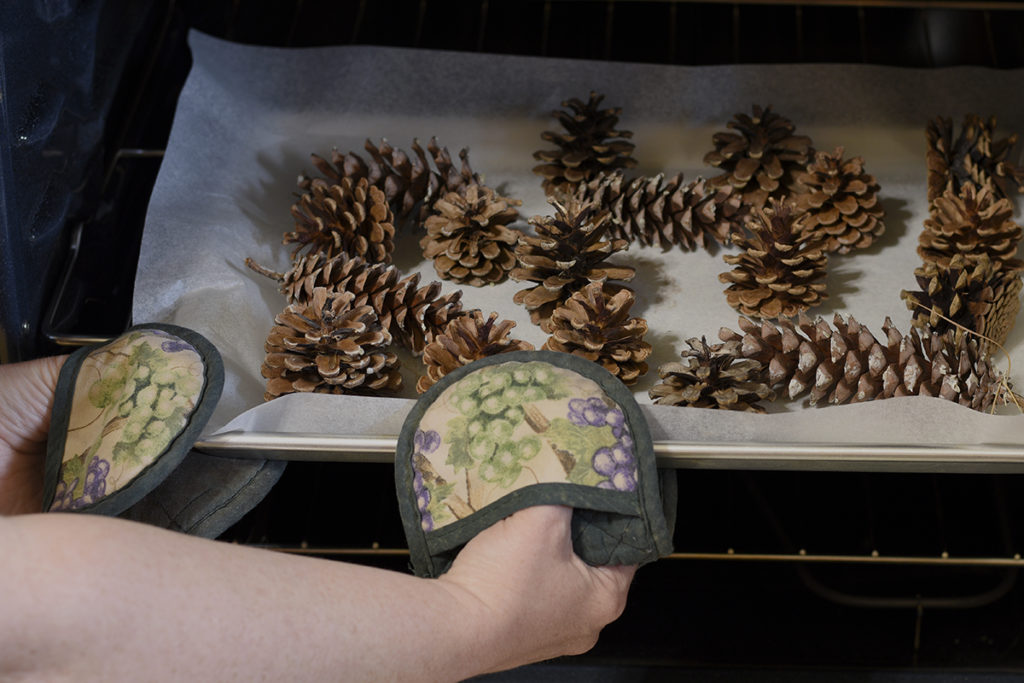
Now get out there and grab some pine cones. Don’t forget to grab closed ones too. Pop them on a lined baking sheet and bake at 230 degrees F for about half an hour, and they will pop right open. It would be best to bake your pine cones anyway to kill any bugs before you use them for crafting.
All of this taken into account; some folks don’t have pine trees growing where they live. And for you, I suggest foraging on Amazon for pine cones.
Eastern Hemlock Cones
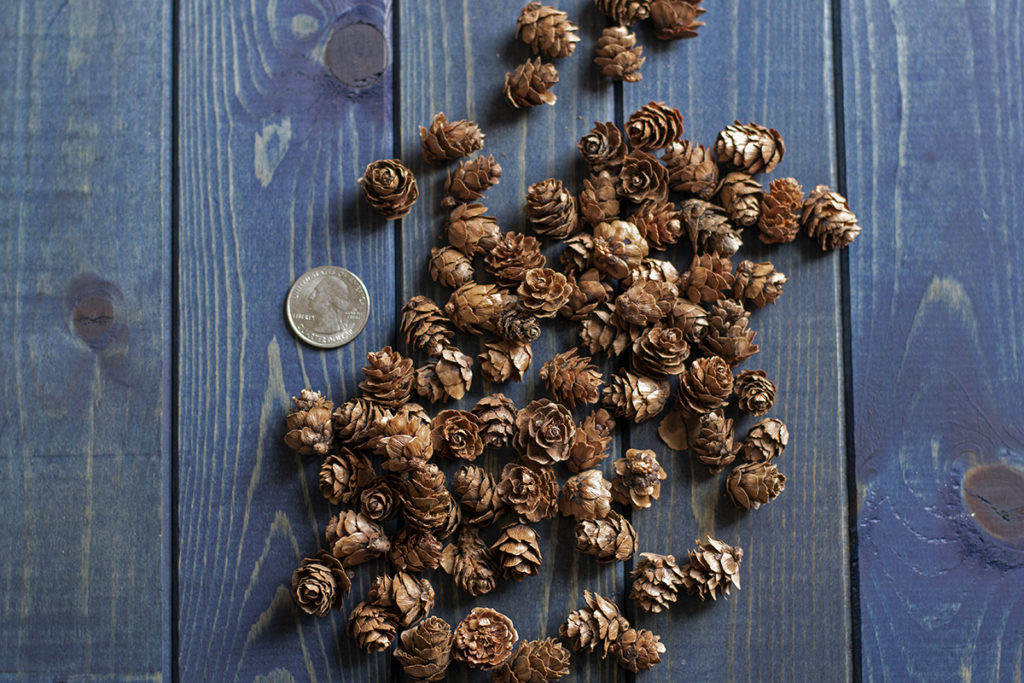
Another evergreen that produces cones perfect for crafting is the eastern hemlock. This flat-needled evergreen is the tree responsible for producing hundreds of those tiny, soft, un-spikey cones.
Hemlock cones are excellent for crafting, and if you have them in your area, I highly recommend gathering them. As a last resort, you can purchase them here.
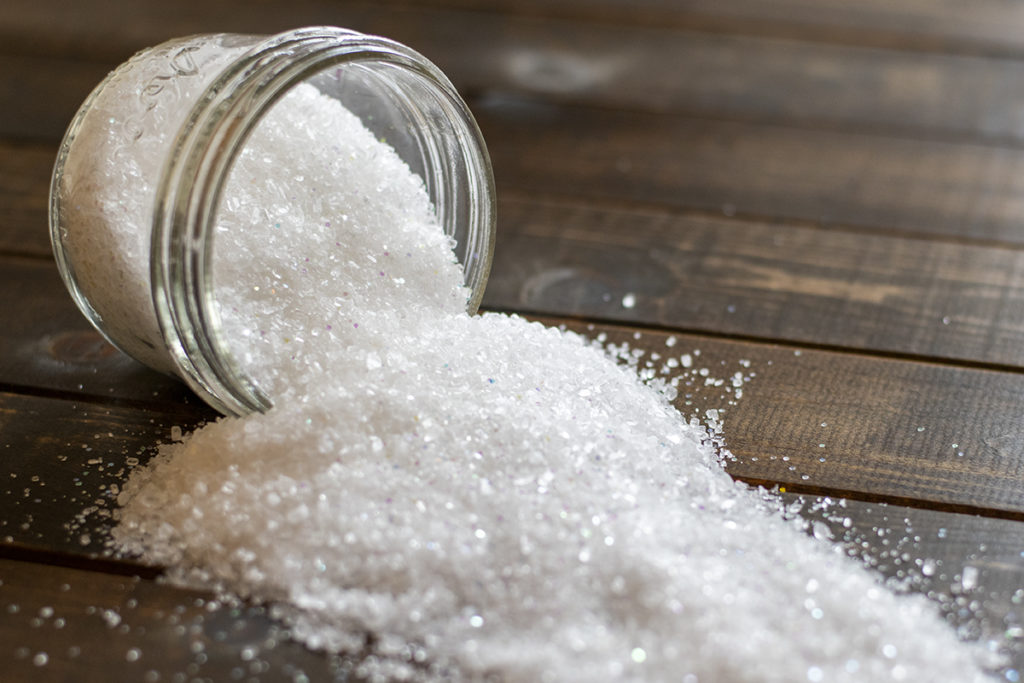
Gorgeous Fake Snow
And would you also like to know how to make beautiful and easy fake snow.
Ready?
Sprinkle as much or as little silver or aurora borealis glitter into as much or as little Epsom salt as you want. I found a 6:1 ration of Epsom salt and glitter provides the perfect amount of sparkle. Gently blend the two with a fork. You can even skip the glitter if you want more neutral snow.
I made a rather large batch, and I’m using every last ounce of restraint I have not to sprinkle it over every flat surface in my apartment.
Let’s get crafting. We’ll start with some larger projects for your home.
Christmas Décor
1. Scented Pine Cones
This project is much nicer than those over-scented pine cones that hit the stores in the fall. And you can choose your own scent, personalizing your pine cones with your favorite holiday essential oils.
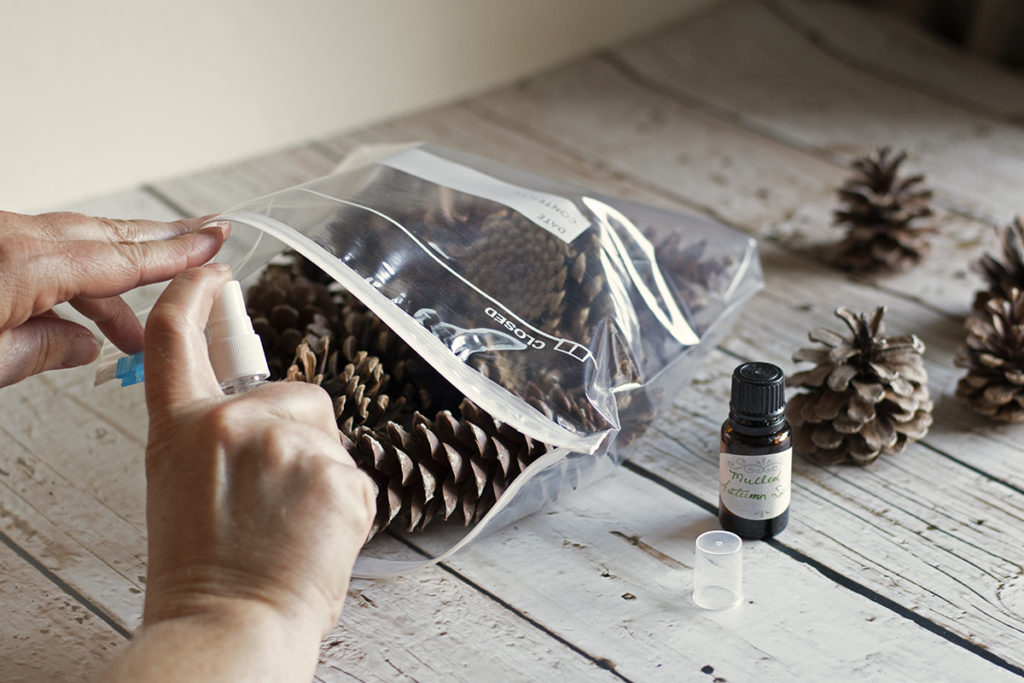
Place the pine cones in a gallon-size plastic storage bag. Mix several drops of your favorite essential oil or a mixture of several oils into a couple of tablespoons of neutral carrier oil such as grapeseed or apricot kernel oil in a small spray bottle. Spray the pine cones well inside the bag. Now close up the bag, and shake it well. This will ensure the oils are distributed equally among the pine cones. Let the pine cones sit in the bag for about a week.
Place the pine cones in decorative bowls around your home, add other festive accents like gold baubles, strings of beads, or bells.
Pine Cone Centerpieces to Grace Your Holiday Table
When you set your holiday table, don’t forget pine cones for the centerpiece. No matter your decorating style, you can easily put together a festive spread that takes center stage on your table.
2. Minimalist Centerpiece
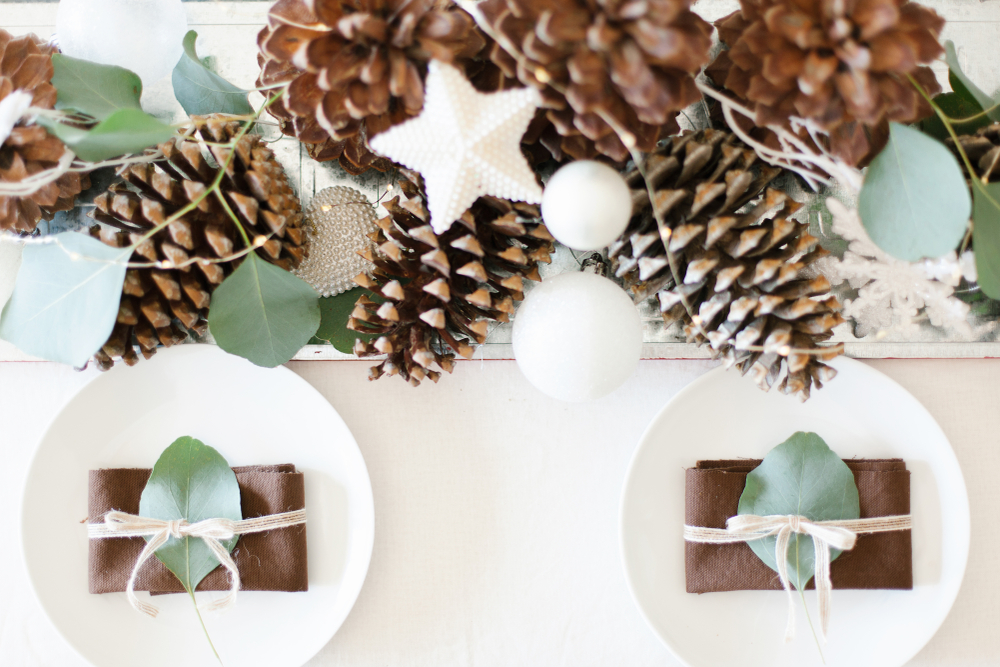
This centerpiece is put together using a mirrored tray layered with natural pine cones, pearlized ornaments, and green leaves. For a clean, minimalist style, give this one a try.
3. Traditional Centerpiece
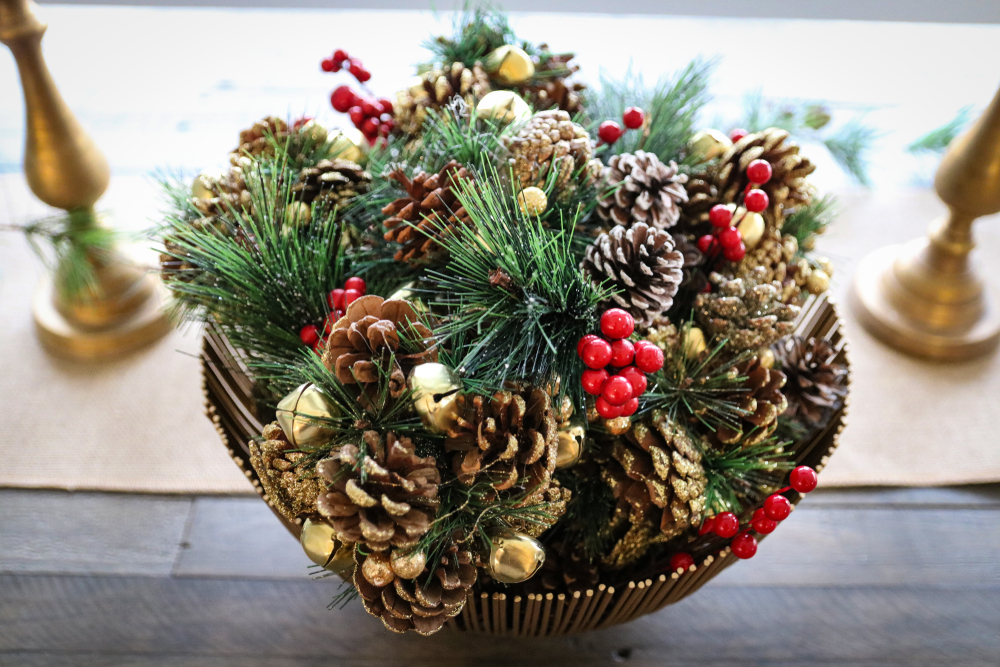
If you want to make sure you’ve got room for the gravy, grab a bowl or basket and fill it with pine cones, greenery, jingle bells, and red berries.
4. Last Minute Centerpiece
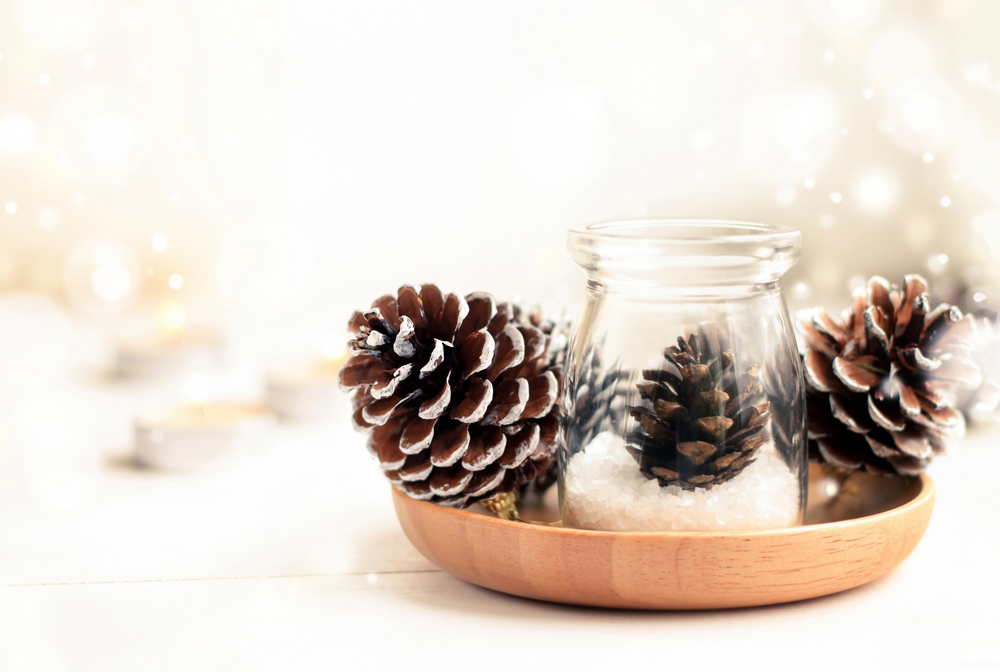
Only got a few minutes before company arrives? Keep it simple. Fill a small mason jar with a bit of fake snow (Epsom salt or coarse Kosher salt), plop a pine cone in one, a tea light in a couple of others, and group a few frosted pine cones around them. Voila, instant centerpiece.
Christmas Pine Cone Wreaths

Decorate your door with a pine cone wreath. You can go all out and create a wreath made entirely of pine cones or use them as an accent. And the best part is, you can use it as a centerpiece; simply put a few candles or a pillar candle in the center with a hurricane globe over it. Here are a few ideas to get you going.
5. DIY Metallic Pine Cone and Acorn Wreath
A gorgeous metallic wreath tutorial from Oriental Trading Company gives your holidays extra shimmer and uses pine cones cut in half to make a flower shape.
6. Super Easy and Cheap Pine Cone Wreath
I love this wreath from Do It Yourself Divas! Seriously, check out this tutorial; you’re going to be blown away at how clever it is. And you can decorate it any way you wish.
7. Christmas Vignette
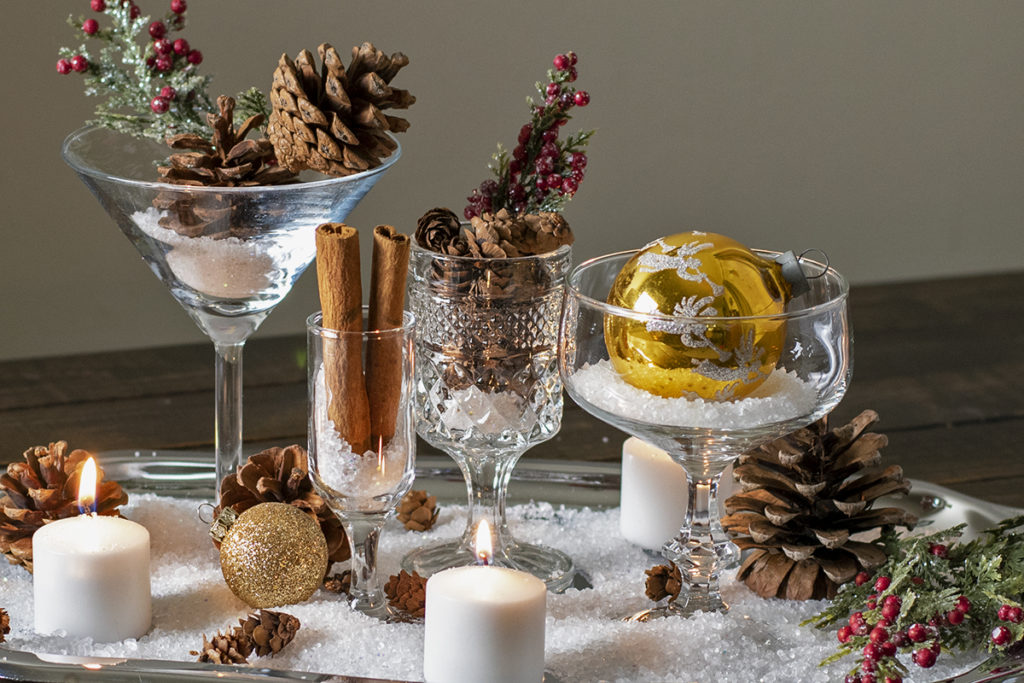
Use glasses of varying heights and textures, pine cones, fake snow, citrus fruits, candles, and other baubles to create little vignettes or scenes. Use whatever you have on hand creating different textures and heights. Place them around your home, anywhere you want to add visual interest and draw the eye.
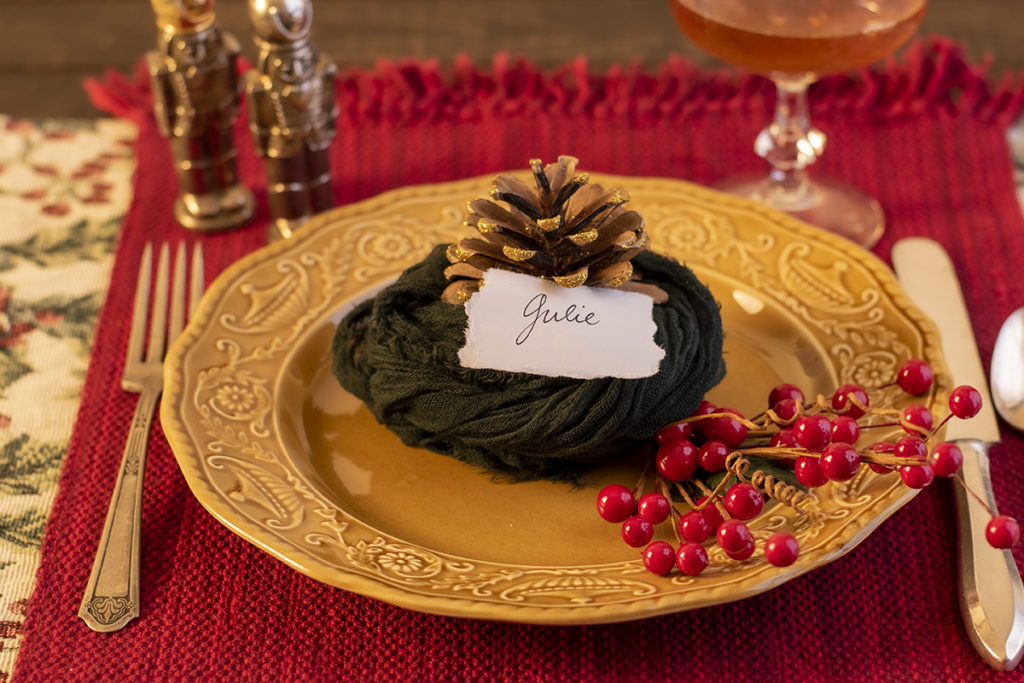
8. Table Setting
Yes, that was an evergreen pun. You’re welcome.
When it’s time for dinner, let everyone know where they will be sitting with these natural place card holders. Use them just as they are, or make them more festive with sprigs of berries, glitter, or metallic paint. Attach a ribbon to one end, and your guests can take home their place card holder and hang it on their Christmas tree.
9. Mini Pine Cone Christmas Trees

These sweet little trees are easy to make with eastern hemlock cones. Use a glue gun to glue a base circle of cones. Add smaller circles to each ring, finally topping the tree off with a cone at the top. Make several and set them up on a bed of fake snow.
10. Christmas Pennant Garland

Create a rustic Christmas garland with felt flags and pine cones. Cut 1.5”x 6” rectangles and notch the ends. Glue them folded over onto twine, alternating pine cones, and pennants. Use this charming garland on your Christmas tree or dress up a doorway for the holidays.
11. Tiny Christmas Tree Topiary
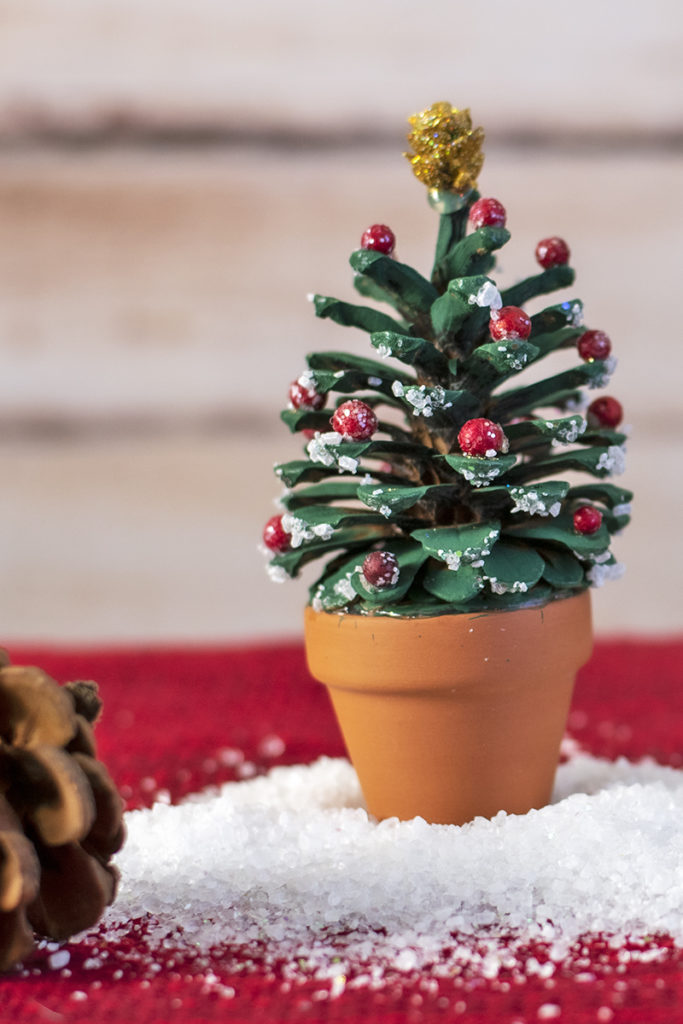
Hot glue a pine cone onto a tiny terracotta pot and paint it green. Add fake snow and decorations. Don’t forget the ‘star.’
Christmas Tree Ornaments
It’s kind of funny when you think about it – you get a Christmas tree, which is usually some sort of cone-producing evergreen, chosen specifically because it’s free of pine cones. And now we’re going to put pine cones on it.
But who can blame us when pine cones make such great Christmas ornaments? You can keep it as natural as you want or get your creative juices flowing.
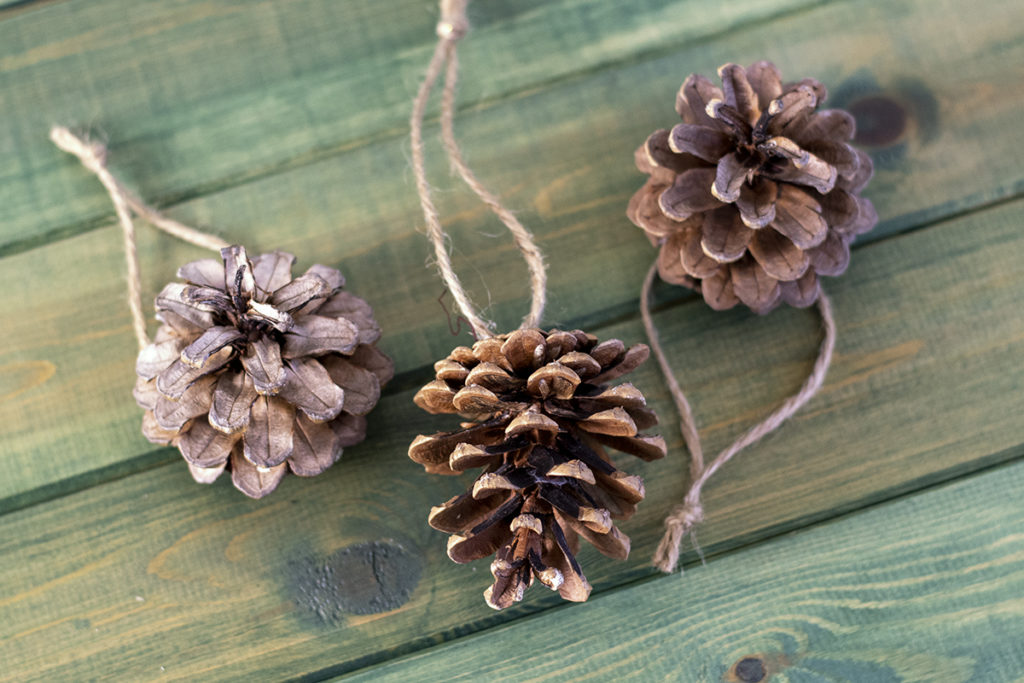
12. Natural Ornaments
For a natural look that’s incredibly easy, glue twine loops onto pine cones, and hang them on your Christmas tree.
If the natural look is a bit too dull for your tree, there are a multitude of easy treatments to glam up pine cones for the Christmas tree. Here are just a few simple ideas to get us started.
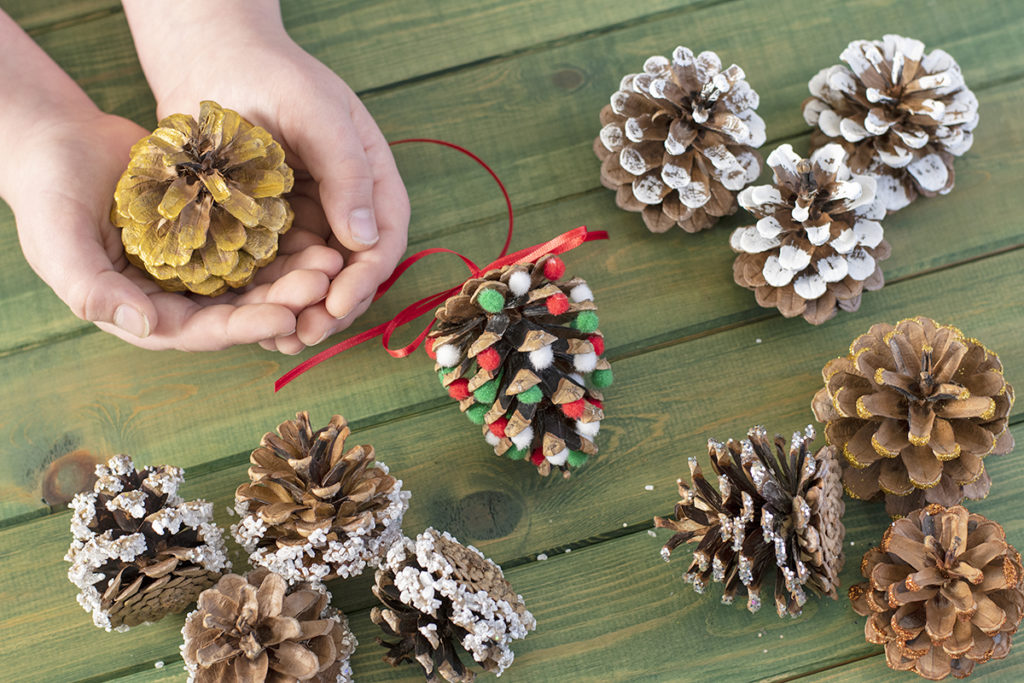
Finish each off by gluing twine or a ribbon to the pine cone. Try attaching the ribbon to the tops of some and the bottoms of others for different looks.
13. Glue tiny pom-poms on the pine cones.
14. Paint the ends to look as though they’ve been dusted with snow.
15. Give each scale a touch of glue and then coat them with glitter.
16.Or how about metallic paint or glitter paint?
17. Fake snow is always beautiful on pine cones and gives them a frosted look.
18. Paint the scales in an ombre effect, starting with a dark color at the bottom and going lighter as you move up the cone.
Ornaments to Make With the Kids
If you really want to make your pine cones into something special, how about these pine cone ornaments? These are all easy enough for the kids yet impressive enough to make the perfect gift for grandparents, teachers, etc.
19. Penguin Pine Cone Ornament
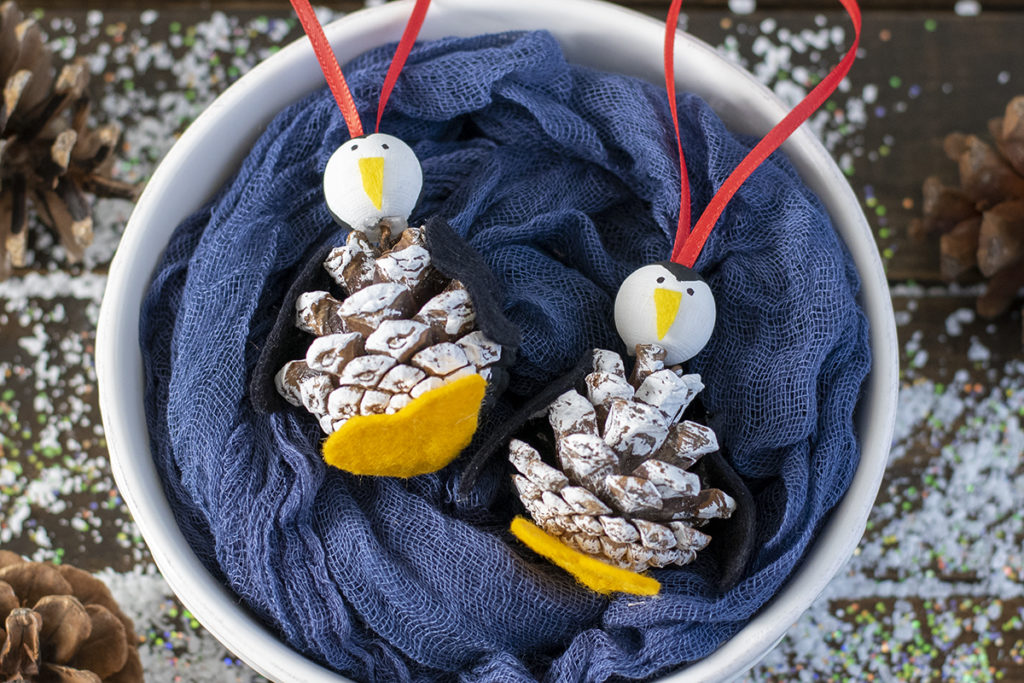
How cute is this little snow-loving fellow from Hello, Wonderful?
20. Snow Birds or Love Birds?
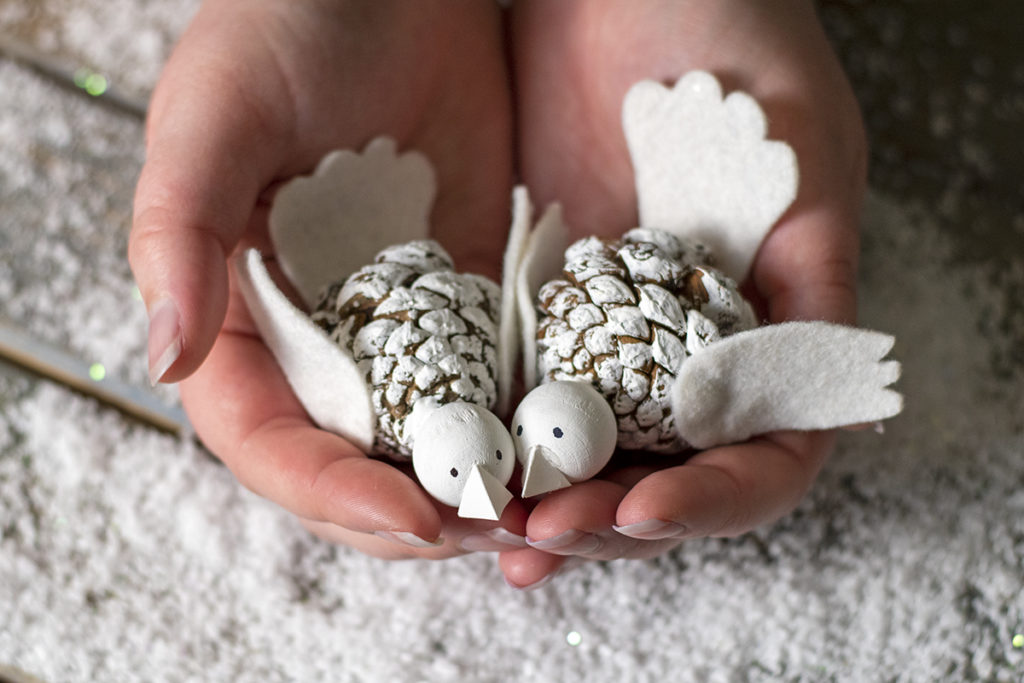
These adorable little love birds are the perfect ornament for the newlyweds in your life. I got the inspiration from Lia Griffith; however, I didn’t think I needed to pay for a membership to figure out how to make these sweet little ornaments.
21. Pine Cone Reindeer Ornament

A classic Christmas character makes an appearance with these easy and quick Rudolph the Red-Nosed Reindeer Ornaments. Along with looking good on the tree, these would also make great package toppers.
22. Snowman Ornament

And don’t forget to make some room on the Christmas tree for Frosty and friends. This tiny snowman takes no time at all to make.
23. Christmas Owls
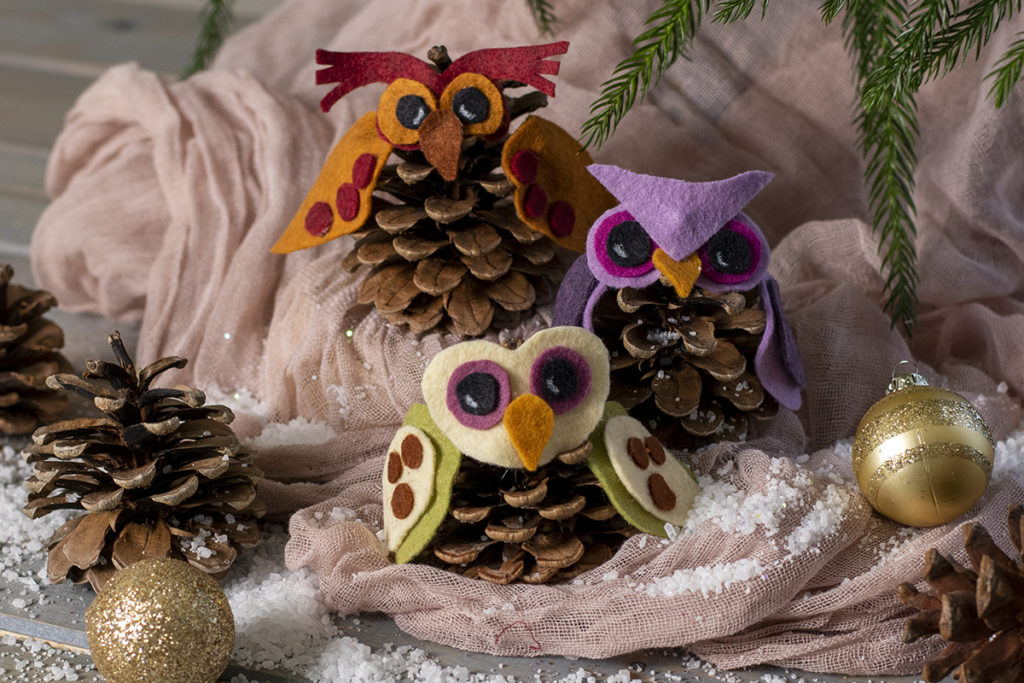
Another cute pine cone ornament idea from Lia Griffith are these sweet little owls. Again, Lia Griffith charges a small membership fee to download the template for the felt pieces. But just using the pictures from their website, I was easily able to wing it. (Get it? Owls. Wing it. I’ll stop now.)
24. Adorable Little Pine Cone Christmas Elves
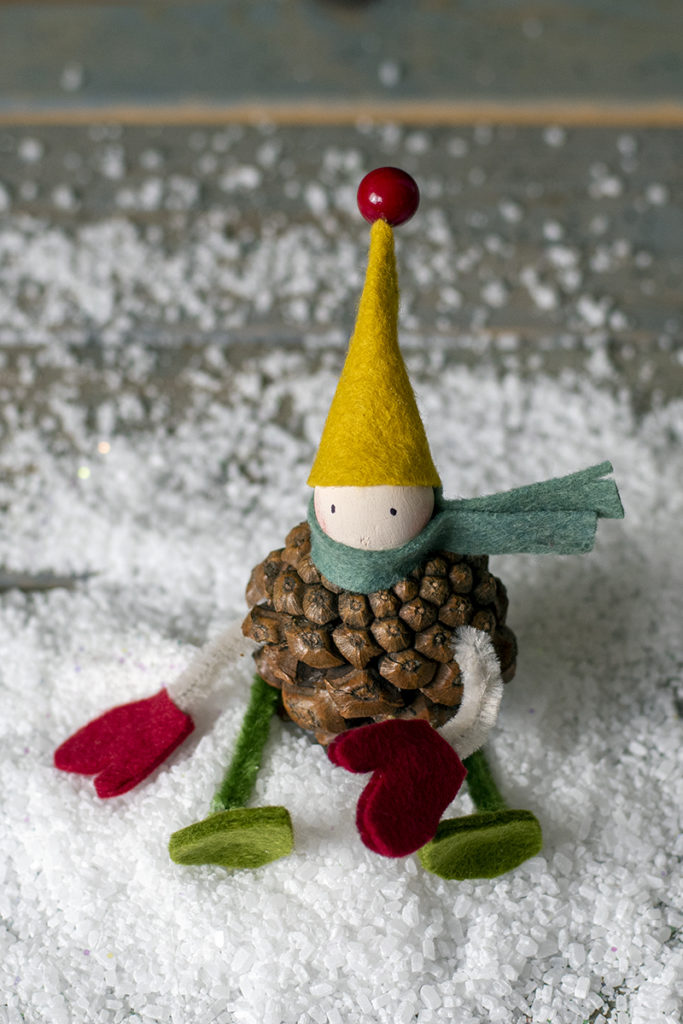
Marth Stewart, the original DIY queen herself, gives us this great tutorial for making these charming little Christmas elves. Hide them in the Christmas tree, add them to a package, or create a whole tribe of elves and set them to play in a landscape of fake snow.
Update 2024: The original tutorial seems to have disappeared from Martha Stewart’s website. Instead, try this great alternative.
25. Pine Cone Picture Frame

Turn school pictures into a cherished Christmas ornament.
- Use a wide-mouth Mason jar lid to trace around the photo.
- Use a large mug or bowl to trace a circle out of cardboard larger than the photo circle.
- Cut the photo and cardboard circle out and glue the photo in the center of the circle.
- Using a glue gun, glue a ribbon at the top of the cardboard circle for a hanger. Now, glue hemlock cones to the cardboard circle in a wreath shape. Decorate the wreath with red berries or a bow.
Now that you’ve got all these great pine cone Christmas décor ideas, I’ll bet you need more pine cones. It’s okay; I’ll keep the hot cocoa warm while you get some.
Pin This To Save For Later

Get the famous Rural Sprout newsletter delivered to your inbox.
Join the 50,000+ gardeners who get timely gardening tutorials, tips and tasks delivered direct to their inbox.