


If you’ve ever seen houseplants planted in LECA and you thought to yourself “why would anyone use cocoa puffs to pot their plants in?”, let me assure you that you’re not alone.
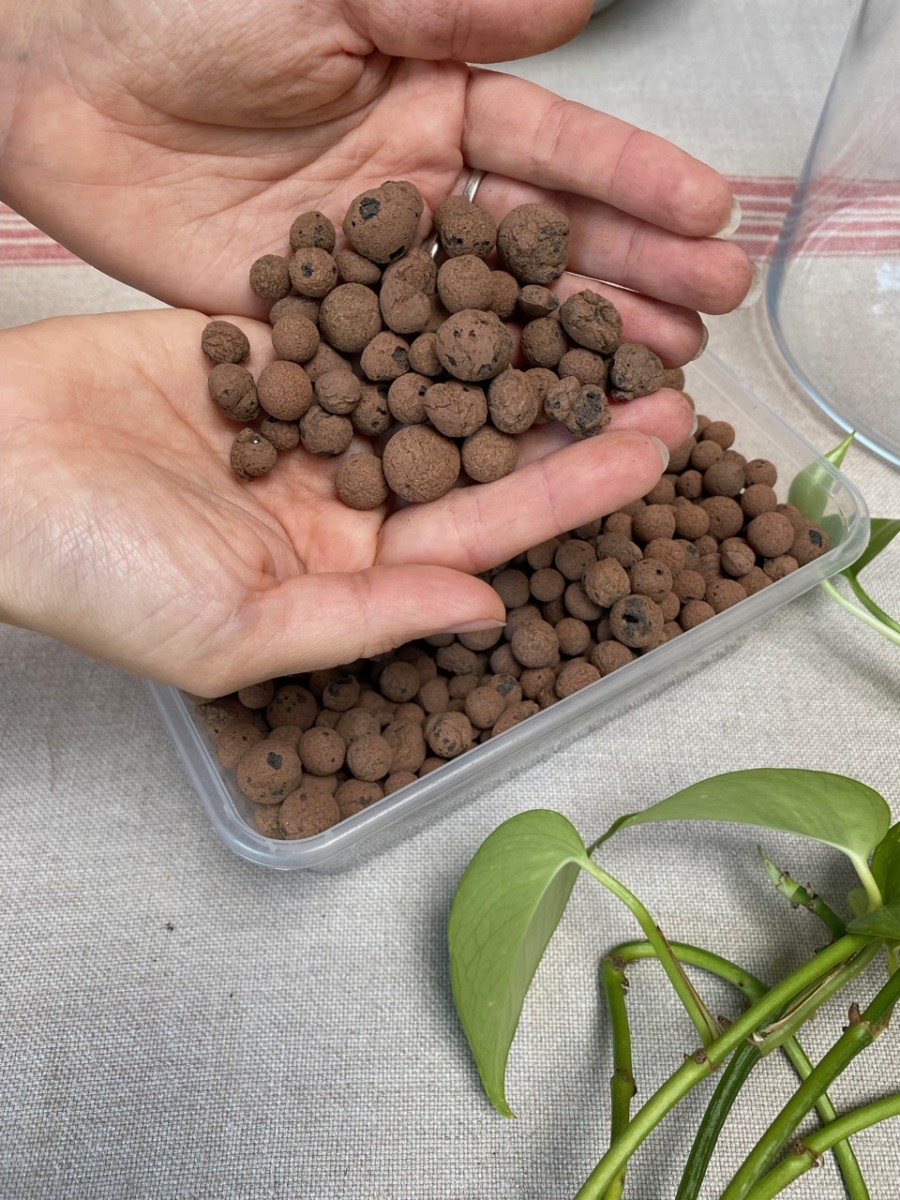
LECA (Lightweight Expanded Clay Aggregate) looks exactly like that beloved breakfast cereal, but that’s where the similarities end.
LECA are clay pebbles that were heated in a kiln at around 2190 °F (1200 °C). Exposure to high heat causes the structure of the clay to expand until it resembles a honeycomb that contains air pockets in between the compartments. So while LECA is just as light and water-absorbent as cocoa puffs, it’s much more durable.
Should I switch my houseplants to LECA?
I’ve been noticing LECA having a moment in the houseplant world, with a lot of YouTube videos and Instagram reels of people jumping on the bandwagon. But what I don’t see mentioned as often are the downsides of replacing potting soil with LECA.
So before you jump on board the LECA train, here are the advantages and disadvantages of transitioning your houseplants to this growing medium.
The Pros of Using LECA for Your Houseplants
1. LECA is a good choice if you’re fighting a pest infestation.
Soil-borne diseases are just that – soil-dependent. It’s common for colonies of pests such as thrips, fungus gnats, mites, whiteflies and scale to use moist potting medium as a hospitable breeding ground.
It was a very stubborn family (more like a clan) of thrips that convinced me to give LECA a try. I didn’t move all my houseplants to LECA, but I did repot all the ones that were a thrip magnet. I tried to resist this solution for months (for some of the reasons I’ll explain in the cons part), but it proved to be the right solution for my houseplants. So far, so good.
2. LECA helps to keep overwatering tendencies in check.
The most common issues with growing houseplants often come as a result of overwatering, rather than underwatering, our plants. Root rot, pests, yellowing leaves, etc. are all side-effects of giving our houseplants more water than they need.
Enter LECA to help us keep our overwatering tendencies in check. There’s little guesswork in LECA because you can see exactly how much water is left in the reservoir. All you have to do is pour more water when you see the water level has dropped.
3. You buy LECA once and reuse it again and again.
Obviously, using contaminated potting soil is a big no-no. The same goes for potting soil that has reached the end of its life and is now drained of nutrients.
I know it’s heartbreaking when we have to dispose of soil, even if it has served us and our houseplants well. In a best-case scenario, it’s destined for the compost bin. In a worst-case scenario (when it’s teeming with pests and their larvae), into the waste bin it goes.

This is not the case with LECA, which can be used all over again, provided it’s properly cleaned.
The best way to clean LECA is to give it a rinse in a bucket in which you’ve mixed water and Epsom salt. For a more thorough clean, you can leave it in this solution overnight, changing the water (and the salts) a few times in between.
4. LECA can be an aesthetic choice.
Granted, I don’t know if I could call this an advantage of using LECA, but there are plant lovers out there who use it just because it looks cool and quirky. There’s a certain allure to the see-through look, I admit. Being able to see the root structure as it grows does satisfy our sense of curiosity and our ability to track a plant’s health and progress.
The Cons of Using LECA for Your Houseplants
It sounds like LECA is all rainbow and clay unicorns, right? With so many problems solved by these magical puffs, you’re this close to canceling all weekend plans and putting in a full shift to convert your houseplants to LECA.
Before you order a supply of LECA, have a look at some of the disadvantages of growing plants in this medium.
1. LECA can get pricey.
This one depends on how much LECA you’re buying and where you’re getting it from. I usually buy mine from the local garden center. Sometimes, they sell it in bags of 10lbs, but most of the time I can only find it in single “portions” (like the ones in the photos). So if I wanted to convert all my houseplants to LECA (thankfully, I don’t), that would require a significant investment.
As LECA becomes more popular, it should come down in price. But at this point, you’ll end up paying more for a bag of LECA than for a bag of regular potting soil.
Then depending on what LECA setup you use (more on that below), you might need to buy new growing containers for your plants.
If your garden center don’t stock LECA in bulk, then there are some options on Amazon. This 25l bag of LECA is well reviewed and relatively affordable.
2. LECA provides no nutrients to your plants.
Unlike potting soil, LECA is inert and does not contain any beneficial nutrients for your plants. So if you can get away with not fertilizing your potted houseplants for around three months after you’re repotted them, it’s different when you use LECA. It’s up to you to add fertilizer to the water.
Growing in LECA is called “semi-hydro” growing, so you’ll have to buy hydroponic fertilizer (preferably organic) that’s specially designed to be water-soluble.
3. LECA is not maintenance-free.
One of the pros of LECA that I’ve mentioned above is the fact that it’s reusable. It’s an excellent way to get more out of your investment, but that also adds some maintenance back into the equation.
You can’t just transfer LECA from one plant to another without disinfecting it. You’d risk transferring pests and bacteria between plants. Some people boil their LECA before they start growing another plant in it. I haven’t gone that far. I’ve found that simply letting it soak in Epsom salts and flushing it out a few times is good enough for me.
4. Some plants don’t take to LECA right away.
This doesn’t happen every time you repot a plant in LECA, but it may happen occasionally. The main reason why some houseplants may go through a rocky transitional period has to do with the type of roots the plant has. Roots adapted to soil are different from water-adapted roots. So as you move your houseplant from soil to water, it will start growing water roots and some of the old roots might die back (remove them if they get brown).
As the plant uses its energy to do this, you might see less growth and even deterioration in other aspects. The leaves may become yellow and drop. The plant may look droopy. It’s normal, and some plants do better than others. The key is to be patient through this transition and not stress the plant with too many other changes in an attempt to “fix” it.
Ok, so the disadvantages don’t sound that bad. You’re willing to put up with all of them if you just won’t have to deal with overwatered mushy roots ever again.
How To Transition Your Houseplants To LECA
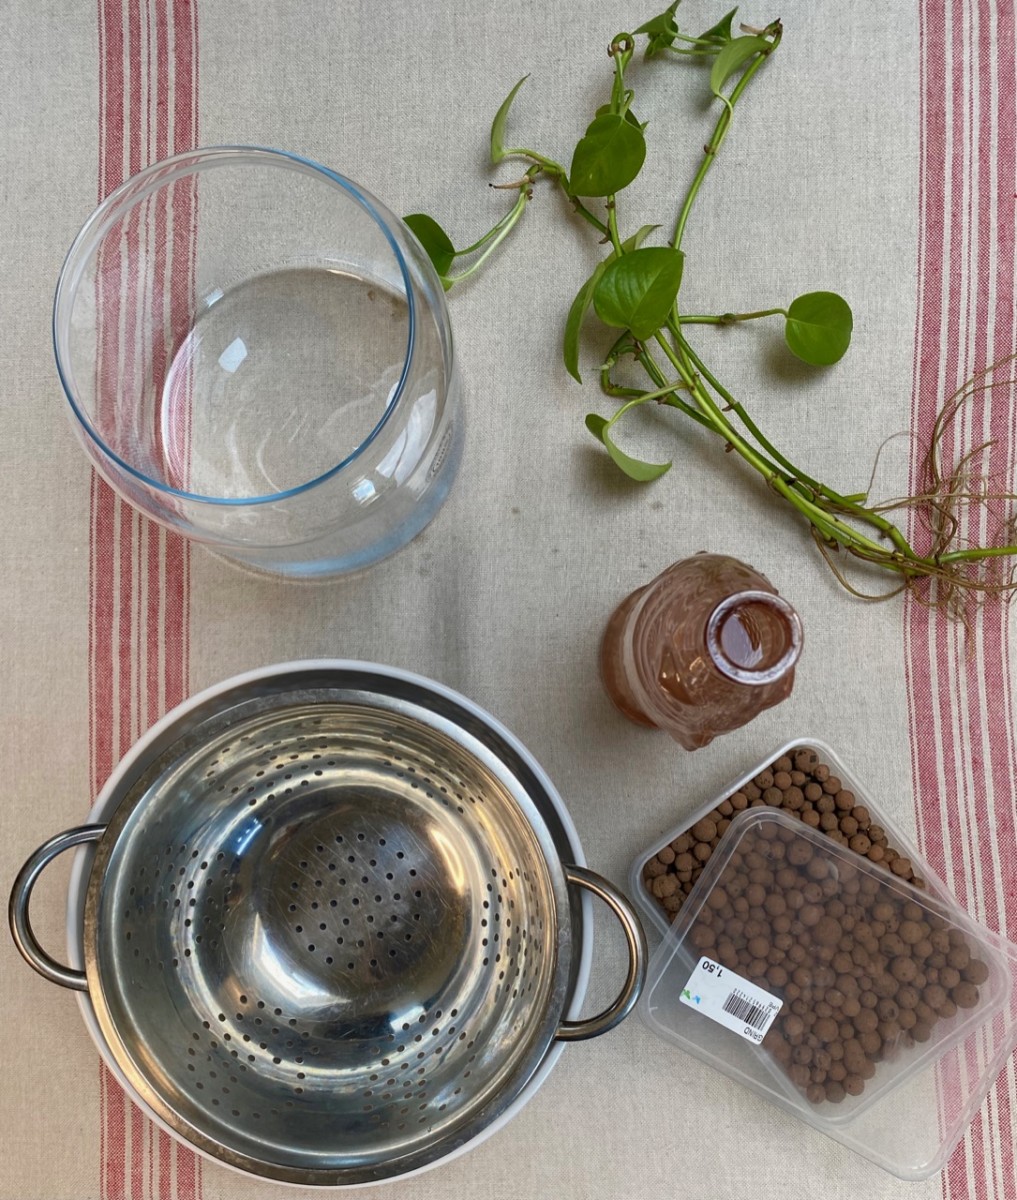
Here’s how to transfer your houseplants from regular old potting soil to LECA, step by step.
As a word of advice (or caution), based on my own experience, please think about starting small. Don’t attempt to repot all your plants in LECA at the same time. Start with a couple of houseplants – maybe your most problematic ones – and use them as guinea pigs to perfect the process of moving plants and work out any kinks. Also, you might find that you’re not too keen to put up with the disadvantages after all.
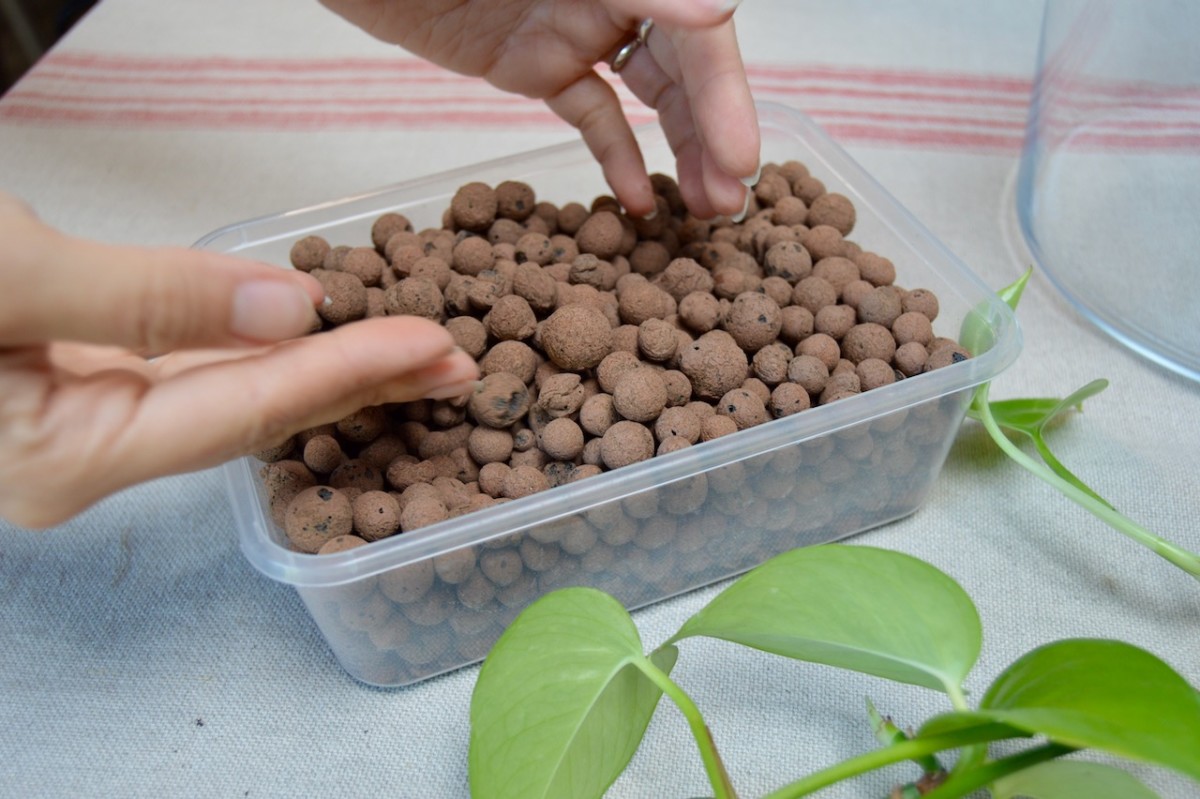
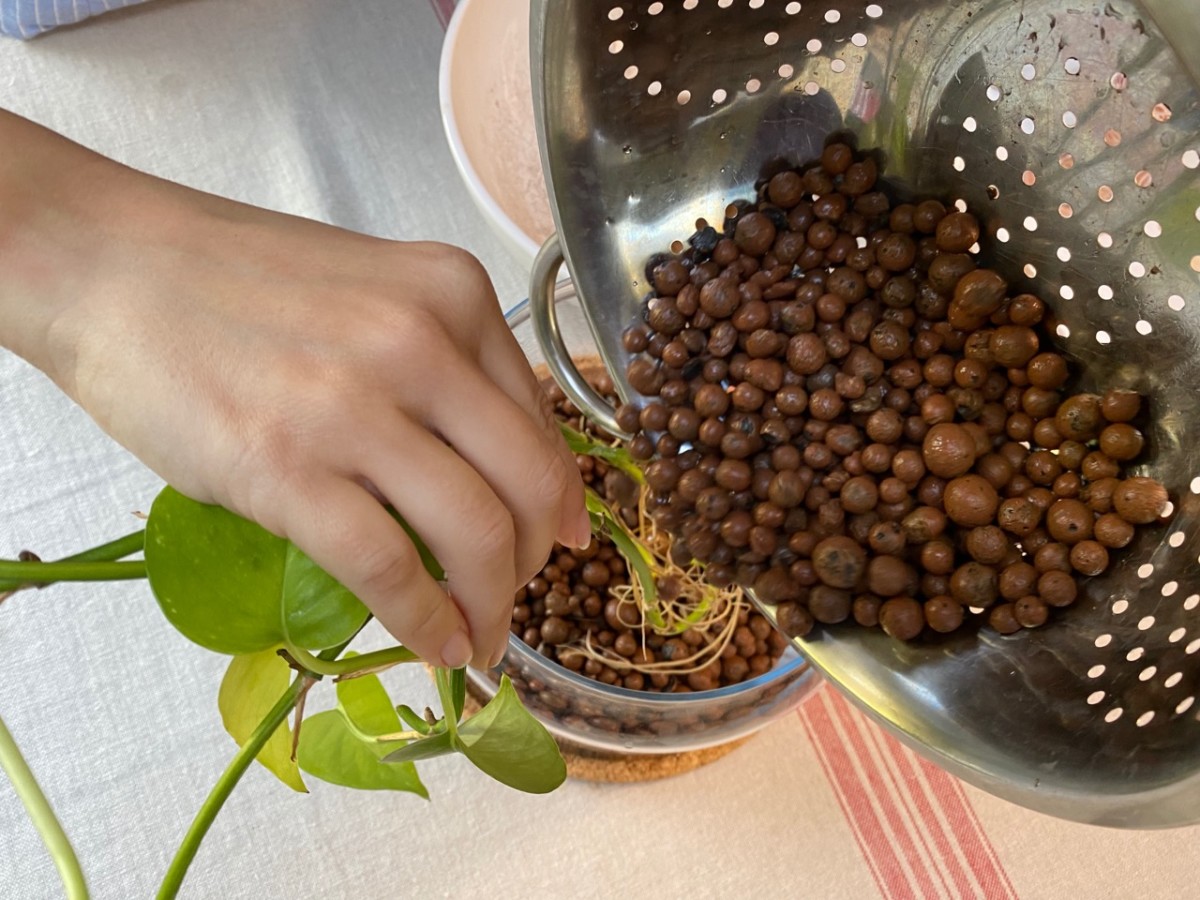
Step 1: Clean the LECA before you use it.
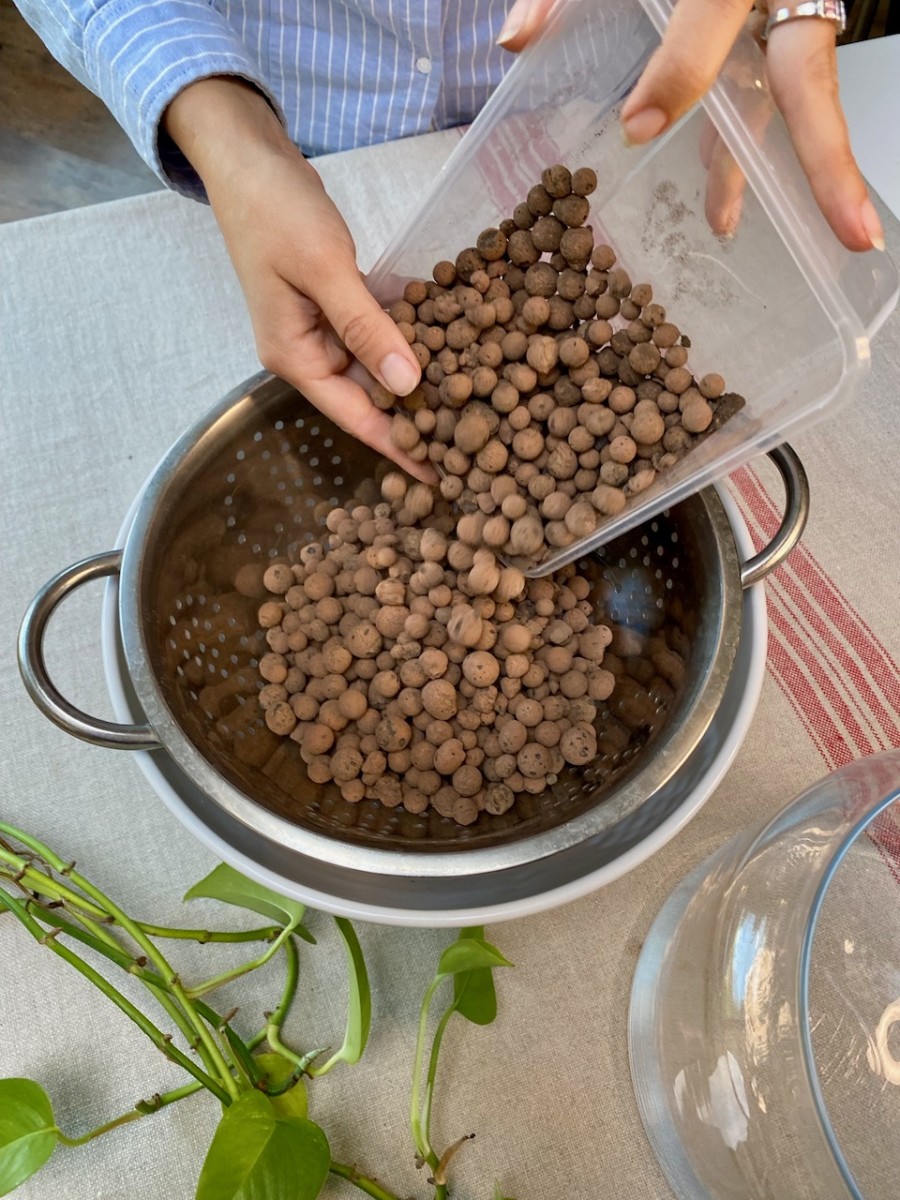
LECA is bagged during the production process, which means you’ll be getting all the dust and debris that comes with blowing out clay in a kiln. You don’t want that floating around your house or gunking up plant roots. That’s why the first step is to rinse out your LECA.
I use a colander over an old chipped bowl (nothing that I’m still using for food preparation, mind you). You can also place the clay balls in a mesh bag and submerge them in a bucket of water.

A word of warning: do not rinse your LECA under the tap and then let the dirty water go down the drain. The clay residue that washed off will do a number on your pipes, especially if you’re working with a lot of LECA.
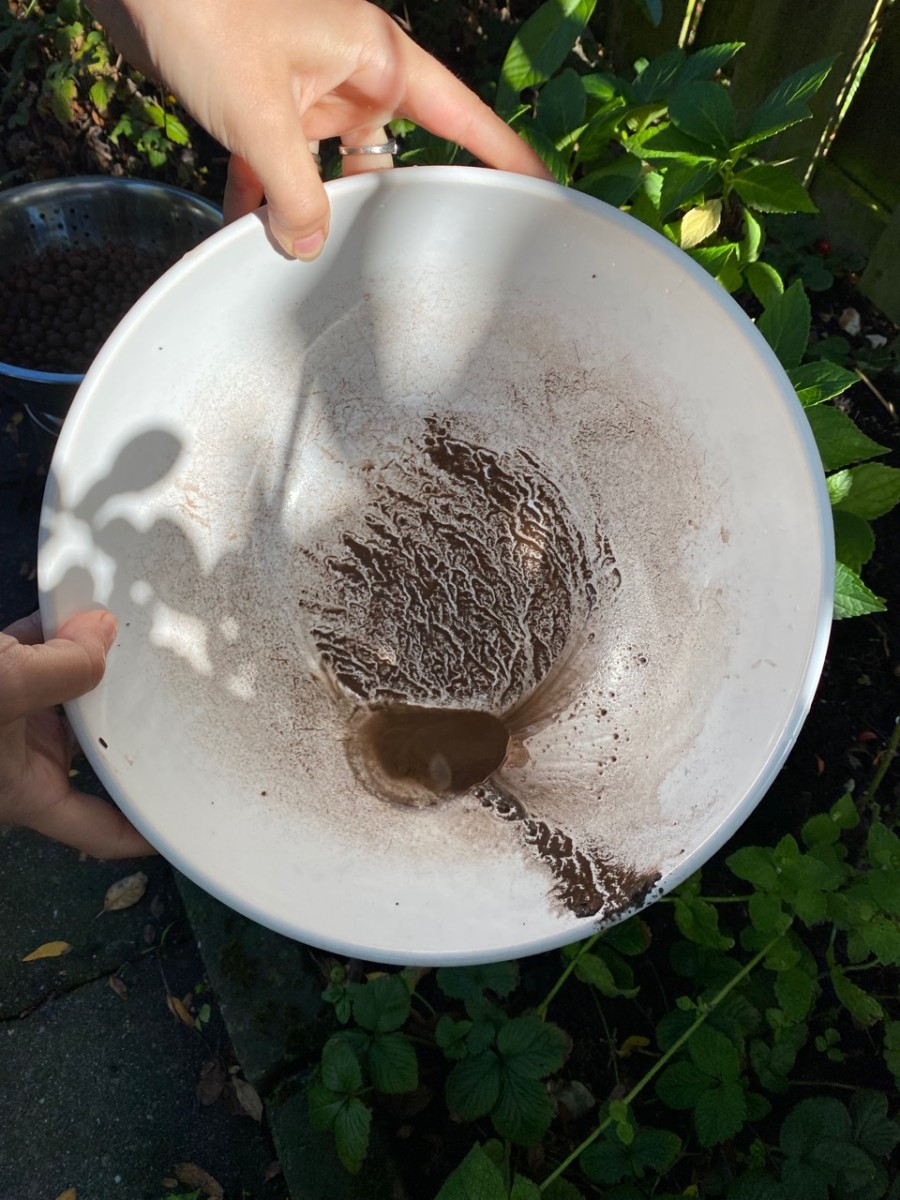
Dispose of the water outdoors, if possible. I pour the clay water in a corner of the garden where not much grows. If you don’t have an outdoor space to dispose of it, you can pour it down the toilet and flush it right away.
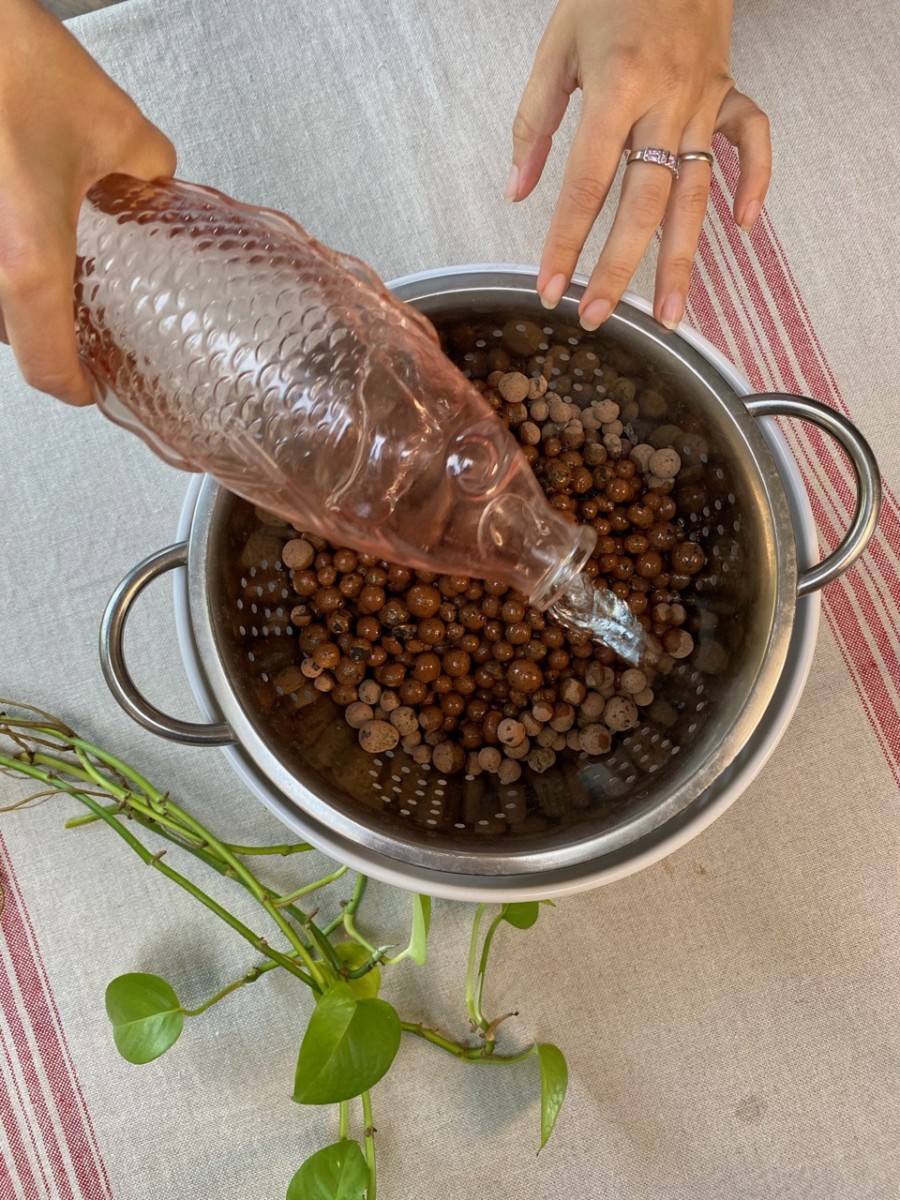
Step 2: Soak the LECA before you use it.
For a good head start, the clay balls should be saturated with water before you first start using them. If they’re too dry, they will absorb all the water right away, leaving little moisture for the roots. You can let it soak for a few hours, although the most common advice I’ve seen floating around is to soak it for 24 hours. This depends on how much LECA you’re working with, of course. The bigger the quantity, the longer the soak.
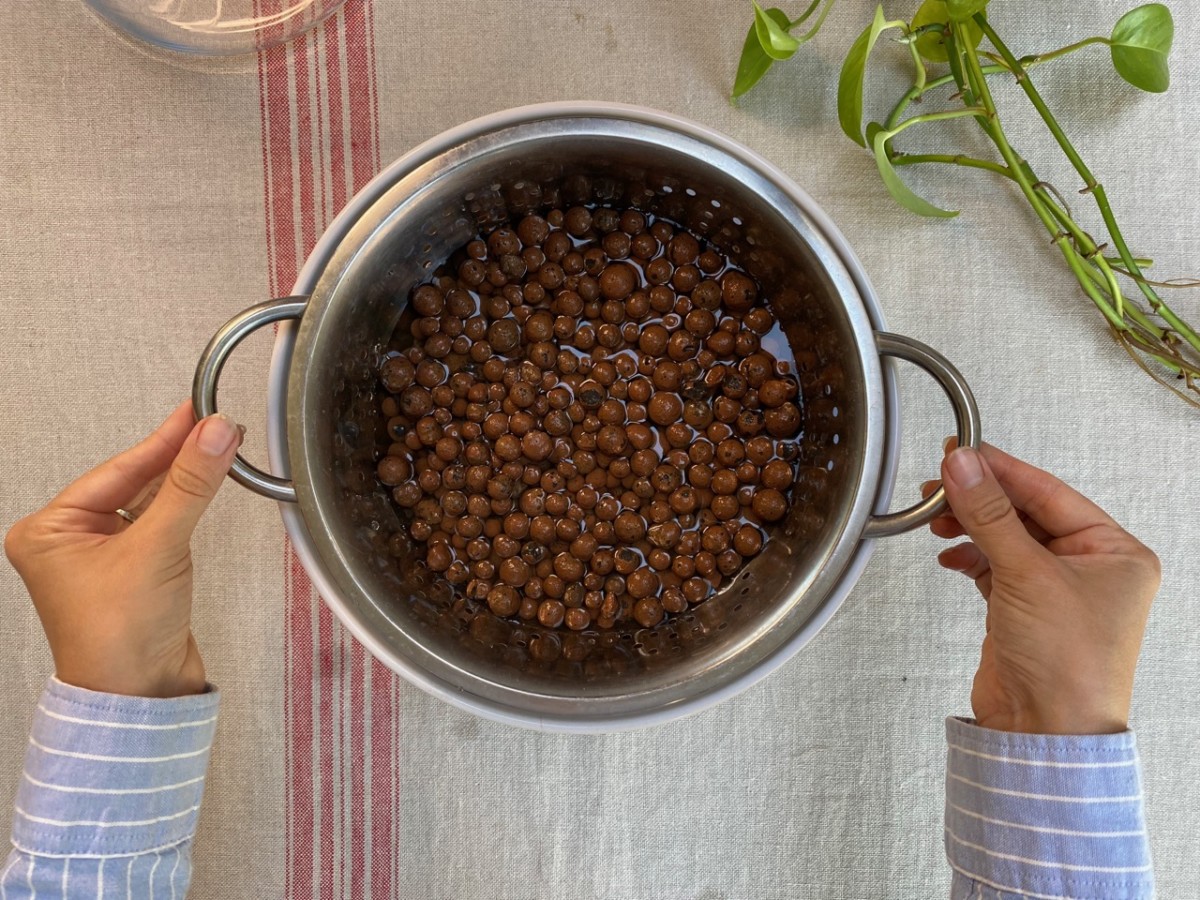
Once thoroughly saturated, drain the excess water. You don’t need to dry the LECA.
Step 3: Prepare your houseplant for LECA.
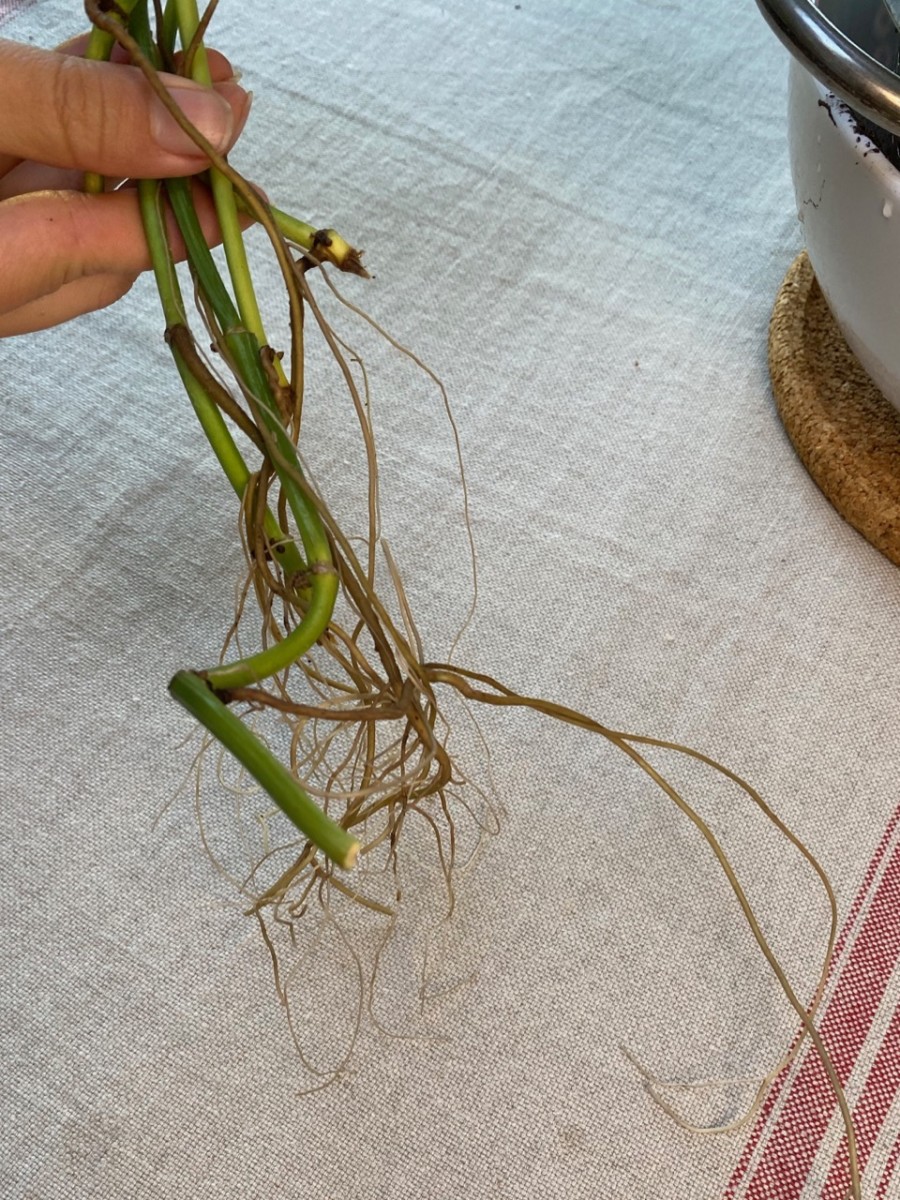
Remove the houseplant from potting soil and thoroughly rinse off the roots. You don’t want any soil residue clinging on to the roots. If you’re moving your houseplant due to pests, double-check that there aren’t hitching a ride on the leaves or the stem of the plant.
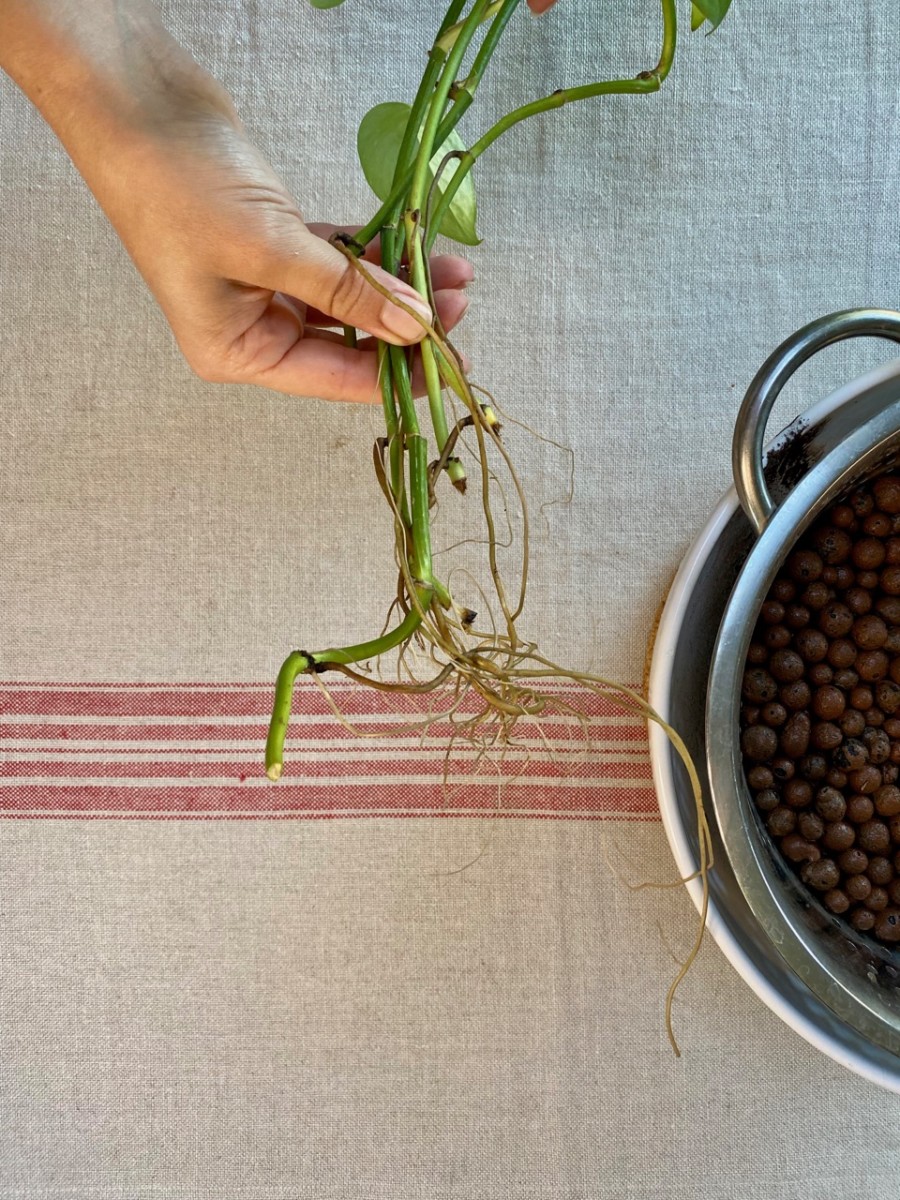
Optional step: For a smoother transition from soil-based growing to water-based growing, you can root your plant in water before you move it to LECA. This step will encourage the plant to grow more water roots. You can then continue the move when the new roots have reached about three inches in length.
If you’re putting new cuttings in LECA, this step becomes mandatory. Cuttings need a bit more water than LECA can provide in order to grow roots for the first time.
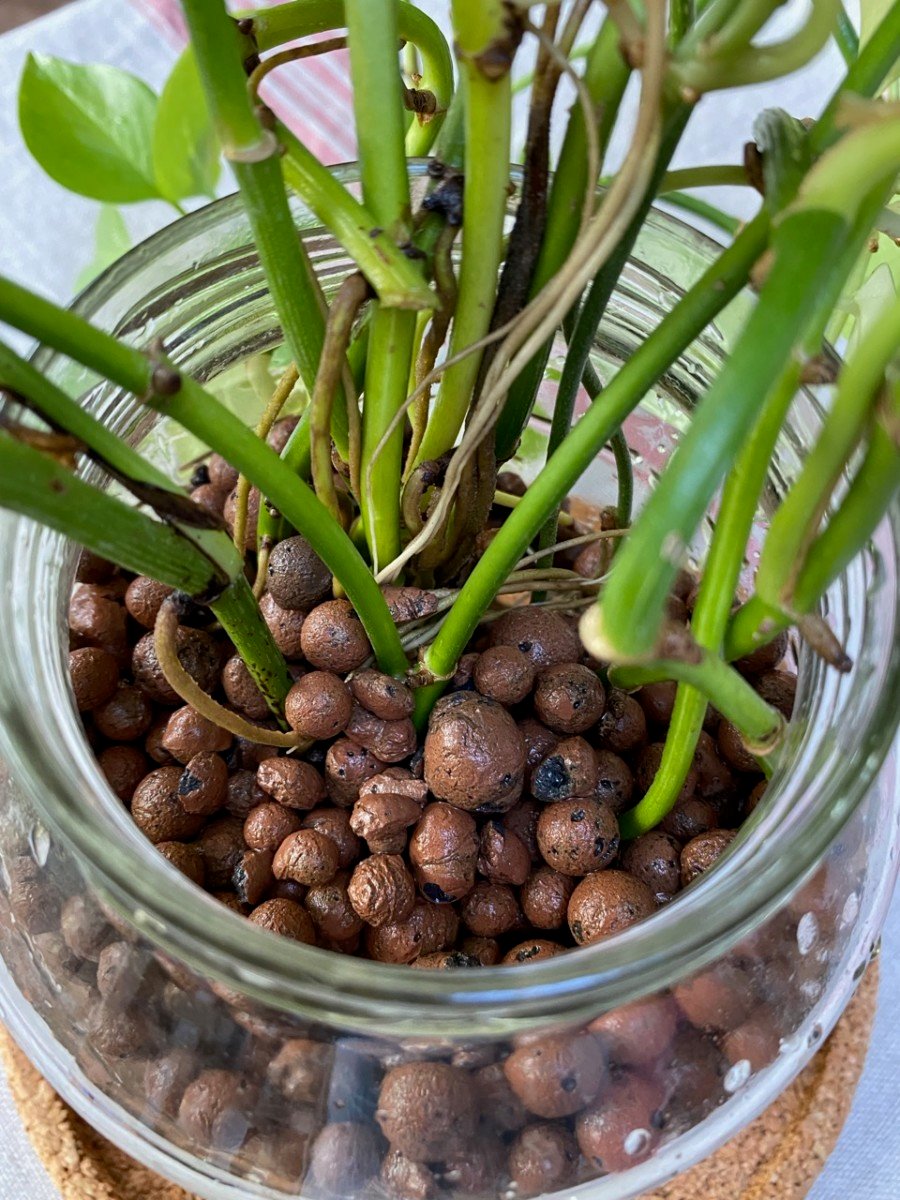
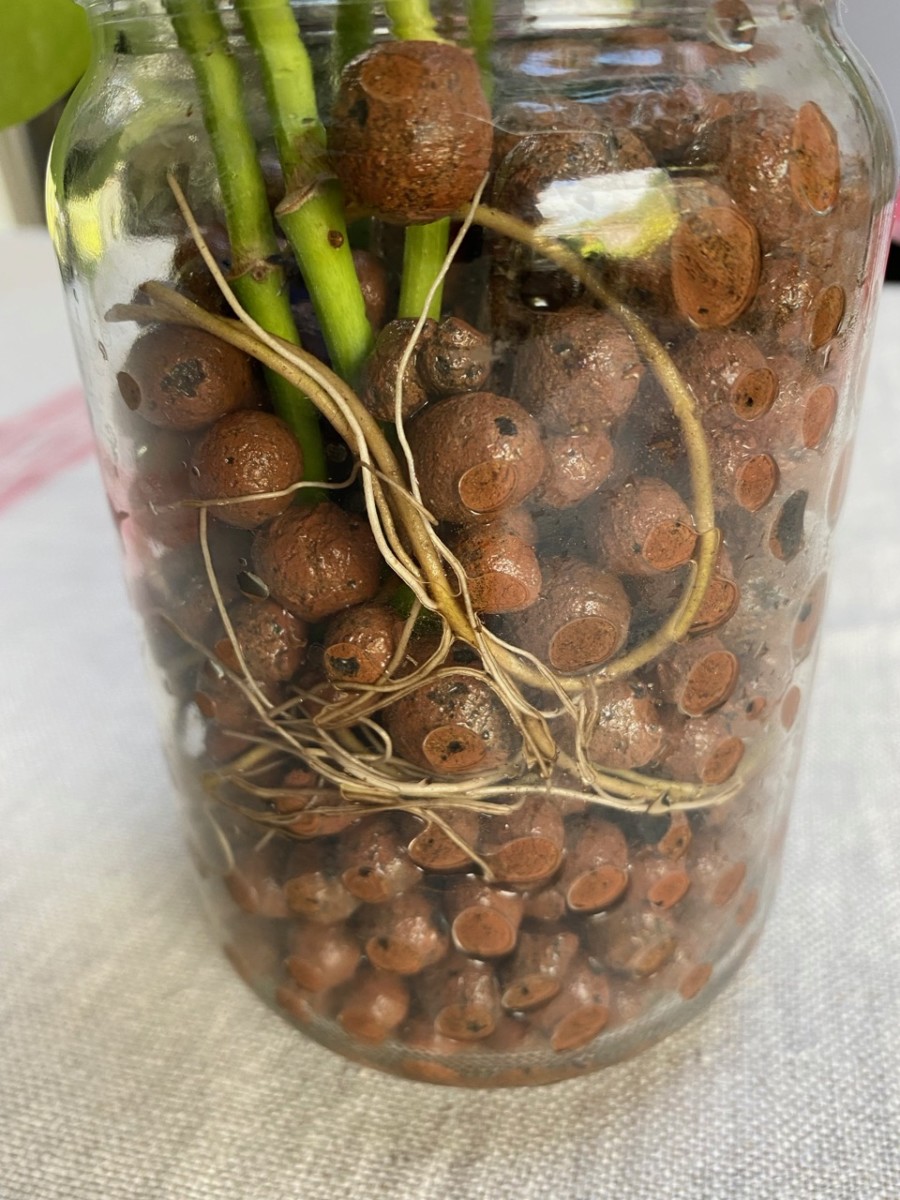
Step 4: Place your houseplants in LECA
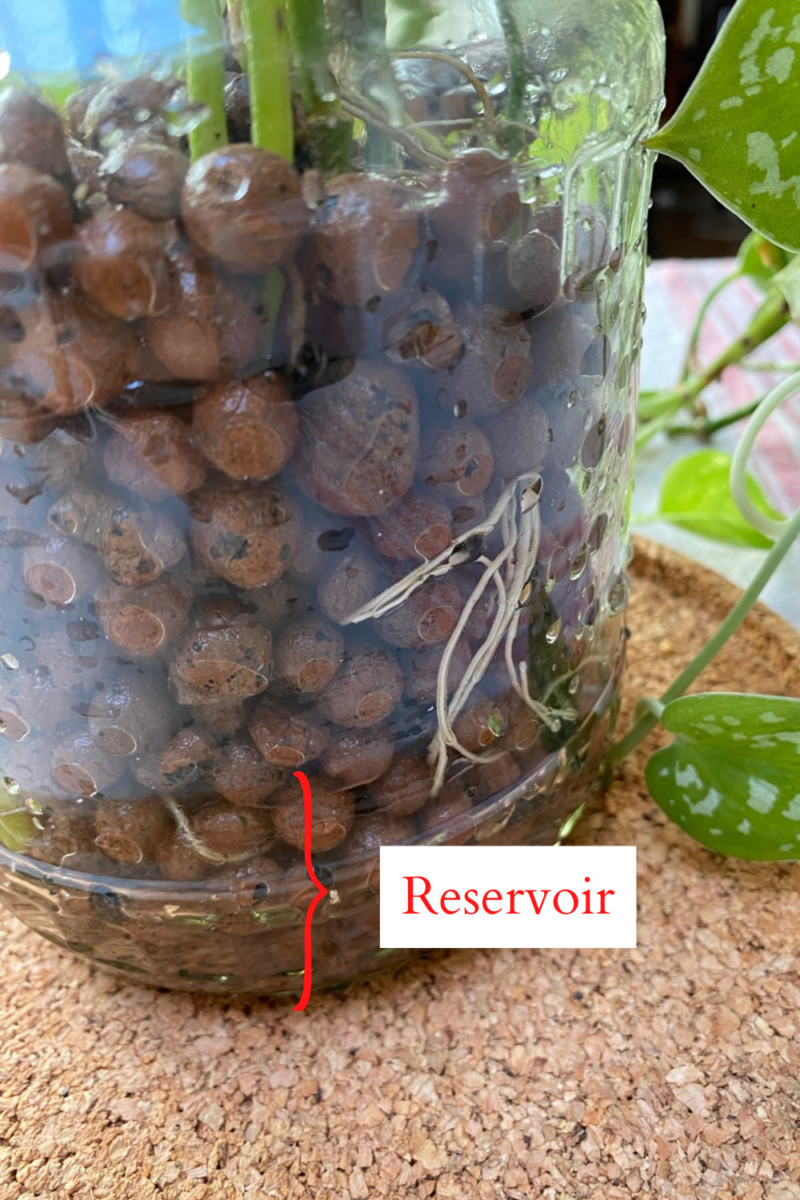
Choose a container without a drainage hole (a jar, pot or vase, for example). Pour half of your LECA into the container. Then place your plant roots on top and continue topping up the container with LECA.
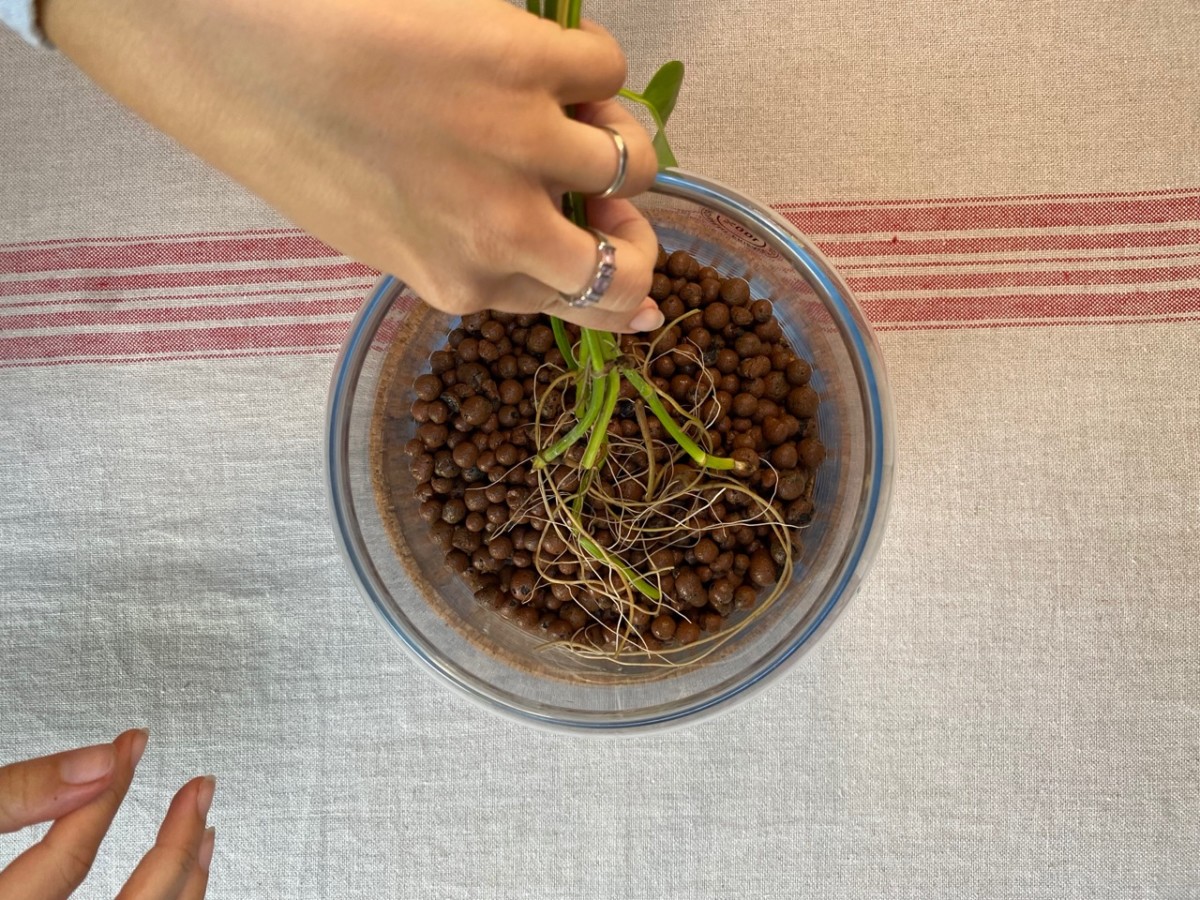
Pour enough water to submerge about a quarter or a third of the LECA at the bottom.
You’ll have to keep an eye on this portion of the container (the reservoir) and top it up when the water dips below this level.
Optional step: Create a separate reservoir.
Another method of doing it is by creating a separate reservoir for water. In this case, you add your LECA to a container that does have drainage holes. Then you add a water wick from the LECA container to the bottom container. The water that you add to the bottom container is absorbed through the wick to the top container where it becomes accessible to your plant’s roots.
The advantage to using this double container method is the fact that it makes it easier to flush out the LECA (more on that below). It also makes it easier to monitor the level of the water.
The main disadvantages include the fact that it requires an extra investment (water wicks), it doubles the number of containers you’re using and the LECA in the pot tends to dry out too much.
Personally, the extra hassle of having extra pots filled with water ready for my pets to knock over was what made me choose the simpler method with everything (LECA, plant, water) contained in one pot.
Step 5: Do some LECA maintenance.
In general, growing in LECA is maintenance-light, not maintenance-free. The least you should do is flush your LECA every month or so. The goal is to eliminate the salts and deposits that you add via your water. How often you flush it out is up to you and varies greatly depending on the type of water you have. The harder your water, the more deposits it will leave behind.
If you have LECA in a container with drainage holes, simply run tap water over it for about 30 seconds and let all the water drain out. If your LECA is in a container without drainage holes, you can top up the container with water, then pour it out making sure the LECA doesn’t spill all over. Repeat a few times until the water is clear.

To counteract one of the disadvantages – LECA containing no nutrients, you have to supplement the water with a liquid fertilizer. Choose a fertilizer, preferably an organic one that will leave less residue, designed for semi-hydroponic setups. Every fertilizer is different, so always follow the instructions on the package.
Are you a LECA convert now? Or does it look like too much hassle? Head to your local garden center and pick up a bag of LECA, or purchase a bag on Amazon.
Let me reiterate my advice: start the conversion to LECA small and keep it manageable until you notice how your houseplants adapt to it. Soon, you may even have cocoa puffs smiling at you from every jar in the house.

Get the famous Rural Sprout newsletter delivered to your inbox.
Join the 50,000+ gardeners who get timely gardening tutorials, tips and tasks delivered direct to their inbox.