

Lemon? This time of year? You bet.
Citrus fruits are at their best in the winter, at least here in the states. And who doesn’t need a little boost of vitamin C during cold and flu season, especially when it comes in the form of a sweet liqueur?
Scurvy.
But the real reason you should give limoncello a go is that it’s a ridiculously easy and quick last-minute gift to make. Plus, it impresses the heck out of the receiving party.
From start to tasty finish, limoncello takes as little as five days to make. And the ingredient list is tiny and inexpensive.
Did I mention that it’s an impressive gift-giving option?
If you’re not familiar with it, limoncello is a classic Italian liqueur. Limoncello is traditionally made in the southern region of Italy. So, when you make your own, be sure to do the Italian back-handed wave thing and say things like fettuccini, Ferrari, and chianti.
Il mio italiano non è così buono.
Before we get started, let’s talk about limoncello ingredients.
The two main components of limoncello are lemons and alcohol.
Some folks insist that you need to use 100 proof grain alcohol, vodka, or otherwise. I prefer vodka when making my limoncello. But personally, I think using 100 proof makes for a much too strong, almost medicinal liqueur. A good 80 proof vodka leaves you with a nicely flavored limoncello, which is quite enjoyable for sipping all on its own.
As far as booze quality, you want to shoot for the middle of the road. You don’t need to use a bottle of top-shelf vodka to get a nice limoncello. But if that’s what floats your boat, go for it. However, you shouldn’t get the cheapest vodka either.
If it comes in a plastic bottle, you probably shouldn’t use it. (For anything really, unless you’re using it to clean wounds.) Aim for something mid-priced.
I use New Amsterdam for all of my tinctures and limoncello. It’s very clean and neutral-tasting, without breaking the bank. I’ve also used a locally produced vodka from a micro-distillery nearby, which was my best batch yet. I’m always a fan of using locally made products. See what you’ve got in your area and give it a try.
The amount of simple syrup you use also plays a large part in your finished flavor, but we’ll come back to that later.
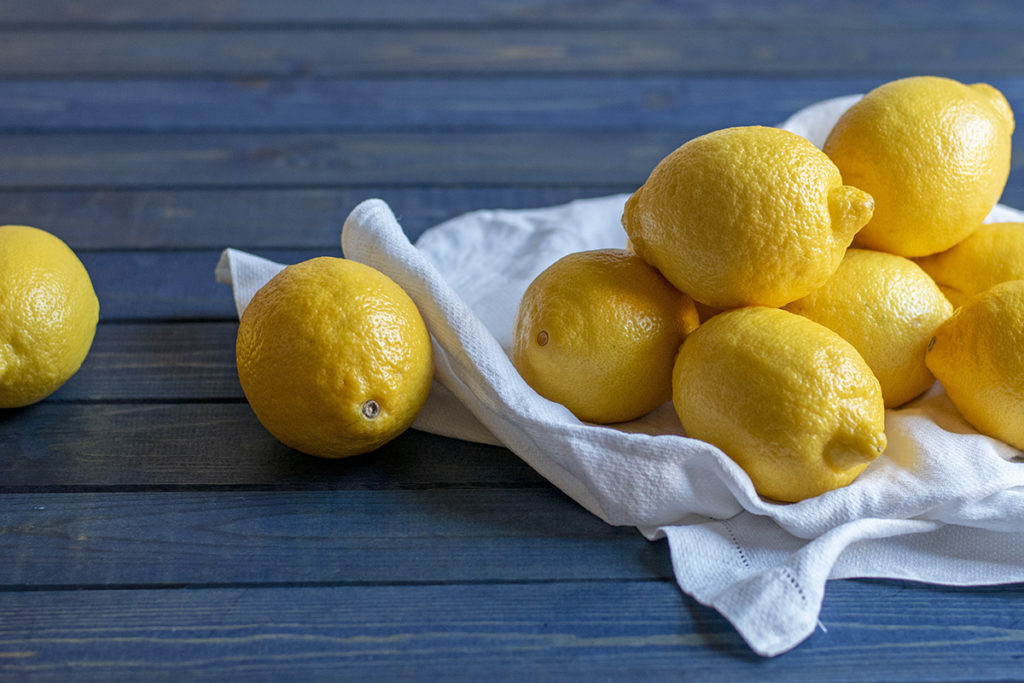
Lemons are the most important factor for a delicious finished liqueur. If you can, grow a lemon tree. If you can’t, find a friend that grows a lemon tree.
But failing that, go organic if you can, and if possible, buy them individually rather than by the bag. It’s easiest to get what you want if you can pick out each lemon. You want firm, bright lemons with few blemishes on the outside. If bagged lemons are your only option, check the lemons in the bag carefully.
The #1 Mistake That Will Ruin Your Homemade Limoncello
Most citrus fruit is covered with a very thin layer of wax to protect it while shipping and to keep it fresh longer in the store. Normally, this isn’t an issue, as we don’t eat the outer skin. But when the peel is the main component for your flavor, you have to make sure you don’t eat the wax.
So the best choice is to choose unwaxed lemons, but failing that, we can get that wax off pretty easily.
Alcohol has an uncanny ability to amplify flavors, so if you don’t get all the wax off your finished limoncello, it’s going to taste like USDA food-grade wax. Mmm, my favorite.
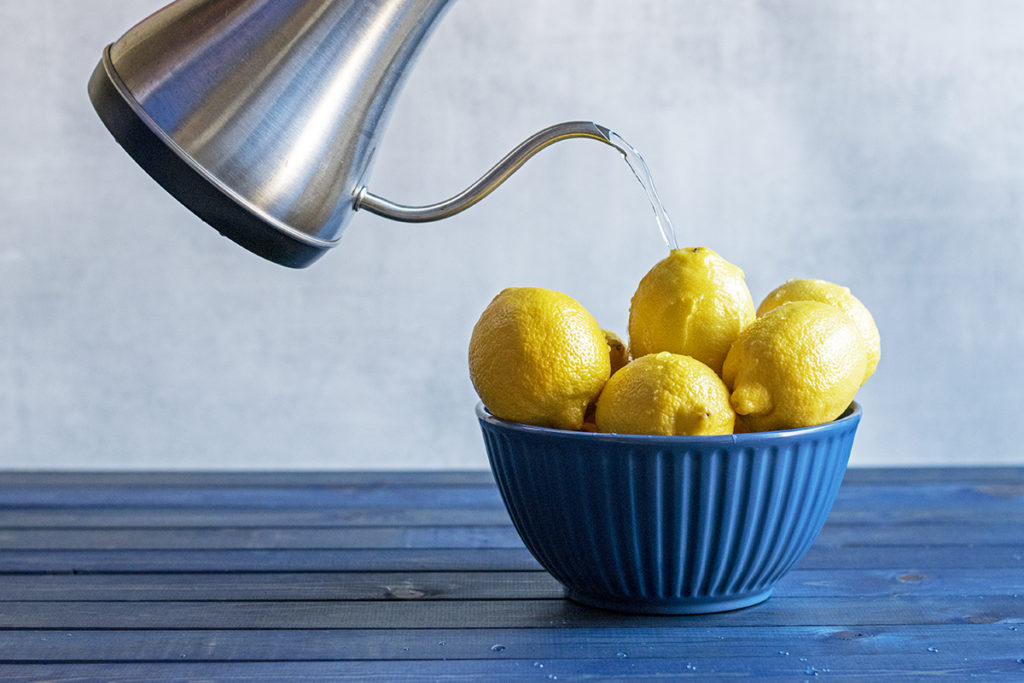
No worries though, it’s pretty easy to clean the wax off of your citrus fruit. Place your citrus in a bowl or colander and pour boiling water over the fruit. You want to be sure you get the entire surface of the fruits wet. Now, gently scrub the citrus under cool running water with a soft-bristled vegetable brush. Easy-peasy.
These little silicone scrubbers work amazingly well for the job.
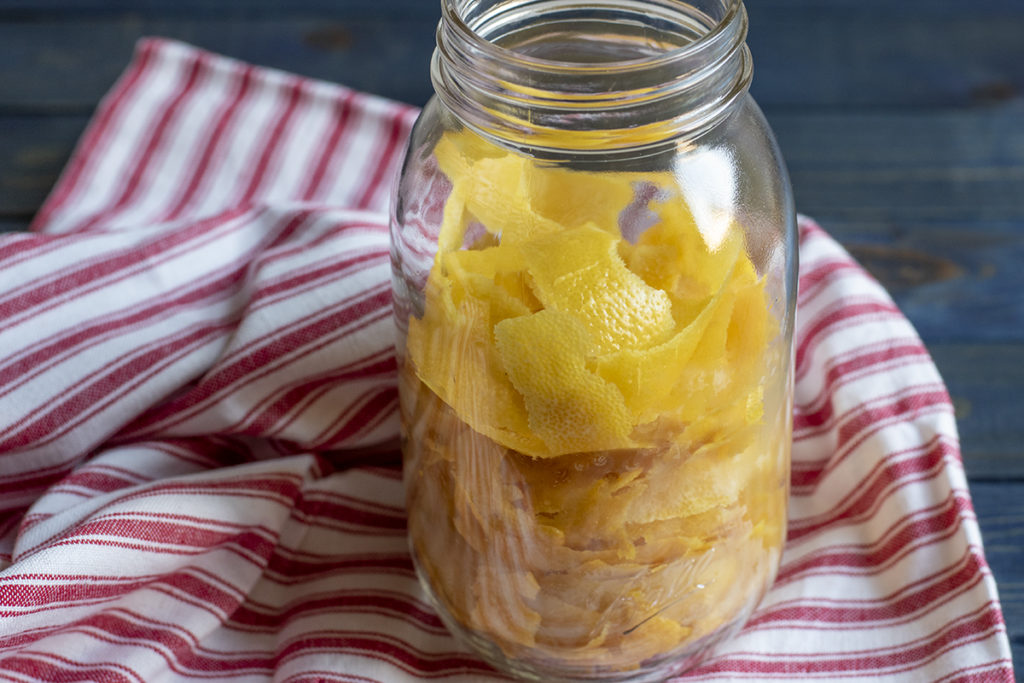
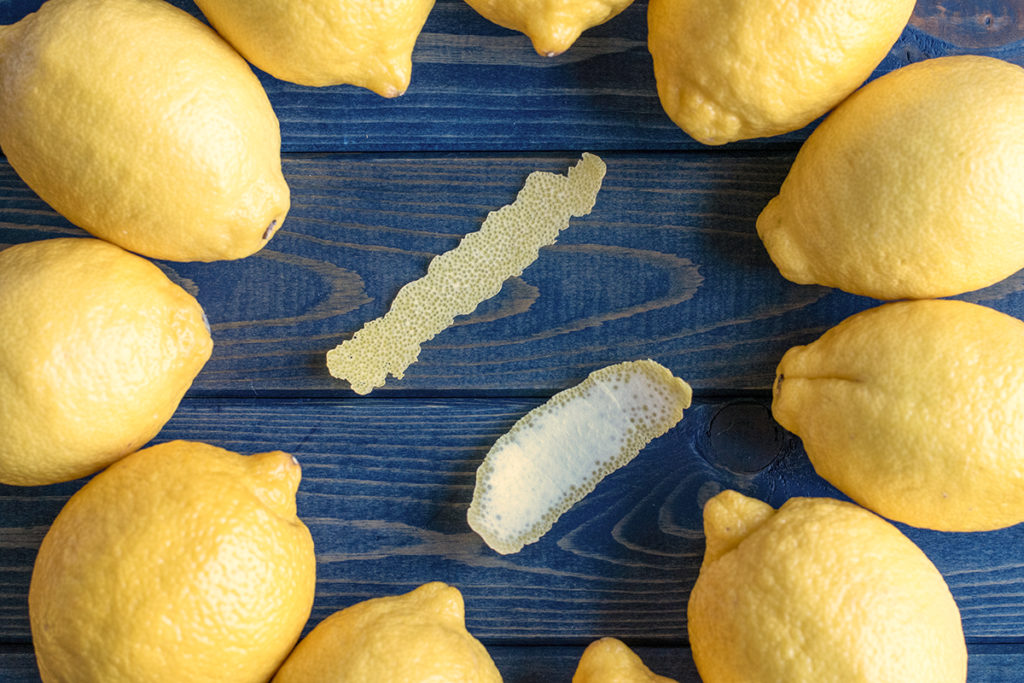
It’s also incredibly important when you’re removing the lemon zest not to remove the white pith along with it. Trust me; this is a flavor you don’t want to be amplified by alcohol. I suggest using a very sharp vegetable peeler, preferably one where the blade aligns lengthwise with the handle, as this offers better control.
You don’t need to use a lot of pressure here. See the uppermost strip in the picture below? That’s what we’re going for. Not the pith of crap on the bottom. Ha.
Infusing
You can easily make a delightful limoncello in as little as five days, as most of the flavor is infused within the first four days. However, if you choose to, you can let the lemon zest infuse the vodka for much longer, even up to a month. This will give you a much stronger lemon flavor.
I think we’ve covered the finer points here, so let’s get started.
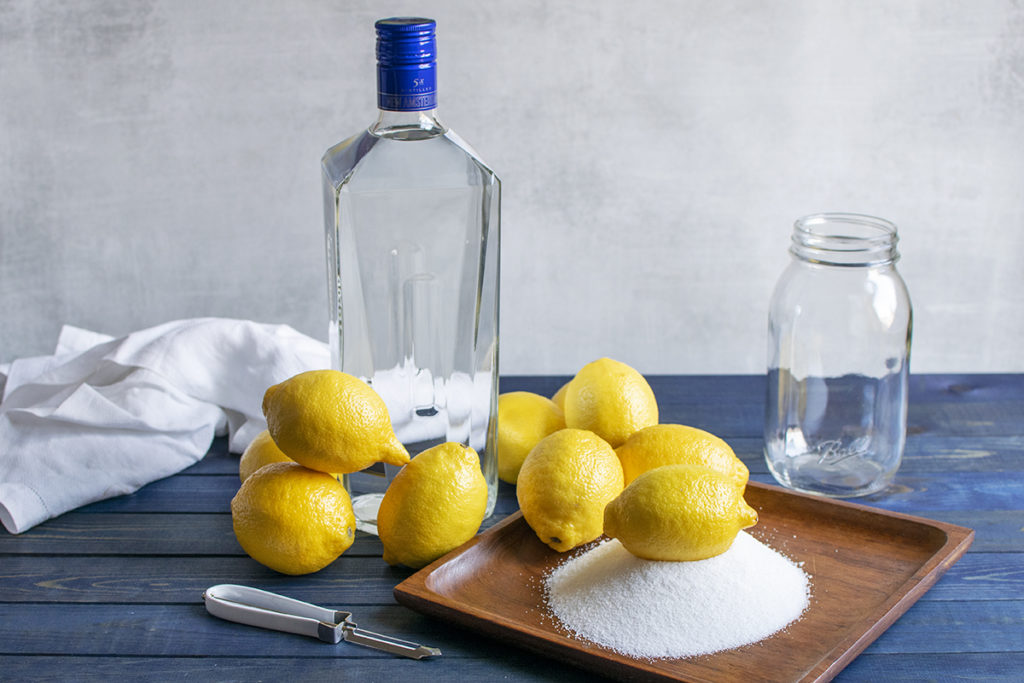
Ingredients
- 12 lemons
- 3 cups of vodka
- 2 cups of water
- 2 cups of sugar
Equipment
- Colander or bowl
- Mesh strainer
- Sharp vegetable peeler
- A large jar with lid, at least a quart
- Paper coffee filter, paper towel, or cheesecloth
- Bottles or jars for your finished limoncello and parchment paper
Method
- After cleaning the wax from your lemons, remove the zest from each lemon, being careful not to remove the white pith as well.
- Place the lemon zest in a clean jar and pour in the vodka.
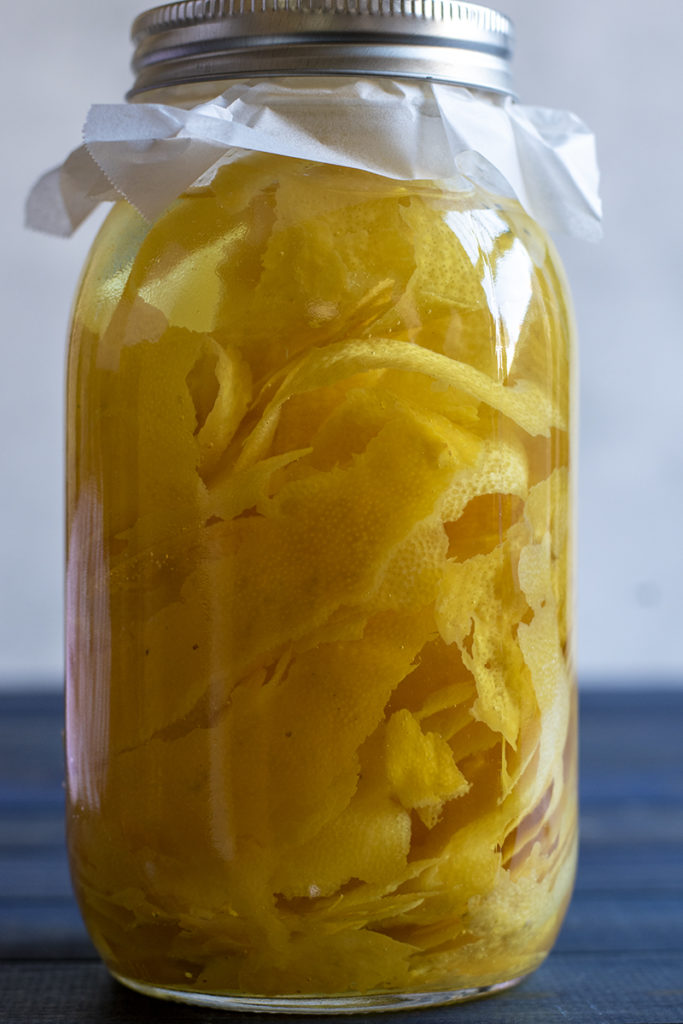
- Seal the jar and place it in a warm, dark space for four days. Gently shake the jar each day.
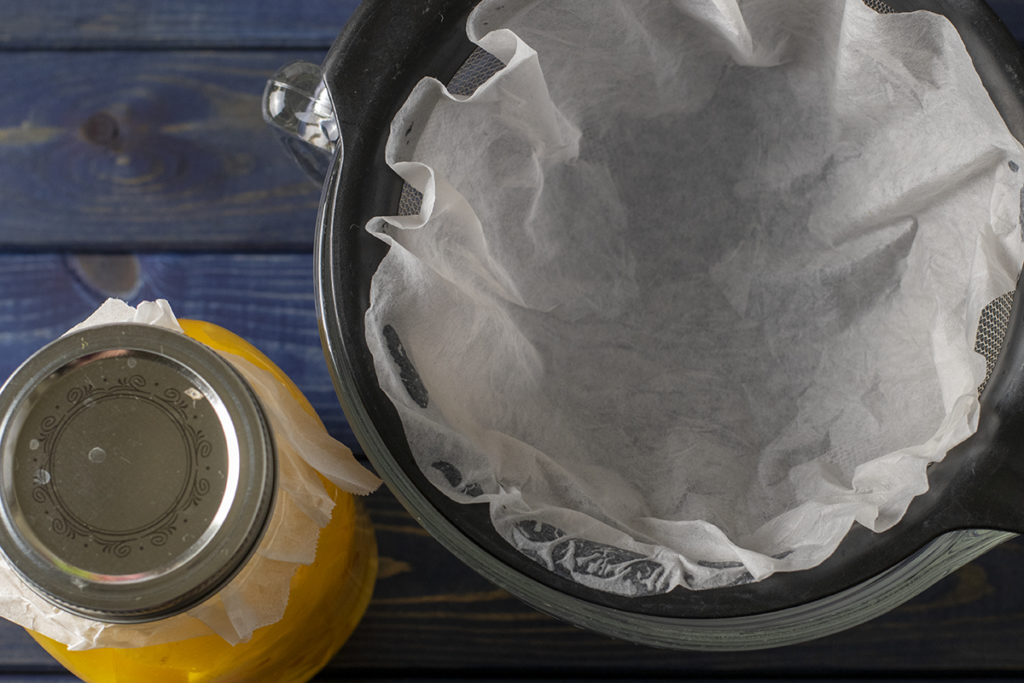
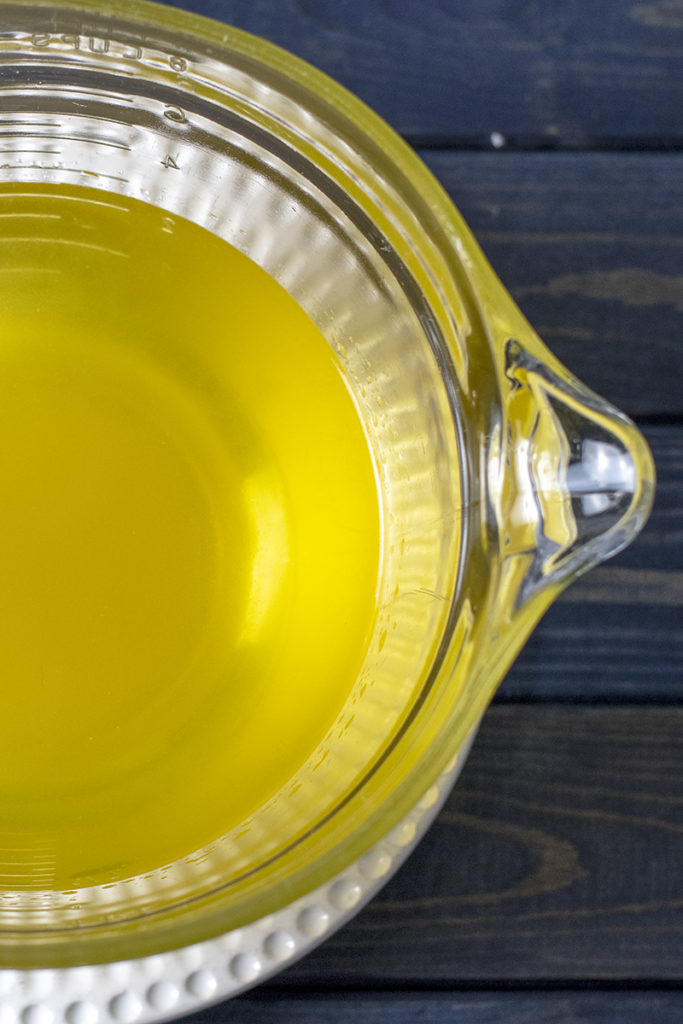
- After four days, strain the lemon-infused vodka into a clean bowl or jar. Line a mesh strainer with a coffee filter, paper towel, or a double layer of cheesecloth. Rinse the coffee filter or paper towel with water first. Otherwise, you will end up with papery-tasting limoncello.
- Make simple syrup by bringing the water and sugar to a boil. Let the syrup cool completely.
- Mix half of the simple syrup into the lemon-infused vodka and cover the jar or bowl and refrigerate for 24 hours. After which, taste the limoncello, adding more simple syrup until the desired sweetness is achieved.
The more simple syrup you add, the more diluted your finished alcohol will be. I prefer something a little less potent; I think the flavor is nicer. And of course, if you want a sweeter limoncello, you can make more syrup to add to it. The final product is pretty customizable depending on whether you’re going for a more tart or more sweet lemon flavor.
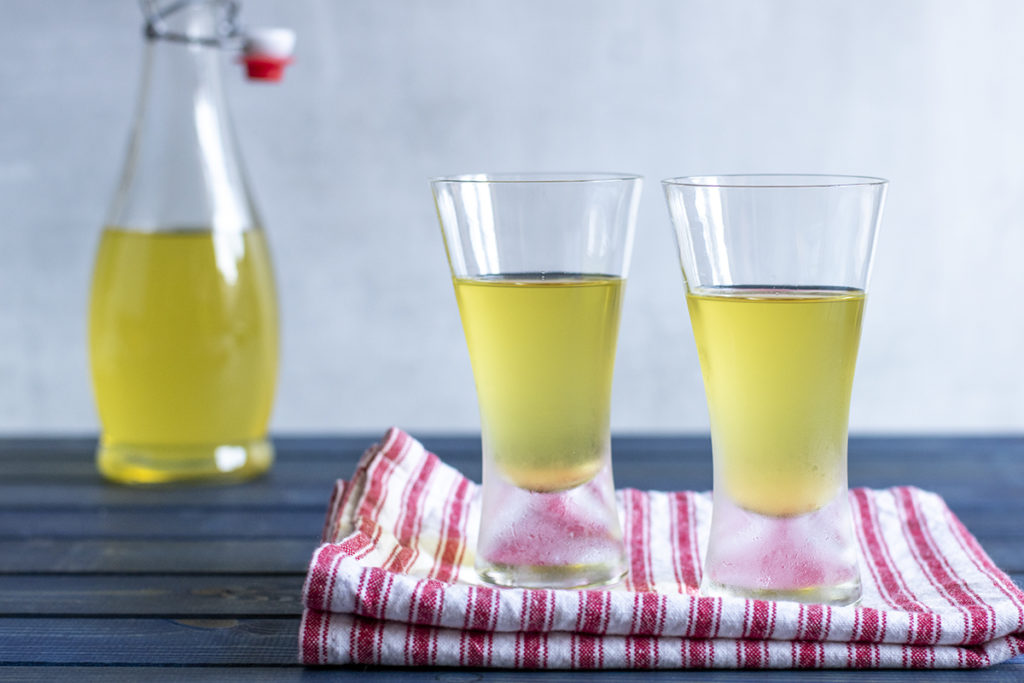
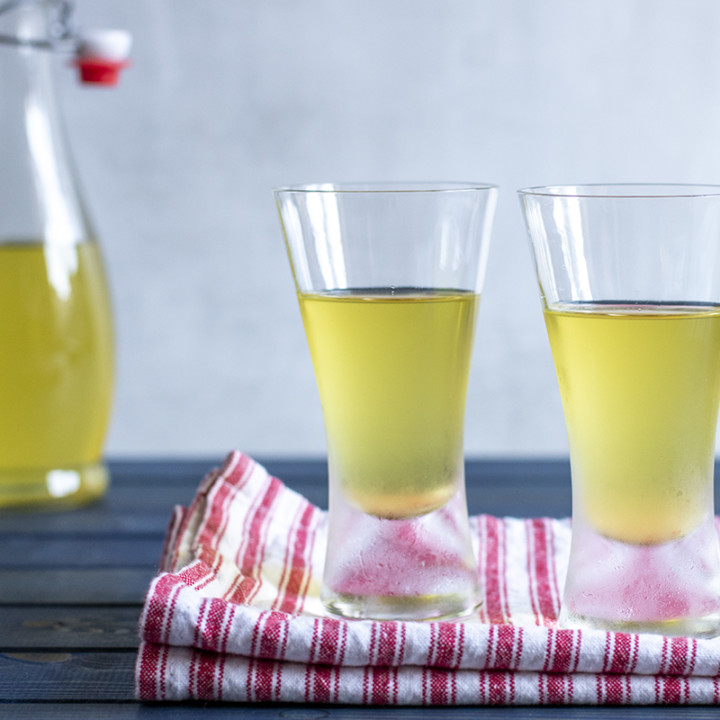
Bottling your finished limoncello
You can keep your bottling as simple as a mason jar, although I would add a piece of parchment paper before putting the lid on. Or you can purchase pretty swing-top bottles for a more refined look. In either case, don’t forget to dress up your bottles with a bit of twine or ribbon for holiday gift-giving.

You’re saying to the recipient, “Here’s some liquid vitamin C, drink it in good health.”
You can keep limoncello for up to a year in the freezer, maybe longer. And this is really the only place to store your limoncello anyway as it tastes best served ice cold. Because of the alcohol content, there is very little chance of mold growing. However, if you do notice anything eventually growing in your limoncello, discard it.
Of course, now that I’ve gotten pretty good at making limoncello, I’m thinking of what other kinds of citrus fruit would make a good liqueur. Lime-oncello? Clementinoncello? Grapefrucello? All the cellos. Who wants to experiment with me?
Now, what to do with all of those naked lemons?

Well, here are some ways to store lemons while you figure that out. As for me, I’m thinking of freezing the juice for cooking and cocktails.
Homemade Limoncello
Three ingredients, half an hour of active time and a little patience and you'll have a bottle of delicious sweet and zesty limoncello.
Ingredients
- 12 organic lemons - unwaxed if possible
- 3 cups of vodka
- 2 cups of water
- 2 cups of sugar
Instructions
- After cleaning the wax from your lemons (if using waxed lemons), remove the zest from each lemon, being careful not to remove the white pith as well.
- Place the lemon zest in a clean jar and pour in the vodka.
- Seal the jar and place it in a warm, dark space for four days. Gently shake the jar each day.
- After four days, strain the lemon-infused vodka into a clean bowl or jar. Line a mesh strainer with a coffee filter, paper towel, or a double layer of cheesecloth. Rinse the coffee filter or paper towel with water first. Otherwise, you will end up with papery-tasting limoncello.
- Make simple syrup by bringing the water and sugar to a boil. Let the syrup cool completely.
- Mix half of the simple syrup into the lemon-infused vodka and cover the jar or bowl and refrigerate for 24 hours. After which, taste the limoncello, adding more simple syrup until the desired sweetness is achieved.

Get the famous Rural Sprout newsletter delivered to your inbox.
Join the 50,000+ gardeners who get timely gardening tutorials, tips and tasks delivered direct to their inbox.