


I like to try and live seasonally as much as possible. These days we can eat pretty much anything year-round. But I think we miss out on how special certain foods can be when we get to eat them anytime we want.
For instance, watermelon tastes best when it’s in season in the summer. And the same goes for corn on the cob. I never buy corn on the cob unless it’s straight from the farm and straight from the field. Eating foods seasonally means getting them when they taste the best and remaining a true treat.
My favorite seasonal food being Trader Joe’s Candy Cane Joe Joe’s.
What? Don’t judge me; those things are amazing. I never said anything about healthy food, just seasonal.
However, living a self-sufficient life means preserving for later too.
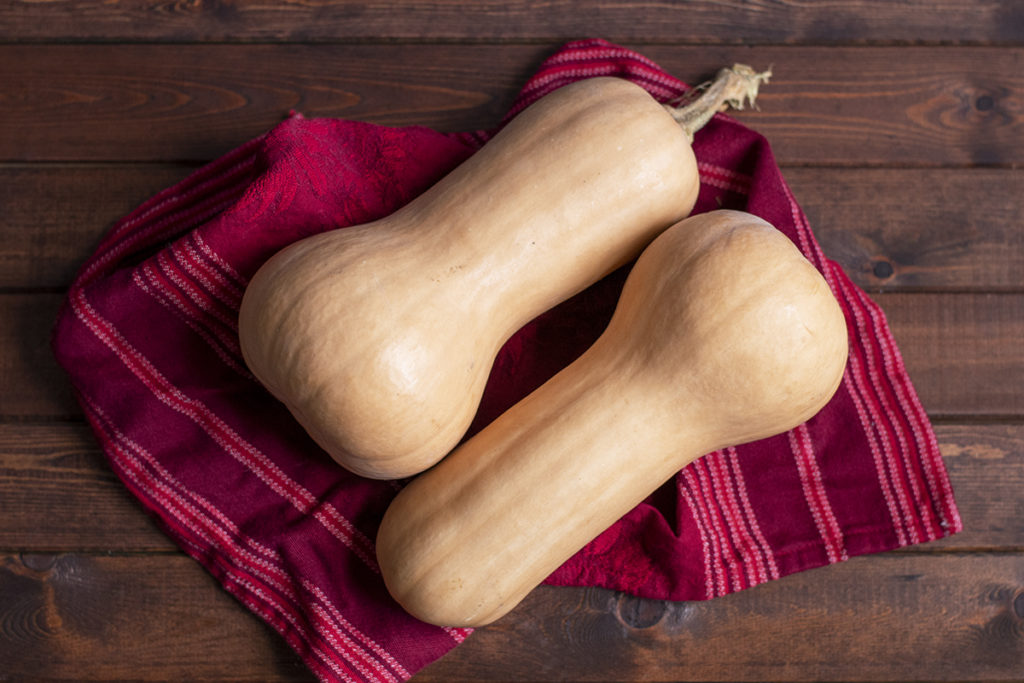
And one of my favorite seasonal foods that I will happily pack away like a squirrel is winter squash, specifically butternut squash.
The list of delicious butternut possibilities just goes on and on.
When butternut squash hits the farmer’s market, I stock up and freeze, freeze, freeze it. There’s nothing sadder than having a craving for butternut squash soup and finding my freezer completely empty.
It only takes an afternoon to have my freezer well stocked with plenty of that sweet, orange squash.
(And here’s a list of things to do with another orange squash that’s popular this time of year.)
There are several ways you can freeze butternut squash, and all of them are equally easy to do. The most labor-intensive part of the whole process is the prep, and even that’s pretty simple.
Grab yourself a couple of butternuts, and let’s put ‘em on ice.
Equipment
- A freezer (Yeah, I know, but it’s worth mentioning.)
- Cutting board
- Sharp chef’s knife
- Spoon or cookie dough scoop
- Sharp vegetable peeler
- Immersion blender or food ricer
- Food vacuum sealer (I use this one.) or plastic zip-top freezer bags
Alright, basically, you’ve got a few different options for freezing butternut squash. Let’s go over each one individually.
1. Freezing a Whole Butternut Squash
The first is the easiest – just freeze it whole. Yup, you heard me right. Just chuck that squash right in the deep freeze. Of course, it’s the easiest on the front end, but when it comes time to thaw your whole squash and cook with it, things get a bit harder, or softer, rather.
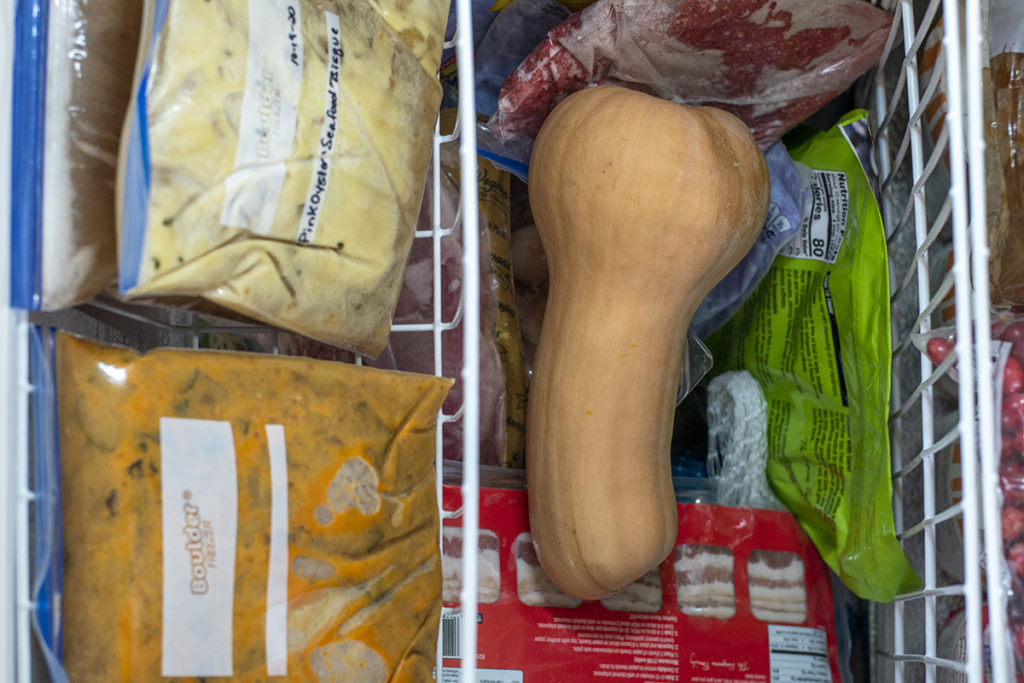
To thaw your squash, place it on a plate or cookie sheet. Freezing vegetables will begin to break down the cell walls, so the thawed squash will be softer and may leak a little.
While you can freeze a whole butternut squash, it’s not the best way to do it.
Preparing Butternut Squash for the Freezer
We’re going to make things a little easier on ourselves by preparing our squash before we freeze it. The result is much easier to work with when cooking, and you’ll end up with much better flavor and good color.
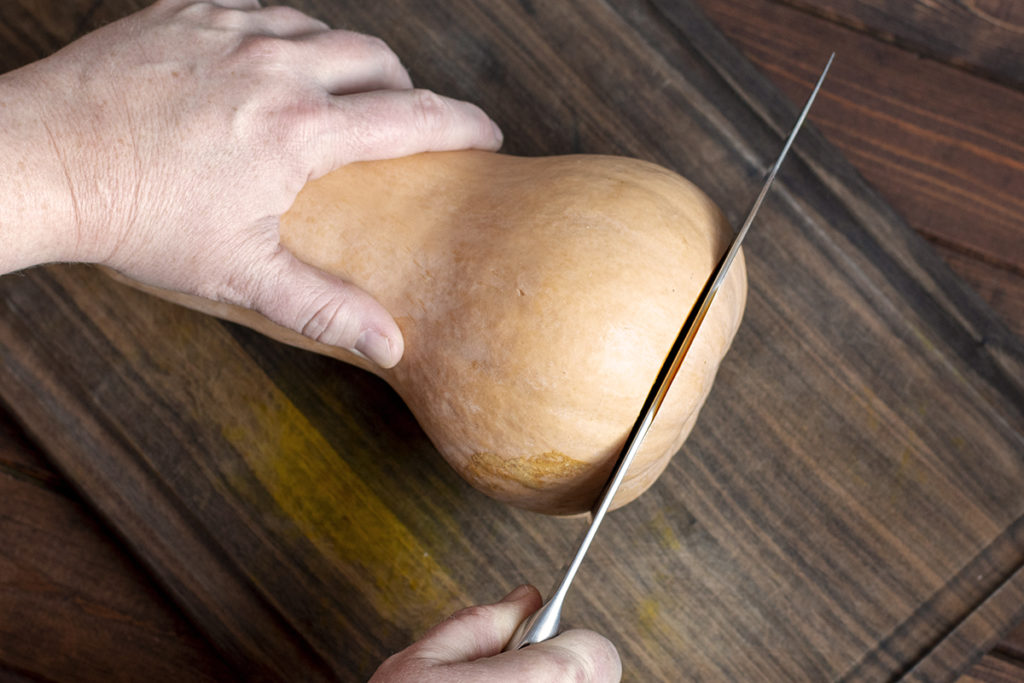
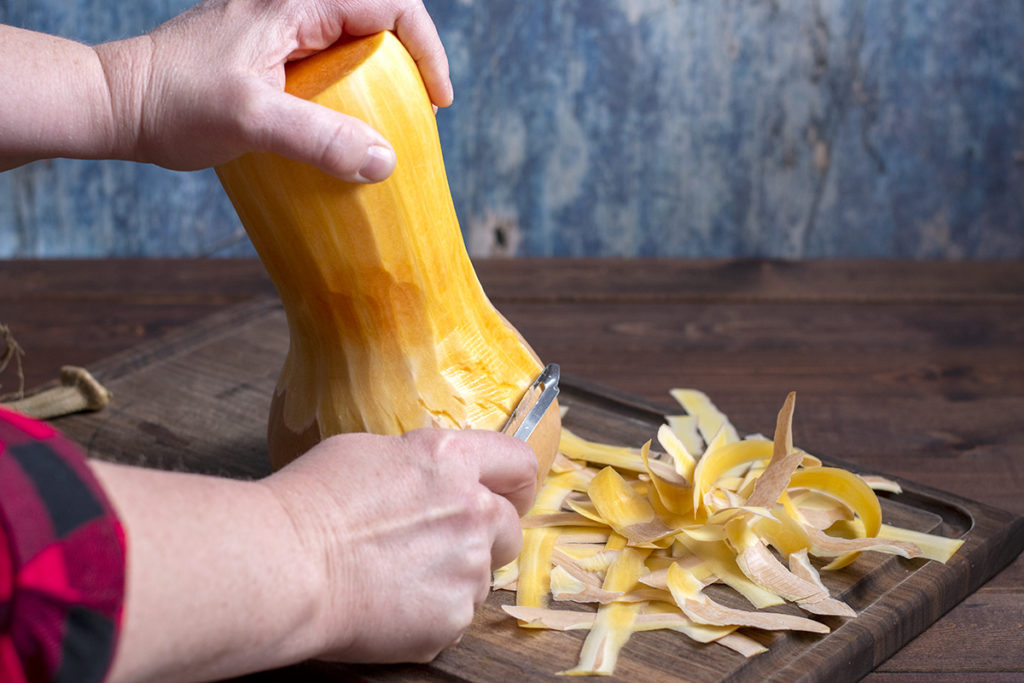
Butternut squash is a bit tough to cut through, so it’s a good idea to sharpen your kitchen knife beforehand. Be sure your cutting board and squash are dry, so you don’t run the risk of cutting yourself because something slipped.
2. Freeze Raw or Blanched Chunks of Butternut Squash
Slice the very bottom and top of the squash off, so it has a flat spot to rest on while we’re working.
Use a sharp vegetable peeler to remove all of the skin from the squash. The skin is rather tough, so again, you want to make sure you’re using a quality tool that’s got a good blade on it. Hold one end of the squash firmly and always peel away from you.
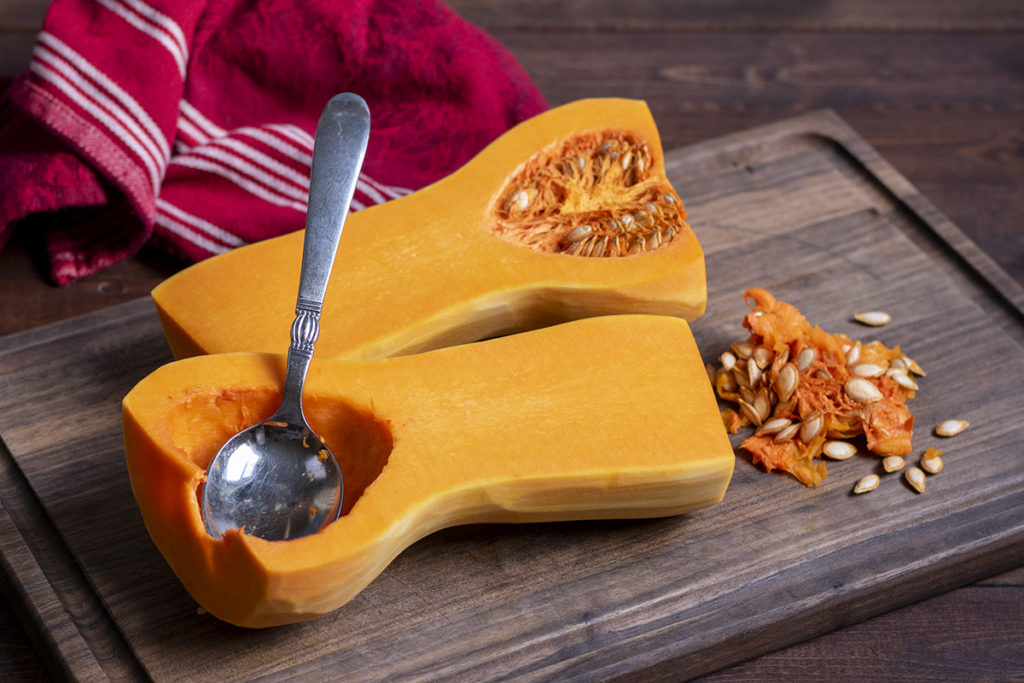
Once you’ve peeled the squash, slice it in half lengthwise and scoop out the seeds and stringy flesh.
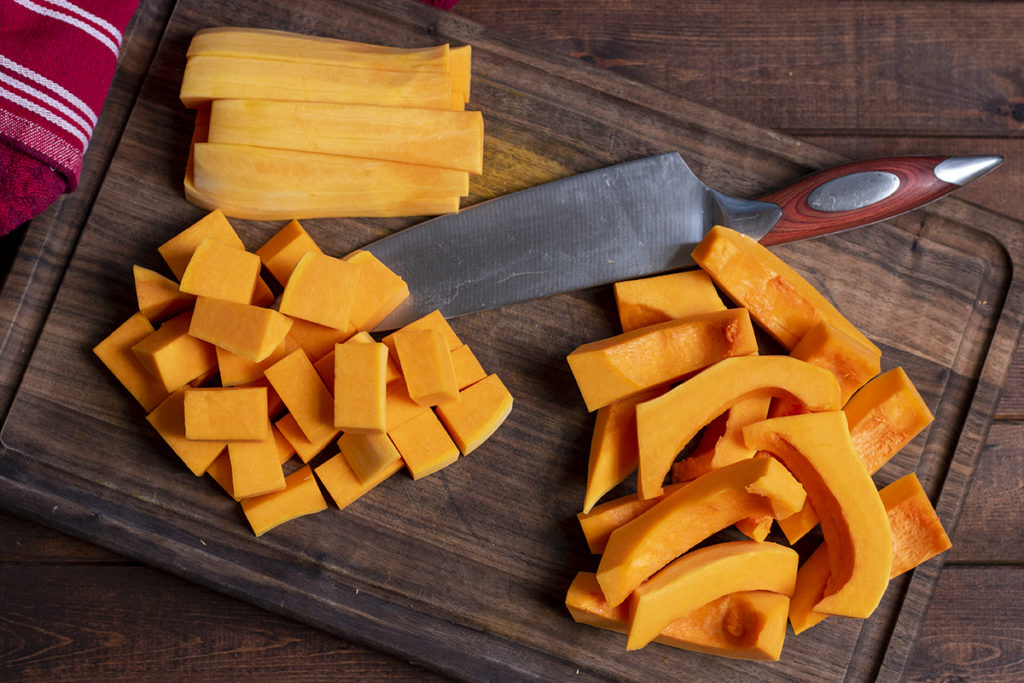
Cube the squash however you want; just be sure your cubes are all pretty uniform in size. One-inch cubes seem ideal.
Blanching
When it comes to butternut squash, whether or not you blanch it before freezing, it’s entirely up to you.
Some vegetables you have to blanch them, or they won’t hold up well in the freezer; butternut does just fine either way. Blanching stops or slows the enzymes that break down food, and in the case of butternut squash, blanching is more about flavor and color than food safety.
I’ve done both raw and blanched, and to be honest; I can never taste the difference in the end. I suppose, if I let them sit in the freezer longer, then blanching would be the best way to go. However, my squash always disappears within six months of being frozen, so I don’t worry too much about it.
To blanch your squash, plunge it in boiling water for 2-3 minutes, remove it from the boiling water and immerse it in an ice bath to stop the cooking process. Allow the blanched squash to drain thoroughly before freezing.
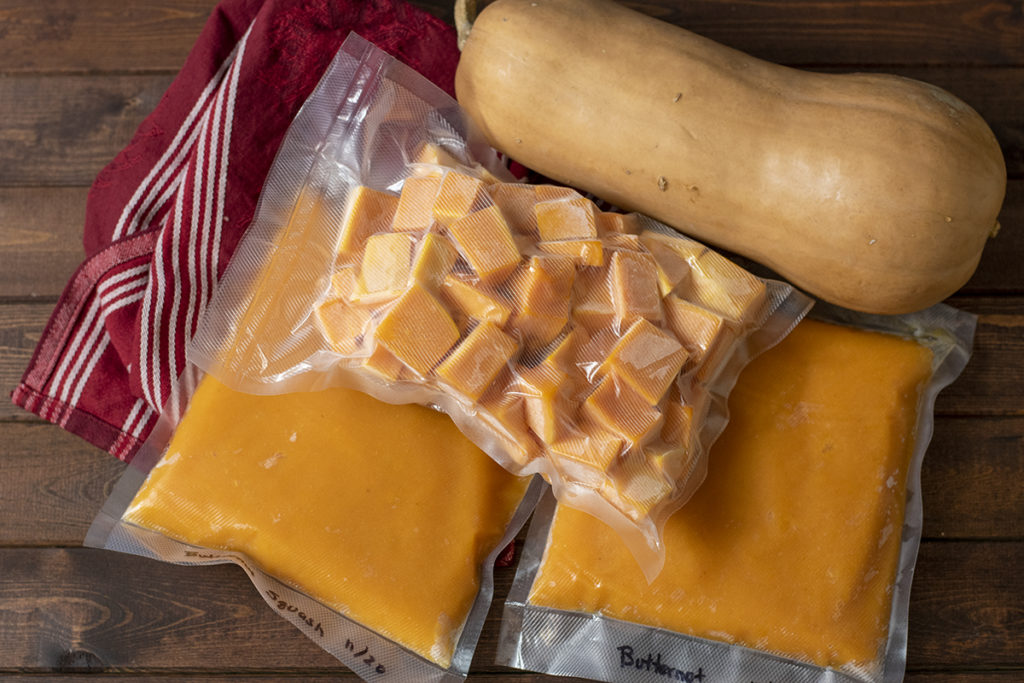
Freezing Cubed Squash
After you’ve blanched (or not) your squash, place the cubes in a single layer on a baking sheet. Place the baking sheet in the freezer for 3-4 hours or until the cubes are frozen solid.
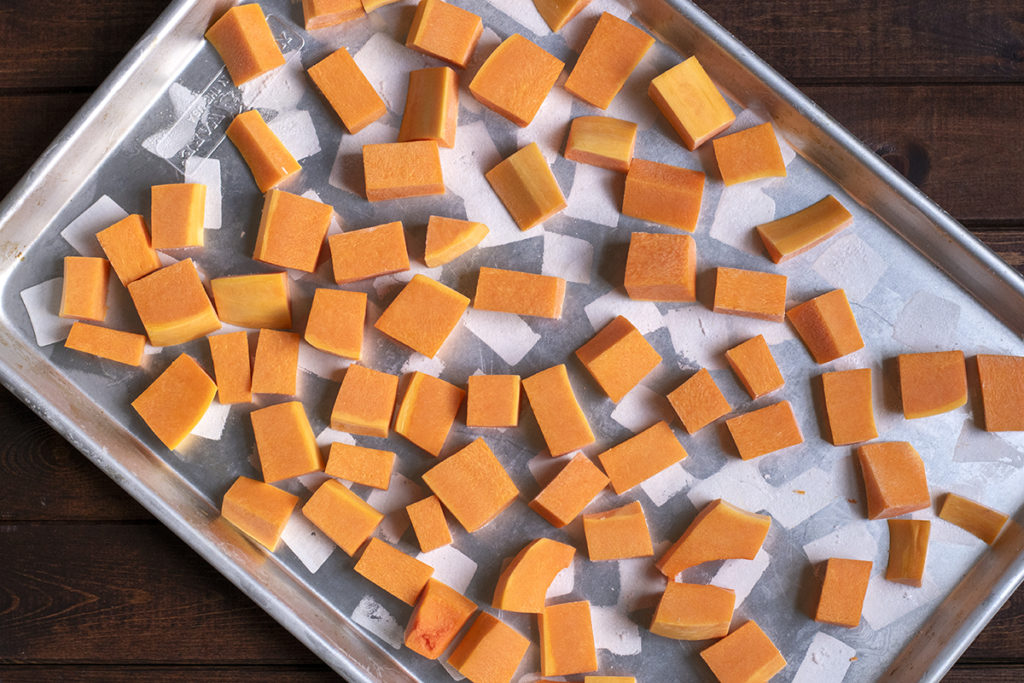
Working quickly, transfer the frozen squash cubes into bags, remove any air, seal and label them, and toss the bags in the freezer.
3. The “No-Peel” Method To Freeze Butternut Squash Puree
This is my favorite way to freeze butternut squash. It’s the easiest way to go, and the end result takes up less space in my freezer. (I like things that stack in my freezer.) Most of what I cook using butternut squash calls for it in puree form rather than cubed anyway, so I figure I’m ahead of the game.
Preheat your oven to 350-degrees F. Slice the butternut squash in half and lay them cut side down on a baking sheet. Bake the squash in the preheated oven for 30-40 minutes or until you can easily pierce the skin with a fork.
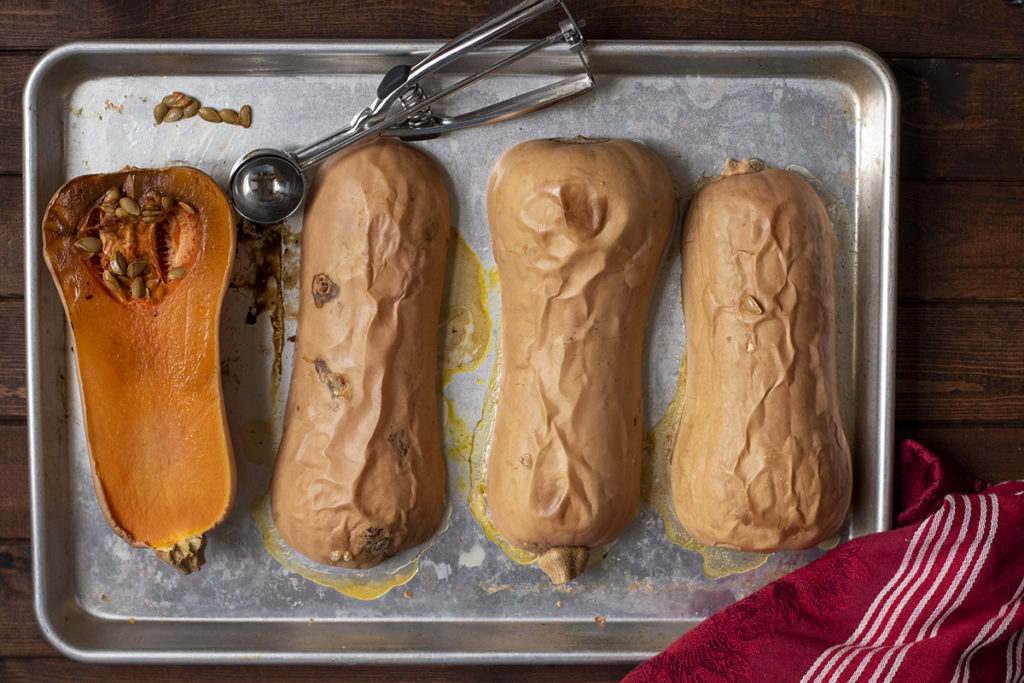
Remove the baking sheet from the oven and allow the squash to cool completely.
Once the squash has cooled, use a spoon or cookie dough scoop to scrape out the seeds and stringy flesh. Then scoop the cooked squash into a bowl.
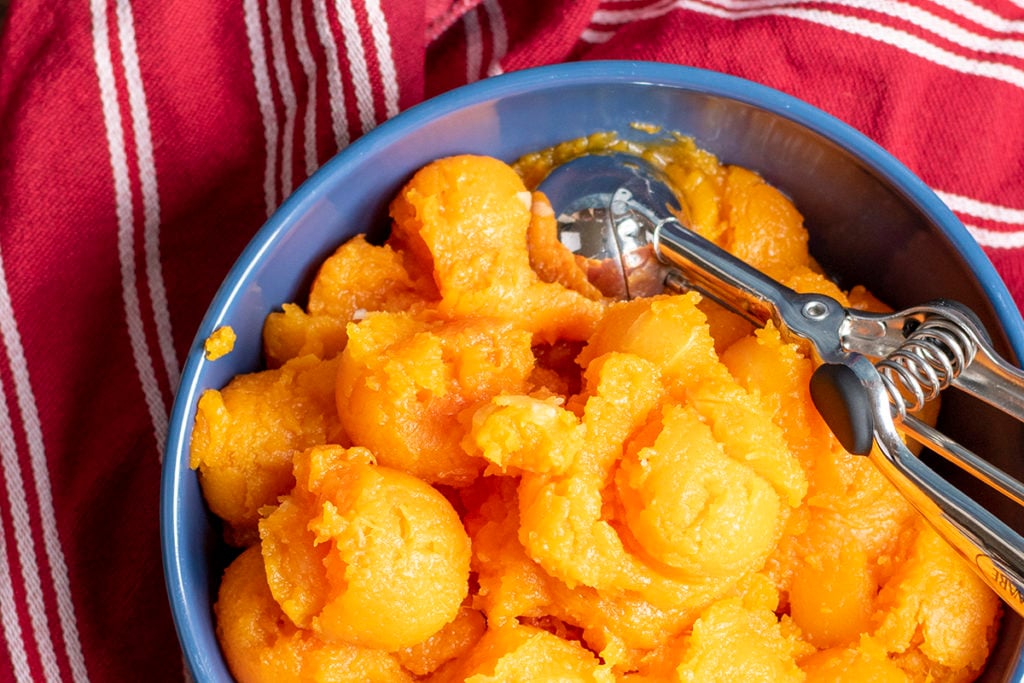
Puree the cooked squash with a stick blender or a ricer.
Ladle the pureed squash into bags and remove as much air as possible, seal, label and toss them in the freezer.
See? Easy as pie. Butternut squash pie.
Your frozen butternut squash will keep in the freezer for six months. But if you’re anything like me, it will be gone long before that, and you’ll be ready to start the whole process all over again come next fall.
If you’re looking for other ways to store winter squash, check out Cheryl’s article on how to cure and store winter squash so they last all winter; no freezer or electricity is needed.

Get the famous Rural Sprout newsletter delivered to your inbox.
Join the 50,000+ gardeners who get timely gardening tutorials, tips and tasks delivered direct to their inbox.