

A beautiful and delicious tomato is a gardener’s prize.
This does not, however, rule out the fact that sometimes things go wrong with our tomatoes and we have to buckle down, diagnose and fix the problem.
One of the best ways to avoid problems is to be sure that you are starting with healthy plants that are stronger and better able to fend off pests and disease.
Be sure to provide plenty of organic soil and water for your tomatoes and locate them where they will get full sun.
In addition, to keep your tomato plants thriving and producing awesome fruit, make sure that you provide a steady source of nutrients when you plant and throughout the growing season.
Avoid the most common tomato growing mistakes, prune off the suckers and make sure you provide adequate support and you’ll minimize the risk of problems and disease.
Even the healthiest plants sometimes have issues
No matter how well cared for your plants are, they can still be plagued by issues. The first step, of course, is always to determine what is causing the issues. Is it a disease, an insect, an environmental condition or something else?
If you have grown tomatoes for any length of time, it is likely that you have struggled at one point or another. Here are some of the most common problems and some ways you can resolve the issues.
13 Common Tomato Problems
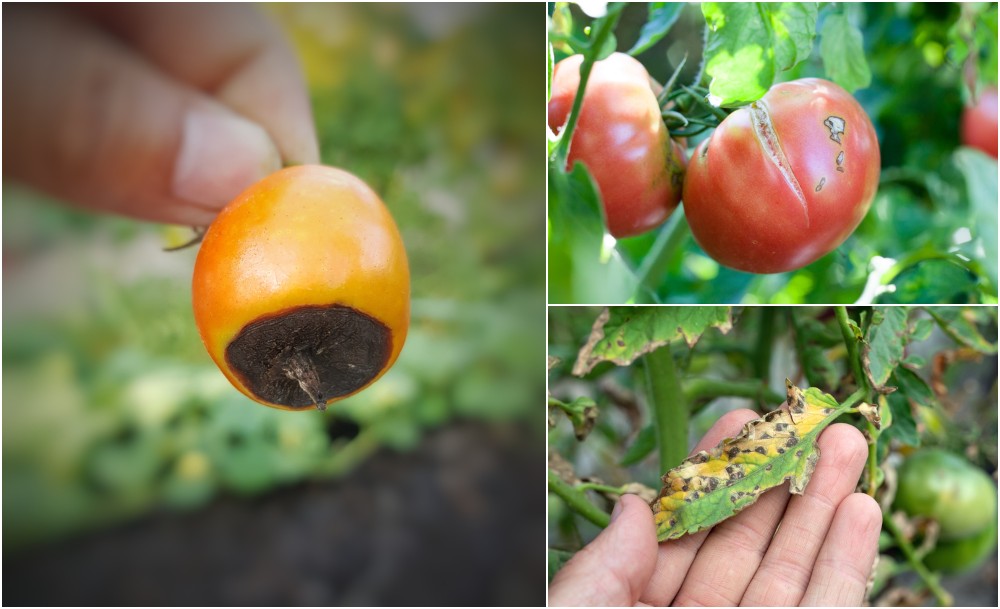
1. Fruit with black sunken areas on the blossom end
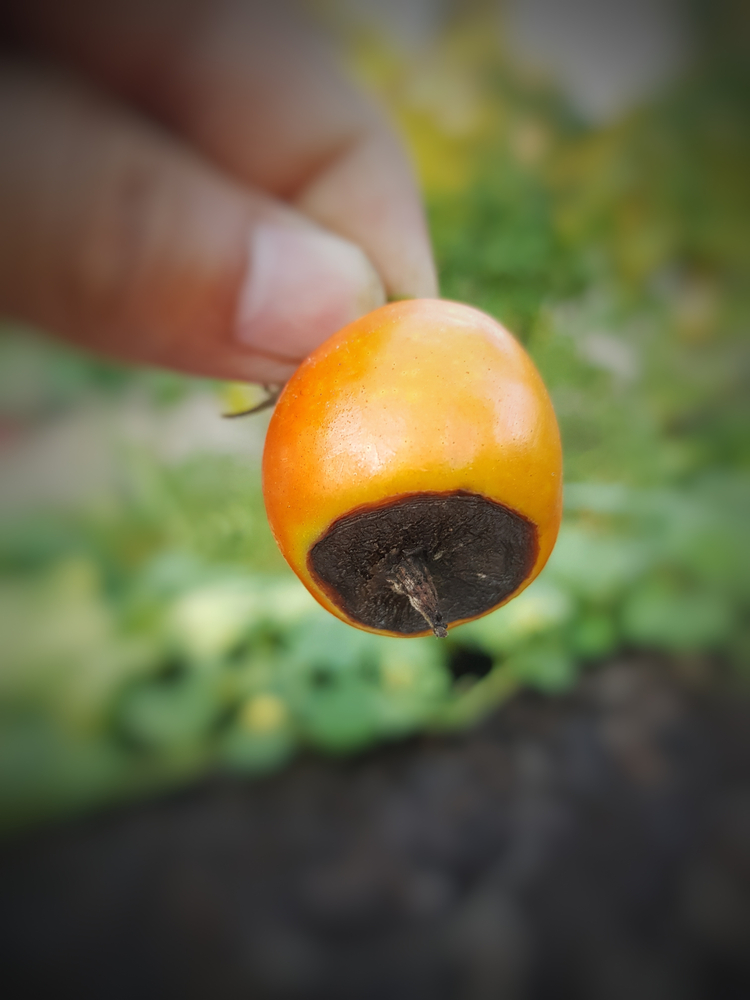
Blossom end rot presents as ugly black sunken spots on the blossom end of tomatoes. Although it looks like a disease it is actually caused by a lack of calcium.
In addition, blossom-end rot is also exacerbated by excessively dry conditions, uneven watering, excess nitrogen or root damage.
The good news is that usually only a few tomatoes are impacted at the beginning of the harvest season.
To fix, provide your tomatoes with enough calcium – crushed eggshells are a great option both in the planting hole and also around the base of the plant. Water tomatoes deeply one to two times a week rather than lightly more often. This promotes healthy root growth.
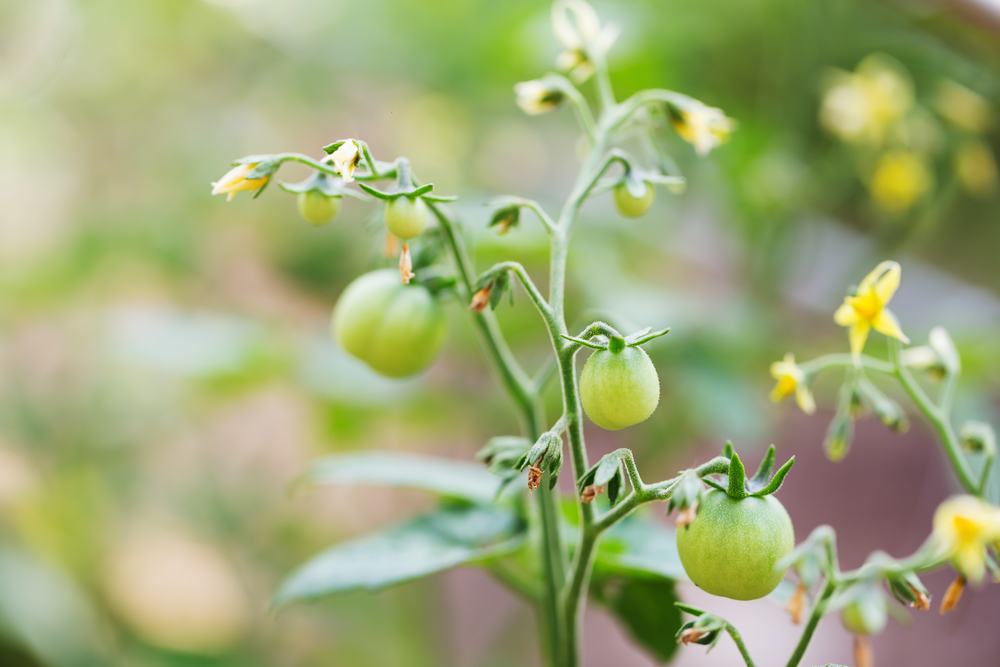
2. Few flowers or flowers dropping
If your plant only develops a few flowers or the flowers begin to drop off before setting fruit, it could be because of any of the following:
- Stress from drought
- Too much nitrogen
- Too little sun
- Night temperatures above 70 degrees F or below 50 degrees F
- Day temperatures above 85 degrees F
Because the most common cause of few or dropping flowers is weather – plants generally perk up once the weather issue has passed. Help keep your plants strong by regular feeding and planting to draw pollinators – good options are milkweed and cosmos.
3. Fruit cracking

Tomatoes may suffer circular cracking which introduces an opportunity for insects and birds to start munching on the fruit.
Cracks are generally the result of hot and rainy weather. If the weather has been particularly arid with little rain and tomatoes are thirsty, they soak up the water from the rain quickly which causes the fruit to swell and crack.
Be sure to provide plenty of moisture for your tomatoes during the growing season. This will keep them from becoming overly thirsty when there is a heavy downpour.
4. Sunscald
Tomato plants and fruit may look and seem perfectly healthy but develop symptoms of sunscald as they mature.
Yellow patches appear on fruit which turns white and extremely thin. This creates a poor appearance and also impacts the taste. True to the name, tomatoes have actually been scalded by the sun.
To protect plants from sunscald use a sturdy wire cage around the plant that allows for stable branch support and natural shade for developing tomatoes.
Sunscald most frequently appears on plants that have been heavily pruned leaving too little foliage and too few branches for shade.
5. Deformed fruit
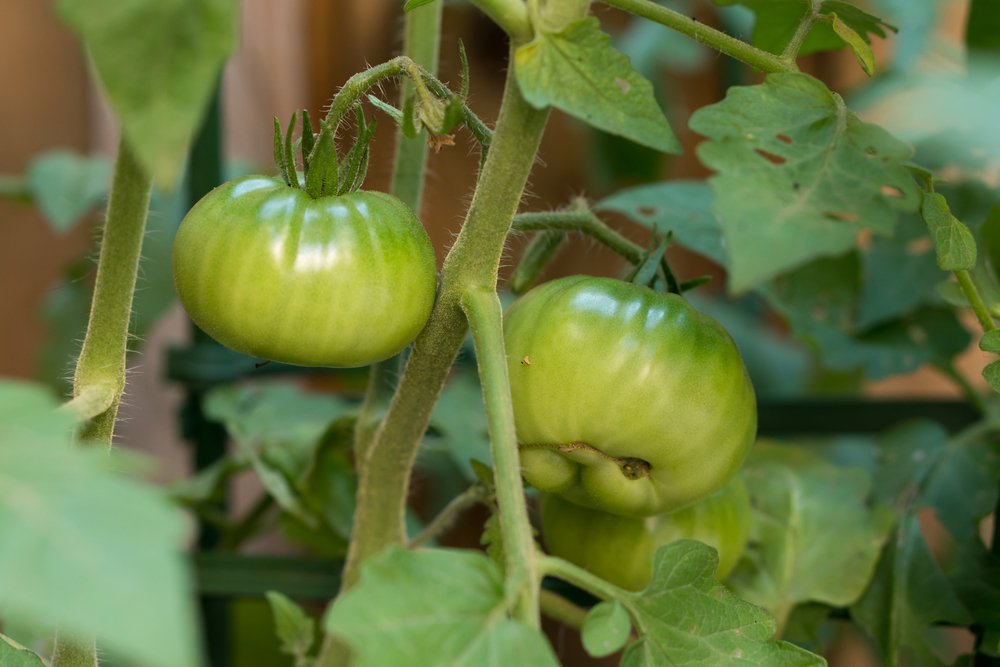
If your tomatoes appear deformed and the blossom end is rippled and lumpy it could be that pollination happened when temperatures were cool – around 50 -55 degrees F.
To avoid this deformation, plant tomatoes a little later, once the weather is truly warm. You can also use black plastic on the soil to help plants stay warm at night.
6. Poor fruit set
Tomato plants that receive too much nitrogen will develop into big green busy adults but they also may have few flowers and small, tasteless fruits.
Not leaving enough space between plants does not allow for proper pollination which can also cause poor fruit set.
Be sure to leave at least two feet or more between plants for air circulation and pollination. To help with pollination, shake the flowering branches
7. Leaf rolling / leaf curl
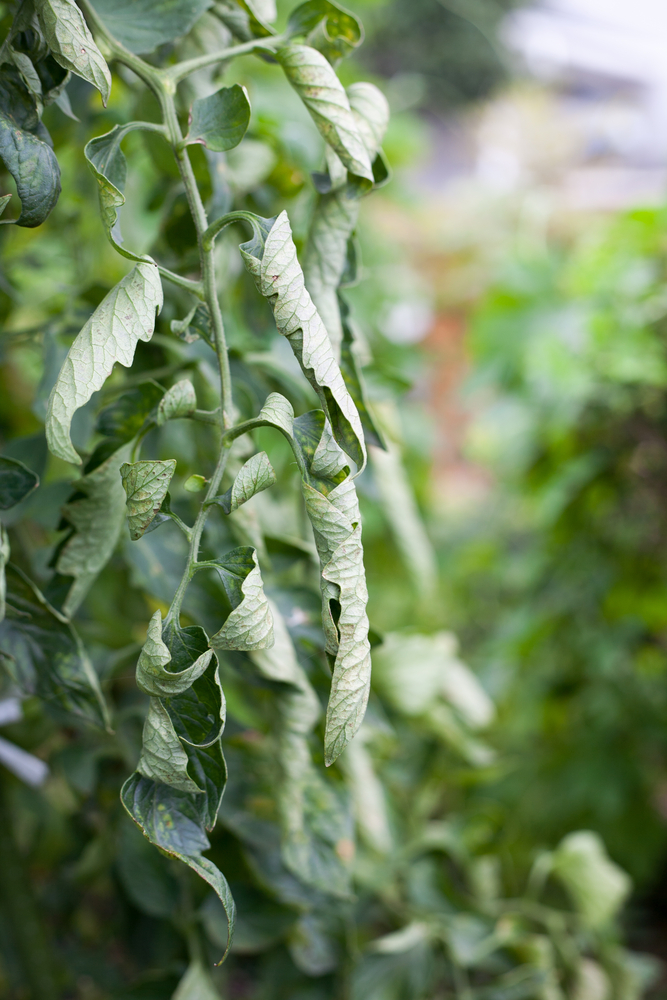
Curled leaves at the bottom a tomato plant are caused by high temperatures or wet soil which causes stress. It may look ugly but thankfully, this condition will not impact tomato development.
To help your plants recover, don’t over-prune and make sure to plant in well-draining soil or containers with plenty of drainage.
8. Brown spots on leaves
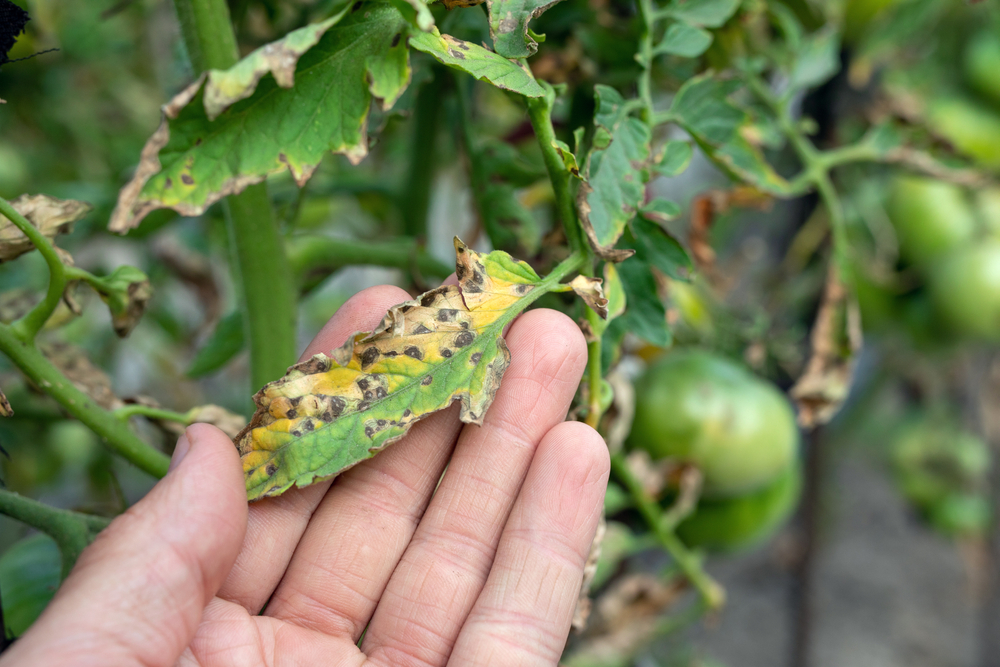
Spots develop on older leaves first and begin to form rings like a target, Following this they turn yellow around the brown spot and the entire leaf turns brown and falls off.
If this is happening to your tomatoes, it is likely a condition called Early Blight. It can be so bad that eventually, your plant may have few if any leaves.
Early Blight is caused by a fungus that overwinters in the soil. This means that if your tomatoes had a problem with the condition the year before and you plant them in the same spot the following year, they are highly susceptible to the condition again.
The best way to prevent this is to rotate crops so that new plants do not get the disease. Eggplants and peppers can also experience Early Blight.
When planting tomatoes be sure to stake and prune plants to encourage circulation. Disinfect your pruning shears using one part bleach and 4 parts water, after each cut. Keep dead or decaying organic material away from plants and use a layer of organic compost under plants.
To keep foliage dry, use a drip irrigation system. Baking soda has fungicidal properties that can help stop blight or reduce the spread.
To make a spray, add 1 teaspoon baking soda to 1 quart of water along with 2 ½ tablespoons of vegetable oil to help the solution stick to plants. Pour mixture in a spray bottle and shake before applying to the entire plant. Do not apply in the heat of the day.
Additionally, having good insect control in your garden can help prevent the spread of spores. Copper fungicides can also be effective – be sure to follow application instructions.
Related Reading: Tomato Blight – How To Spot, Prevent & Treat 3 Types Of Blight
9. Wilting plants
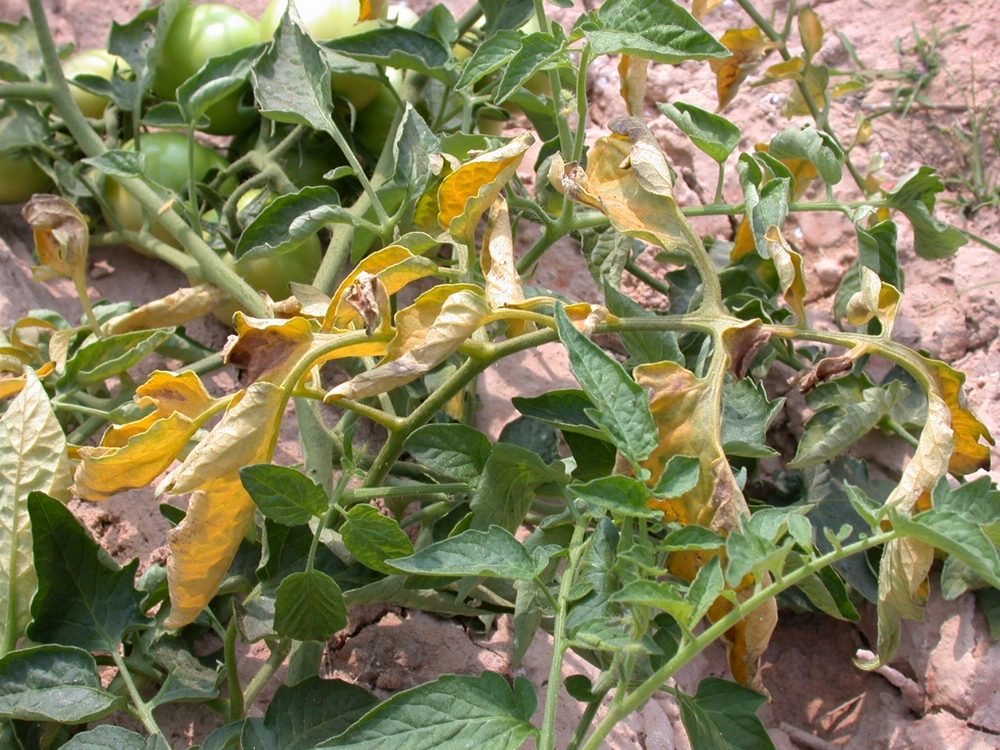
Plants impacted by Fusarium Wilt may look fine one day and suddenly begin to wilt the next day. This condition is caused by a fungus that attacks the vascular system of the plant (like human veins).
The fungus destroys the xylem tubes which are responsible for transporting water and nutrients from the roots to the leaves. One side only may be impacted at first but soon the whole plant begins to wilt. Water exacerbates the condition and the plant soon dies.
The best way to handle the condition is to take a preventative approach.
Crop rotation is essential as is purchasing wilt resistant varieties of tomatoes. This fungus, like the Early Blight, also lives in soil over the winter so make sure that you don’t plant tomatoes in the same spot each year.
10. Powdery mildew
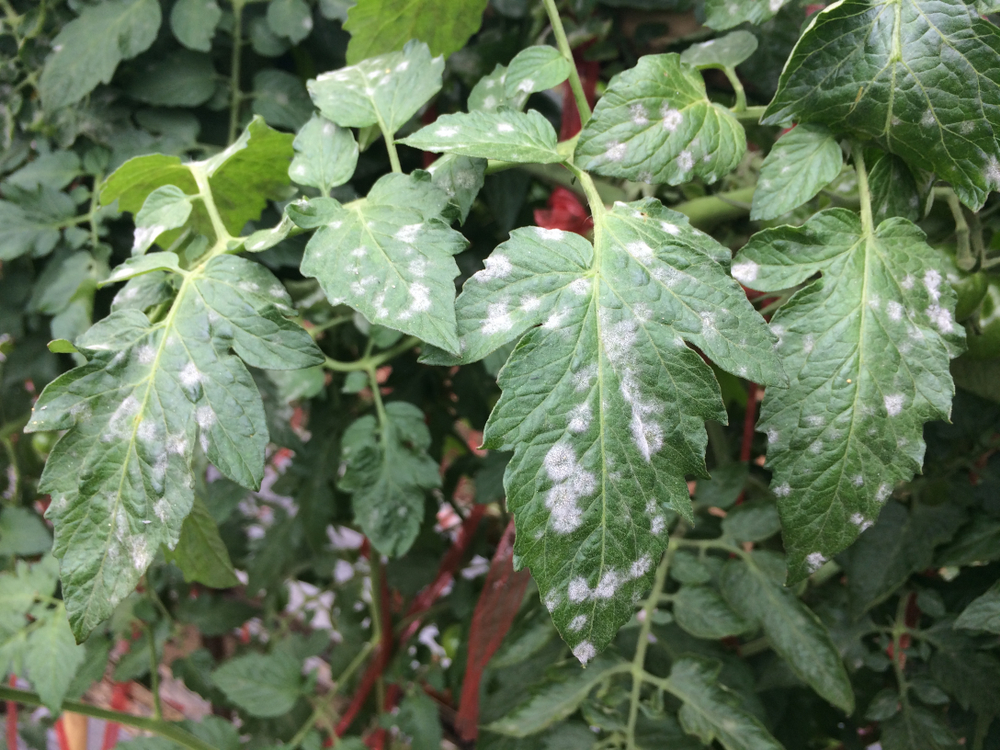
Leaves that are impacted by powdery mildew look as if they have been brushed with a fine white powder. In addition, you may also find white spots on the stem.
If the fungi progress it eventually turns leaves yellow and brown.
Powdery mildew results when humidity is high and there is poor air circulation, making this condition common in greenhouses. There are a number of natural ways to combat this condition including:
- Milk – Some gardeners have success using 60% milk and 40% water as a plant spray. It is thought that when milk is exposed to the sun it creates free radicals that kill the fungus. Spray leaves twice a week for best results.
- Garlic – Garlic has a high sulfur content which is an effective anti-fungicide. You can purchase garlic oil or make your own at home. Either way – coat leaves with the solution bi-weekly until the condition improves.
- Apple cider vinegar – The high acid level in vinegar can kill the mildew. Be sure to add only 4 tablespoons of vinegar to one gallon of water. Spray on leaves every three days.
- Baking soda – Baking soda has a pH of 9 which is quite high. When you use baking soda on plants it raises the pH level of the plant creating an alkaline environment which kills the fungus. Mix 1 tablespoon baking soda and ½ tsp liquid hand soap with a gallon of water. Spray the affected leaves and dispose of any leftover solution. Don’t apply during daylight hours and test a couple of leaves first to check to make sure that the solution does not cause sunburn on your plant.
Copper fungicides can also help with the condition. Just be sure to follow the application instructions.
11. Bulls-eye circle on the blossom end

A mushy, bulls-eye circle on the tomato may be a sign of a nasty fungus known as anthracnose.
The spot is soft to touch and reveals a black spot under the skin upon slicing. The fungus takes hold in hot and moist weather and is spread when water spaces on the ground pushing the fungus upward.
The best way to avoid this condition is to switch to a drip irrigation system that waters the roots not the foliage of the plant.
Be sure to harvest tomatoes when they are ripe. Letting tomatoes hang on the vine too long is just an invitation for the fungus.
12. Puffiness
Tomatoes may look great and ripen on time but you find something strange when you slice into the fruit. There are large open spaces with very little fruit.
In addition, you may notice that the fruit was lighter than usual upon harvesting and also had an angular or square shape. This condition is caused by lack of nutrients, poor soil or inadequate pollination.
Be sure that you are feeding your plants during the growing season. Keep in mind that tomatoes are heavy feeders and a frequent top dressing of homemade compost or compost tea is necessary for healthy fruit.
13. Holes in fruit
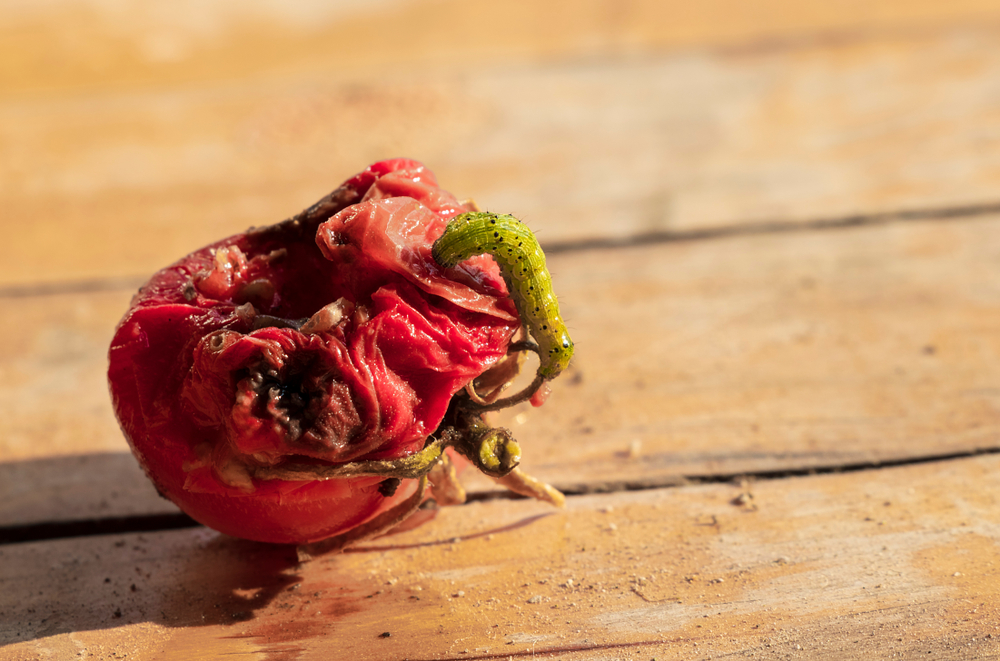
Your tomatoes may have small holes that collapse when you pick them up. This could be from tomato fruit worms. The moth larvae make a hole in fruits and begin eating from the inside out. Once the larvae have made a hole the only thing you can do is destroy the fruit that is infected.
If you have consistent trouble with fruit worms try starting your planting under row covers, keeping them covered until they flower.
Remember, the best medicine is always prevention – even for your tomato plants.
Always put plenty of time into choosing healthy plants, preparing the planting area and tending your tomatoes throughout the growing season. This time and effort won’t guarantee zero problems but it will go a long ways towards ensuring the health of your plants and fruit!

Get the famous Rural Sprout newsletter delivered to your inbox.
Join the 50,000+ gardeners who get timely gardening tutorials, tips and tasks delivered direct to their inbox.