

Towards the end of the growing season, as the bounty starts to pile up, I reach for one recipe time and time again.
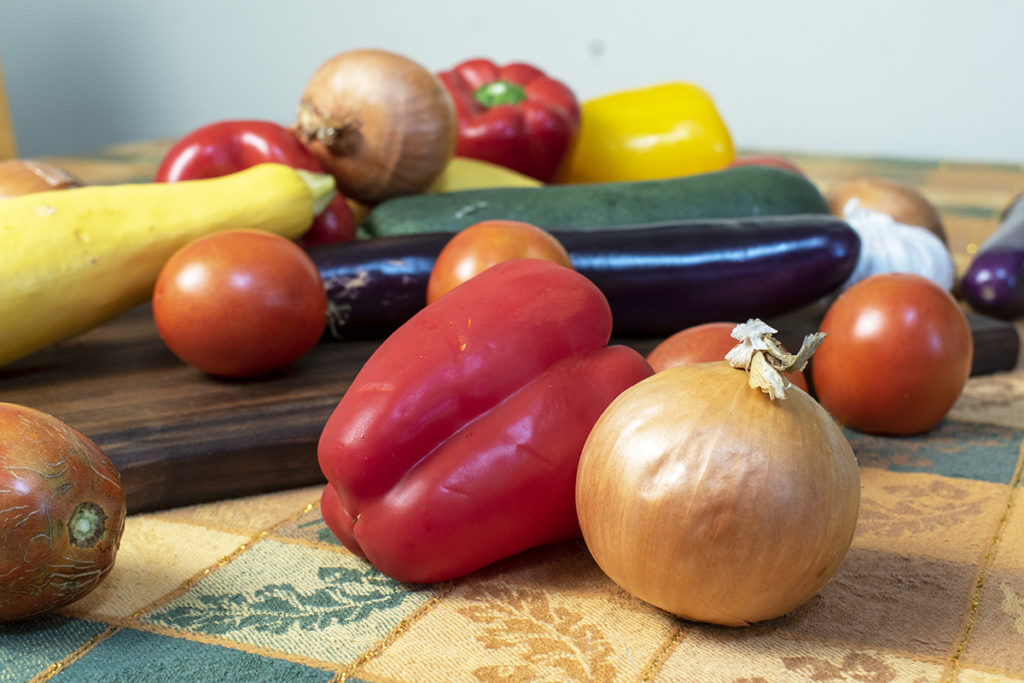
When my kitchen counter is no longer visible beneath all the tomatoes, zucchini, eggplants, peppers and onions, I reach for my stockpot.
It’s time to make ratatouille.
Nothing helps you use up your garden harvest like this classic French dish.
I will unashamedly admit to being ignorant of ratatouille until the Disney Pixar movie came out. Don’t worry, though; I’ve made up for lost time over the years, easily eating my own body weight in this hearty veggie stew.
The movie showcases a version of the dish known as confit byaldi, invented by chef Michel Guérard. It’s a lighter take on the classic, using thinly sliced vegetables artfully arranged instead of a hearty stew. Unlike many who saw the movie, I was drawn to the humbler classic version.
There is a scene in which the food critic takes a bite of the main character’s confit byaldi, and he’s instantly transported back to his childhood where his mother kisses his head and then sets a steaming bowl of hot ratatouille before him on the table.
The comfort food buzzer went off in my brain when I saw this tender scene, and I knew I had to try it.
Healthy comfort food – this is the brilliance of ratatouille.
Naturally, it sounds fancy because it’s French; however, ratatouille is a bowl full of warm garden comfort food at its best. It’s a dish that tastes better the day after you make it, and the day after that, and the day after that…
I will make a large stockpot of ratatouille and eat it all week, often freezing some to eat later.
Now I know what you’re saying, “But, Tracey, it’s just stewed vegetables? Don’t you get tired of eating the same thing all week?
Ratatouille is a Versatile Dish
Here’s the thing about ratatouille; it’s ridiculously versatile. Served piping hot, it becomes a warm comfort food equally good as the main course or a side dish. Eaten cold, straight from the fridge, the flavors are brighter and more pronounced.
There are so many ways to enjoy ratatouille. Here are a few of my favorites.
- Reheated in the microwave with a drizzle of olive oil.
- Eaten cold with a drizzle of olive oil.
- For breakfast, I top it (hot or cold) with a fried or soft-boiled egg.
- I’ll add a good dollop of ratatouille to congee; the rice porridge and soft veggies make a perfect pairing.
- Mix in cooked crumbled sausage for an easy winter stew that will keep you full.
- Add chicken broth and heat for a quick and tasty veggie soup. Don’t forget the crusty bread!
- Toss ratatouille with pasta and olive oil and top with grated pecorino romano.
- And possibly my favorite – ratatouille pizza. Swap out tomato sauce for ratatouille and top with obscene amounts of cheese. So good!
This stuff is the answer to “what’s for dinner” when you don’t have time to cook.
Why Canning Ratatouille Makes Sense
It didn’t take long into my love affair with ratatouille for me to realize having a giant pot in my fridge all week wasn’t going to work.
I began freezing ratatouille but then I had to go through the fuss of thawing it out before eating it. I also found that freezing it made it mushy.
And then it hit me, why not can it?
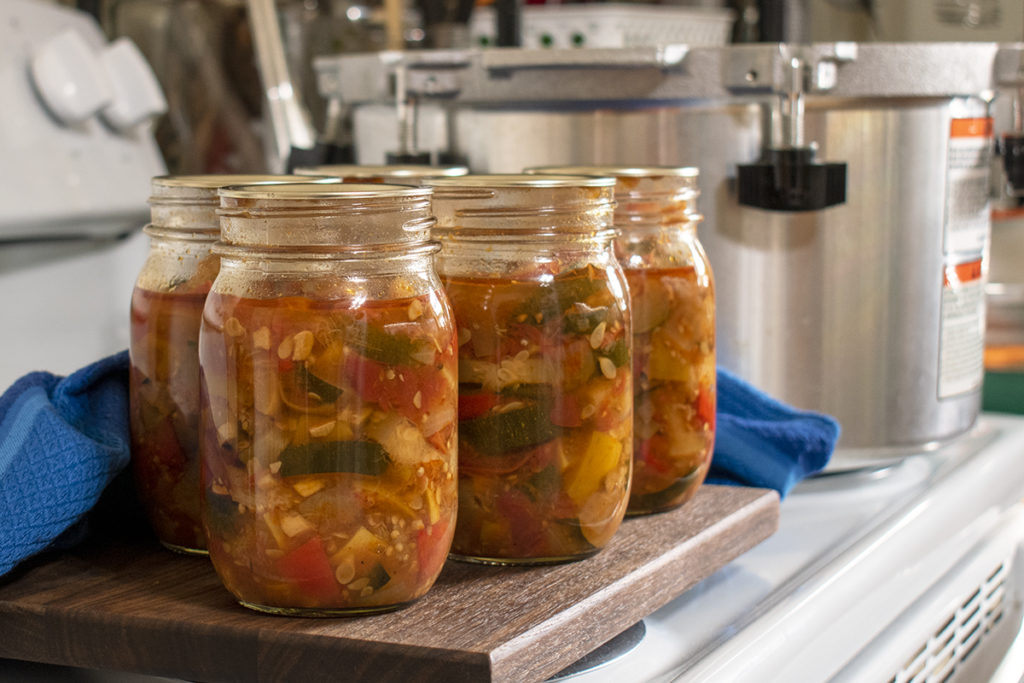
I could process it in pint and half-pint jars and have perfectly portioned sizes. Not to mention a half-pint jar of ratatouille makes for easy grab-and-go lunch options.
Because ratatouille contains non-acidic vegetables, it has to be pressure canned. I’ve seen recipes out there that claim you can use the water bath method for ratatouille. It’s downright dangerous; there isn’t enough acid in ratatouille to make water bath canning safe.
For this reason, when I make ratatouille to can, I usually make a double batch, so it’s worth the time and effort. Like I mentioned earlier, this is a great way to use a lot of fresh produce in one go.
And depending on your garden, you may have all the ingredients on hand. I can’t tell you how satisfying it is to make a recipe like this and have everything come out of your garden.
A few notes about my version of ratatouille
I based my recipe on Alice Water’s recipe in her book The Art of Simple Food. Over the years, I’ve tweaked it to make it my own.
When cooked correctly, eggplant should have a tender or creamy texture. Often it ends up being mushy on the inside with tough, chewy skins on the outside. It’s no wonder so many people don’t like it. If only they knew how delicious it could be.
When growing eggplant, pick them when they’re on the smaller side.
The bulbous bottom should be no bigger than a baseball.
Consider growing or purchasing an Asian variety. Asian eggplants are long and thin, making them more tender and easier to slice into bite-sized pieces. They tend to have much thinner skin. I have found the yield is much larger too.
If you’re dealing with a larger eggplant, peel it with a vegetable peeler, and you’ll avoid the tough skins altogether. Cube the eggplant into bite-sized pieces about 1/2” thick and place them in a colander. Lightly salt the eggplant, toss it a bit, and let it sit in the colander for about fifteen minutes.
Salting overly large eggplants helps to remove some of the bitterness and tenderizes them before cooking. Asian and smaller eggplants don’t need this treatment.
Making ratatouille is a great way to use green baseball bats (that zucchini you didn’t see hiding under the leaves).
If you’re using a large zucchini, peel some or all of the skin off. It gets tougher as the squash gets larger. Slice the squash in half lengthwise and use a spoon to scoop out the seeds and fibrous center.
When choosing tomatoes, I say anything goes. If it’s growing in your garden, toss it in there; you’ll have a nicer flavor overall. When I use smaller tomatoes, like cherry or pear, I rarely slice them, preferring to let them pop on their own as they cook.
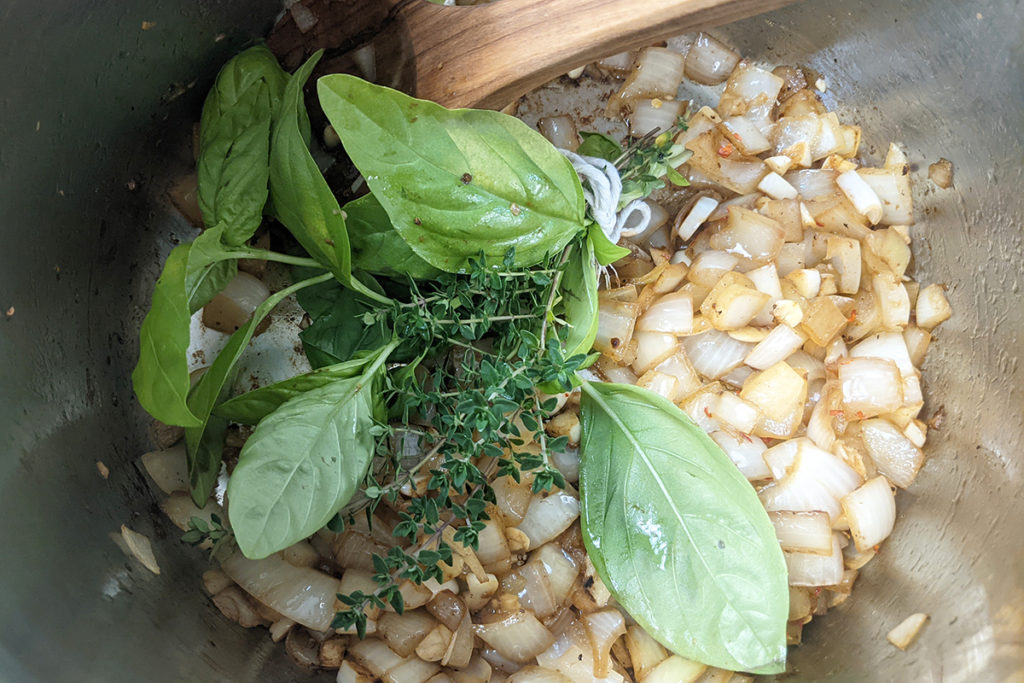
We’ll be making a bouquet garni for our ratatouille.
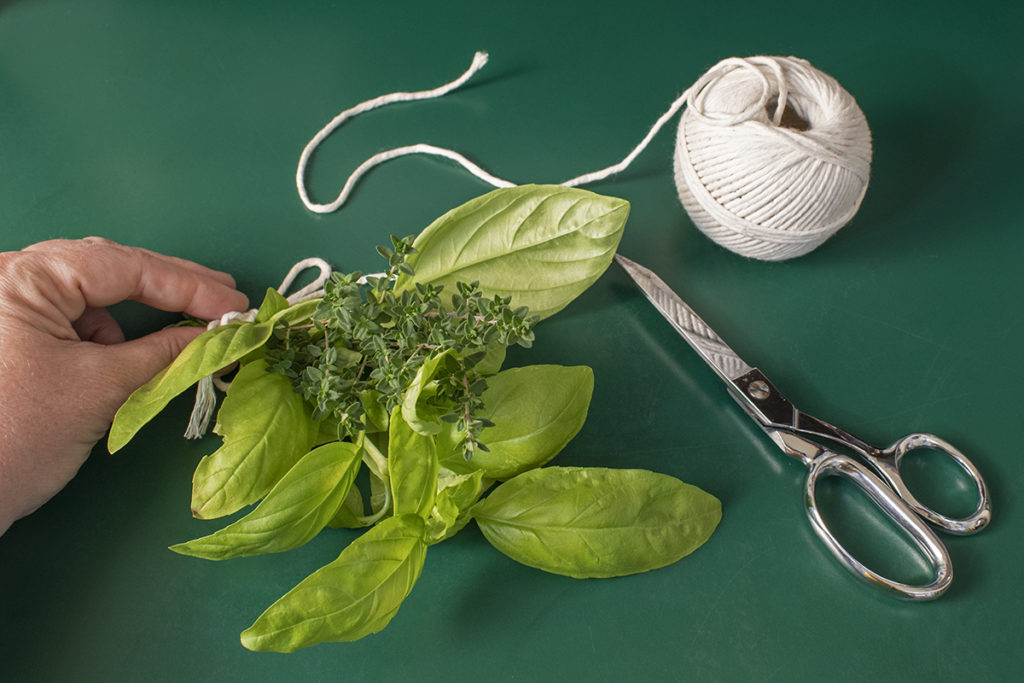
While I’ve used dried spices in the past, I’ve found that the best flavor comes from using fresh sprigs of thyme and basil.
The overall texture should be tender bites of veggie with a sauce-like base. It’s important to cook the vegetables in the right order to achieve this balance, so we will pay special attention to the eggplant and peppers.
Salt is your friend. Please taste your ratatouille and salt liberally. It’s the difference between uh-may-zing and a jar full of bland vegetables.
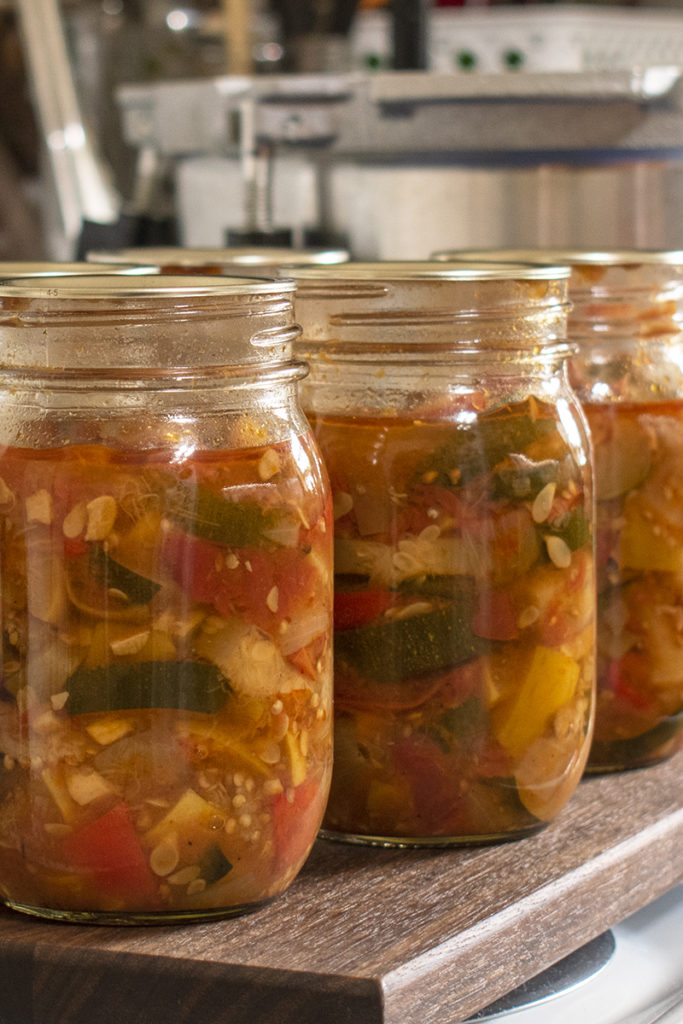
If you plan on canning the ratatouille, as soon as you add the eggplant and sweet pepper mixture back into the rest, it’s ready to can. The flavors will mix and mingle while it’s being processed, there’s no need to cook it further.
Seriously Comforting Ratatouille
Yield: Roughly 8 one-cup servings, double the recipe if you plan on canning it
Tools:
- Heavy-bottomed pot
- Knife and cutting board
- Wooden spoon
- Cotton kitchen string
- Vegetable peeler, optional
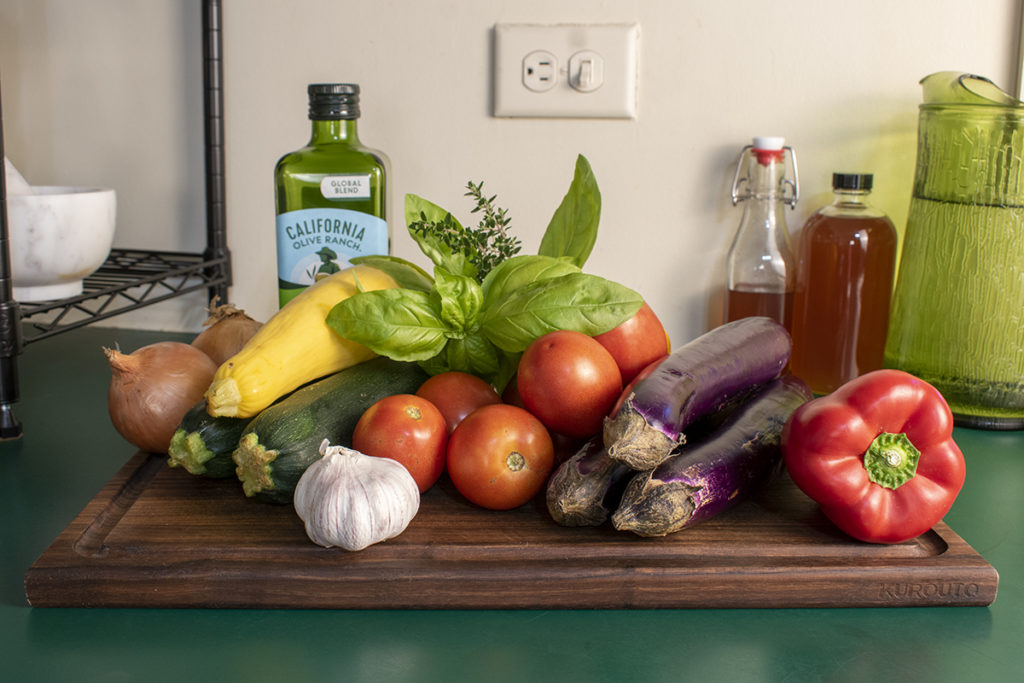
Ingredients:
- 4-6 tbsp of extra virgin olive oil, divided
- 1 medium eggplant, or 2-3 Asian eggplants, cubed into bite-sized pieces, see notes above
- 2 sweet peppers, cored and diced
- 1 bouquet garni consisting of 2-3 large sprigs of basil and 2-3 sprigs of thyme, tie with cotton string
- 1/8 tsp hot pepper flakes
- Two medium onions, chopped
- 6 garlic cloves chopped
- 4 cups of tomatoes, diced
- 3 medium summer squash (zucchini or yellow, 8” to 10”), cubed
- Salt to taste
Directions:
- Heat 3 tablespoons of olive oil over medium heat in the pot. Once the oil is good and hot, add the eggplant and sweet peppers and give them a good stir around the pan. We’re cooking these two vegetables first to give the dish some smoky, browned goodness and because they need the most attention for the biggest flavor payoff.
- You want the veggies and the bottom of the pan to get good and browned, but you don’t want anything to burn. Eggplant has a habit of vacuuming up all the oil in the pan, and that’s okay; this makes for better browning. Only stir enough to keep things from burning.
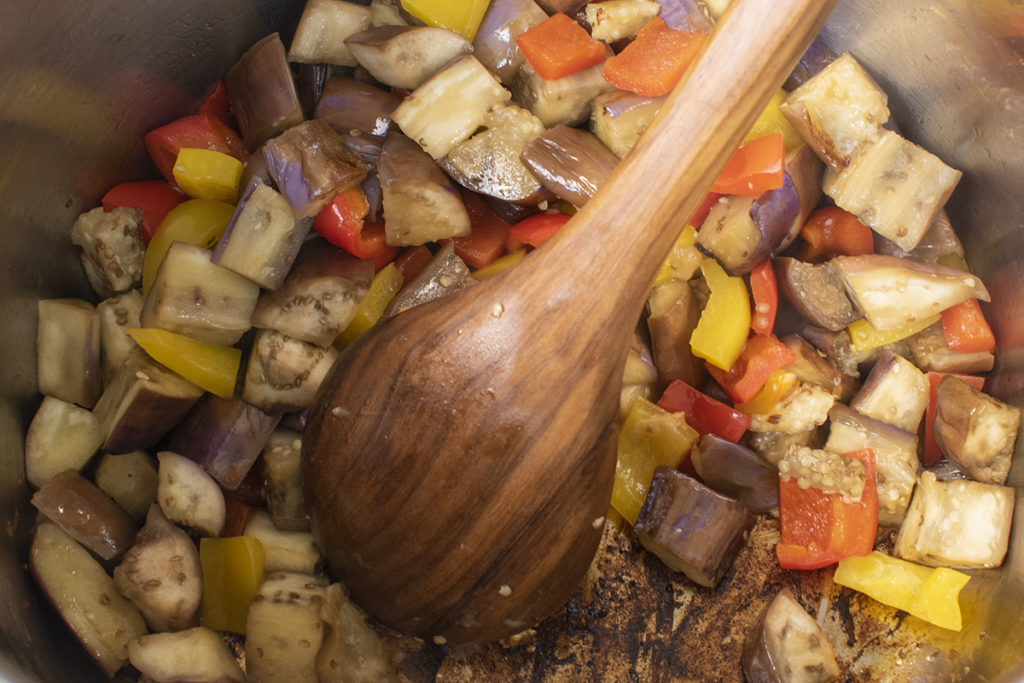
- Once the eggplant is tender and the peppers are browned, remove them to a bowl and set them aside.

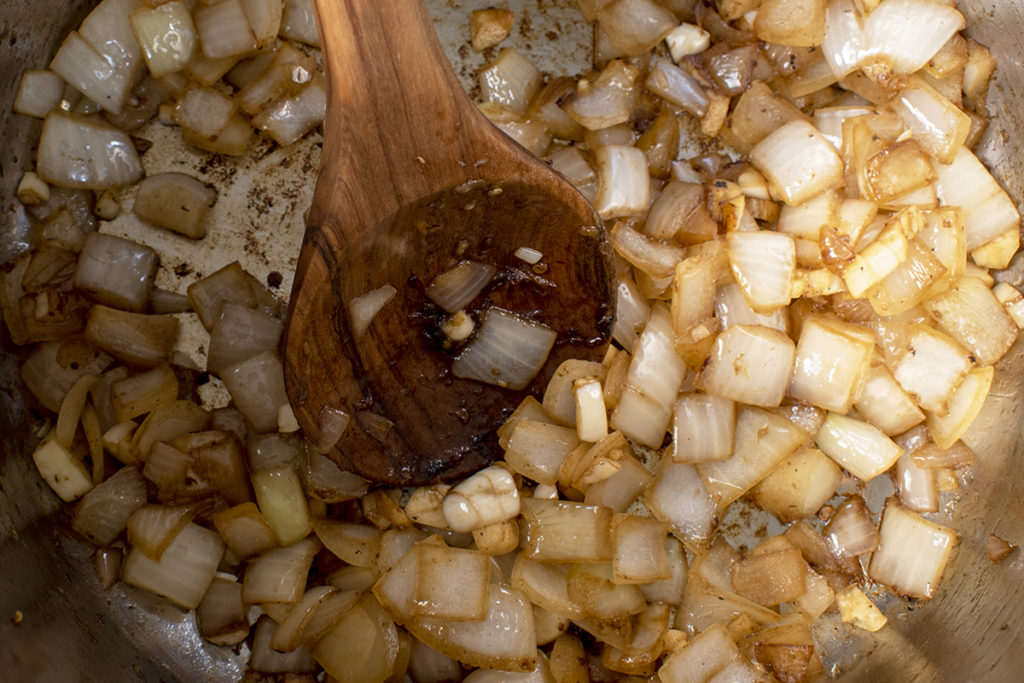
- In the same pot, add another two tablespoons of olive oil and your onions. Cook the onions until they’re translucent and just beginning to brown at the edges.
- Next, you’ll add in the garlic, pepper flakes, and bouquet garni. Stir gently to bruise the herbs and coat everything in oil. Garlic gets tough and sticky if it browns, so keep stirring and adjust your heat if the garlic cooks too hot.
- After several minutes add in your summer squash, again, stirring to make sure everything gets a good coating of oil.
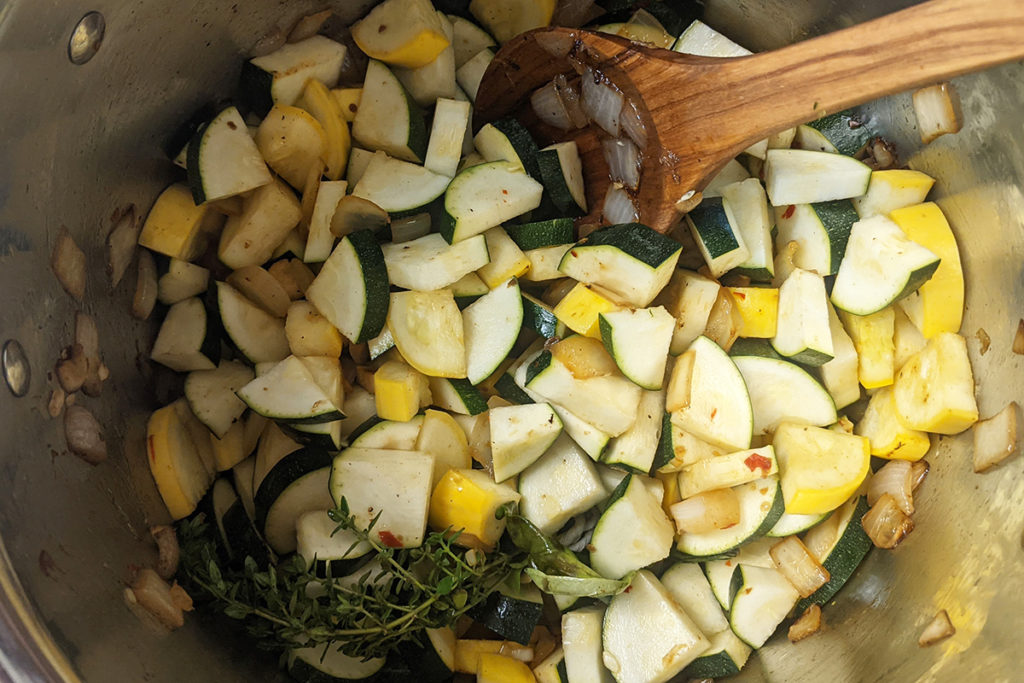
- Cook the mixture for another five minutes, and then stir in your tomatoes.
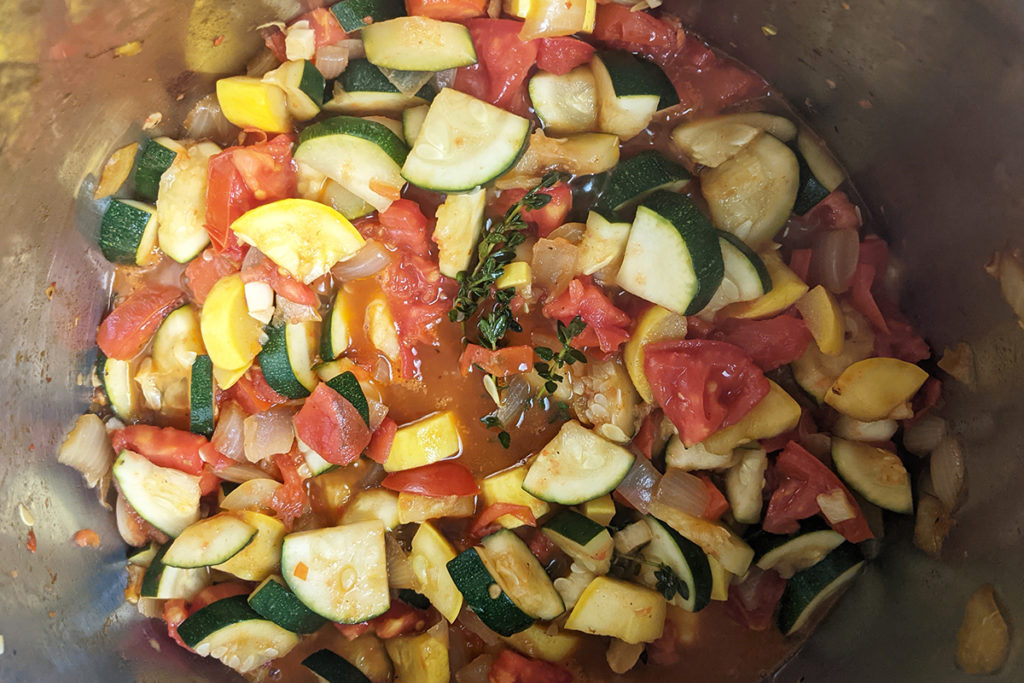
- Let the whole pot cook for ten to fifteen minutes, stirring occasionally to keep things from sticking.
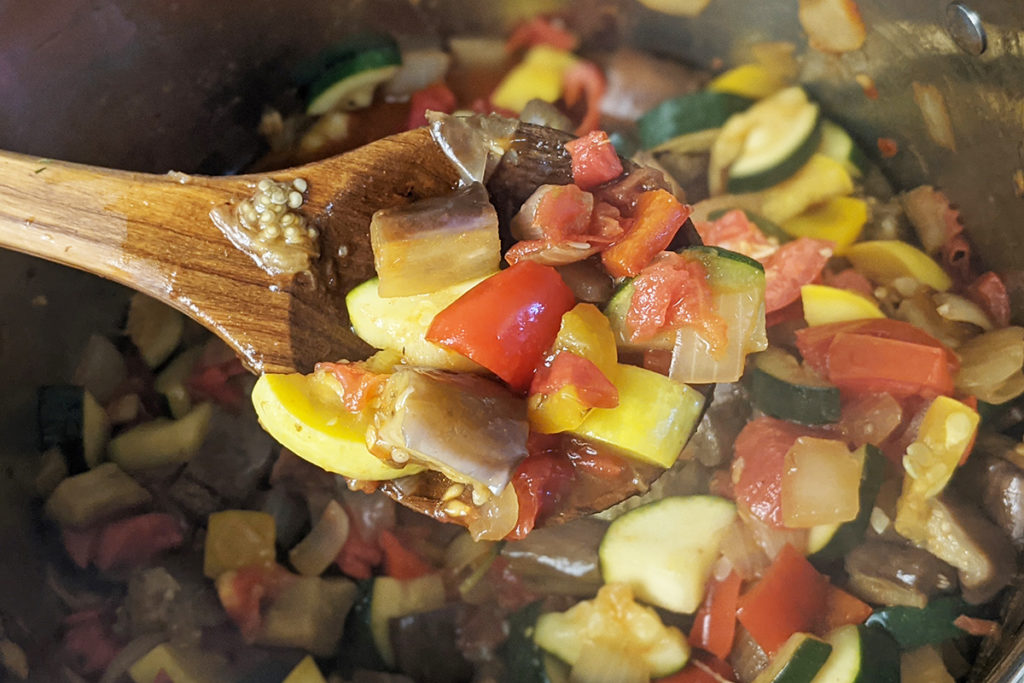
- Stir in the eggplant and peppers and let ratatouille cook for another ten to fifteen minutes.
- After that, remove the bouquet garni, using your wooden spoon to press out the juices against the side of the pot. Salt the mixture to taste and add more oil if it needs it. Now turn off the heat and cover the pot for ten minutes to let everything mix and mingle.
- At this point, give it another gentle stir, and it’s ready to serve. You can also let it cool and put it in the fridge.
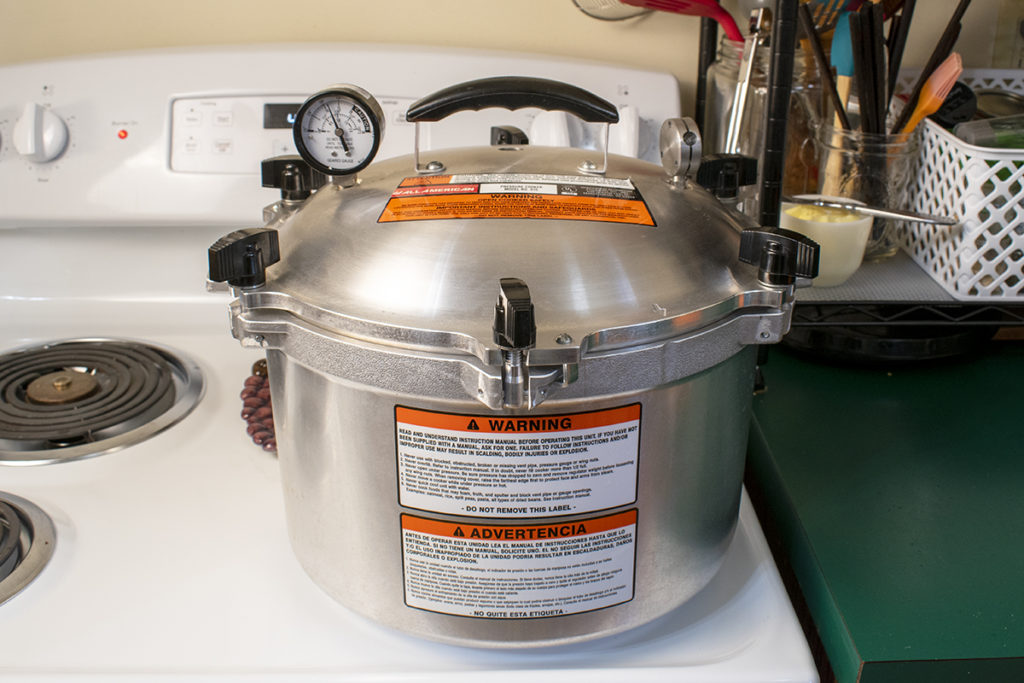
Tools for Canning:
- Pressure canner
- Clean jars with bands and new lids
- Knife
- Clean, damp cloth
- Ladle
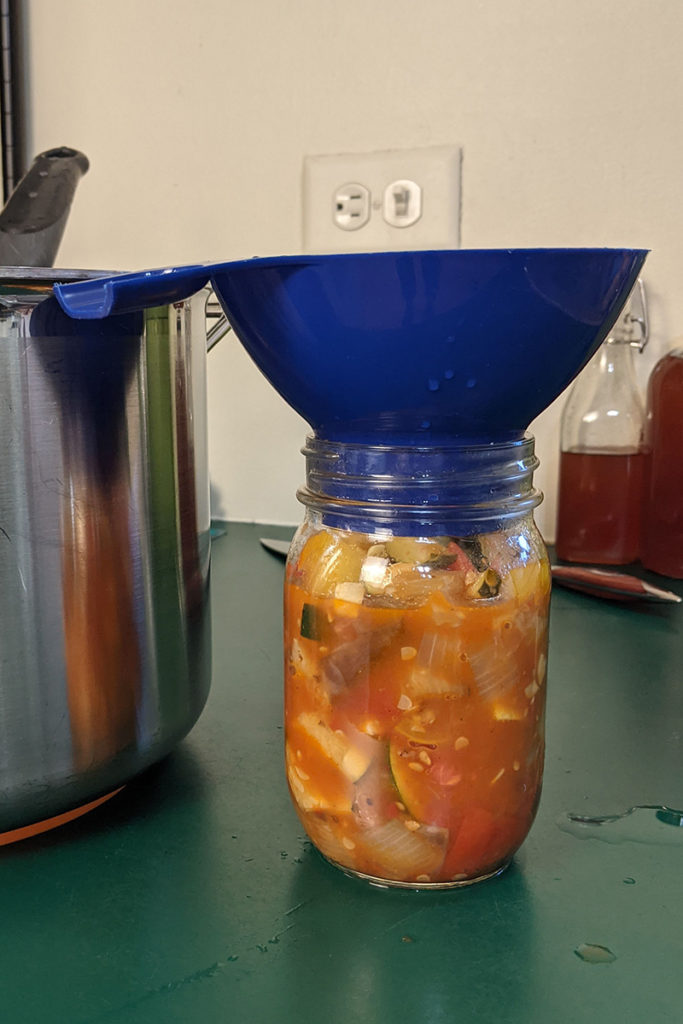
- Canning funnel
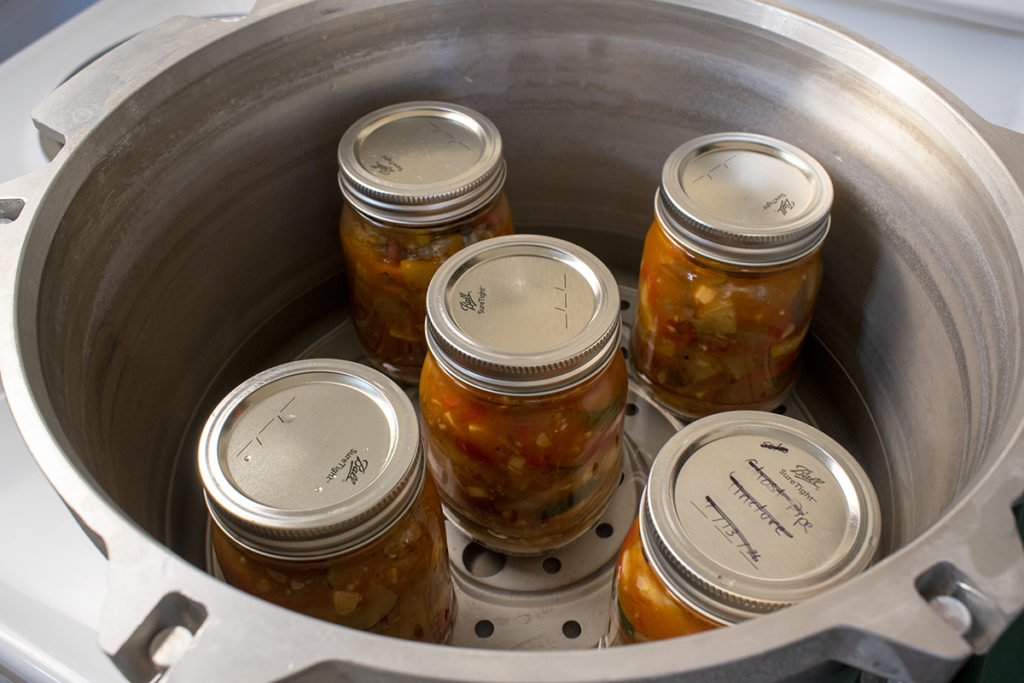
- Pressure Canning
Doubled, the recipe should yield around 10 pint jars.
Start with clean jars, lids and bands.
Use your preferred method for keeping jars hot before canning.
Ladle the hot ratatouille into the jars being sure to leave 1” headspace. Use a knife to run around the inside edge of the jar, and tap the jar on the counter to release any trapped air.
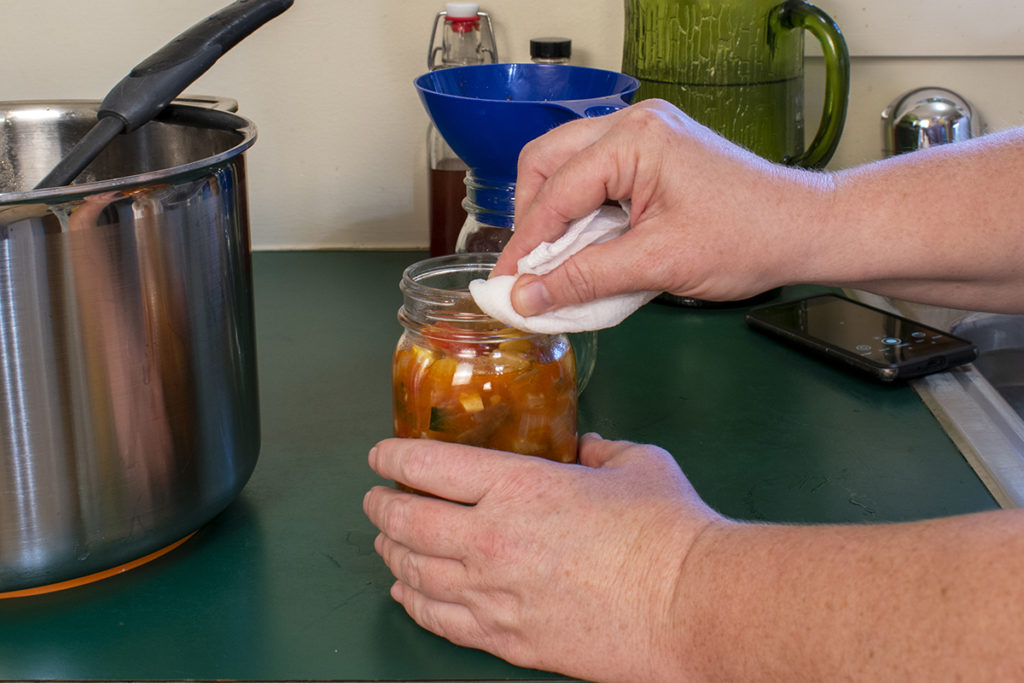
Wipe the rim of the jar with a clean, damp cloth and put on the lid and band.
Process the filled jars in your prepared pressure canner for 75 minutes.
- 10 pounds pressure for a weighted-gauge canner
- 11 pounds pressure for a dial-gauge canner
Begin timing when your canner reaches the listed pressure.
Don’t forget to dance whenever your pressure weight wiggles because it’s the best sound in the canning world. Whenever I hear it I’m immediately transported back to my grandmother’s kitchen as a kiddo.
Depending on where you live, you may need to adjust the pressure for your altitude. Click here for a handy chart with altitude and pressure guidelines.
Pressure canning is safe and easy. It only seems intimidating until you do it.
After processing, allow the pressure to come down to 0, then carefully remove the canner lid per your pressure canners instructions. Let the jars sit untouched for 30 minutes. If your kitchen is especially cool, leave the lid cracked on top of the canner and let the jars cool a little longer to avoid temperature shock.
Using a jar lifter, remove the jars to a clean towel or wire rack on the counter, being careful to keep the jars upright. Cover the jars with a clean towel if there is a breeze or your kitchen is drafty. Let the jars cool for 24 hours before checking the seals.
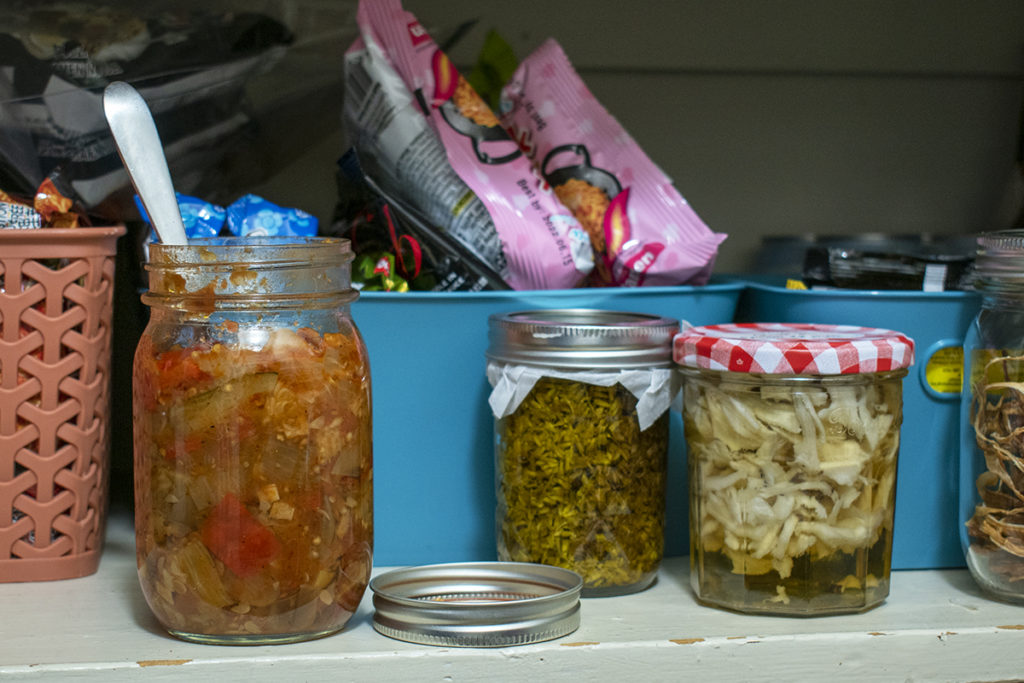
Remove the bands, wipe down the jars if needed (stupid hard water) and label.
Stand back and smugly survey your jars of canned garden goodness. Resist the urge to crack one open immediately. Or don’t.
Ratatouille is a gardener’s best friend. When it comes to enjoying your harvest, getting the most bang for your food-preserving buck and just overall deliciousness, you simply can’t beat it.
Unlike canning single ingredients, such as tomato sauce, or individual vegetables, you’ll end up with a complete meal in a jar and plenty of ways to use it with the same time investment. You can pop the lid off the jar and stand in your pantry eating ratatouille with a spoon. Ask me how I know.
Plus, this recipe uses up lots of different vegetables all in one go.
I hope you try my ratatouille; I think you’ll enjoy it. And if you can it, be sure to save a jar to eat in January while you plan your garden. There’s nothing like enjoying spoonfuls of summertime garden flavor to inspire your next growing season.

Get the famous Rural Sprout newsletter delivered to your inbox.
Join the 50,000+ gardeners who get timely gardening tutorials, tips and tasks delivered direct to their inbox.