

When we think of gardening, leafy greens with vibrant flowers and delectable fruit are usually what come to mind. Most herbaceous plants have the typical care requirements of lots of sunshine, fertile soil, and good drainage to take root and give us that show.
Mushrooms are unlike traditional plants, an oddball distant cousin that doesn’t play by the same rules. They are not bound by photosynthesis for energy; instead, they feast on decay. Rather than rich soil, they prefer fresh and unrotted materials as their growing medium. And while most mushrooms like a bit of sunshine, they will positively thrive in damp shade.
Introducing us to a world beneath our feet, where unseen networks and communications bring the forest to life, mushrooms are a wonderfully weird addition to any permaculture setup.
If you’re looking to dip your toe in fungiculture, wine cap mushrooms are an excellent beginner-friendly mushroom to grow.
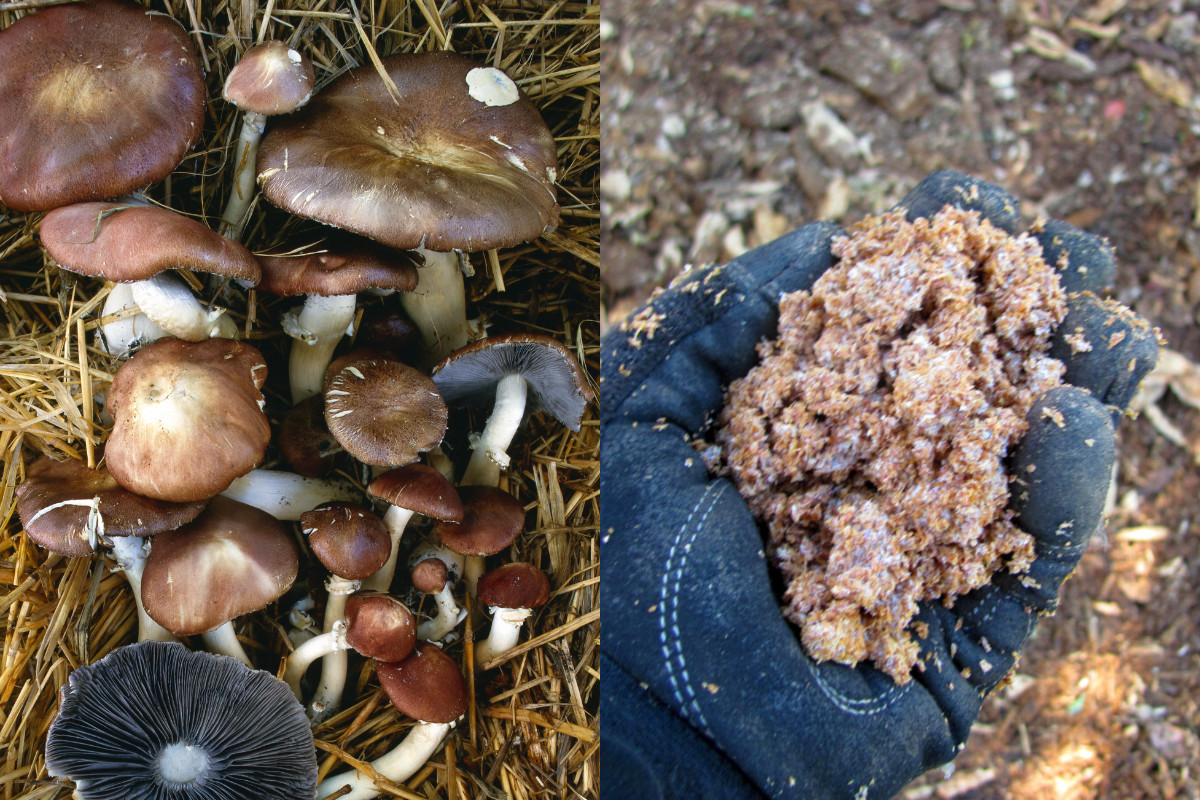
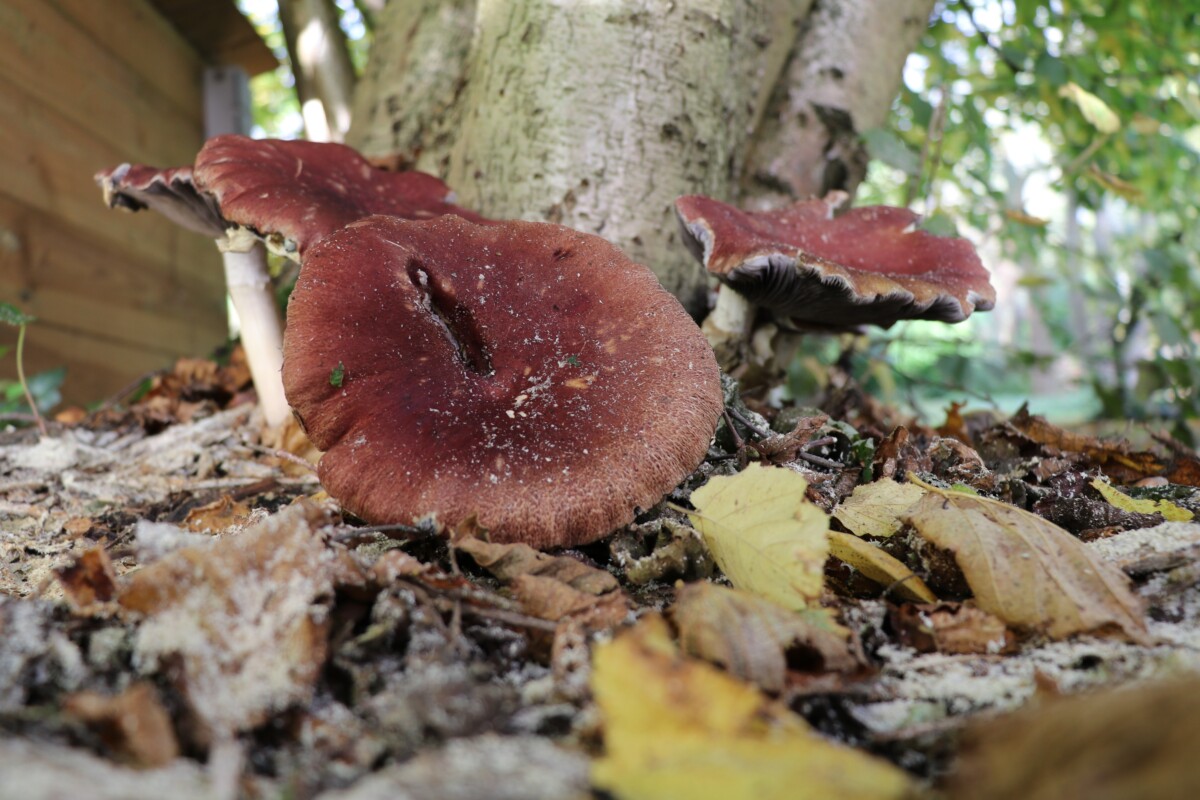
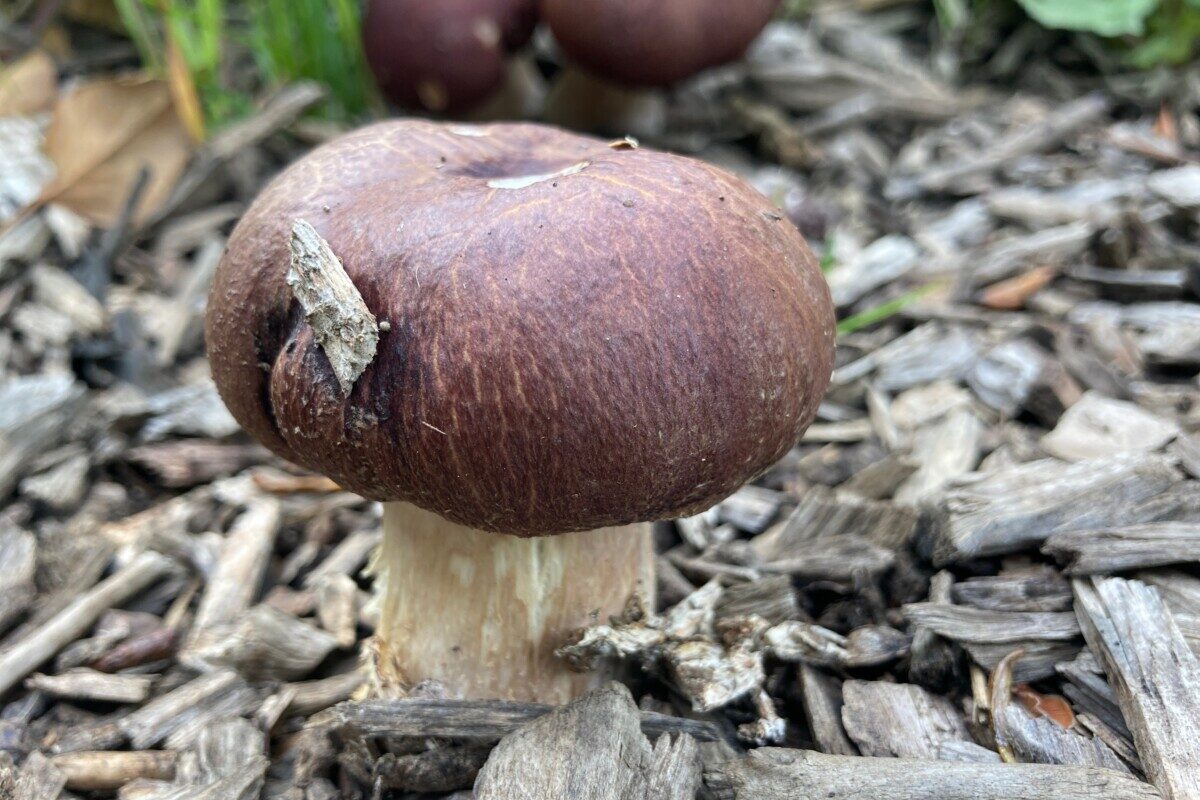
Stropharia rugosoannulata is a distinctive agaric mushroom that’s easy to recognize for its white stalks with a wrinkled ring and reddish-purple to burgundy caps.
So large and prolific are wine caps that they also go by the names garden giant, king stropharia, and – fittingly – Godzilla mushroom.
Wine cap mushrooms naturally grow in the forest understory, an edible ground cover that loves the shade. As such, wine caps are a delicacy you won’t see at your grocery store. Although you might chance upon them at farmers’ markets and specialty shops, the most reliable way to have wine caps is to grow them yourself.
5 Reasons to Grow Wine Cap Mushrooms in Your Garden

1. Wine cap mushrooms are delicious and nutritious
It’s well worth your while to grow wine caps and experience their pleasant and earthy taste, hinting of nuttiness with subtle notes of wine. Texture-wise, immature wine caps are delicate and tender, and mature ones are firm and a little meaty.
A versatile culinary mushroom, the flavor wine caps contribute is complex but not overly imposing. Wine caps take on the flavors of the foods they are cooked in while imparting their own savory richness to the dish. Toss them in stir-fries, sautés, soups, and any recipe that includes mushrooms on the ingredient list.
Wine caps are tasty, and they’re good for you, too. A rich source of fiber, protein, and amino acids, wine cap mushrooms are also chock-full of calcium, potassium, iron, phosphorus, and magnesium. They are a great source of B vitamins – specifically B2, B5, B6, B9, and B12.
2. Wine caps are easy to grow and very hardy
Wine cap mushrooms are native to the temperate regions of the world, most commonly in North America and Europe. They prefer habitats filled with a mix of softwood and hardwood trees, both coniferous and deciduous. As saprophytic fungi, wine caps live on fallen branches, leaf litter, and other organic debris – all things that are easy enough to source around the ol’ homestead.
When winter comes, the mushroom-fruiting bodies die back. But the mycelium – the mass of branching, thread-like filaments – lives on underground. A perennial forever food of a different sort, wine caps will return year after year in hardiness zones 4 through 8.
All wine caps need to flourish is a bit of shade, plenty of moisture, and lots of carbon-rich food.
3. Wine cap is an exceptional performer
There’s good reason wine caps are dubbed Godzilla mushrooms – and it’s meant in the best possible way!
Wine cap mushrooms can grow to gigantic proportions, reaching up to 8 inches tall with caps 12 inches across. One large wine cap mushroom may weigh as much as 3 pounds.
Once the mycelium is established, wine caps will provide a lot of food from summer to fall, even in small beds.
As wanderers, wine caps tend to pop up in other shaded and woodsy parts of the garden to give you a surprise harvest here and there.
4. Wine cap mushrooms enrich the soil
Like all saprotrophs, wine caps are decomposers that feed on dead and decaying organic matter. As they work their way through woody debris, the nutrients bound within are released and returned to the earth.
Along with improved soil fertility, wine caps benefit soil structure as well. Below the surface, the mycelium, with its myriad hair-like structures, pushes through the soil to create channels for air and water. Better porosity means improved moisture retention, drainage, and oxygen flow – and that makes plants happy.
Mushroom mycelium is full of mystery, but we are starting to grasp the vital role it plays in healthy soil ecosystems. The massive underground web of fungal filaments crosses vast distances and is interwoven into the roots of plants. In this way, the mycelium connects individual plants together, allowing them to communicate and transmit water, carbon, nitrogen, and minerals across the entire network.
An example of the complex interconnectedness is “mother trees”, so tall that they receive sunlight above the forest canopy. Flowing with sugary energy, these old-growth trees use the mycorrhizal network to send sugars down to small saplings struggling to grow in deep shade. By sharing its resources, big trees keep the little ones alive.

So we, too, can harness the ancient wisdom of the forest through homegrown mycelium cultivation. And growing wine cap mushrooms can bring us a little closer to the ideal of a self-sustaining and interconnected permaculture garden.
5. Wine cap mushrooms are an earthly delight
In a garden filled with herbaceous plants and woody shrubs and trees, a mound of adorable toadstools will add another layer of dimension to your outdoor space.
The unique burgundy-topped mushrooms are an attractive ground cover, especially eye-catching among the greenery. The rounded purplish-red caps are slightly rough and scaly, with smooth white stalks.
As intriguing fungal sculptures, wine caps break up the usual scheme of color, texture, and form. Hulking but low-growing, they are visually striking and bring a welcome change to the surrounding scene.
Beyond its curious looks, watching wine caps grow is a fascinating thing to see. There’s no better proof that your soil is good and healthy as when wine cap mushrooms arise from the substrate. They offer a splendid visual reminder of the positive effect the mycelium below the surface is having on your garden.
Where to Buy Wine Cap Mushroom Spawn
The first step toward growing your own wine cap mushroom patch is to purchase sawdust spawn.
Typically sold in 2.5 or 5.5-pound weights, these kits contain pasteurized sawdust inoculated with wine cap mycelium. When crumbled over a garden bed, a 5.5-pound kit will cover up to 50 square feet of space.
You can find wine cap mushroom spawn for sale at these online retailers:
Because wine caps return year after year, you’ll only need to purchase the spawn once. When the mycelium has fully colonized the substrate after a growing season or two, you can take a few scoops to transplant it around to other parts of your garden if you wish. Wine caps are vigorous and grow so readily that dropping the butts of the mushroom stem on mulch is often enough to seed a whole new colony.
Once you’ve received your spawn, it’s best to start the grow as soon as possible. In the meantime, keep the mushroom kit in the fridge until it’s time to “plant”.
When to Plant Wine Cap Mushrooms
Wine cap sawdust spawn can be spread anytime during the warm months, from spring to fall.
For fall plantings, wine cap spawn is sown from mid-autumn and up to 3 weeks after the first frost – as long as the ground isn’t yet frozen. Fall-planted wine caps will come to life the following spring, with mushrooms emerging from summer to fall.
Wine caps started in spring are scattered after the last frost date for a same-year harvest. These will usually start fruiting in summer and are ready to be harvested by fall.
Topping up the bed with fresh wood chips after every harvest will keep the wine cap mushroom bed going and going until wintertime.
Where to Plant Wine Cap Mushrooms
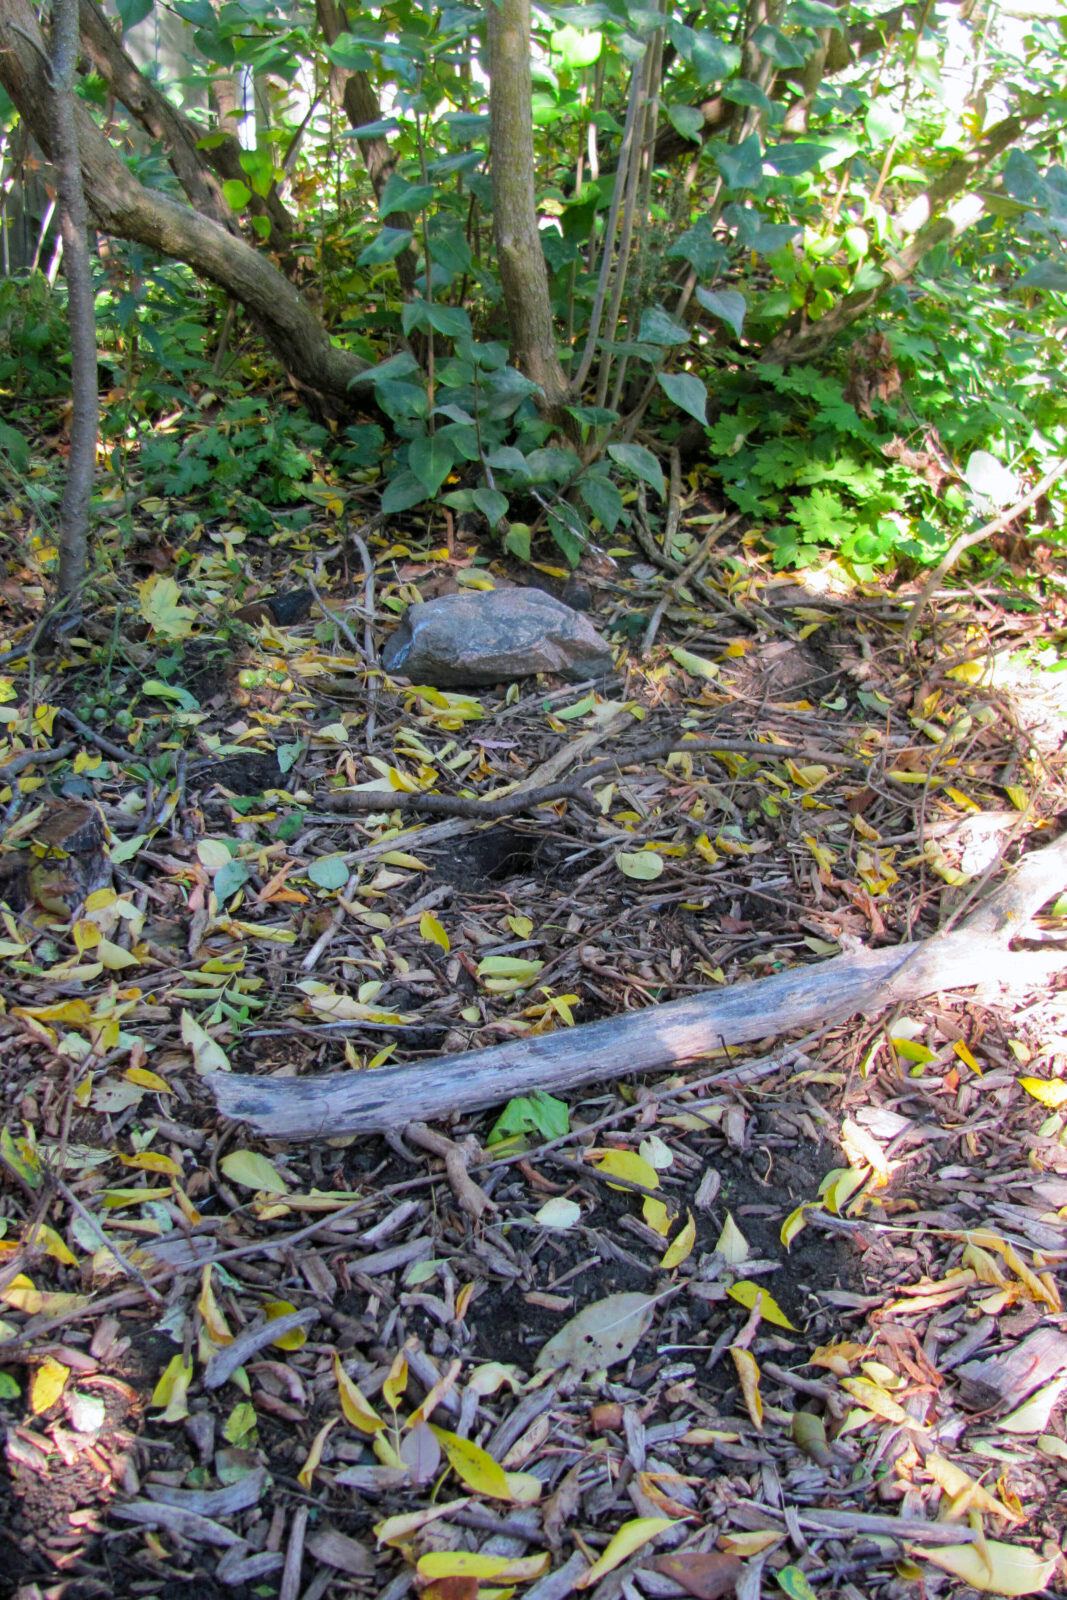
Wine cap mushrooms can be tucked into all sorts of nooks and crannies of the garden. The best spots to pick are places where they will receive rain and a little sunlight. Morning sun with afternoon shade is an ideal location.
Plant them between vegetable rows to take advantage of their soil-enhancing benefits. They grow happily in apple orchards, beneath fruit trees and grape arbors, and under the fluffy umbrage of asparagus.
As an ornamental, wine caps are shade-friendly ground covers that will brighten up the darker parts of the garden. These mushrooms are darling planted along pathways, shady borders, and forest edges.
Growing wine caps in raised beds and containers is possible as well, as long as the mushroom spawn isn’t planted too deeply. Crumble the spawn no more than 2 inches below the substrate so it doesn’t become smothered by the mulch.
Prepping the Wine Cap Bed
Once you’ve picked the perfect spot, your mushroom bed will need to be sod and weed-free. Wine cap spawn can be applied to bare soil or a mulched surface in newly-created beds or established plots.
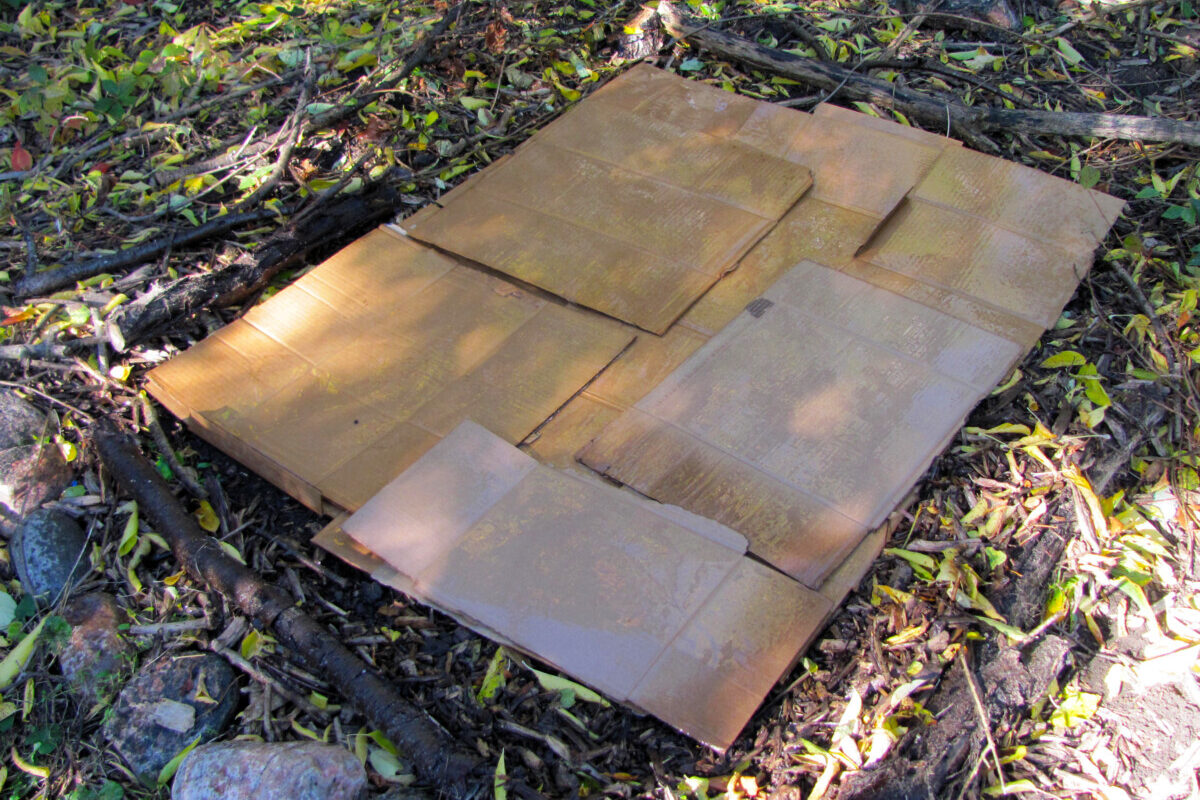
For added weed suppression – or to grow wine caps on the lawn – set down a few layers of cardboard first. Cardboard will smother grass and weedy growth and supply more carbon to fuel the wine caps.
When the cardboard is laid, soak it thoroughly with a hose, making sure all layers are completely wet and fully saturated.
Straw or Wood Chips?
Wood chips are the classic substrate for growing wine cap mushrooms. It’s a full-bodied fungal food that’s rich in carbon and slow to degrade. It can feed your colony for up to 3 years.
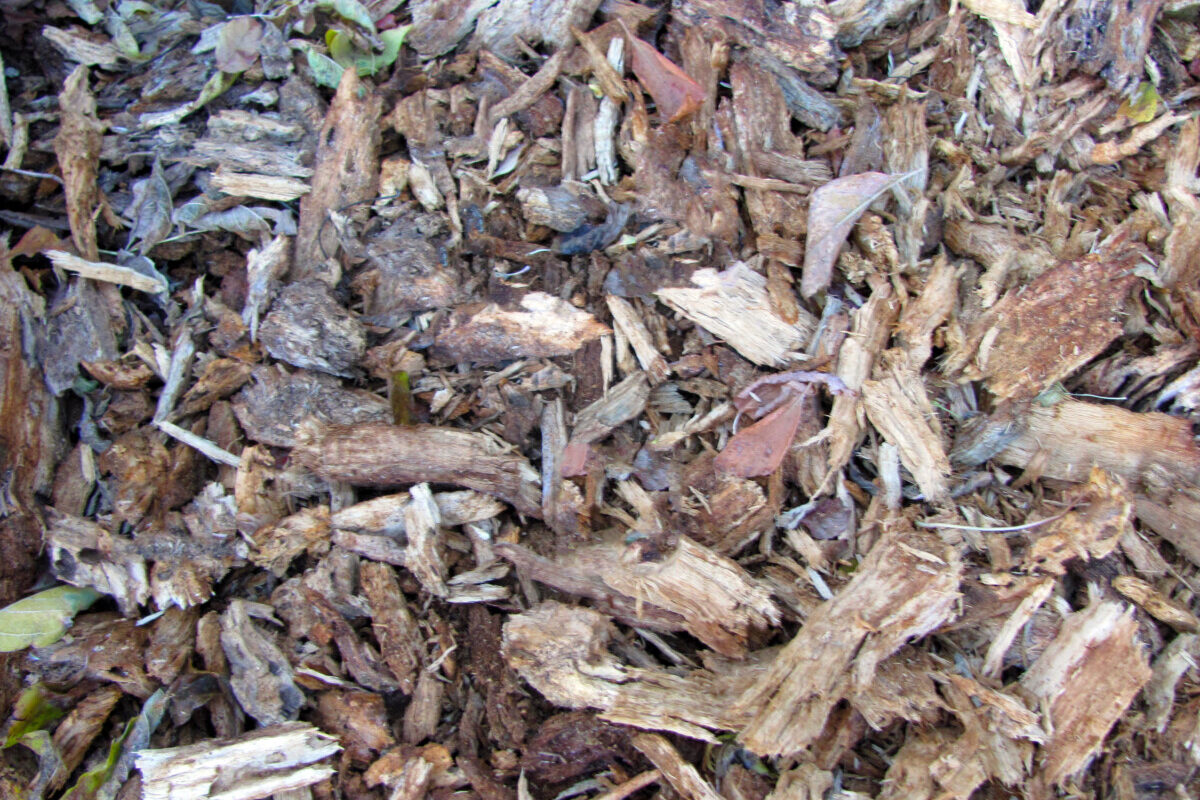
A mixture of softwood and hardwood chips is best – box elder, willow, maple, cottonwood, and oak are great feedstock for wine caps. The wood can be fresh or aged, in chip sizes large and small.
When using wood chips as your wine cap spawn substrate, you’ll need to mulch to an overall depth of 4 inches.
Clean straw (oat or wheat) is another solid choice. It produces mushrooms quicker, but dries out and breaks down just as fast. To help keep moisture in, pre-soak the straw for 2 to 3 days.
Wine cap spawns in straw is mulched to a total depth of 5 to 8 inches, replenishing straw as needed to maintain this depth.
Or, have faster growth along with better moisture retention by using both wood chips and straw in your wine cap beds.
Sandwich Wine Cap Spawn Between Layers of Mulch
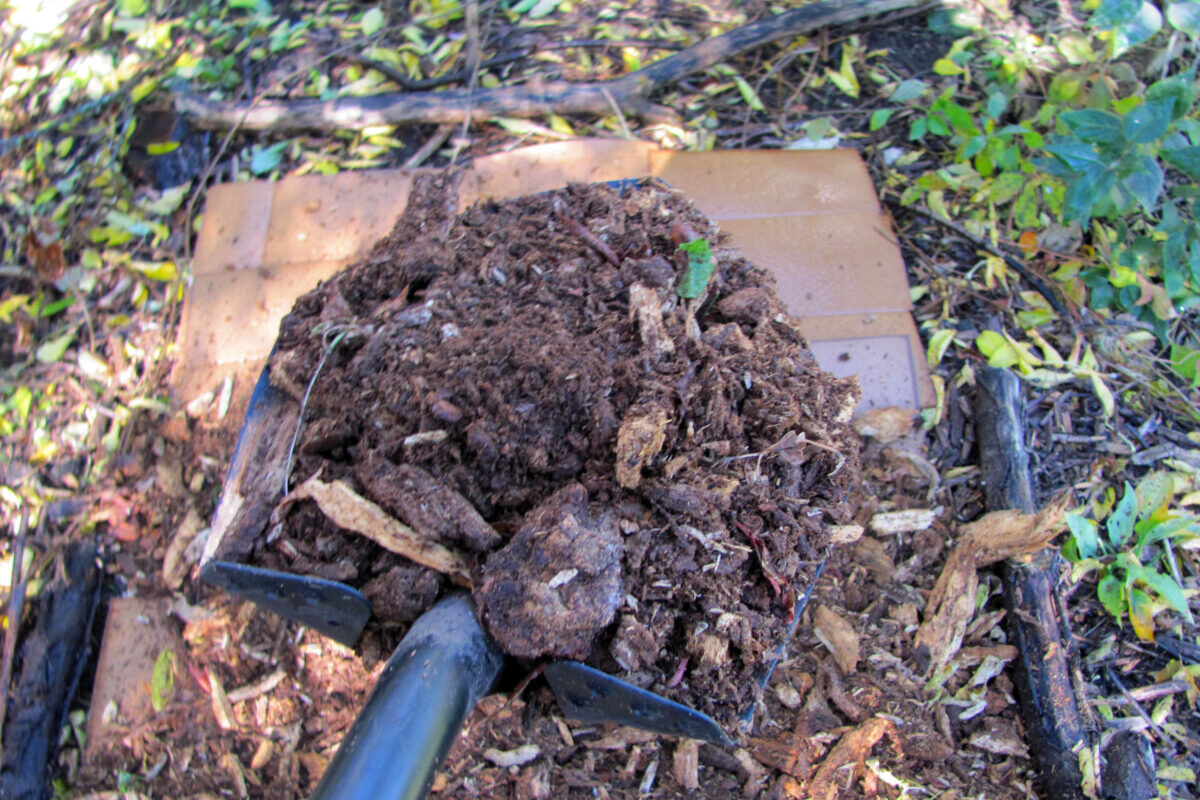
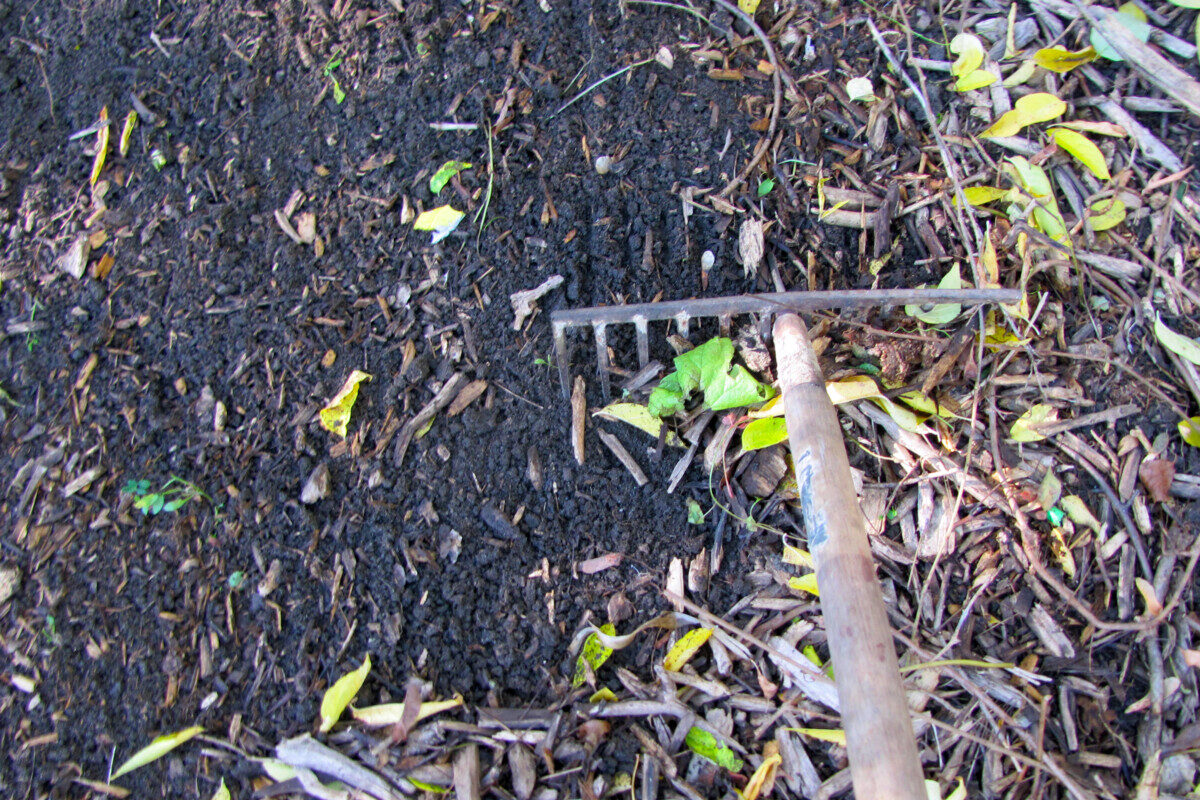
On the wetted cardboard or soil floor, start by doling out a 2-inch layer of wood chips or 4 to 5 inches of straw. Use a rake to distribute it evenly over the bed.
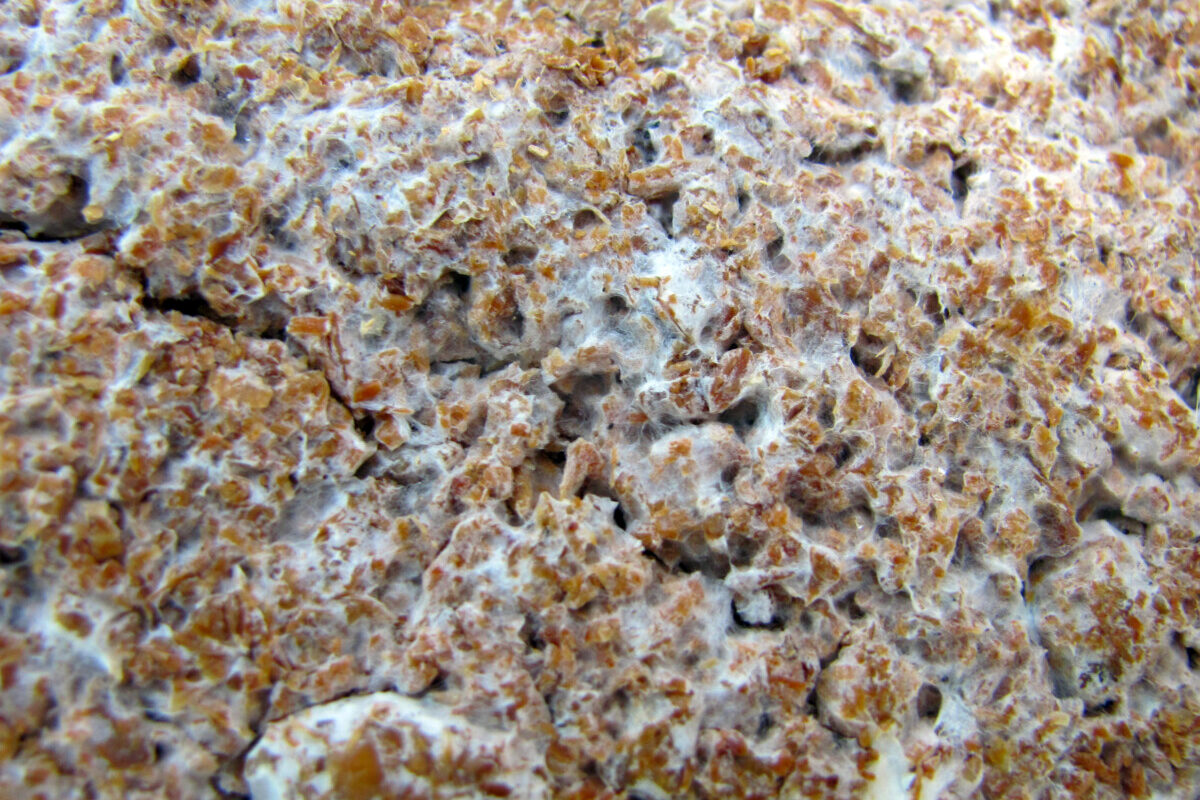
The sawdust spawn comes as a compressed block. It’s quite moist, so it crumbles easily. You’ll see the white mycelium threaded through the sawdust, but don’t worry – breaking it up won’t harm the fungi.
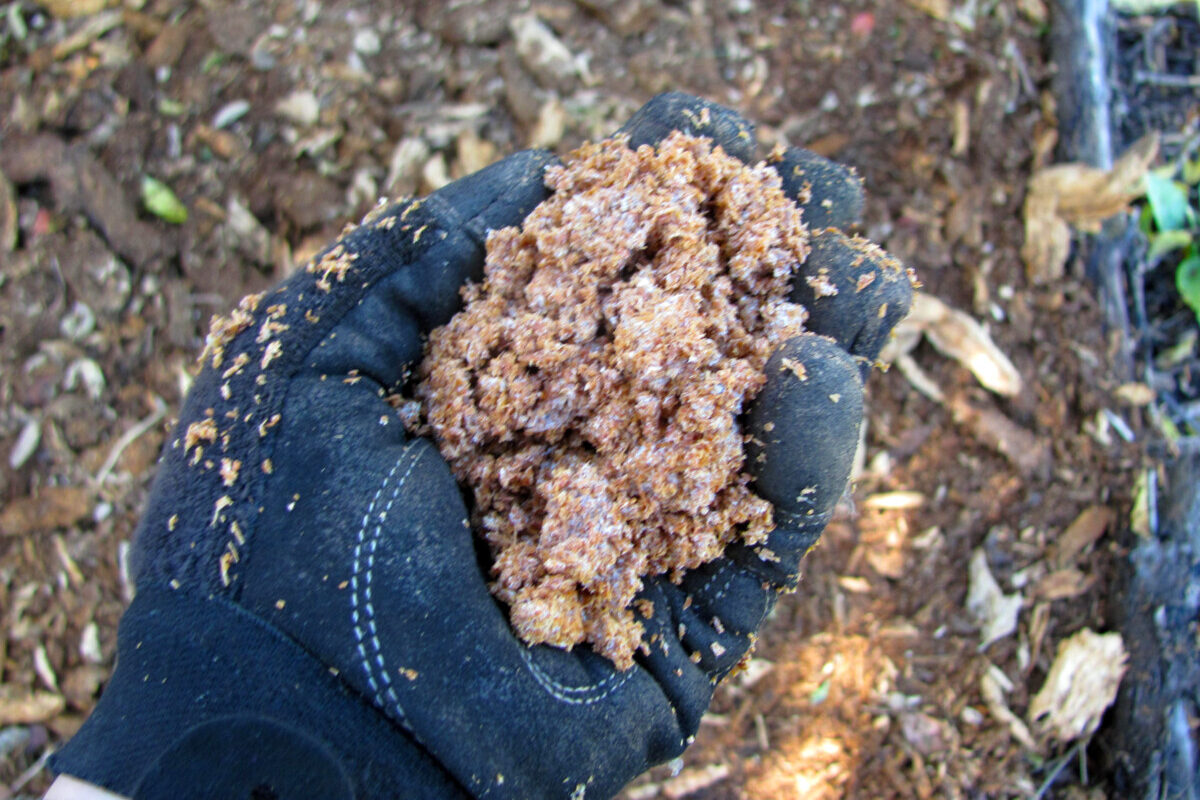
By hand, scatter the crumbled wine cap spawn evenly across the bed.
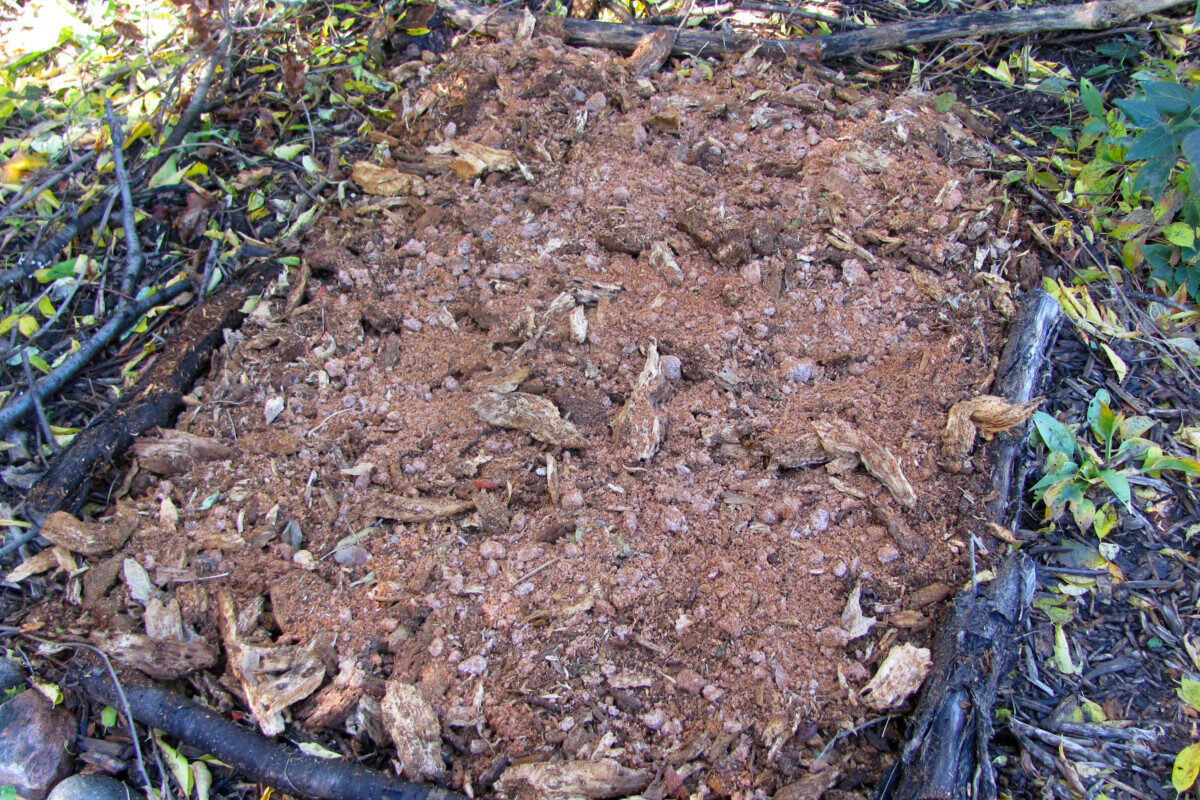
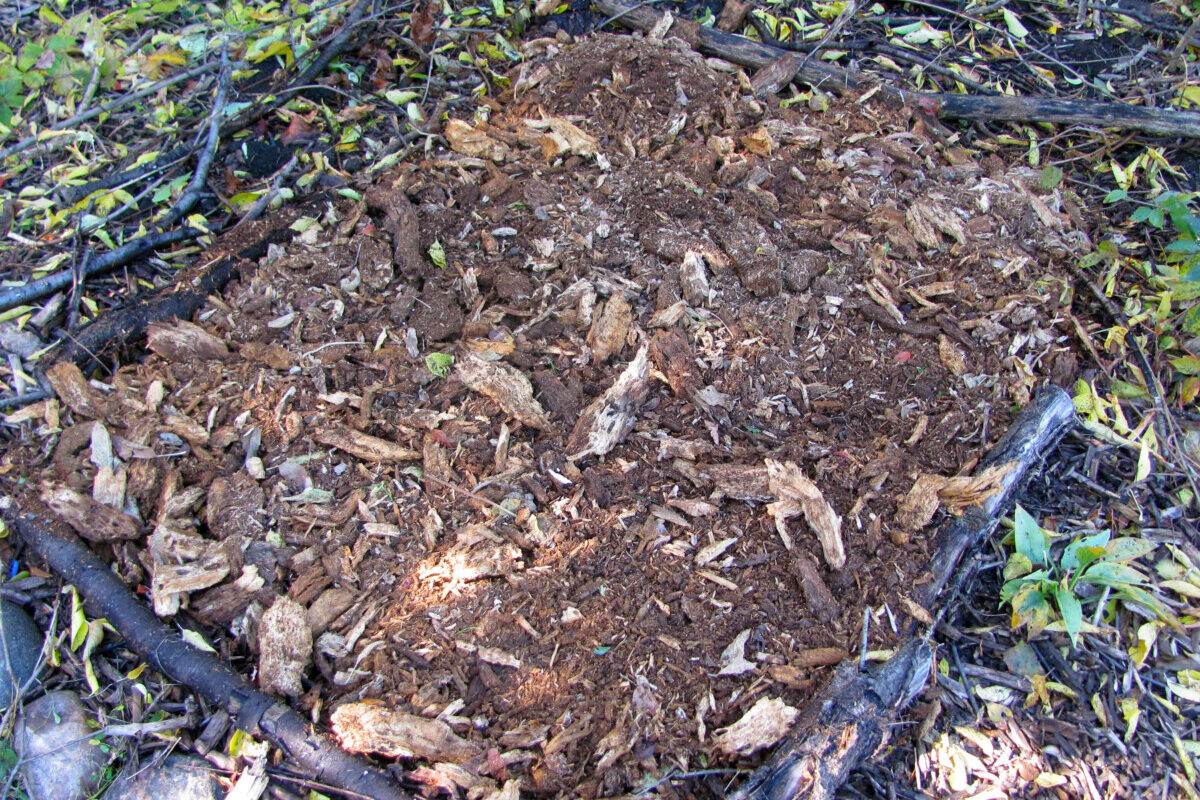
The final layer in our mushroom bed sandwich is 2 inches of wood chips. If you use straw in your mushroom bed, topdressing with wood chips will help keep things moist.
Once you’ve achieved the correct depth, tamp the bed down with your feet to firm it up.

Give the site a deep and thorough watering, and the wine cap bed is complete.
Maintain Moisture
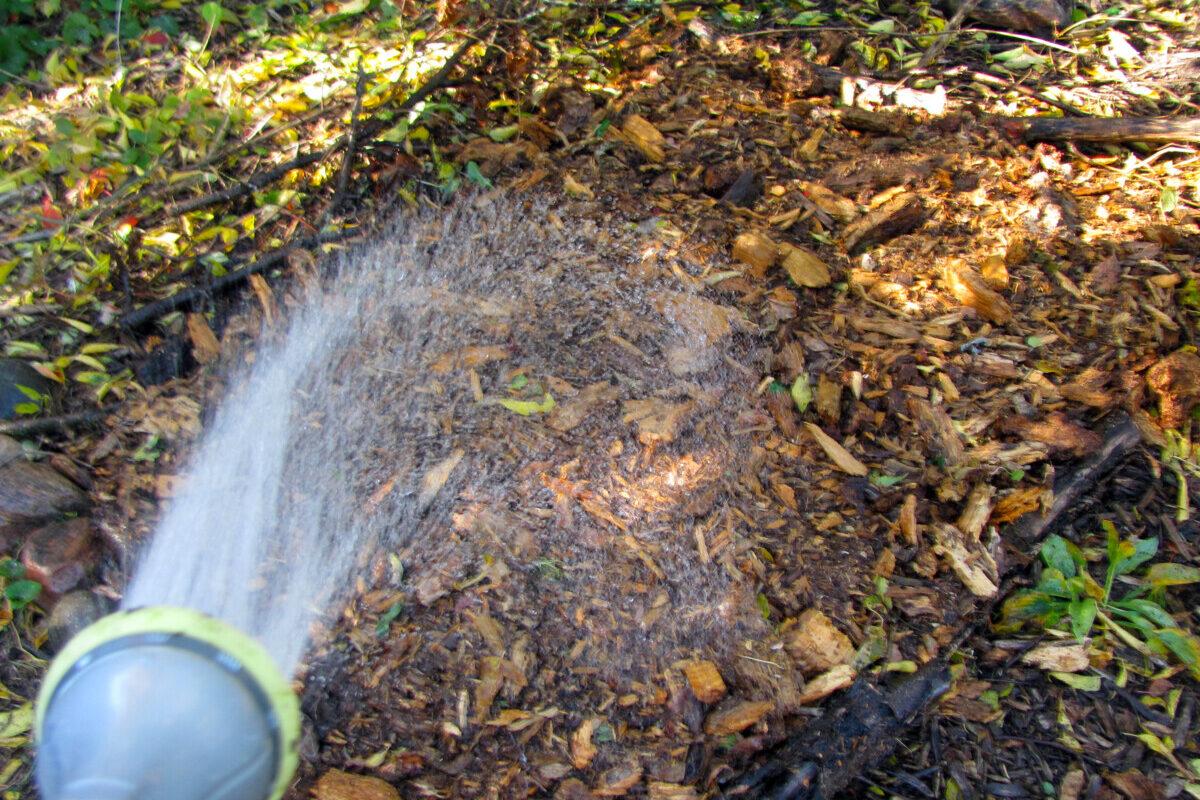
After planting, check in on your wine caps regularly at first. Stick your hand into in the bed; the mulch should be damp but not sopping wet. If it’s on the dry side, spray the bed down with a hose on a gentle setting so as not to disturb the spawn.
Like most crops, wine caps need about an inch of water per week during the warm season. Water them at the same time you would irrigate your vegetable plot, with extra moisture supplied in heat waves.
The trick to growing any type of mushroom is consistent moisture. Wine caps planted in full sun will need more upkeep than those in part shade. Choose your growing site wisely, and your wine cap bed will require only minimal maintenance.
Watch for Signs of Fungal Life
When temperatures reach 50°F to 70°F (10°C to 21°C) for some weeks, you’ll begin to see white, stringy strands of the wine cap mycelium take hold of the substrate.
The mycelium will continue to grow, colonizing the mulch and feeding on the decaying organic matter. With enough energy, the fruiting body will arise from the substrate – the wine cap mushroom, proper.
Wine caps tend to begin fruiting after rain or temperature fluctuations. Once they’re up, the mushrooms grow rapidly. They start out as buttons with tightly closed caps and develop into fully mature garden giants in 10 to 20 days. In the realm of edible gardening, that’s some really fast food!
Wine Cap Mushroom Identification Checklist
Wine caps are a unique-looking and distinctive mushroom with no deadly lookalikes. Still, it’s smart to do a visual check before you go ahead and eat them up.
- Cap color – Wine cap mushrooms have reddish brown to deep wine red caps, fading to a tan hue as the mushroom matures.
- Stem – The stalk is at least a half-inch thick and white when fresh. Wine caps have a distinct wrinkled ring located at the upper portion of the stem, a remnant of the veil breaking when the cap fully opens. This “skirt” is rough to the touch with a shape similar to cogwheels.
- Gills – On the underside of the cap, the gills are initially pale gray or purplish gray and mature to dark purple or nearly black.
- Spore print – When in doubt, remove the mushroom stem and place the cap, and gills down on a white sheet of paper. Cover with a bowl and leave it overnight. The spore dust from wine caps will be a deep purple-black color.
Harvesting and Storing Wine Cap Mushrooms
Wine cap mushrooms can be harvested and enjoyed as immature buttons to humongous burgundy-topped toadstools. Young wine caps have a milder flavor and tender texture, while mature ones are far more robust and meaty.
Older wine caps, past their prime, will dull to a tan color and become too tough and fibrous to eat. Leave these ones back in the bed. They will decompose eventually and replenish the soil with nutrients, so all is not lost.
To harvest, pull the mushrooms from the soil with your hands or use a sharp knife to slice the stems off at ground level.
Place your wine cap haul in a paper bag in the fridge, and they will keep for about a week. They can be preserved over the longer term by freezing, dehydrating, or canning them.
Wine Cap Mushroom Recipes
Wine caps are delectable simply sautéed in olive oil and butter and seasoned with salt and pepper. The mushroom pairs well with wine, lemon juice, fennel, nutmeg, and ramps. It goes great in pasta, polenta, quinoa, and rice. Use wine caps as an alternative to portobellos or really any recipe that calls for mushrooms. It’s also an excellent substitute for meat.
For recipes specifically tailored to the flavor profile of wine cap mushrooms, here are some good ones to try:
- Spiced Wine Caps
- Pickled Wine Cap Mushrooms
- Wine Cap Mushroom Soup
- Wine Caps Stuffed with White Bean & Sun-Dried Tomato
- Corn Fettuccine with Wine Cap, Lemon Verbena & Bucheron
- Braised Wine Cap and Asparagus
- Wine Cap Mushroom Risotto
- Grilled Wine Cap Mushrooms in Herb Sauce
- Wine Cap and Ginger Hash Brown Cakes

Get the famous Rural Sprout newsletter delivered to your inbox.
Join the 50,000+ gardeners who get timely gardening tutorials, tips and tasks delivered direct to their inbox.