

When it comes to time in the kitchen, I’m lazy.
Don’t get me wrong; I love to cook. I adore cooking; I kind of rock at the big fancy dinner parties even. But I like the whole sitting around with family and friends and eating it part the most.
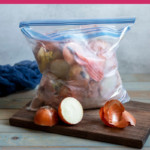
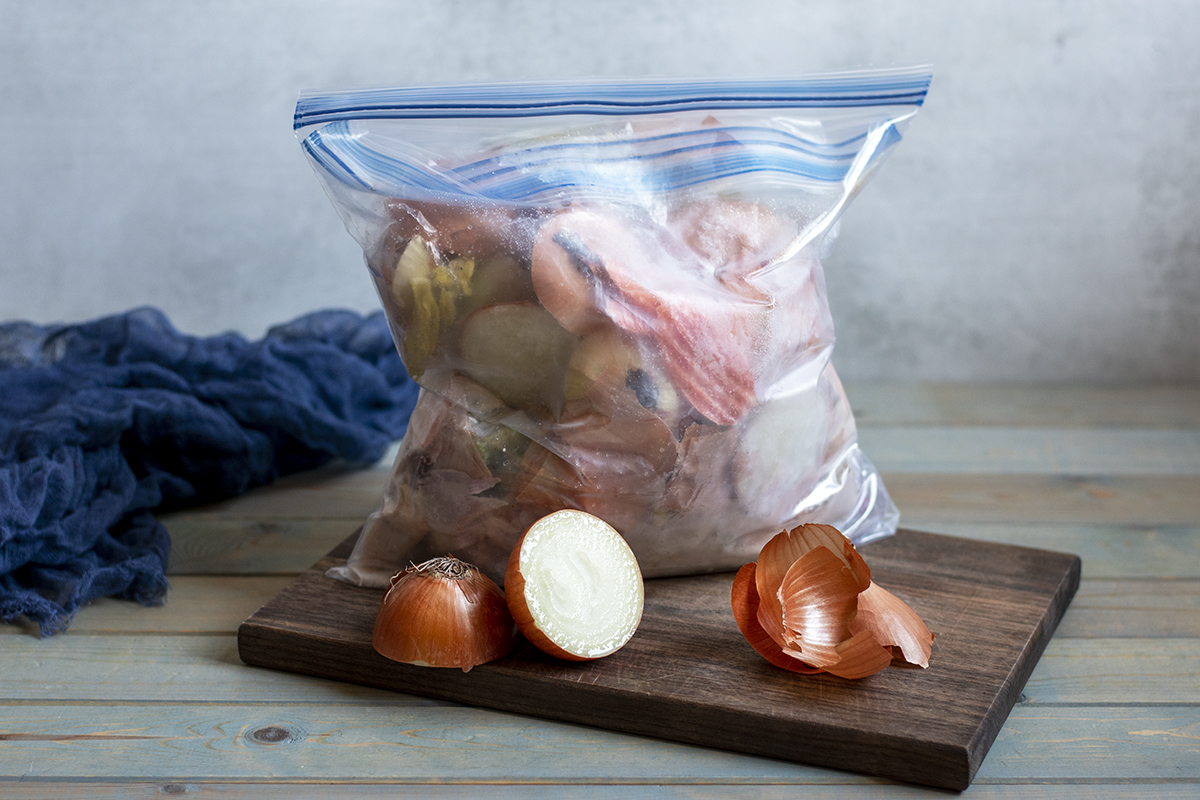
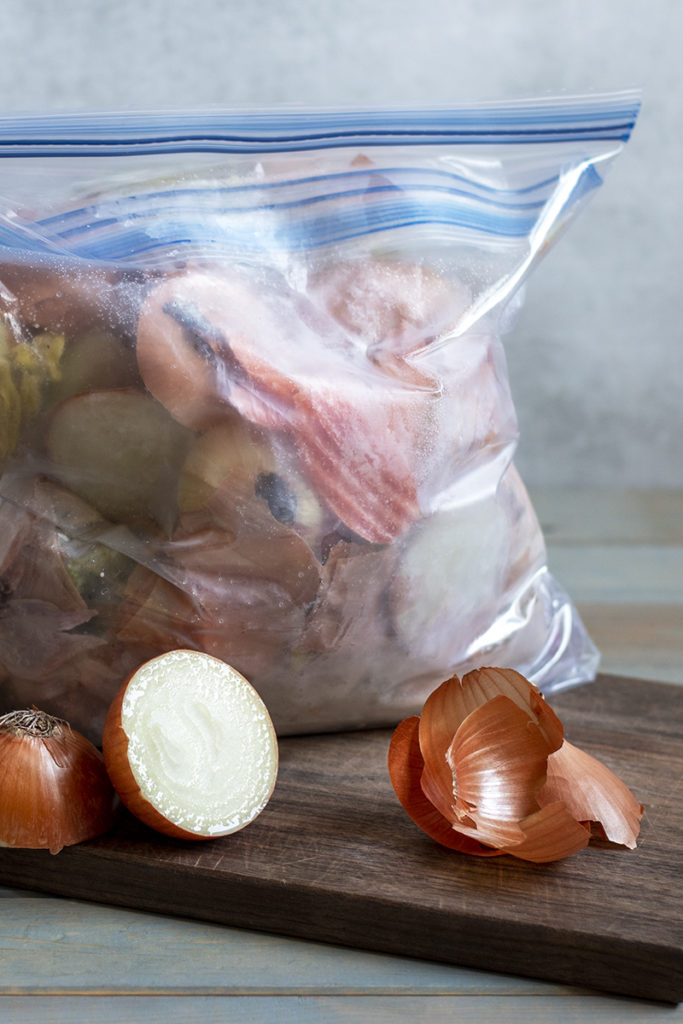
This means I will take a good cooking short cut any day. And that’s where this ugly bag that hangs out in my freezer comes in.
I know, there’s just no way to pretty this thing up for the internet. But like so many things, this beat-up plastic bag is much more than the sum of its parts.
And what are those parts, Tracey?
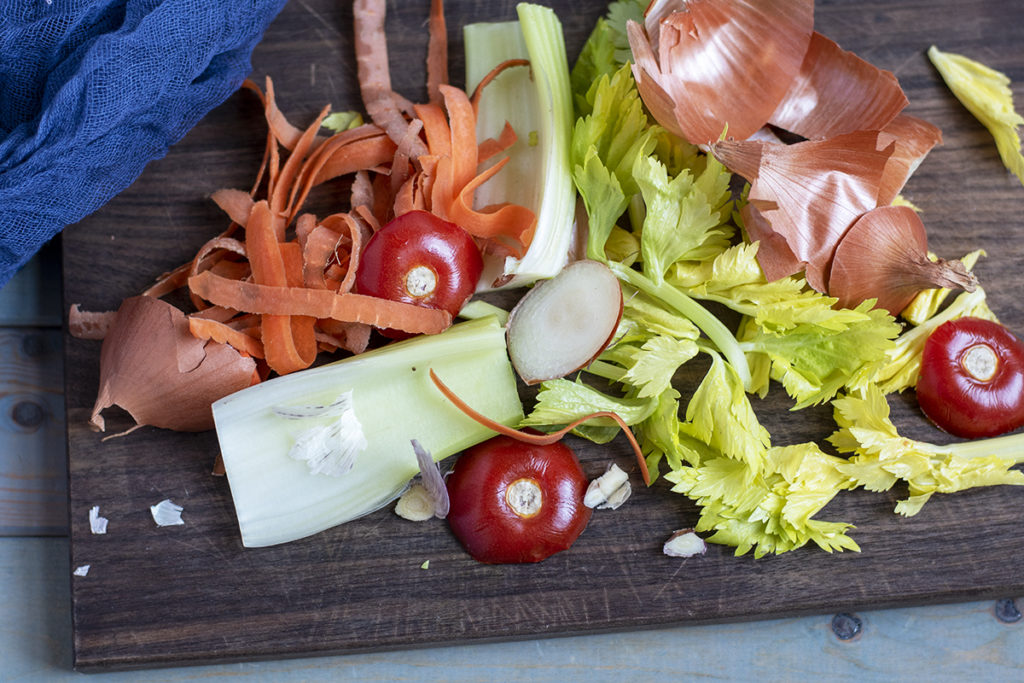
- Onion skins
- The tiny ends of garlic cloves
- Celery bottoms and tops
- Carrot peels
- Mushrooms stems
- Wilted scallion tops
- The sliced off tops of tomatoes
- The bones from the chicken thighs we had for dinner last week
- The rind from that block of parmesan I finished last month
You get the idea – kitchen scraps.
You see, every month, this little bag gets full to bursting, which is when I grab it from the freezer and dump it into a stockpot with some cold water, salt and herbs. About an hour later, I have the most delicious, homemade golden stock or bone broth.
Only without all of the chopping or making a special trip to pick up ingredients.
My humble bag of kitchen scraps has kept me in healthy, homemade broth for ages.
I don’t remember when I started this habit. Still, it’s become such a part of my cooking routine if I grab an onion from the pantry or the celery from the crisper drawer, I automatically pull this bag out of the freezer too.
How to Start Your Own Ugly Broth Bag
You’ll need two one-gallon zip-top plastic freezer storage bags. You want to double bag this thing for a good reason.
When I first started this funky little habit, I trusted that my zip-top plastic bag would be airtight. After making myself a large iced tea filled with onion-scented ice cubes, I found out that this was not so.
Since then, I store my ugly broth bag within its own bag and always double-check the seals before tossing the whole thing back into the freezer.
I also keep an open jar full of coffee grounds in my freezer to absorb funky orders. I change the grounds once a month. I know baking soda does the same thing, but you have to go to the store and buy baking soda. Whereas I drink coffee every single day, so I have an endless supply of free odor-absorbing grounds.
For my fellow coffee-lovers, here are 28 other ways to put those spent beans to good use, other than just pitching them. Oh, and I also took a good look at why you shouldn’t be dumping coffee grounds into your garden or compost.
You can also give one of those fancy silicone bags a try. It’s easy to clean and will stand up to years of use.
Start Adding Scraps
Once you’ve got your bag set up, it’s as simple as pulling it out of the freezer whenever you’re chopping veggies. This is often easier said than done. Out of sight, out of mind, right?
Try putting post-it notes on your refrigerator crisper drawer or in your onion bin, reminding you to grab your bag from the freezer. You can ditch the notes once it becomes a habit.
Keep your bag handy whenever you’re chopping up veggies, and save the bits you aren’t using for cooking. Most of the scrappy parts taste just as good as the part of the veggie you’re actually using.
“Oops, I forgot about those carrots.”
Making broth is also a great way to use up vegetables that have been hanging out in the crisper drawer or on the counter for a little longer than you planned. Just toss them into your ugly broth bag and back in the freezer. Please don’t put rotten vegetables in your ugly broth bag, but those forgotten carrots that are a tad on the limp side will still make great stock.
We all get busy, and sometimes food gets forgotten. Using produce that isn’t all that pretty is much better than throwing it away.
Here’s a list of vegetables and their scrappy bits that work the best for broth:
Onions
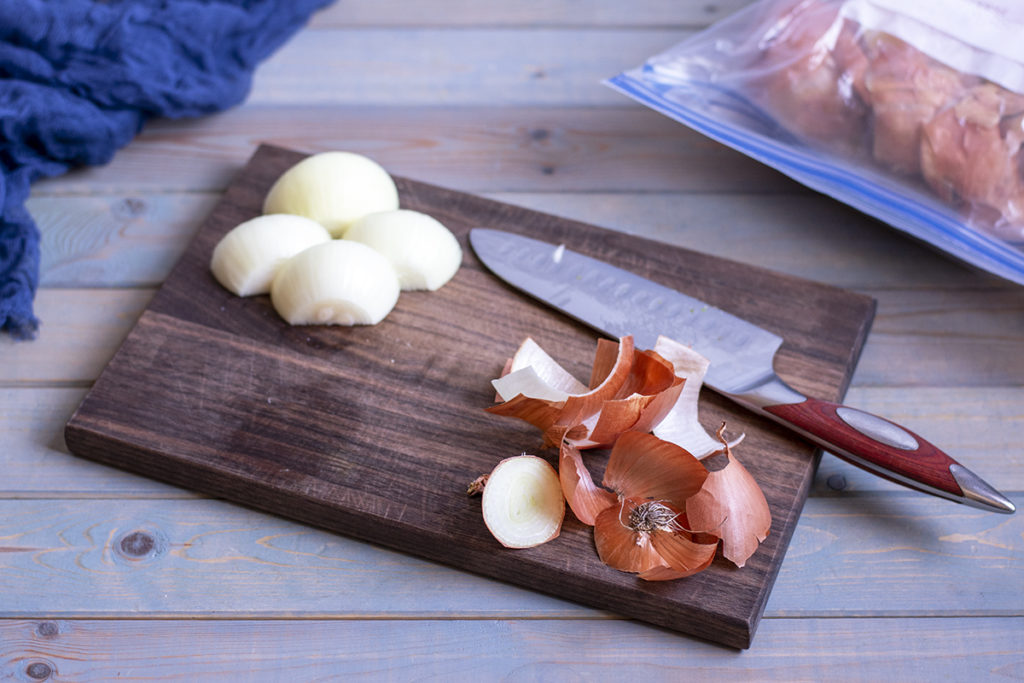
The tops and bottoms are great, as well as the skins. I always save the onion skins for stock, as it gives it a lovely golden color. If the very outermost skin is dirty, I’ll toss that into the compost bin. You can also use shallots in the same way.
Celery
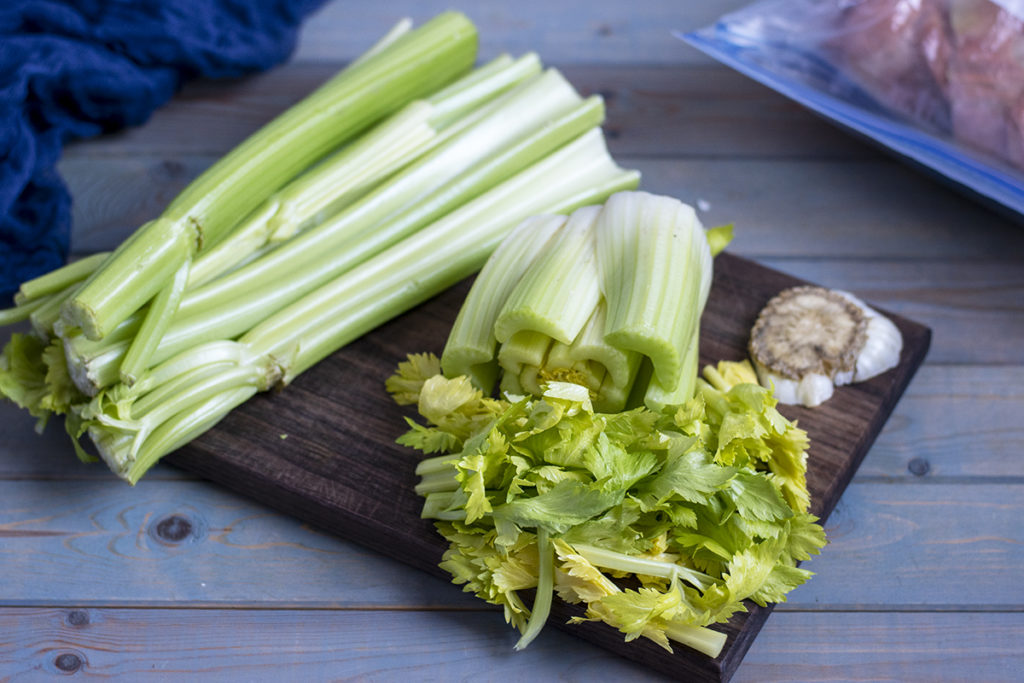
Most folks chop the tops of their celery off and pitch it. The pale inner leaves and stalks have such a lovely flavor, so they go into the ugly broth bag too. You can use the bottoms too, but I prefer to cut the very bottom of the celery stalk off so that the stubs are in pieces instead of one large chunk. (Or you can save the bottom and grow some more celery.)
Carrots

Sometimes the top part of the carrot (where the fronds grow) can be bitter. That part of the carrot usually gets put in the compost bin. However, the tip of the carrot and the peel are both parts that I put in my broth. When I’m peeling carrots, sometimes I’ll peel a little extra just for the broth bag.
These three veggies tend to make up the majority of my bag each month, as that’s what I use most when cooking. Lucky for us, those are the best veggies for broth too. Here are some other things that I toss in my ugly broth bag as well.
Mushrooms
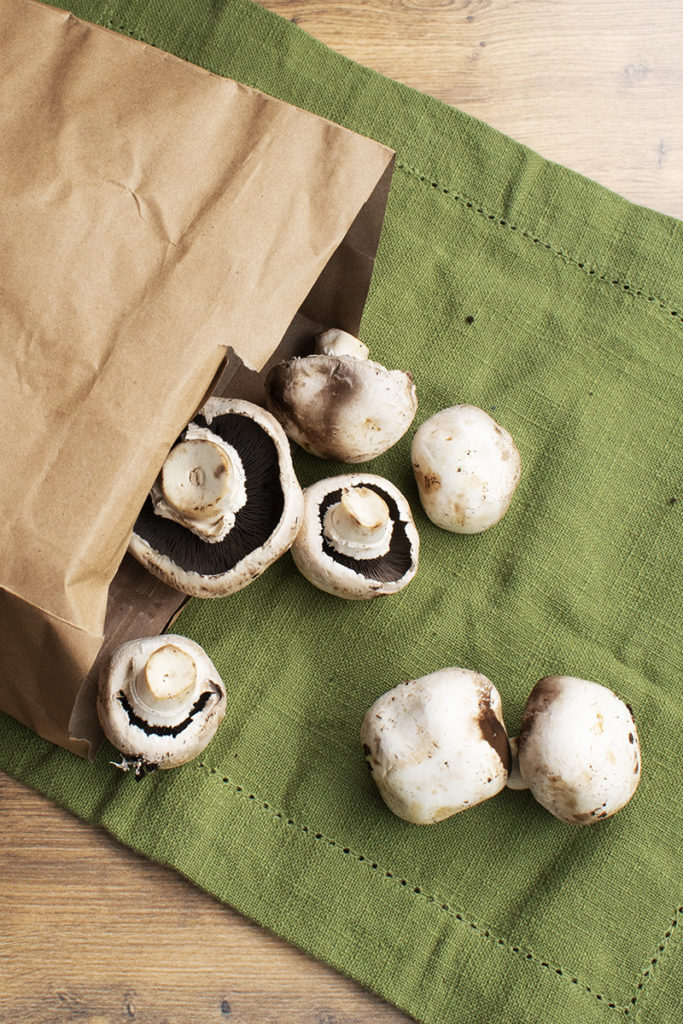
I love mushrooms and will eat every piece, so they rarely make it into the bag. (Especially since I know the secret to everlasting mushrooms.) But depending on the recipe I’m using, or if the stems look beat up, I will save the stems of mushrooms for the freezer. Mushrooms give the vegetable stock a wonderful, robust flavor.
Leeks
Often the very tops or outermost leaves of leeks look less than appealing. They can still impart their wonderful flavor to broth, though. I’ll add the bottom root that I’ve chopped off too.
You can use scallions in the same way.
Tomatoes
Tomatoes definitely go in the ugly broth bag, but try not to add too many of the seeds as they can impart a bitter flavor to the broth.
Other Vegetables
Most other vegetables I’ve experimented with either make your broth cloudy or bitter, so stick to these veggies. We eat enough vegetables in our house that even with this rather short list, I can make stock at least once a month.
Bones
I always toss chicken bones in the bag. I don’t often purchase boneless chicken, so there’s usually plenty of bones for broth. I’ve even got the kids trained to leave the bones on the plate when they clear the table. Give the bones a good whack to crack them open, and then toss them in the freezer bag with everything else.
I try not to let the bag get too full of cracked chicken bones; I don’t want to poke holes in my bags.
Hard Cheese Rinds
And finally, I purchase blocks of parmesan cheese rather than the abomination that comes in a green jar. When we get down to the hard rind that goes in the freezer bag, Pecorino Romano works great too, but I wouldn’t suggest using other cheeses.
Broth Making Day
Whenever I notice the bag is full, it’s time to make broth.
I dump the entire contents of the bag into a stockpot and add enough water to cover the frozen vegetables plus an inch or two.
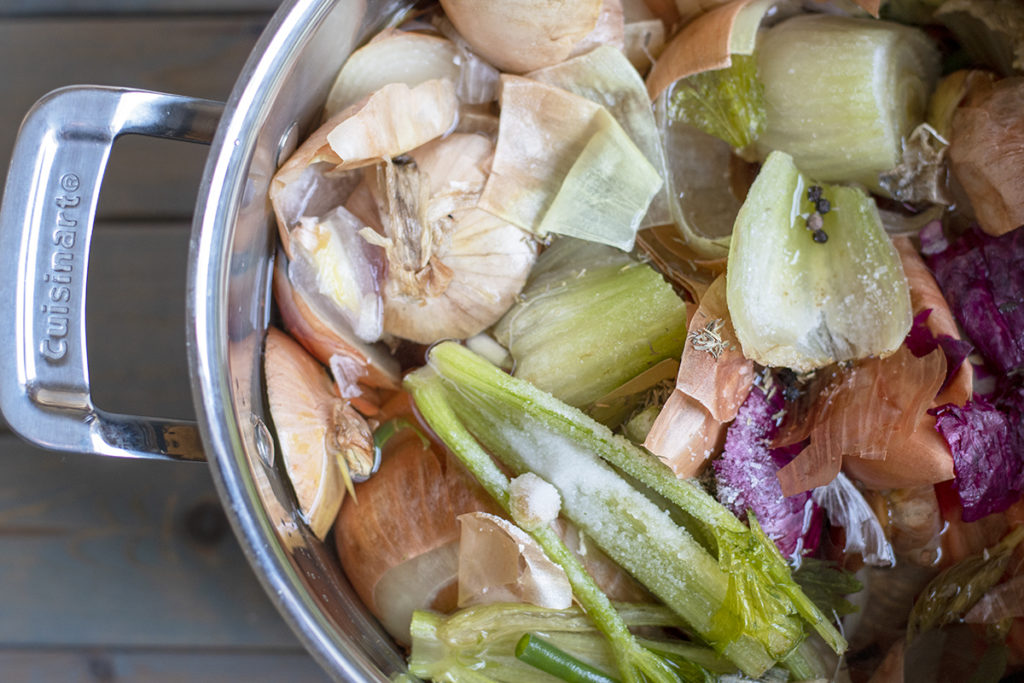
Then I toss in the following:
- Several sprigs of fresh thyme if I have it, or a teaspoon of dried thyme if I don’t
- 1 bay leaf
- ½ a teaspoon of whole peppercorns
- 1 tablespoon of salt
Turn the heat on medium-high and wait. Once the broth starts to bubble, I turn the heat down and let it simmer happily for half an hour. You don’t want to let it go much further than 40 minutes as some of the vegetables contain a compound called terpenoids, which can turn bitter if heated for too long.
At this point, the house starts to smell amazing. I taste the broth and add more salt if needed before straining it through a cheesecloth-lined colander into a bowl. You don’t have to use the cheesecloth, but I would suggest it if you want a lovely clear broth.
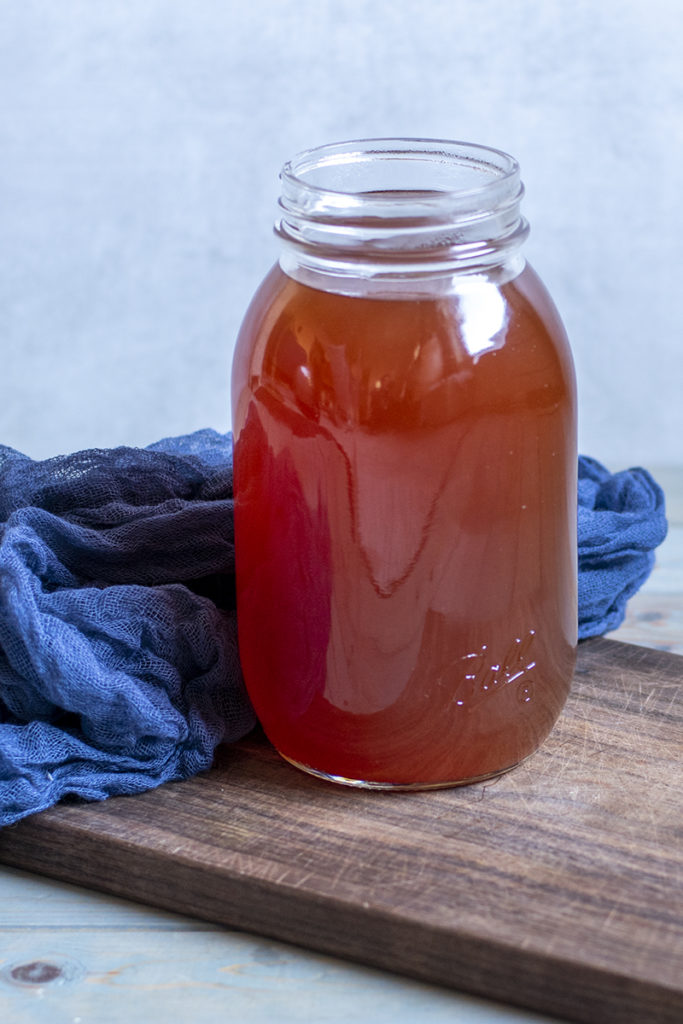
Use your broth right away or freeze it and use it as needed. Don’t forget to label your broth with the date and whether it’s vegetable stock or chicken broth.
Save Your Bag and Reuse It
Please don’t start with a new bag each time. Unless there are holes in the bag, you can simply seal the two empty bags and toss them in the freezer to be filled up again for the next batch. I’ve been using my current ugly broth bags for about two years now.
I hope you share this fun kitchen tip with your friends and family. And I hope you enjoy having healthy homemade stock at hand without all the fuss, all through the year.

Get the famous Rural Sprout newsletter delivered to your inbox.
Join the 50,000+ gardeners who get timely gardening tutorials, tips and tasks delivered direct to their inbox.