

What is a tropical fruit salad without pineapple? These tart fruits are loved by many in grocery stores, but few think about growing them in their own gardens. Luckily, it is easier than you think.
Pineapples are one of the few plants that can be successfully regrown from scraps of a grocery store fruit.
Requiring only a few minutes of your time, you can turn the part of the fruit you’d throw away regardless into an interesting feature.
And, if you’re lucky, they may even produce new fruits after a few years in the right conditions.
Even if the plant does not produce fruit, it can still make a lovely houseplant with its pointed, structural leaves.
Growing it from scraps is a fun experiment and rewarding exercise for a part of the plant that would otherwise end up on your compost heap.
Will It Produce Fruit?
Before they begin the endeavor, the first question on most gardener’s minds is – will it produce fruit?
That’s understandable, considering we like to grow fruiting plants for their fruit. But it’s not a straightforward yes or no answer.
Like other fruit-producing plants, pineapples need the right conditions to grow successfully. Rooting isn’t difficult, but keeping the plant alive and happy for the two or three years it takes to mature and produce fruit can be tricky.
The main consideration in fruit production is light. Pineapples need plenty of direct sunlight to fruit – around 6 hours a day. They are happy with some protection in hot summer weather, but will not produce fruit in low light.
When growing indoors, these conditions are hard to come by. To ensure your plant produces fruit, make sure you invest in grow lights, or rather leave the pineapple in a pot outdoors where it can soak up the rays.
Temperature is also a factor. As tropical plants, pineapples cannot handle cold temperatures and will stop growing if they dip below 60F. Keep temperatures moderate – between 65F and 85F throughout the year – for the best results.
Along with standard watering practices (avoiding underwatering or overwatering), feeding is also important if you’re hoping for fruit. A balanced slow-release fertilizer applied once per season in spring and summer should be enough to sustain your plant throughout the year in the right soil.
With those conditions met, it is certainly possible to grow a new, fruiting pineapple plant from a grocery store pineapple. Here’s how to do it.
Choose The Right Pineapple
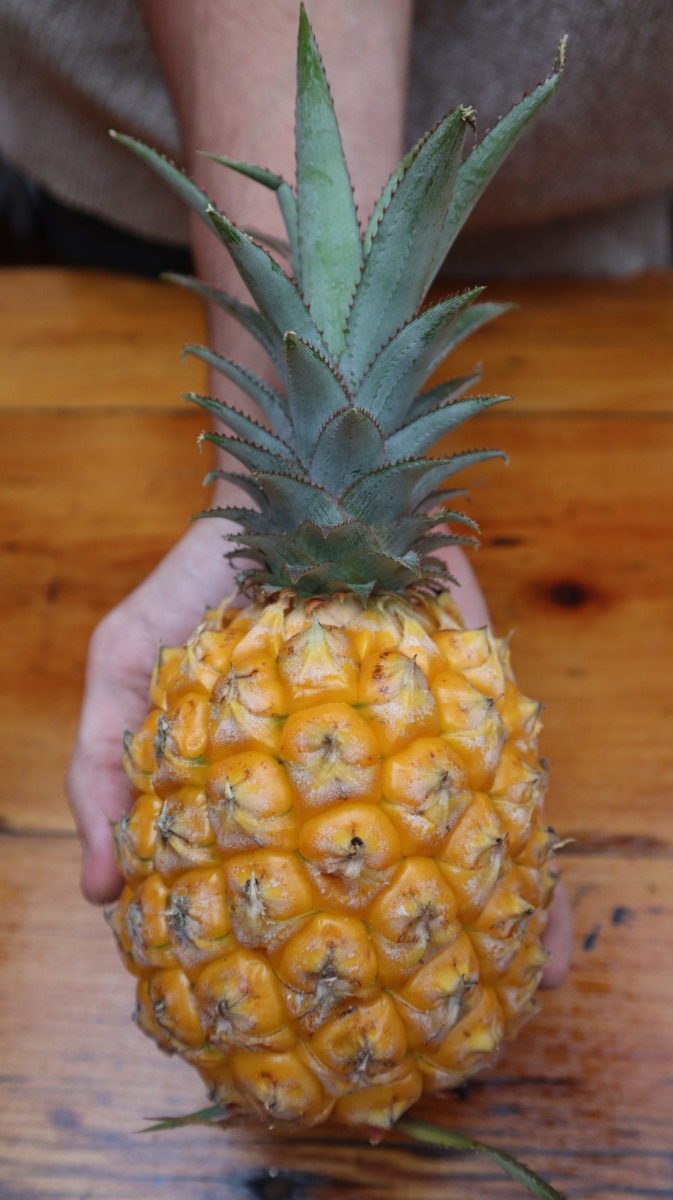
To grow a pineapple from scraps, you need to start with a grocery store pineapple. For the best chances of success, that shouldn’t be just any pineapple. You will need to choose one that is sufficiently ripe, but not too ripe, and has lush green leaves.
Look for pineapples with a touch of yellow to the skin. If the fruit has turned orange, it is likely too ripe, and green fruits are not ripe enough.
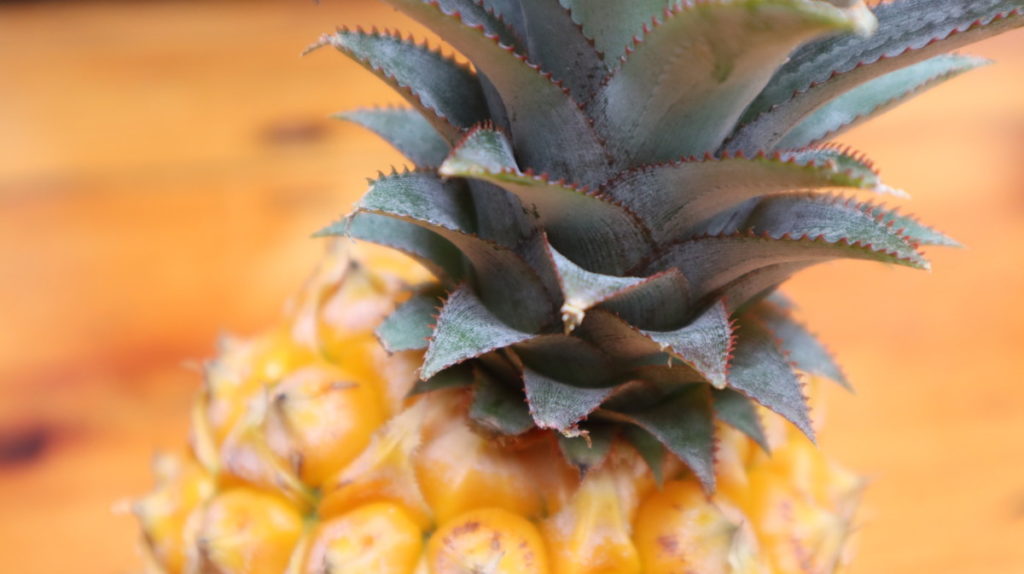
The leaves are also important, as that will be the only part of the plant left when you’re ready to grow. Ensure the foliage is bright and green, not dried or grayish. Brown leaves are also not a good sign. Inspect the leaves for signs of damage or pest issues before making your final choice.
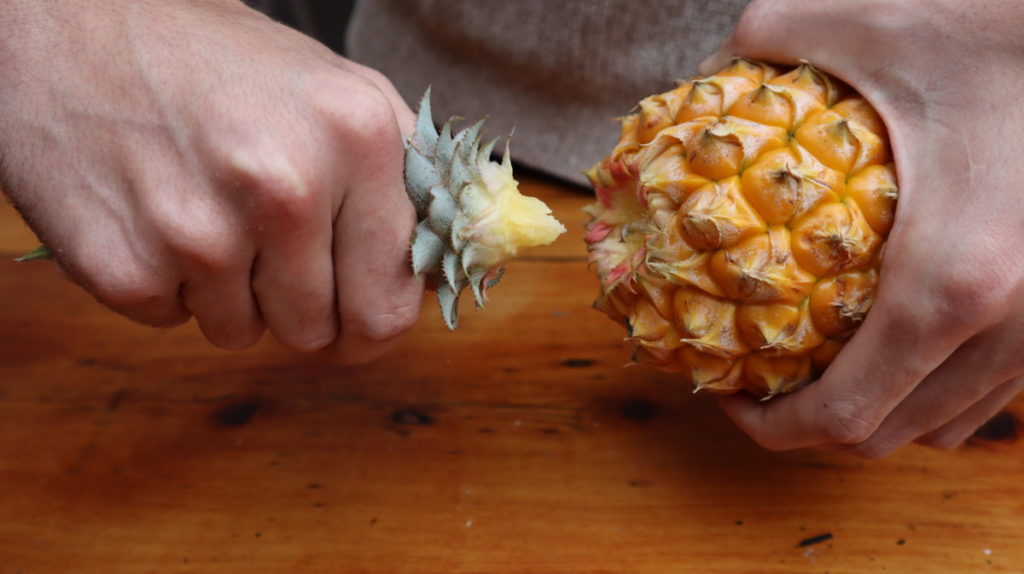
Remove The Tops
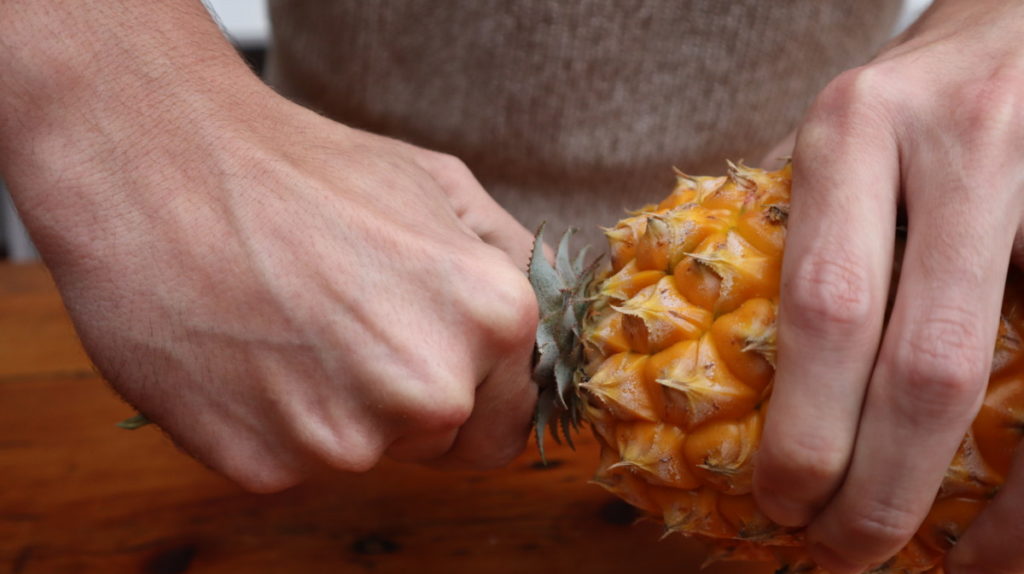
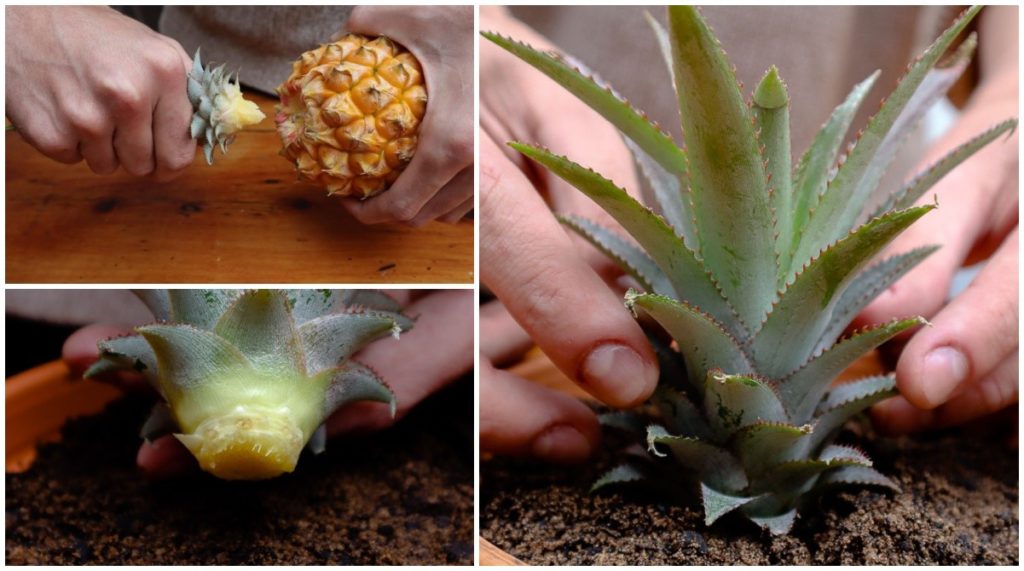
Next, you can remove the tops in preparation for regrowth. Those familiar with whole pineapples will have no trouble with this step.
Simply grab the top of the pineapple (preferably with gloves if your skin is sensitive) and twist it from the base. The crown should easily come off, leaving you with plenty of fruit to enjoy and a top to replant.
Remove The Leaves
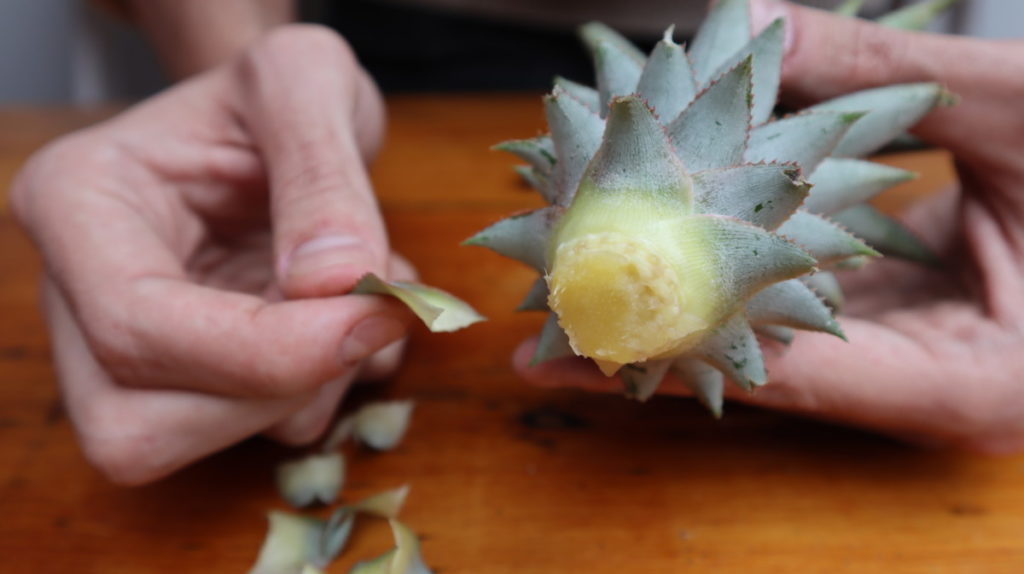
Before rooting, you’ll need to expose some of the stem. Remove the foliage from the bottom two inches of the crown to make space for new root growth.
You can simply peel off the leaves one by one. Don’t worry about damaging the crown – roots will grow from the spots where the leaves were removed.
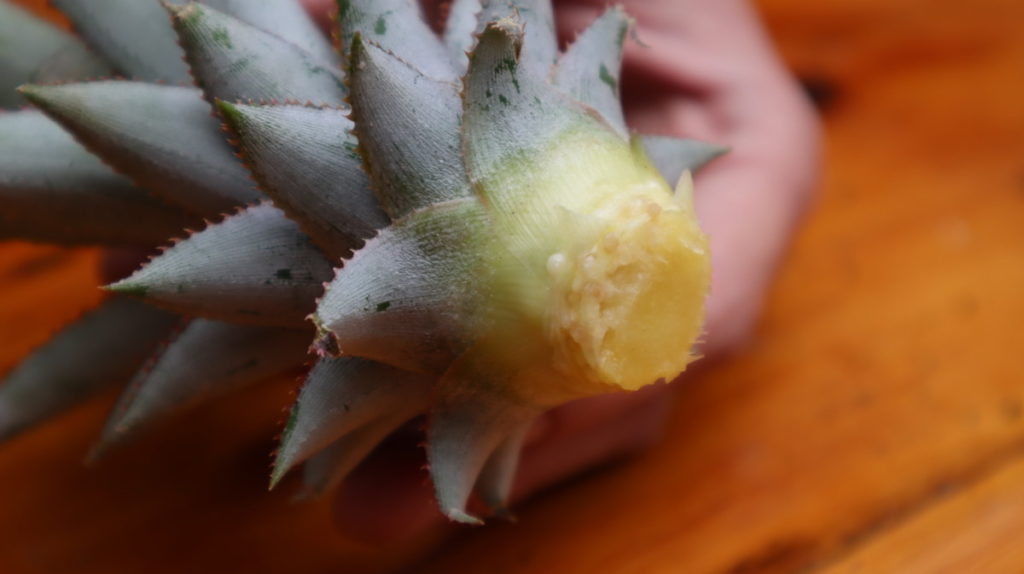
You can choose to dry the crown for a day of two before planting. This will allow the wounds to heal slightly before planting, limiting your chances of disease.
If you’re in a hurry, you can go straight to rooting in water, but when rooting in soil it’s best to wait. Simply leave the top on a counter away from direct sunlight to heal.
Rooting
You have two rooting options – water and soil.
Water is the quickest and requires the fewest materials, plus it allows you to keep an eye on the root growth. However, rooting in soil will produce the strongest early roots and limits the chances of shock later on. Both are reliable methods, so the choice is up to you.
To root in water, grab a jar with a neck that can hold the crown suspended above the waterline. Alternatively, get a large jar and cover it with plastic wrap, making a hole large enough to fit the base of the crown without leaving any foliage in the water.
Leave the jar in bright indirect light and change the water or top up every 2-3 days.
To root in soil, you’ll need to make your own well-draining propagating mix. A soil suitable for succulents and cacti is ideal, or you can make your own by combining potting soil and river sand.
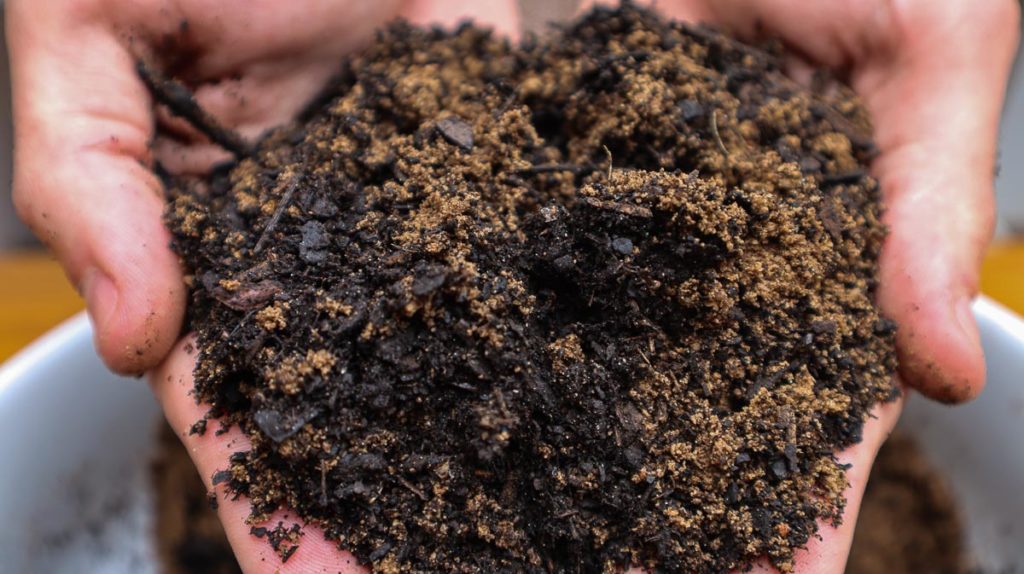
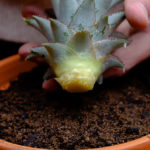
Fill a pot with the mixture and water before planting. Place the top in the soil, ensuring the exposed section of the crown is fully in contact with the soil. Place it in a bright spot and keep the soil moist until roots develop.
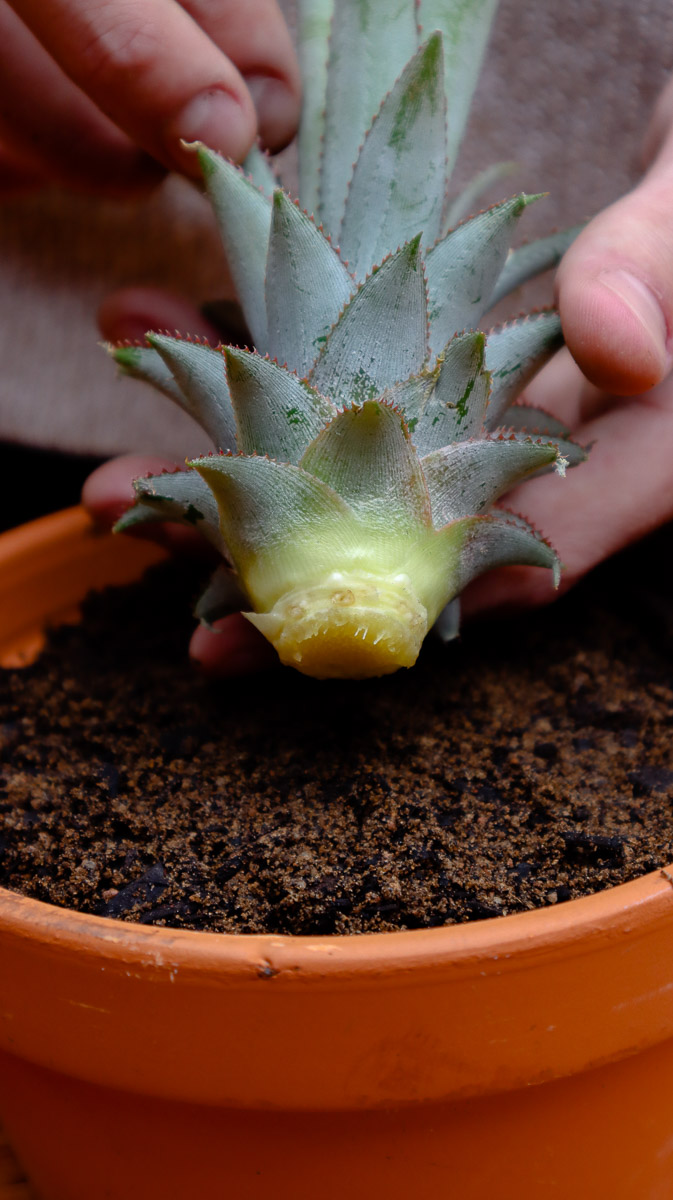
Transplanting
If you’ve rooted in water, you should see roots starting to develop after a few weeks. It can be harder to tell in soil, but give the top a gentle pull – any resistance indicates successful root growth.
Once the roots are around 2-3 inches long (typically after about a month), the top is ready for transplanting.
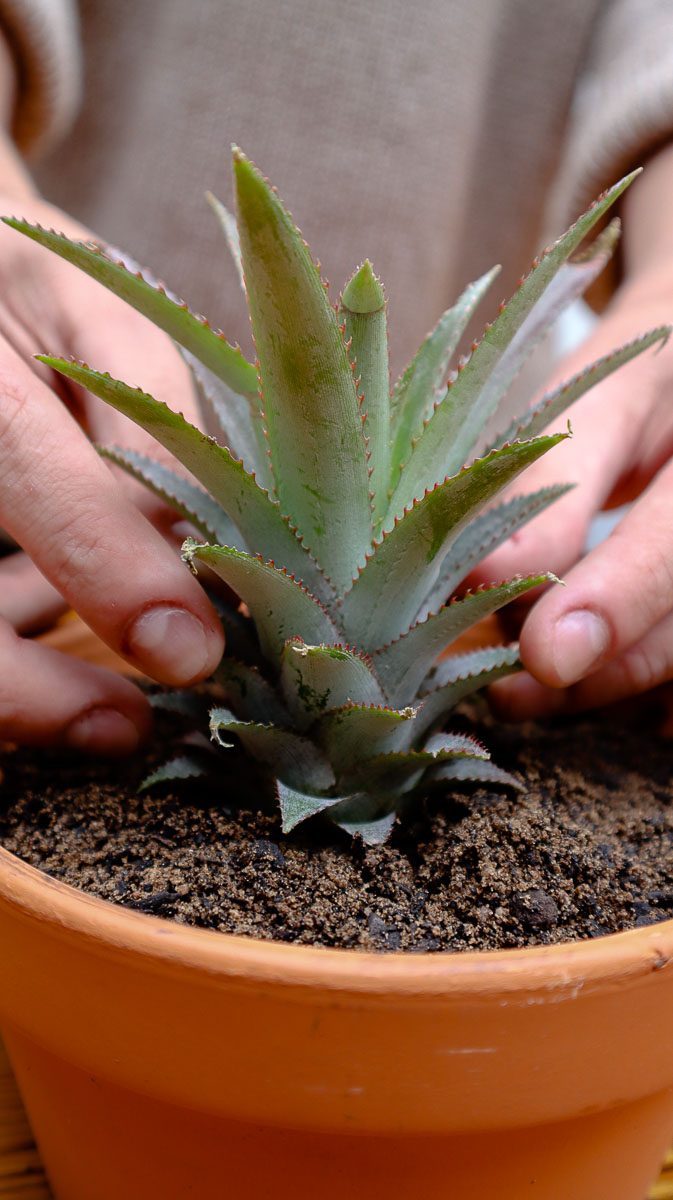
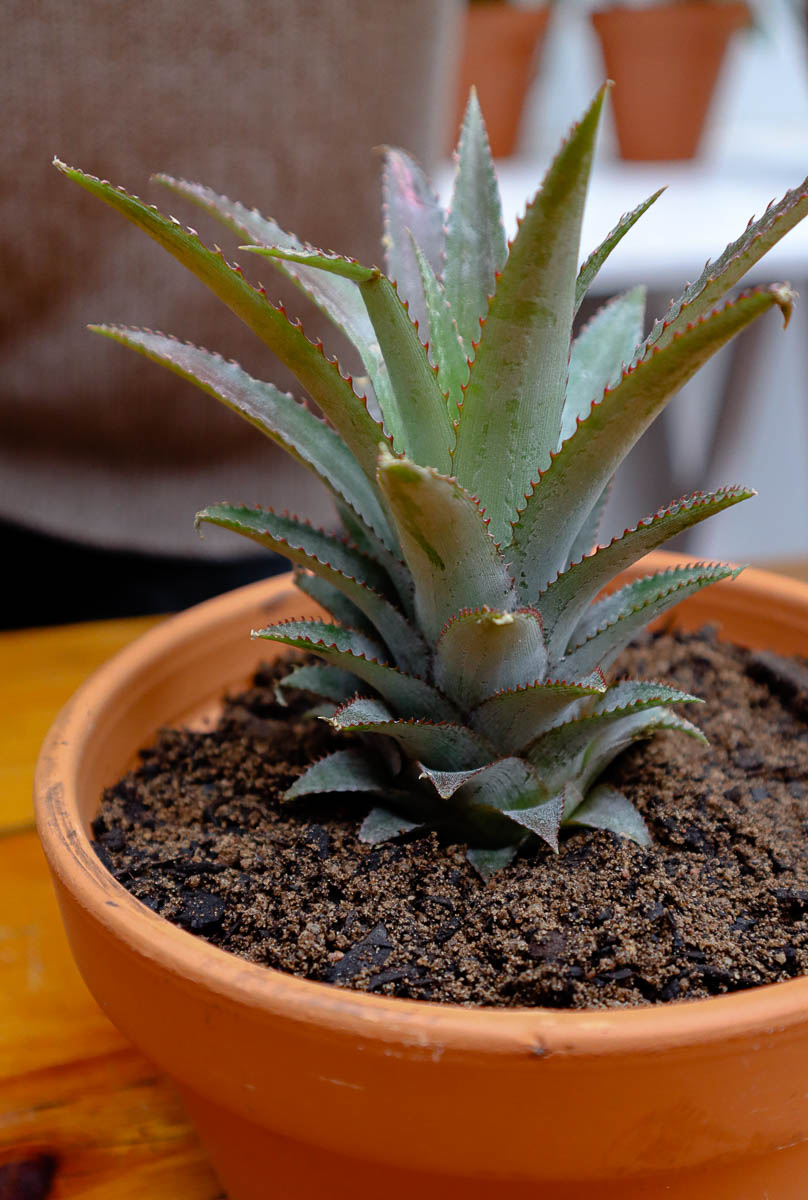
Choose a large pot to accommodate the full size of the plant. Fill it with succulent and cacti soil mix and replant, watering thoroughly afterward.

Leave the plant in a bright spot and keep the soil moist to allow the roots to establish. Once the roots are anchored, the plant can be watered less often.
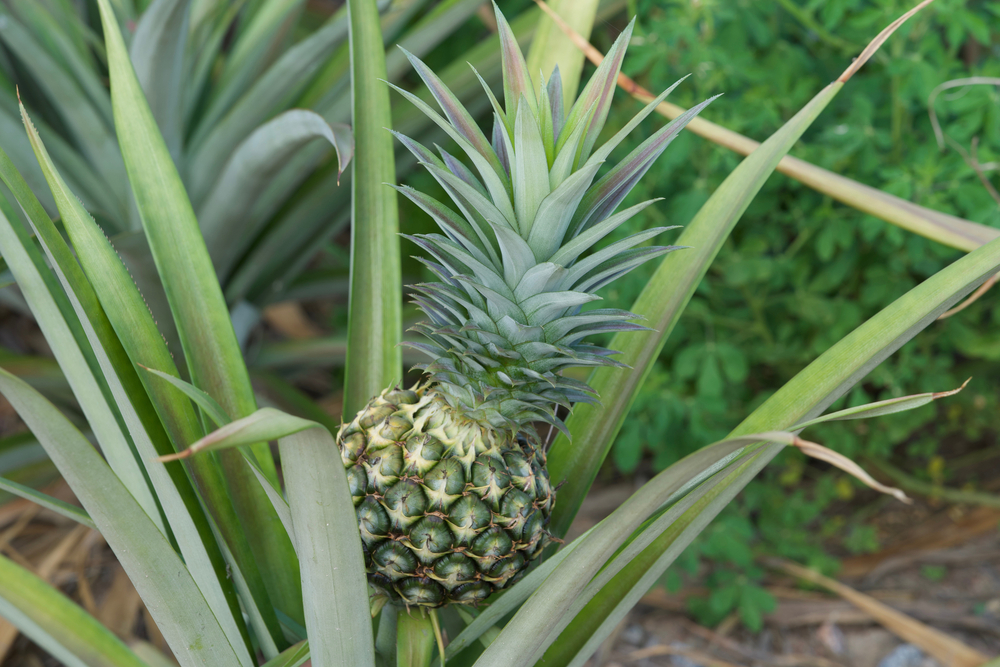
Keep up the care for the next two to three years, protecting the plant from cold and excessive sunlight. Under the right conditions, you may be lucky enough to see a brand new pineapple emerging from your plant.

Get the famous Rural Sprout newsletter delivered to your inbox.
Join the 50,000+ gardeners who get timely gardening tutorials, tips and tasks delivered direct to their inbox.