

I’m not a huge fan of worms. While everyone else is waxing poetic about the fresh scent after a good rain, my nose picks up the scent of dead worms. And I’m not a fan of stepping around their dead bodies on the sidewalk the day after either.
Don’t even get me started about how they crawl onto the road at night in a heavy downpour.
Gross.
However, I made my peace with these wriggly little composting machines when I began to see all the amazing benefits of adding worm castings (a fancy name for worm poop) to my garden and houseplants.
For more information about these benefits, you’ll want to read my post about why worm castings are nature’s best soil amendment.
I knew I wanted access to worm castings without having to run down to the garden center to buy them by the bag.
I needed a worm tower.
But I took one look at the prices of a few pre-made worm farms (admittedly, some of them are quite stylish!), and they sent me running to grab my toolbox and a few old 5-gallon buckets I had laying around.
Using 5-gallon buckets, you can easily build a practical worm tower with very little effort. It’s an incredibly economical set up too – the whole thing costs a little under $15.
Those big-box hardware stores (you know, the blue one and the orange one) have 5-gallon buckets for around $3.50 apiece. And the lids are usually around $1.80 each.
Or, if you don’t mind putting in a little extra effort, you can easily build a worm tower for free.
Check around the garage and garden shed first. You might already have three buckets and a lid sitting forgotten in a corner somewhere. Just be sure you use ones that haven’t been home to harmful chemicals previously.

If you turn up empty-handed after searching all the cob-web covered corners of the garage, call a local restaurant. Many will happily save their empties for you for free.
As someone who has collected food-grade buckets from restaurants for various purposes over the years, I can share a couple of tips.
- Local mom and pop places are more likely to save buckets for you than a chain.
- Delis and hamburger joints are great places to pick up 5-gallon pickle buckets.
- Be polite, offer to check back daily or have them call you when they wish you to pick up the buckets. Taking the buckets off their hands as soon as possible means they are more likely to help you out again for your next DIY project.
Making a worm tower won’t take long either. You don’t need to save this project for a weekend afternoon. You’ll have the whole thing done in under twenty minutes.
Materials
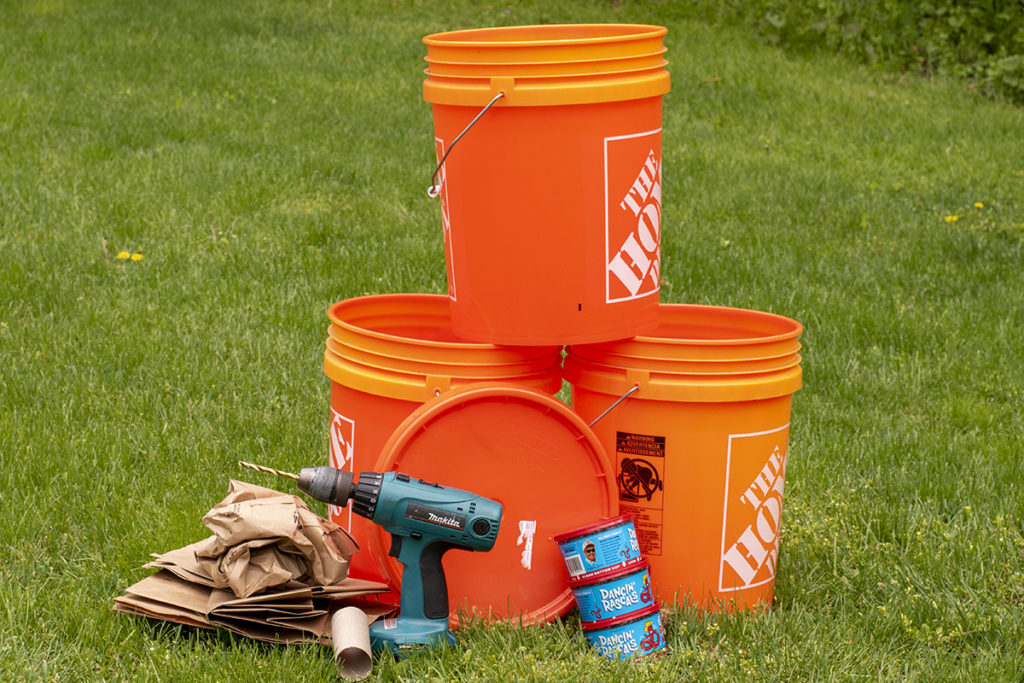
Aside from your three buckets and a lid, you’ll need the following:
- An electric drill with a 3/16” or ¼” drill bit
- Paper bags, newspaper, or dried, fallen leaves
- Water
- Worms, lots of worms
How Many Worms and Where to Get Them?
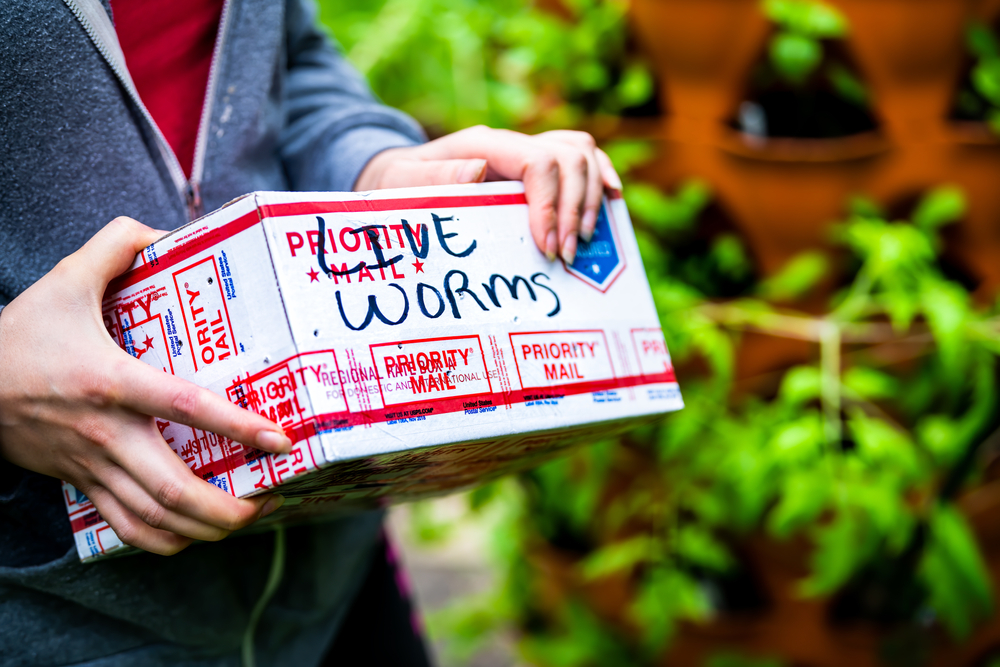
You can easily pick up worms for your tower at any place that sells bait. Red Wigglers and Canadian Nightcrawlers are excellent composting worms. If you don’t know of any bait stores near you, check out your local Walmart. They usually carry worms back in a small fridge in the Sporting Goods section.
For a fun time, pick up a few other weird items while you’re there and see what kind of questions you get from the cashier. When I purchased the worms for this tower, I bought nine tubs of Red Wigglers, a pack of paper party straws and lime Jello.
The cashier just looked at me, with one of her eyebrows doing its best to crawl up into her hairline.
I smiled and offered no explanation.
You’ll need around 250-300 worms for your tower. The worms themselves will set you back around $25-$35 depending on where you get them.
You can, as with anything these days, buy live worms on the internet. There’s a good Amazon listing here from Uncle Jim’s Worm Farm, but it’s always best to source locally – especially for a live product like worms.
Of course, you can always do it the economical way and wait for a good rainy night. Go out with a flashlight and a bucket and grab the nightcrawlers that come up out of the dirt everywhere.
(Gross.)
You may have to do this a few times to get enough worms.
Making the Worm Tower
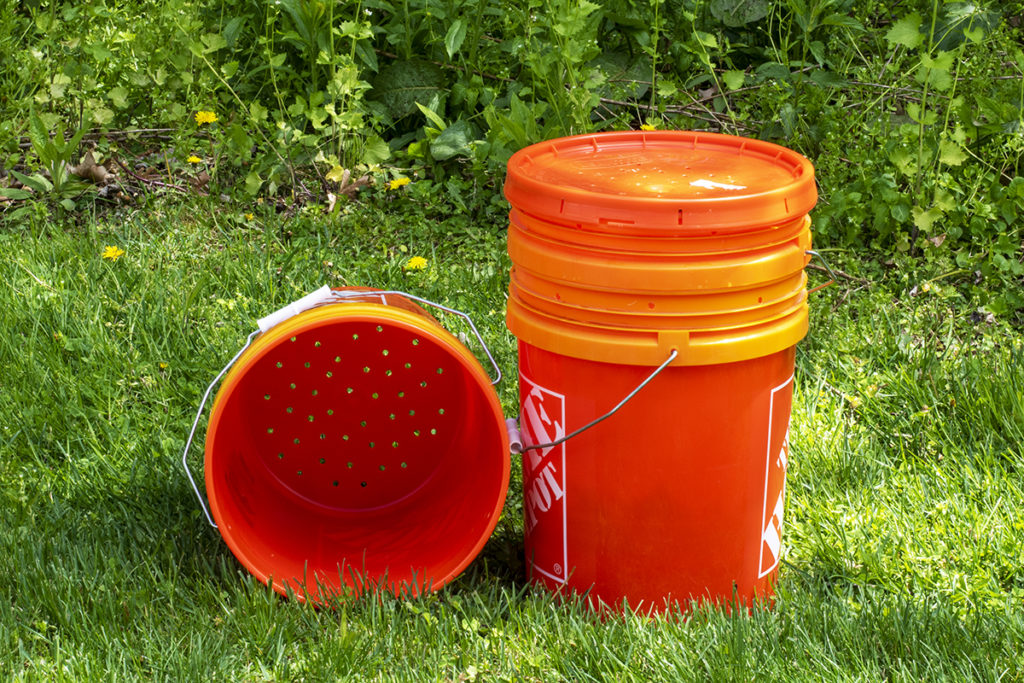
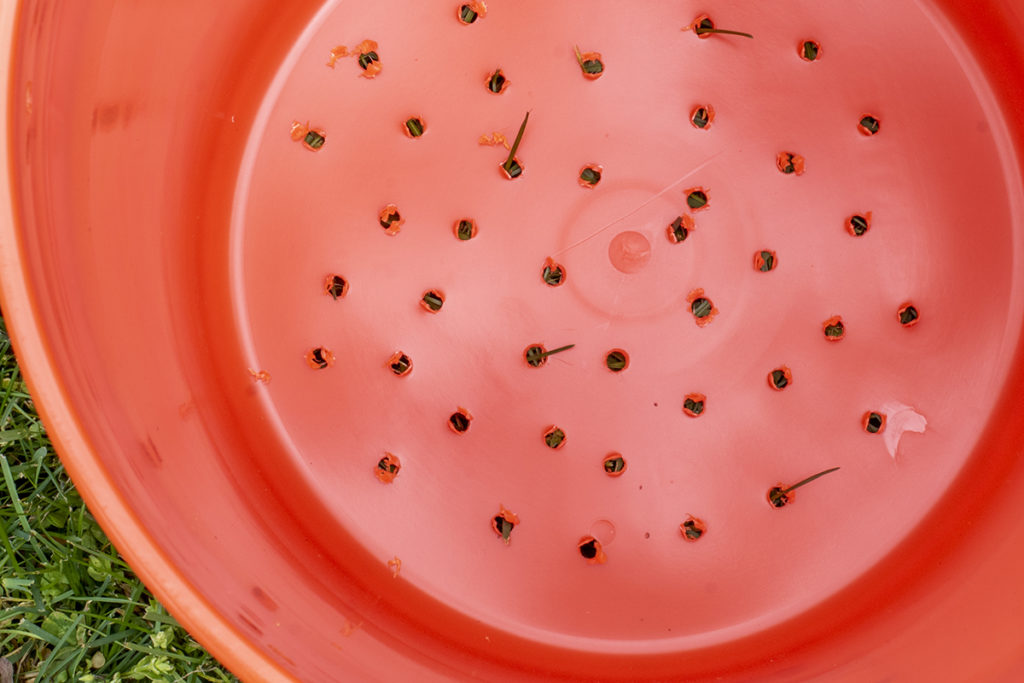
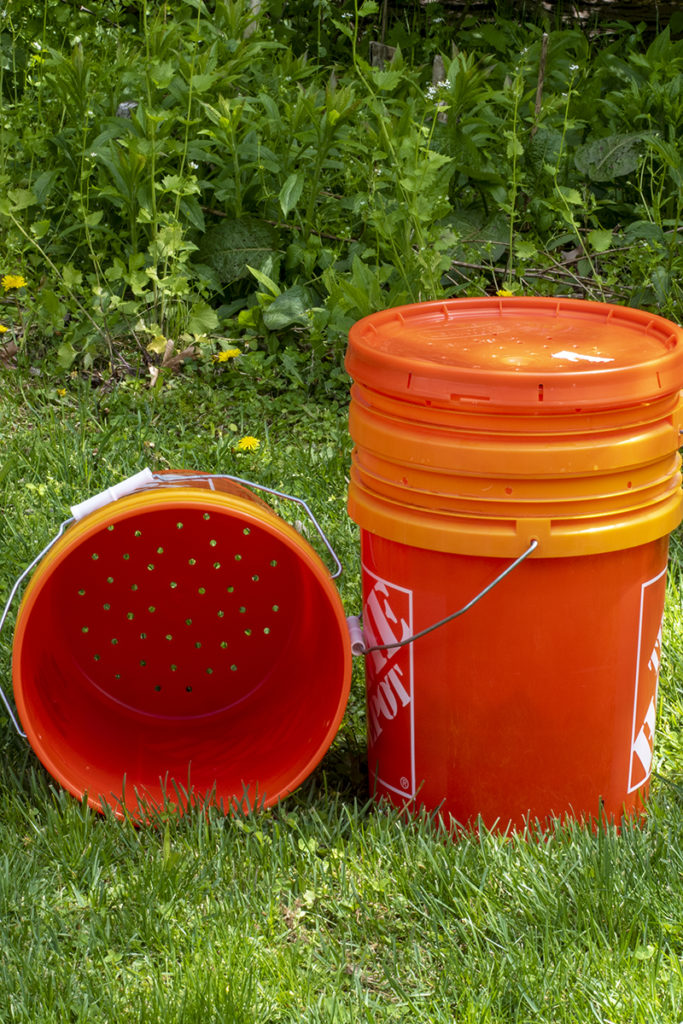
Drill eight holes around the top of all three buckets, right near the lip. This will give you plenty of airflow for each bucket.
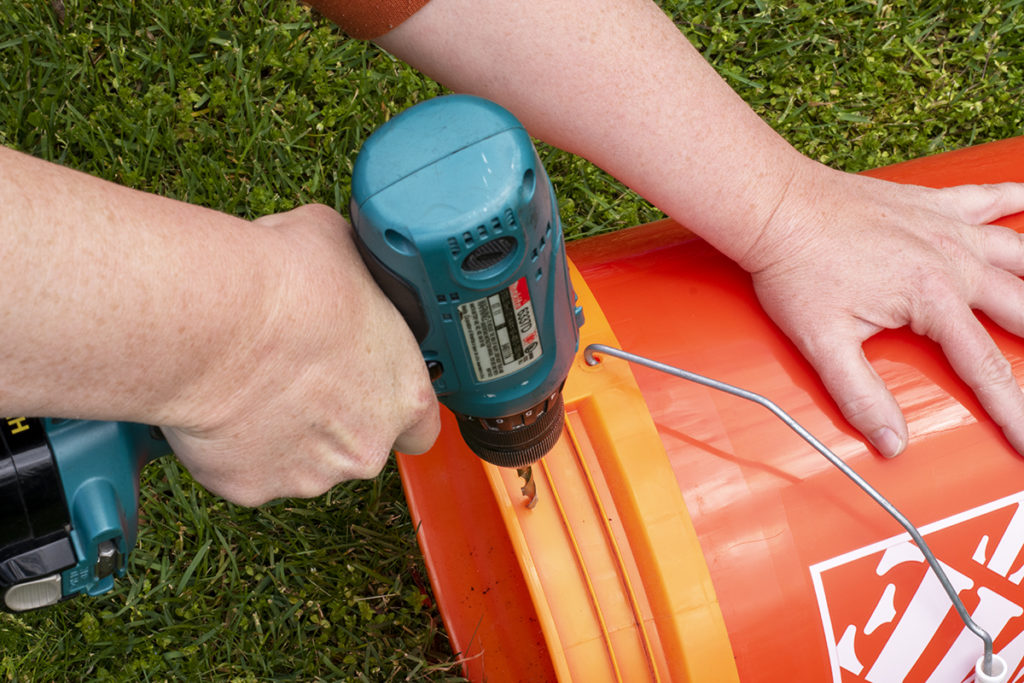
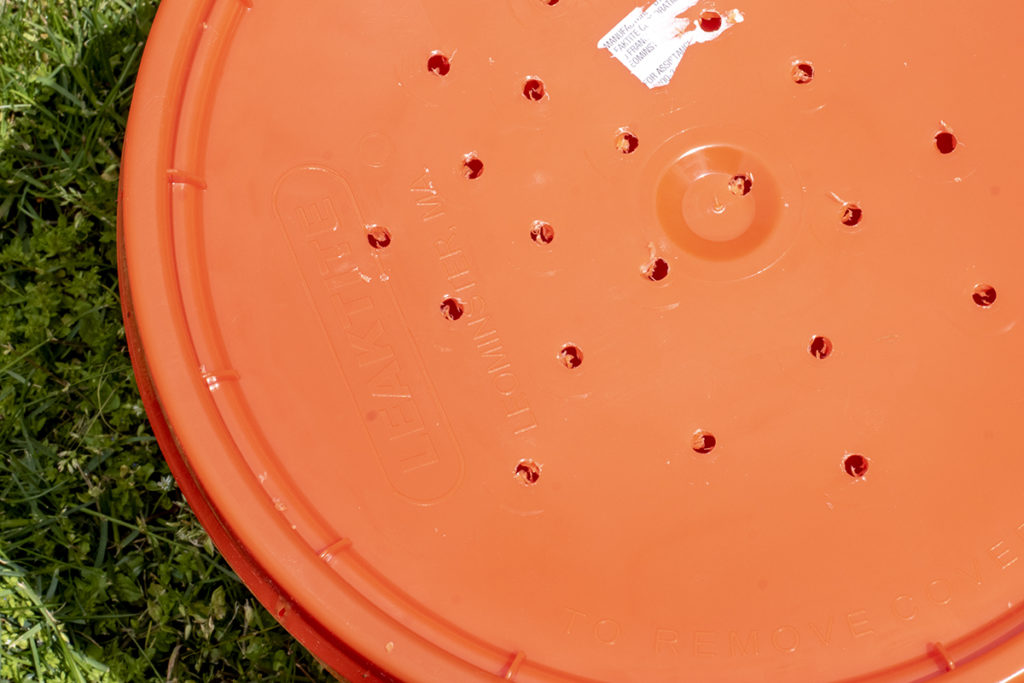
Next, drill holes all over the lid; again, this is to make sure you have plenty of airflow, so your farm doesn’t get too soggy.
Take two of the buckets, flip them over and drill holes all over the bottom. Keep your holes around an inch to an inch and a half apart.
You’ll notice you have lots of prickly burs on the other side of each hole. These will need to be removed to keep from harming your wiggly friends. This is a little time-consuming but fairly easy to do.
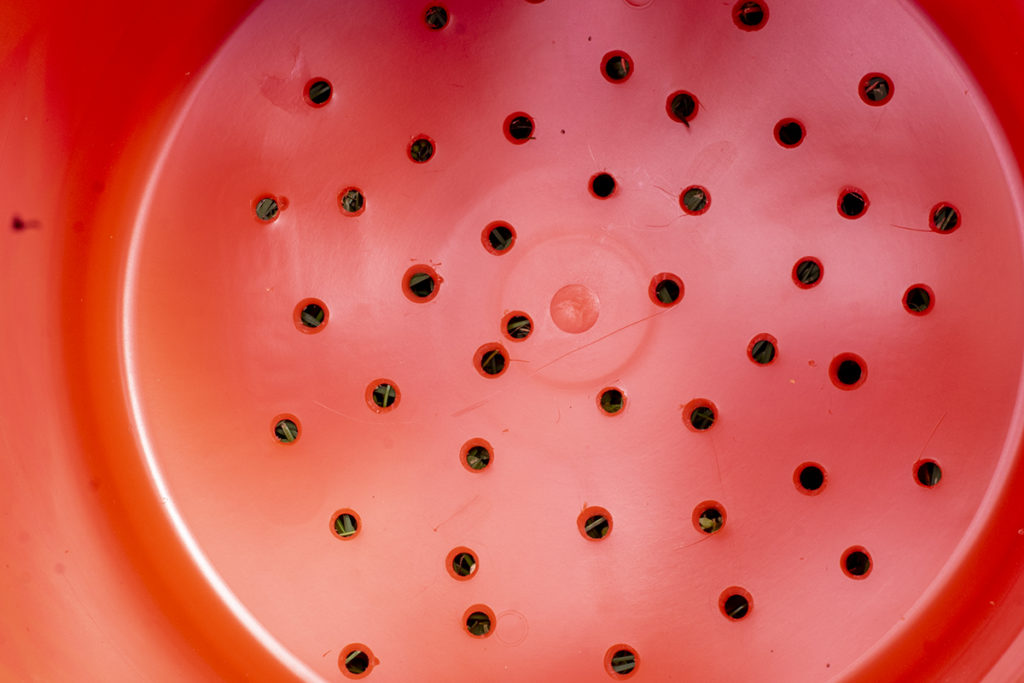
Grab a drill bit that’s a few sizes larger than the holes and put it in your drill chuck. Going from the opposite side, you drilled the holes gently and slowly, running the tip of the drill bit over the top of the hole. You don’t want to drill a bigger hole; you just want the tip of the bit to scrape any burs away.
See? Much better, nice and smooth.
Once you’ve drilled all of your holes and cleaned off the burs, you’re ready to add your paper and your worms.
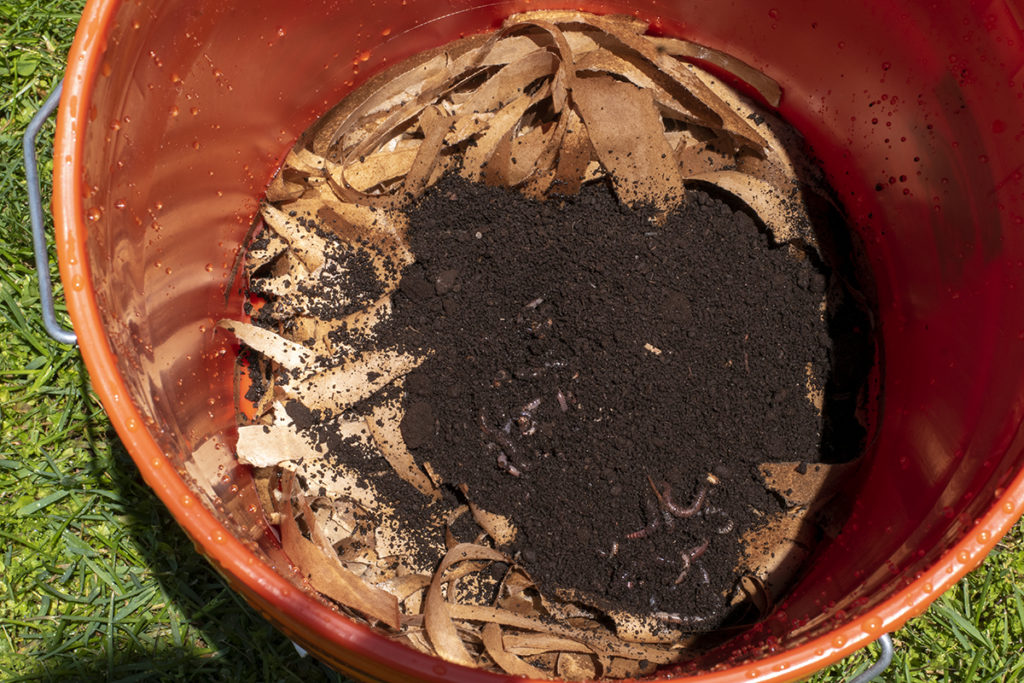
The bottom of your worm tower will always be the bucket with no holes in the bottom. Into this bucket, place one of the buckets with the holes in the bottom.
Now, place a layer of shredded paper bags, newspaper, cardboard (nothing shiny or coated), or dried leaves into the bottom of this bucket. The layer should be about 4-6” thick.
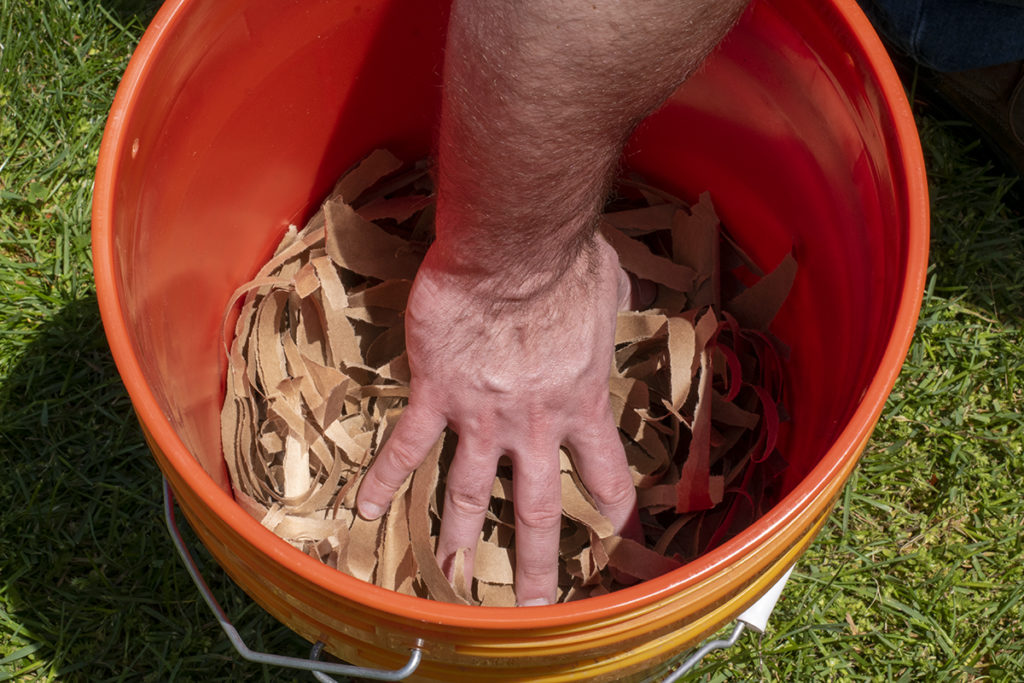
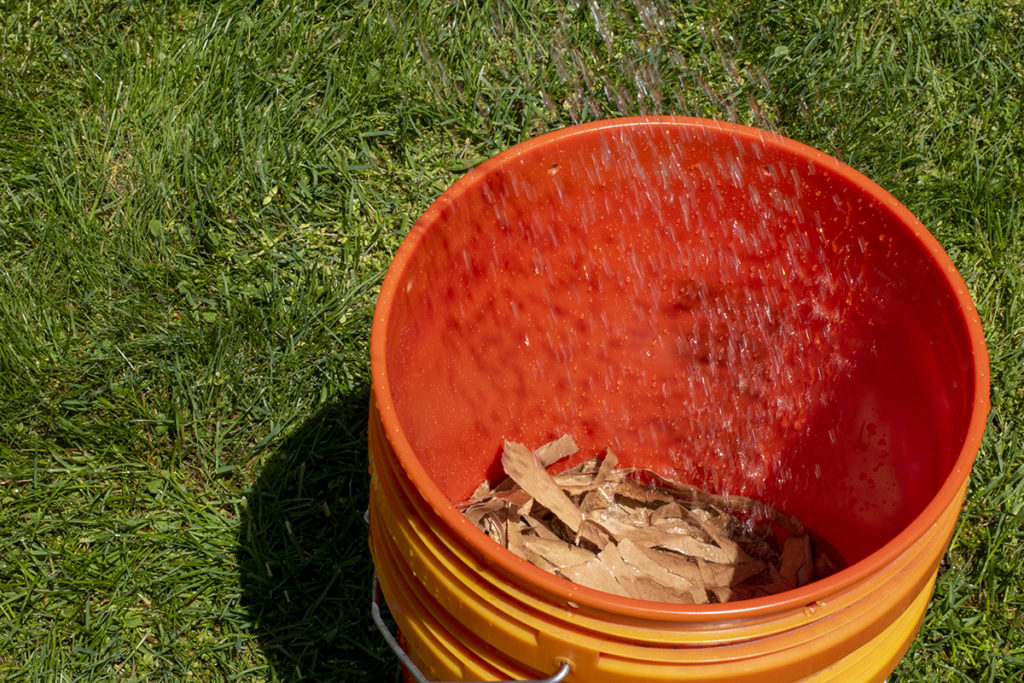
Water this layer well; you want the paper to be good and damp. Once you’ve finished, you may need to pull this bucket from the bottom one and dump out any collected water.
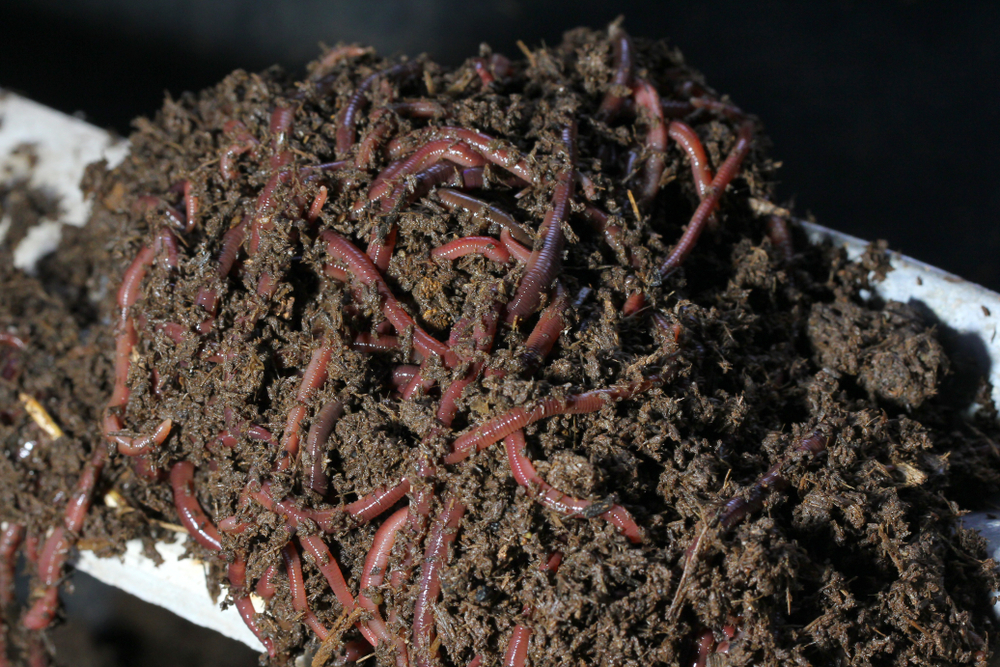
Start adding your worms. They will burrow down into the paper waste pretty quickly. They’re a pretty anti-social bunch.
You can also begin to add kitchen scraps too. Drop in any sort of vegetable kitchen scraps, but no meat or dairy or oils. Worms also don’t do well with coffee grounds or citrus either.
Maintaining Your Farm
Add new scraps as the previous additions disappear.
Occasionally check the bottom bucket for worm tea. (Also known as vermicompost tea.) I love saving this for my houseplants. You can add it to your watering can to give your garden and houseplants a boost.
Once the second bucket begins to fill up, and the scraps break down, add the third bucket to the stack. Again, filling the bottom of this new bucket with another 4-6” layer of wet paper and scraps and replace the lid.
The worms will migrate from the second bucket to the third, where the food is.
After a week or two, swap the second and third buckets. Scoop out the worm castings to use in your garden and on your houseplants. The second bucket is ready to go to keep the process going, swapping buckets as needed.
Within a few months, you’ll have a decent supply of worm castings.
If you find yourself needing compost even sooner, give the Berkeley Composting Method a try. It yields a decent pile of compost within two weeks.
If you had asked five-year-old me what I wanted to be when I grew up, “a worm farmer” would not have been in my top 100 responses. And yet, here I am, currently the proud owner of three vermicomposting setups.
They are cheap to make and easy to look after.
My hungry little worms consistently turn my kitchen scraps into the most amazing soil additive I’ve ever used. And now you can put some worm castings to good use around your garden too. How many towers will you start?

Get the famous Rural Sprout newsletter delivered to your inbox.
Join the 50,000+ gardeners who get timely gardening tutorials, tips and tasks delivered direct to their inbox.