


Christmas is on the horizon, and it will be here before you can say, “partridge in a pear tree.” But before things get too crazy with shopping and Christmas cards and planning, I thought I would share something special with all of you.
I’ve got a great recipe for some special Christmas tipple.
Sure, you can pick up a fancy bottle of wine for Christmas dinner or some champagne to ring in the new year, but how much nicer would it be to serve something you fermented yourself?
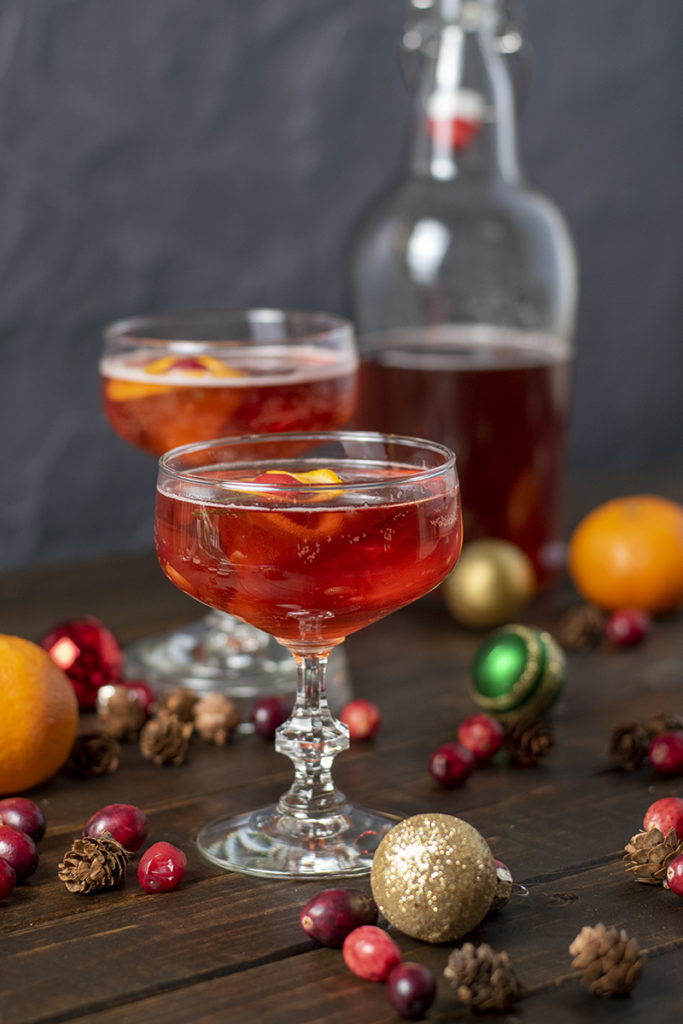
I’ve got just the thing – a sparkling hard Christmas cider with notes of orange and cranberry and a touch of spice.
This sparkling cider is on the drier side, making it perfect for special occasions like Christmas with the family or a New Year’s Eve party. And it’s perfect for when everyone goes home, and the house is finally quiet again. So, don’t forget to put aside a bottle just for that evening.
When the holidays roll around, there are always so many sweet things to eat and drink. It gets a bit old after a bit. There are only so many Christmas cookies and eggnog one can stand. So, I thought why not make a less sweet cider, one a tad drier and more reminiscent of champagne.
It’s just the ticket to go along with your third slice of pie.
The tart crispness of cranberries and cider is a classic combination balanced by the sweetness of the brown sugar and orange juice. The end result is a downright fancy homebrew.
Don’t worry; you can still drink it out of a mason jar. No judgment here.
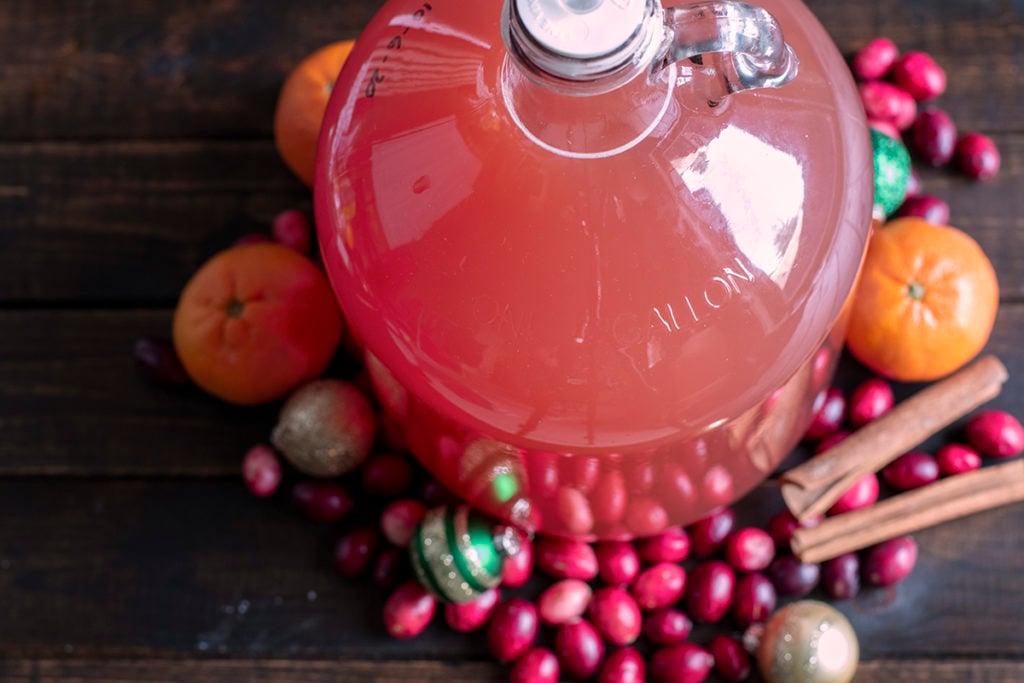
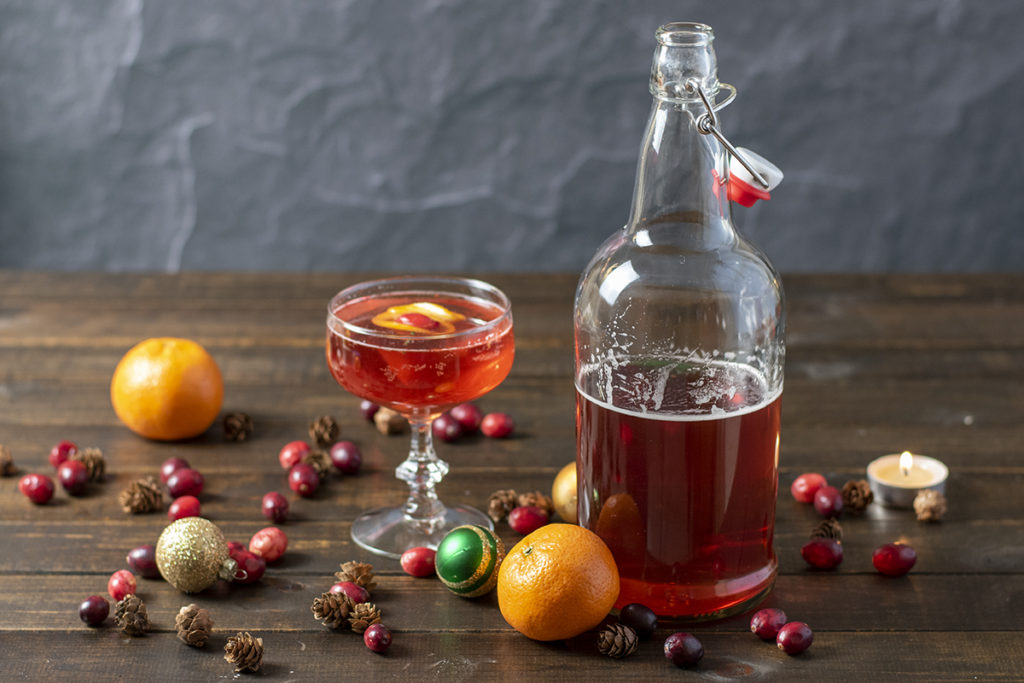
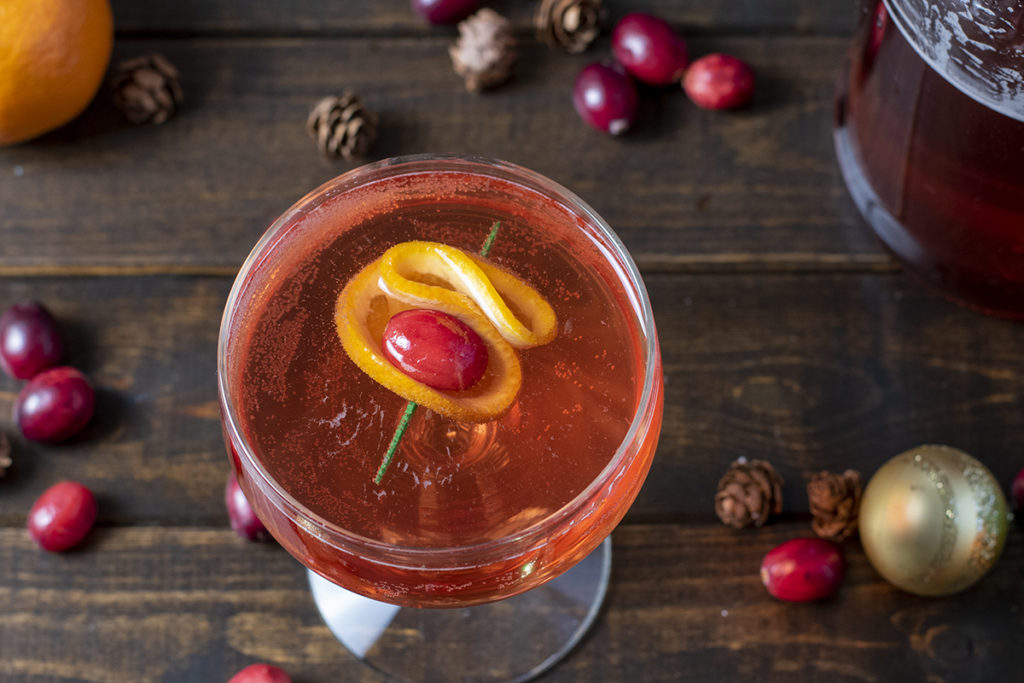
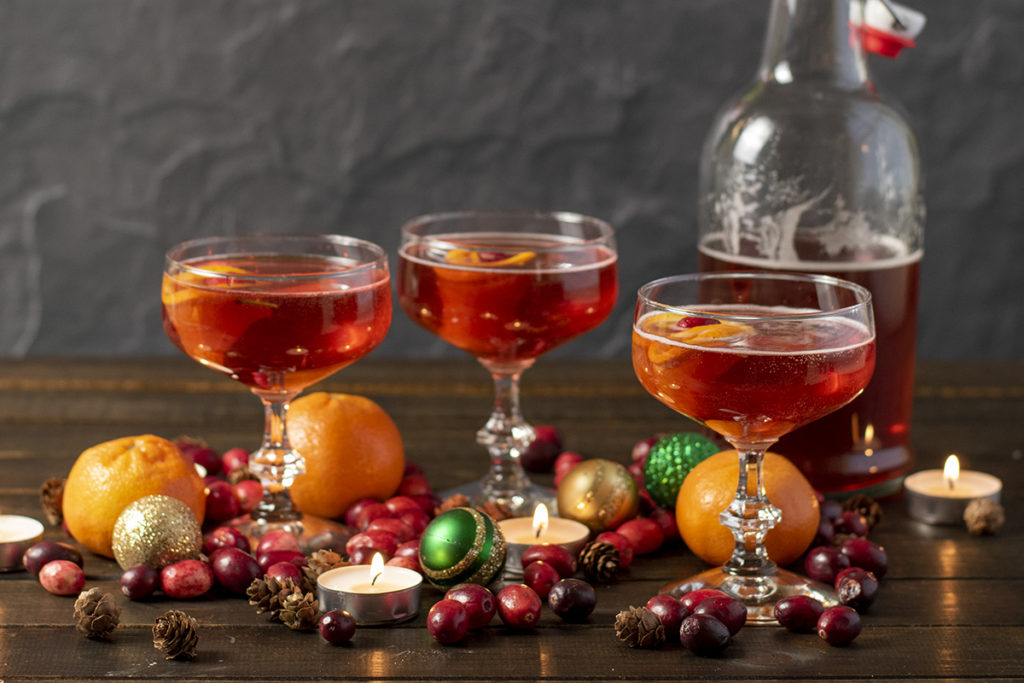
And you should enjoy this cider in a clear glass. The combination of the cider, oranges, and the cranberries’ juice results in a pink or sometimes coral color. You get a different color with every batch, but every batch is lovely.
And this recipe is easy enough that anyone can make it, even if it’s their first time homebrewing.
You’ll want to get started at least a month before Christmas to give the cider time to ferment and then to carbonate in the bottles.
If you’re smart, you’ll get two batches going at the same time.
I had big plans for this cider last year. I was going to bottle some to give as gifts. The only problem was when it finished fermenting; it never made it into the bottles.
It was so good straight out of the jug that we finished the entire gallon at a dinner party one night. I made a second batch that at least made it to Christmas dinner this time, but not much further beyond that.
If you have even the tiniest inkling that you’d like to give a few bottles to family and friends as gifts this year, then I suggest you start two one-gallon batches – one for gift giving and one for celebrating. You’ll thank me later.
Alright then, here we go. Let’s make a gallon of Christmas cider.
First things first – always use cleaned and sanitized equipment throughout each step of the process. This attention to detail will ensure your homebrewing efforts are a success.
Cider, Oranges, and Cranberries, oh my!
Since we’ll be using commercial champagne yeast for this cider, you can use pasteurized cider. Just be sure it has no preservatives in it, as they will prevent the yeast from fermenting. In a pinch, you can even use pasteurized apple juice again, making sure it doesn’t have any preservatives in it.
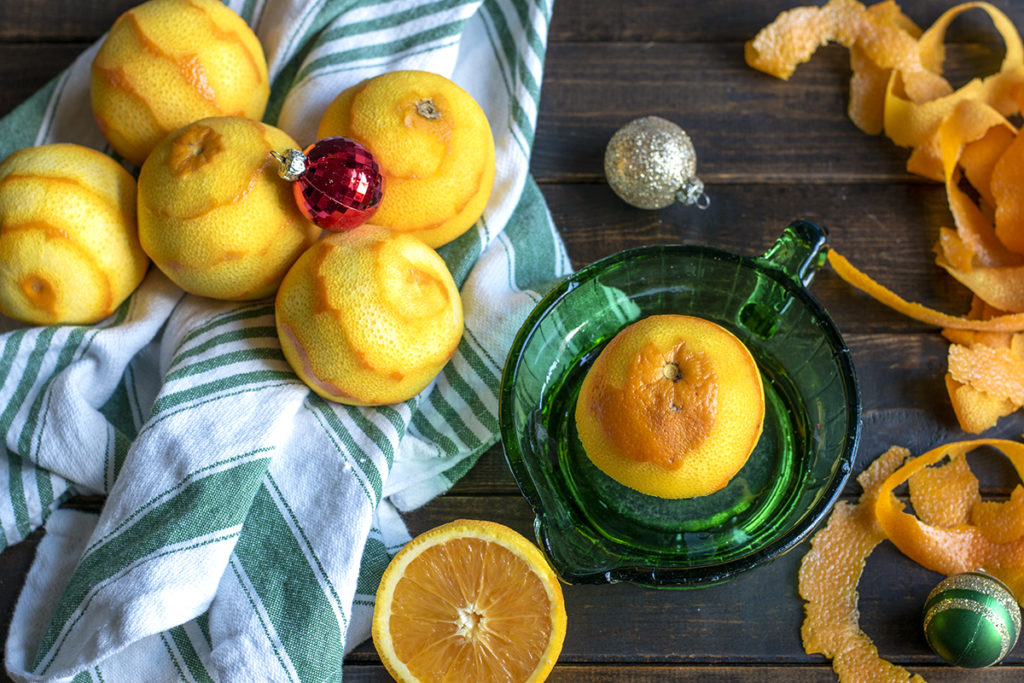
We will also be using fresh oranges in this recipe. Both the juice and the zest add their flavor to this cider. Choose firm, juicy oranges. I don’t put fruits in anything I’m fermenting without tasting it first. Bitter, underripe, or flavorless fruit does you no favors.
Clean the oranges by pouring boiling water over them to remove the wax.
Then scrub them clean with a soft-bristled brush under cool water. This will ensure you don’t get any off-flavors from the zest in your cider.
For the cranberries, you can use either fresh or frozen. And to that end, I prefer using organic cranberries, although it’s not necessary. If you’re using fresh cranberries, give them a good rinse to clean them before using them. If you’re using frozen cranberries, keep them frozen until you’re ready to use them, so you don’t lose any of the juice.
(And if you have any cranberries left, why not make my fermented cranberry sauce, too?)
As far as equipment goes, you know I like to keep things simple, and this sparkling cider is no different.
You won’t need much beyond a basic brew kit.

Note: I’m using a Little Big Mouth Bubbler as it’s easier to photograph how my cider is getting on, and it’s easy to fit the straining bag around the neck of the bubbler when I’m pouring my must. They’re relatively inexpensive and are a nice upgrade from the traditional brew bucket.
Christmas Cider Equipment:
- A 2-gallon plastic brew bucket with a drilled and grommeted lid
- 1 or 2 one-gallon glass carboys (Come on, the ingredients are cheap, make two gallons. It’s an easy and impressive gift.)
- 3-piece airlock
- Drilled rubber stopper
- 6′ length of food-grade silicone or nylon tubing
- Small tubing clamp
- Sanitizing solution
- Nylon straining bag, course mesh
- Racking cane
- Racking cane holder
- A sanitized wooden or plastic spoon
- A stockpot
Special Equipment:
You’ll need swing-top bottles as this is a carbonated cider.
I can’t stress this enough – when you’re purchasing swing-tops for a carbonated brew, it’s important to make sure they’re rated for brewing. Some bottles are made with thinner glass or inferior closures, meaning you end up with an exploding bottle or no fizz at all.
I learned this lesson the hard way with a bottle that blew out the bottom and pool of sticky cider on my kitchen floor. I think I mopped four times that week before I stopped sticking to the floor.
Since then, my personal preference has always been the EZ Cap brand. And for this particular cider, I would go with the clear bottles, so you can enjoy the lovely pink color when it’s finished fermenting.

Christmas Cider Ingredients:
- 1 gallon of cider
- 4 cups of cranberries, fresh or frozen
- 1 ½ cups brown sugar
- 6 oranges
- 1 cinnamon stick
- 10 cloves
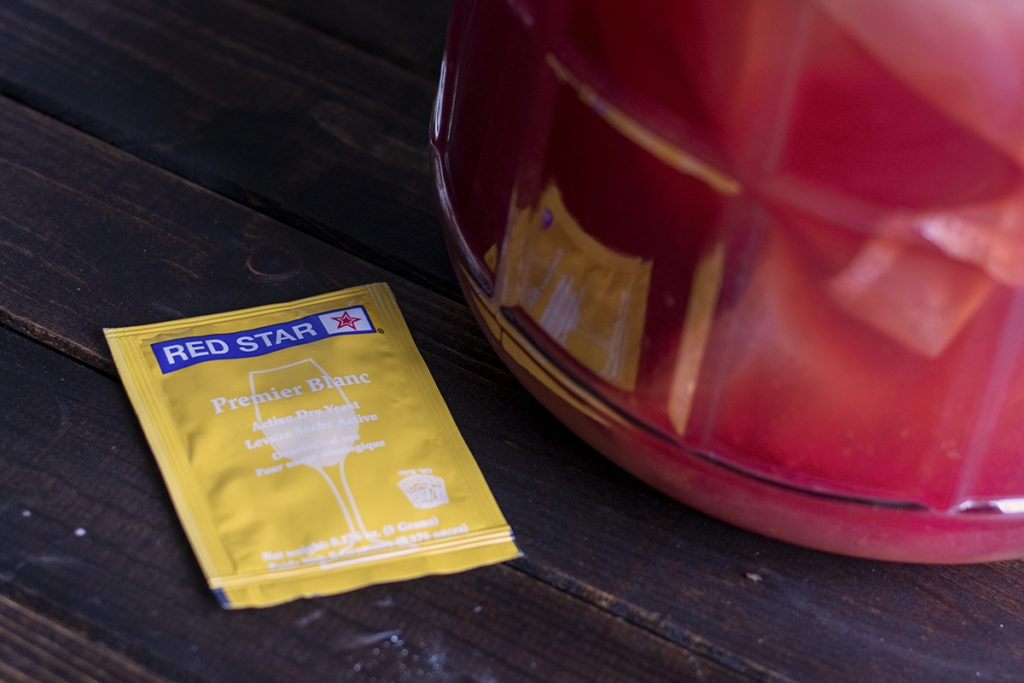
- 1 packet Red Star Premier Blanc (champagne yeast)
Bottling Day
- 1 oz of priming sugar
- ½ cup of water
Brew Day
Begin by pouring ¾ of the gallon of cider into a stockpot on the stove. Add the cranberries and slowly bring to a simmer over medium heat. You want to simmer the cider for about five minutes or until most of the cranberries have popped open.
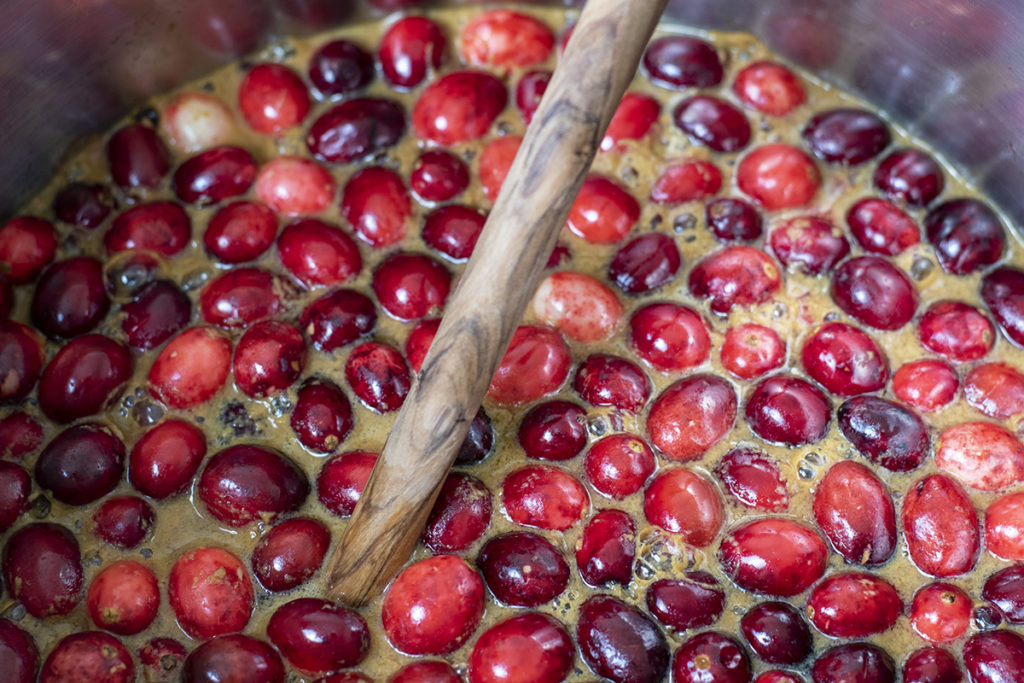
Stir the brown sugar into the cranberry and cider mixture. Stir it all up until the sugar has dissolved. Remove the stockpot from the stove to cool.
Clean the oranges to remove any wax from their rinds. Using a sharp vegetable peeler, peel the orange zest from the oranges, being careful not to remove the bitter, white pith.
Add the zest to the cider and cranberries.
Then cut the oranges in half, and squeeze the juice by hand or with a juicer into the cider mixture.
It’s starting to look like Christmas cider in there.
Prepare your sanitized brew bucket by placing the straining bag inside it. Add the cinnamon stick and cloves to the straining bag. If the straining bag is wide enough, secure it by rolling it down over the top of the brew bucket. Otherwise, you’ll need to have a helper hold the bag open while you pour the cider/cranberry/orange zest mixture into the straining bag inside the bucket.
Once you’ve poured the cider mixture into the bucket (and captured the solids in the straining bag), tie a loose not in the straining bag. Cover the brew bucket with the lid and fit it with the stopper and airlock. Let the cider cool completely, around 12-24 hours.
Pitch the Yeast
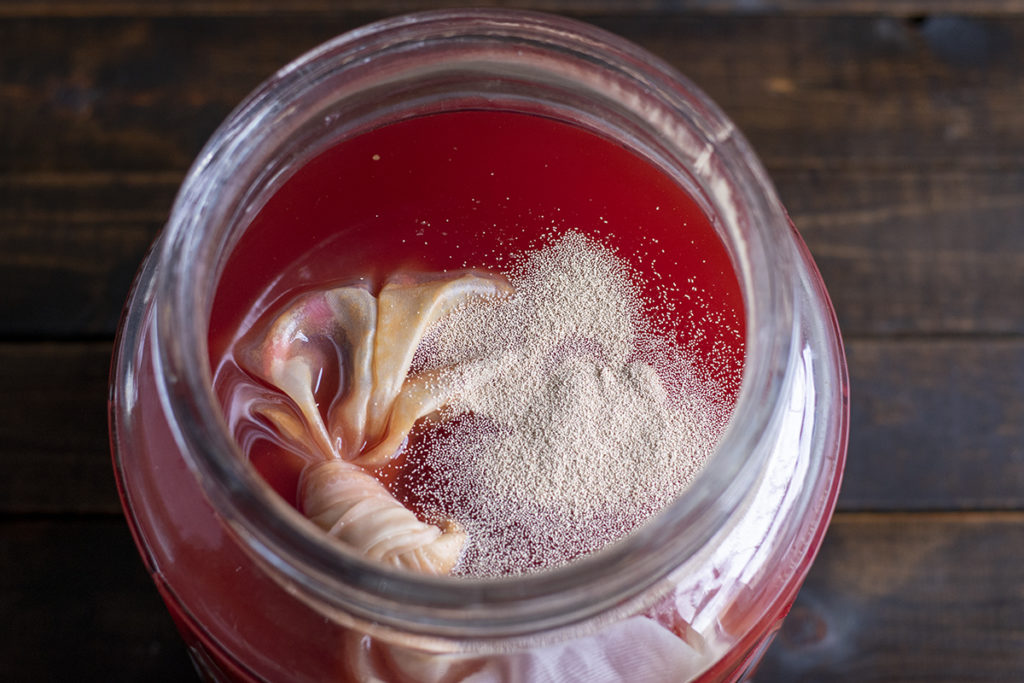
Remove the lid from your bucket and sprinkle the yeast over the surface of the cider. Using a wooden or plastic spoon, vigorously stir the yeast into the cider, being careful not to get your spoon wound up in the straining bag and thereby slopping cider on the floor.
What? It’s not like I’ve actually done it; I’m just telling you, so you don’t do it.
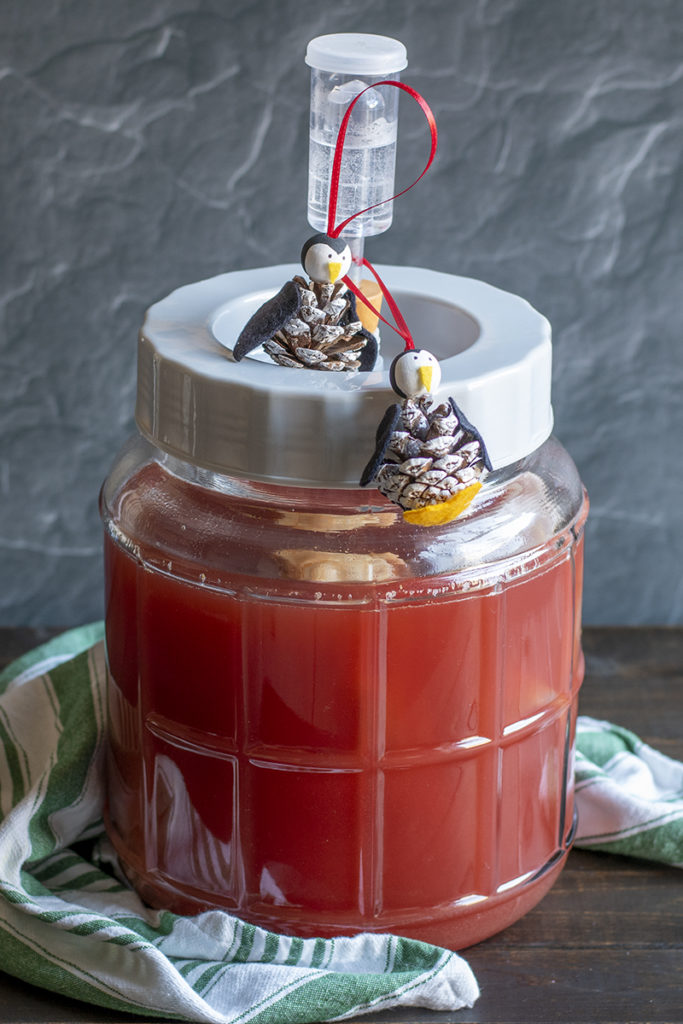
Stand back and admire the beautiful color of your cider. Yearn for the moment when you will be sipping it at Christmas. Have a mild panic attack at the thought of everything you have to do between then and now. Eat an entire row of Oreos. Oh, and don’t forget to put the lid with the airlock back on your cider.
Keep your cider someplace warm and draft-free. Like in the pantry. Next to the Oreos. Consider putting a flashlight next to the Oreos so you can sit in the dark hiding from your kids for a few minutes and watch your beautiful cider glug-glug away.
Within a day or two, you should see bubbles rising from your cider, and your airlock should be happily gurgling away.
After ten days, remove the straining bag. Don’t squeeze the bag. Just sit patiently in the pantry, wishing you hadn’t eaten all the Oreos while the cider drains from the bag back into the bucket.
Using the racking cane and tubing, siphon the cider from the bucket into a cleaned and sanitized one-gallon carboy. Try not to stir up the sediment at the bottom and keep the racking cane up off the bottom of the bucket to avoid transferring the sediment to your carboy.
Put the stopper and airlock on the glass carboy and let the cider clear and finish fermenting.
You’ll know your cider has stopped fermenting when bubbles no longer rise to the top. If your airlock has stopped bubbling, that’s a good sign. I like to hold a flashlight up to the carboy and knock on it with a wooden spoon. If you don’t see any bubbles rising up, your cider has finished fermenting.
Priming Your Cider and Bottling
Now comes the fun part. We’re going to add a little bit of sugar back into the cider, just enough so the yeast can release enough carbon dioxide to carbonate the cider.
Add 1 oz of priming sugar and ½ cup of water to a small saucepan. Bring the sugar water to a rapid boil and boil for five minutes. Remove from the heat and let it cool for a couple of minutes.
Rack your finished cider back into the cleaned and sanitized brew bucket. Stir in the priming syrup and mix it well.
Siphon the primed cider into cleaned and sanitized bottles. Be sure to leave 1-2″ of space in the neck of the bottle.
Label the bottles and wait ten days to two weeks before opening to let the carbonation build. Not that it will last this long, but you should drink your cider within a year of making it for the best flavor.
Sharing your homebrews is one of the best parts of brewing at home. And this fancy cider makes the perfect gift for your DIY friends and family. (Here’s a few more great gift ideas.) Just don’t forget to save a bottle or two for yourself.
Or.
Skip that whole pesky bottling business and serve your finished cider straight from the jug to your guests. It won’t be as fizzy, but it won’t last long enough for them to notice either.
See? I told you to make two batches of Christmas cider.
No matter how you choose to bottle or not bottle this cider, I hope it’s a big hit as you celebrate the Christmas season with your kith and kin this year.
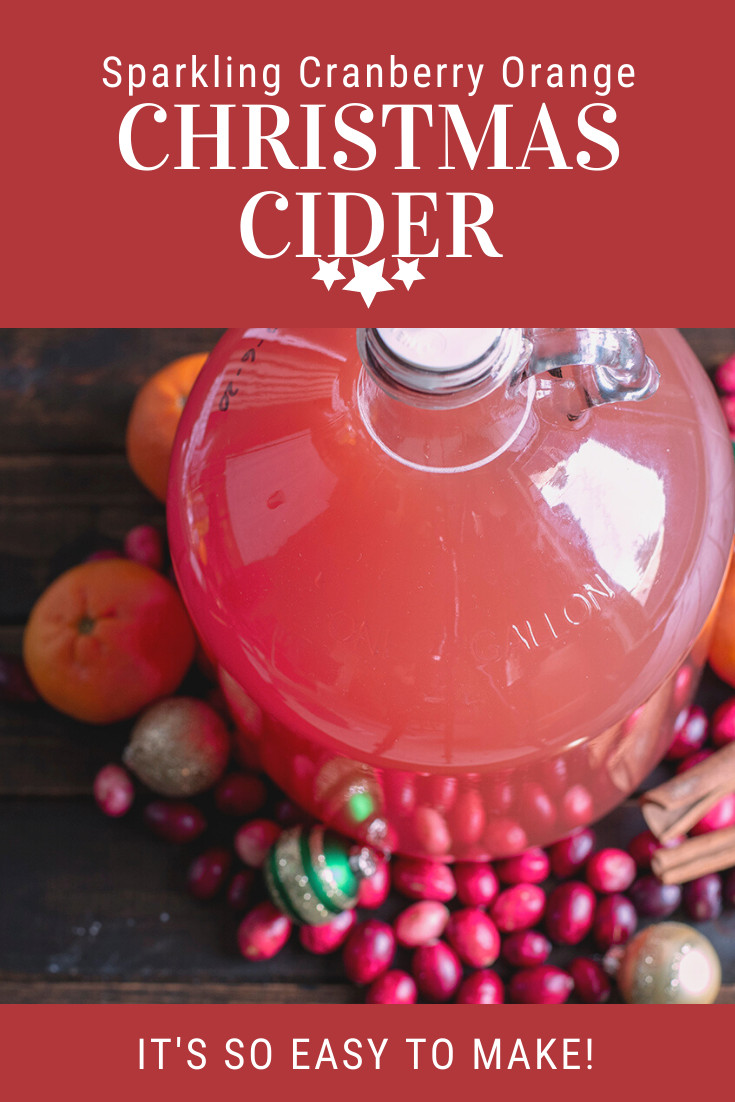
Pin This To Save For Later

Get the famous Rural Sprout newsletter delivered to your inbox.
Join the 50,000+ gardeners who get timely gardening tutorials, tips and tasks delivered direct to their inbox.