

Wait, did you say chipping potatoes? I like potato chips! Oh, chitting potatoes! Yeah, let’s talk about that.
The lazy gardeners (my people) are wondering whether we really need to chit our potatoes? The experienced gardeners started chitting their seed potatoes weeks ago and are rolling their eyes. And the newbie gardeners are sheepishly wondering what the heck we’re all talking about, but they’re too afraid to ask.
So, here’s what you actually need to know about chitting potatoes.
Chitting – a midwinter chore
Sometime in midwinter, between late January and early February, I begin to wonder if I should grow potatoes or not this year. Usually, this decision is made for me when I find a couple of potatoes in my pantry leftover from Christmas. Nature has kindly begun the chitting process for me, as they are covered in pearly white sprouts. (I also buy proper certified seed potatoes to grow, and I chit those as well.)
“And just what the heck is chitting seed potatoes, Tracey?”
It’s basically what happens to potatoes when we forget about them in our pantry, only we gardeners do this in the light and on purpose.
We place seed potatoes in the light a few weeks before planting, and the sprouts that grow are darker in color than their pantry-grown counterparts (go, photosynthesis) and notably sturdier, which is the whole point.
We’re giving our seed potatoes a head start on the growing season with some hefty sprouts.
Let’s dig into it a bit (pun intended) and discuss how to do it, whether or not chitting is necessary, and what potatoes benefit from chitting.
By the way, potato chips are the perfect snack to eat while reading this article. Just saying.
Okay, for all of my impatient readers (hi, friends), let’s discuss how to chit potatoes first. That way, if that’s all you need, you can grab that information and get started.
How to Chit Seed Potatoes
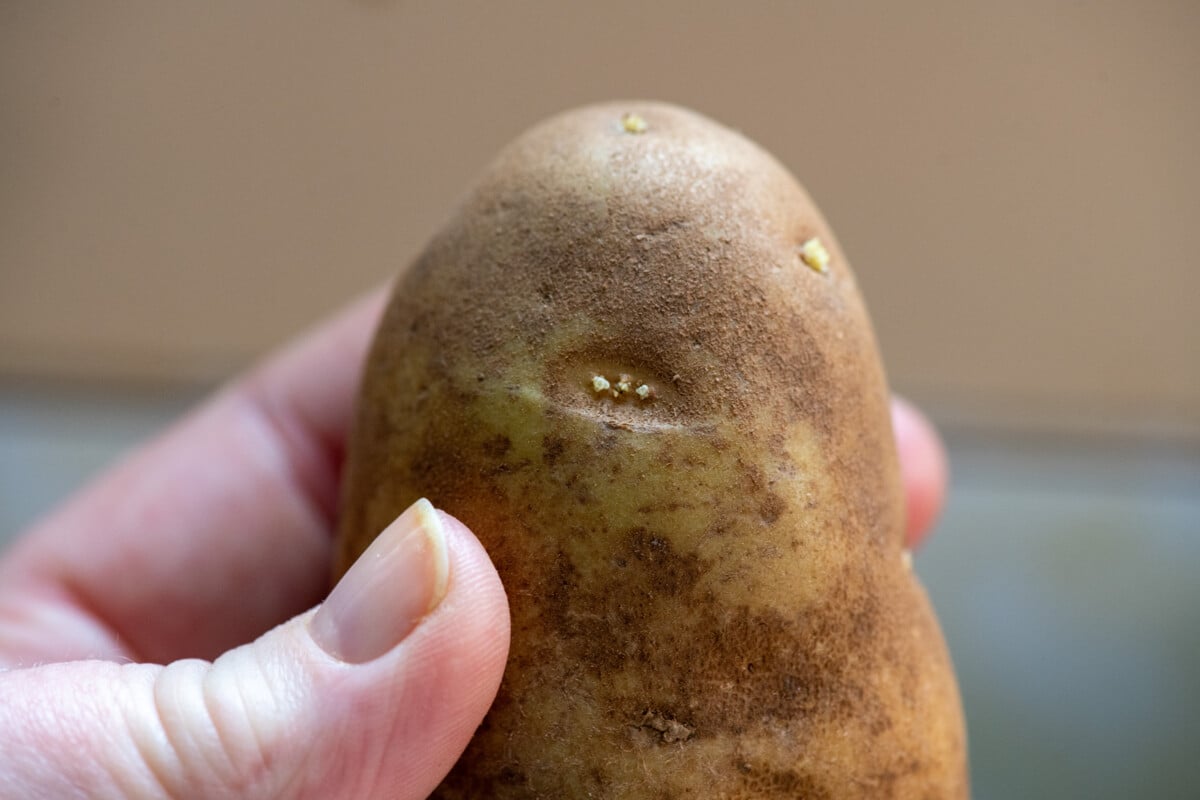
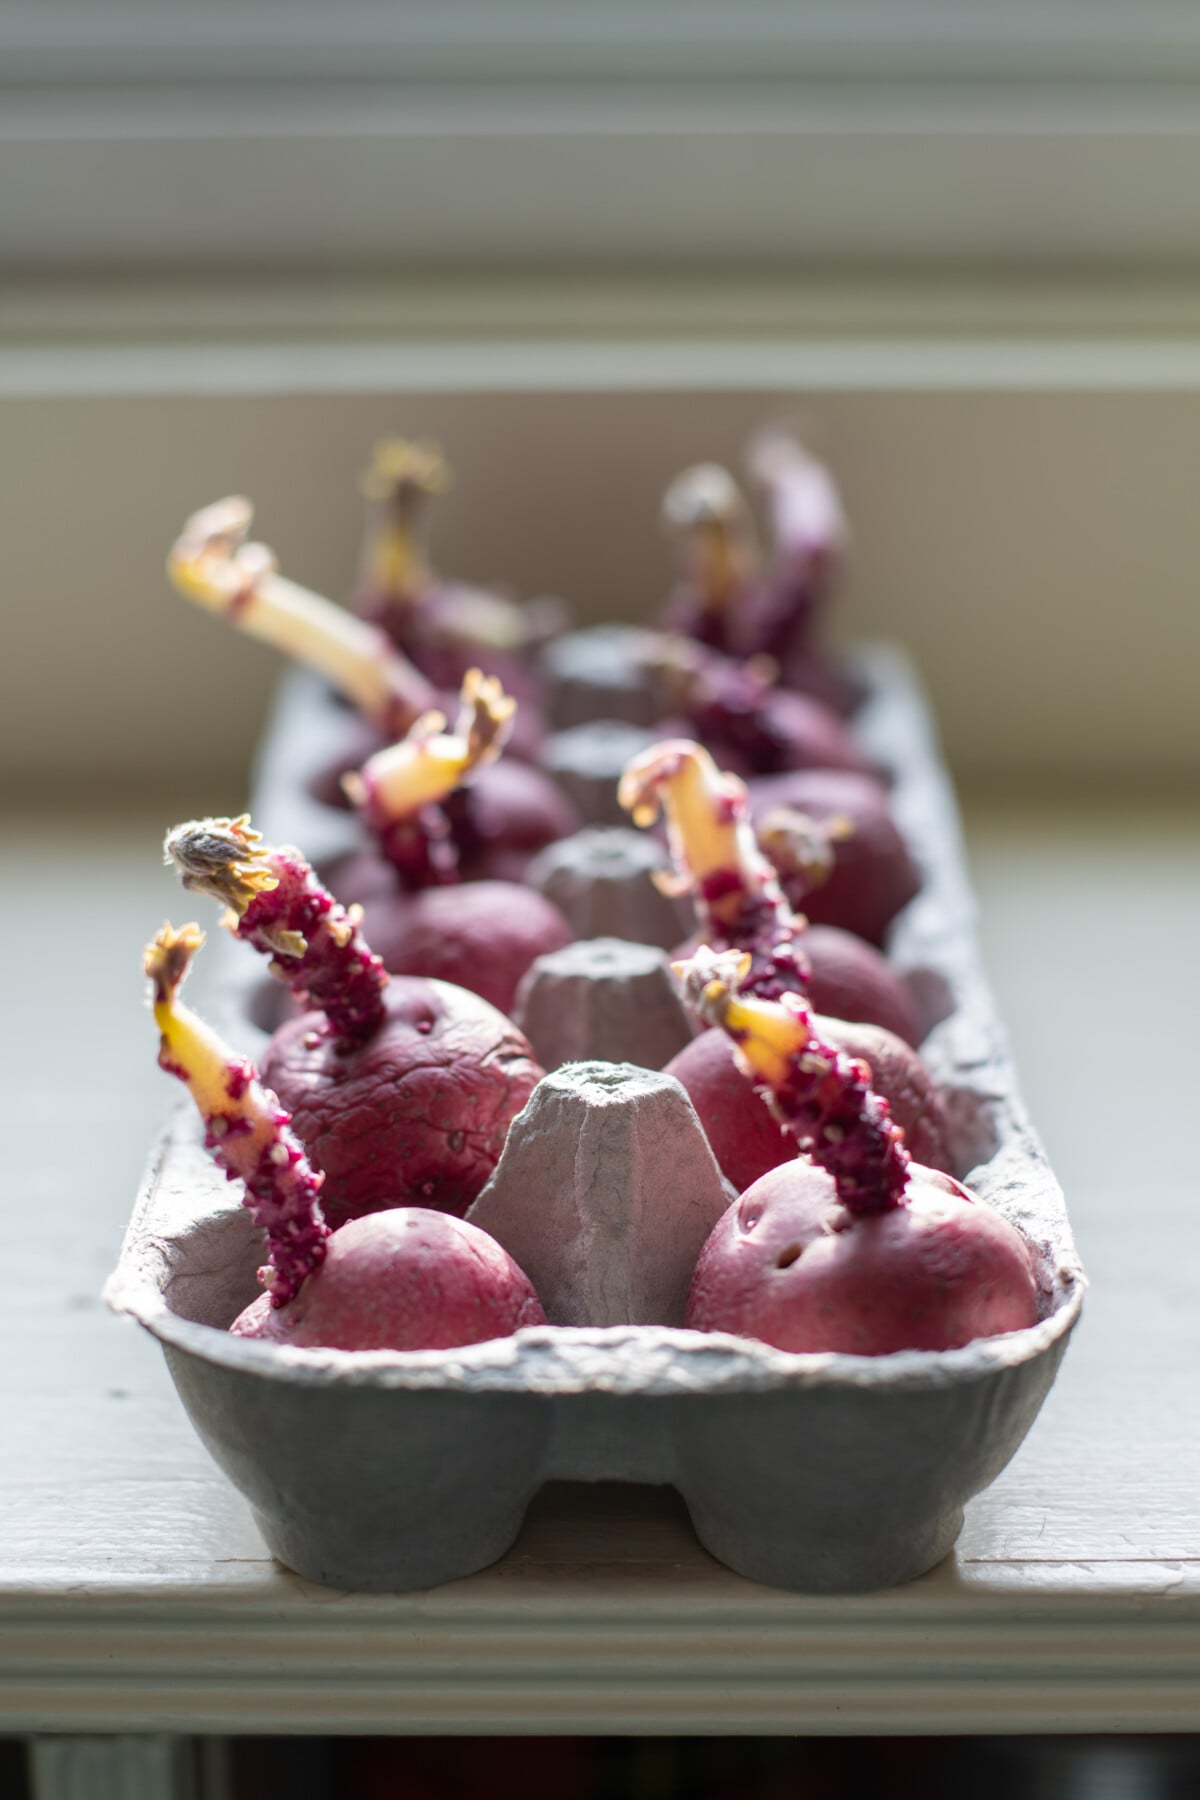
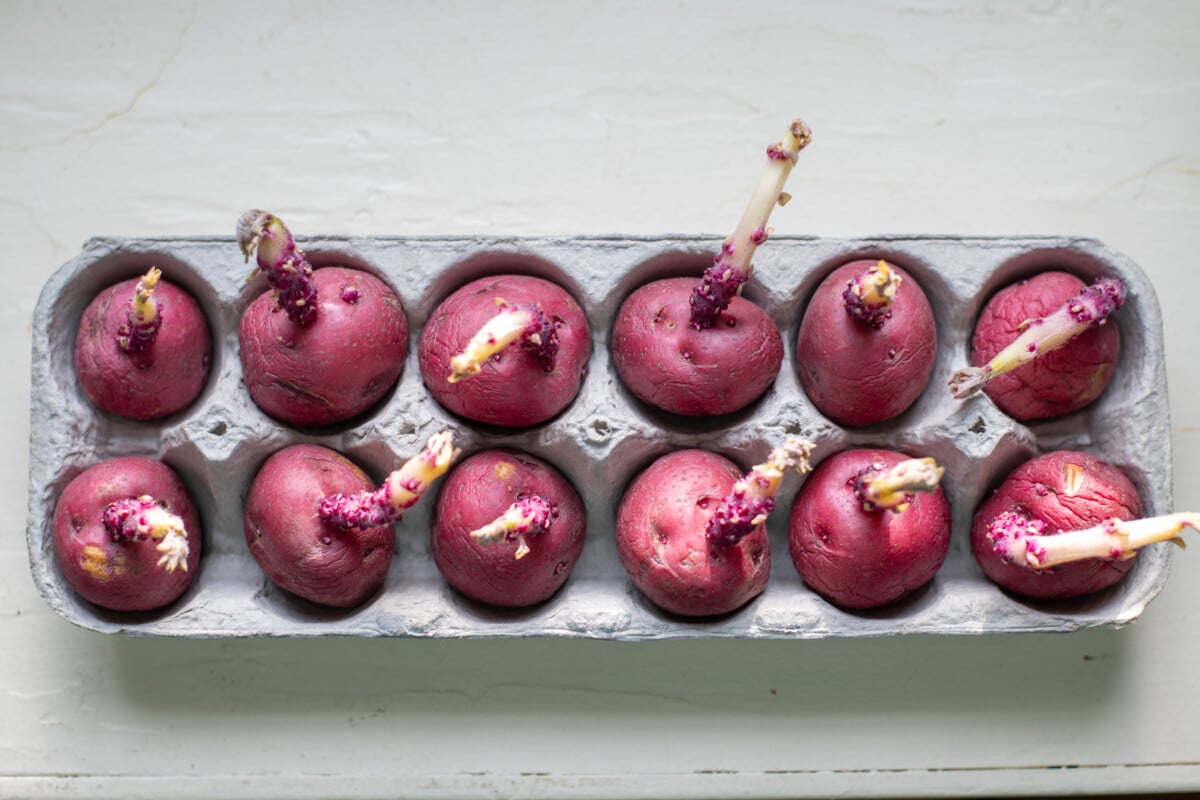
To chit seed potatoes, you need to place them in a cool and sunny location about a month or so before you want to plant them. That’s it. It really is that simple.
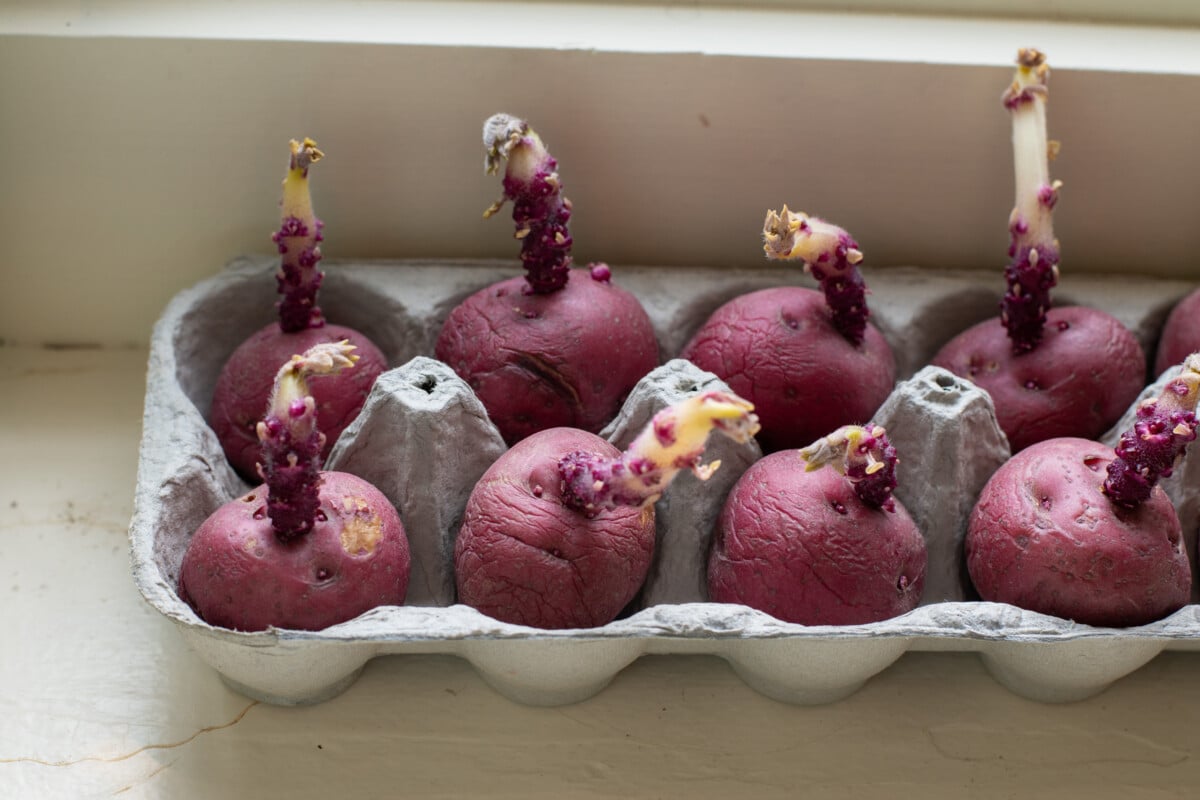
It’s nice to put something under the potatoes or put them in something, like an egg carton, but it’s not necessary. Unless you’re chitting potatoes on your grandmother’s antique mahogany sideboard, then you absolutely need to put something under them.
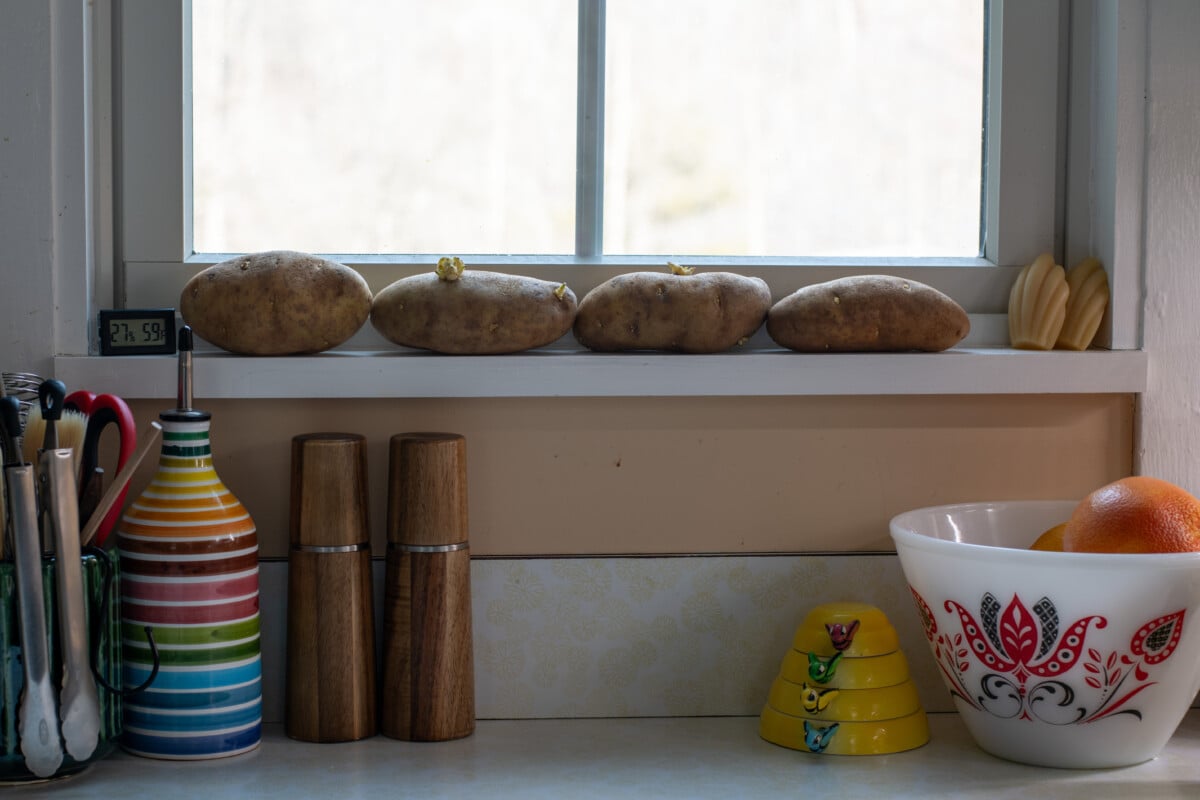
Windowsills work great because no matter how well-insulated your home is, usually, right next to the window is much cooler than the interior of your home. If the thought of having potatoes sprouting funky limbs all over your home isn’t your style, you can chit potatoes in a garage near a window, as long as it’s not cold enough to freeze them.
Pro Tip: Whenever you say you’re chitting potatoes out loud, remember to annunciate the ‘ch’ sound. Otherwise, it sounds as if you’re saying you are shi…you know what? Never mind.
Chitting Basics:
- Start chitting seed potatoes 3-4 weeks before it’s time to plant them outdoors.
- Give your potatoes a little personal space, allowing for airflow around each spud.
- The location needs to be sunny and cool.
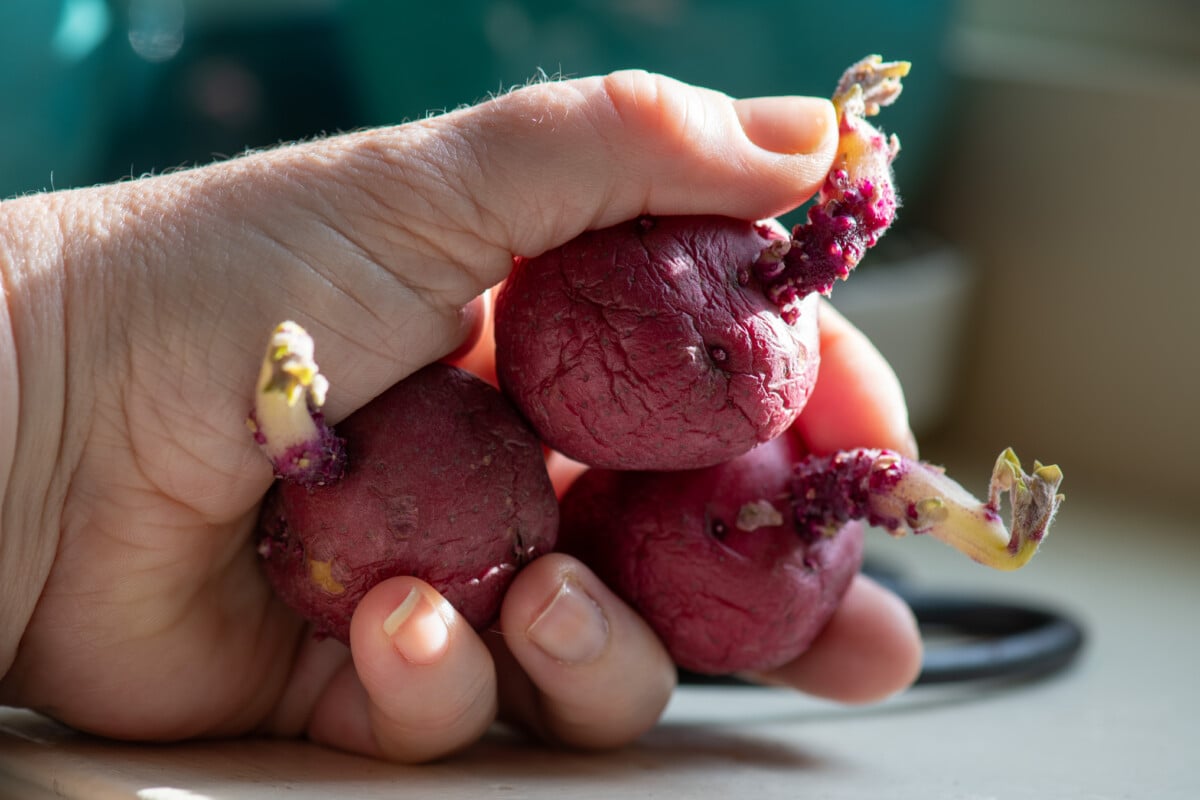
- Place smaller potatoes, like red-skinned potatoes, in egg cartons to make wrangling them easier.
- For larger potatoes, such as russets, turn the potatoes every few days so that all sides (except the bottom) receive light.
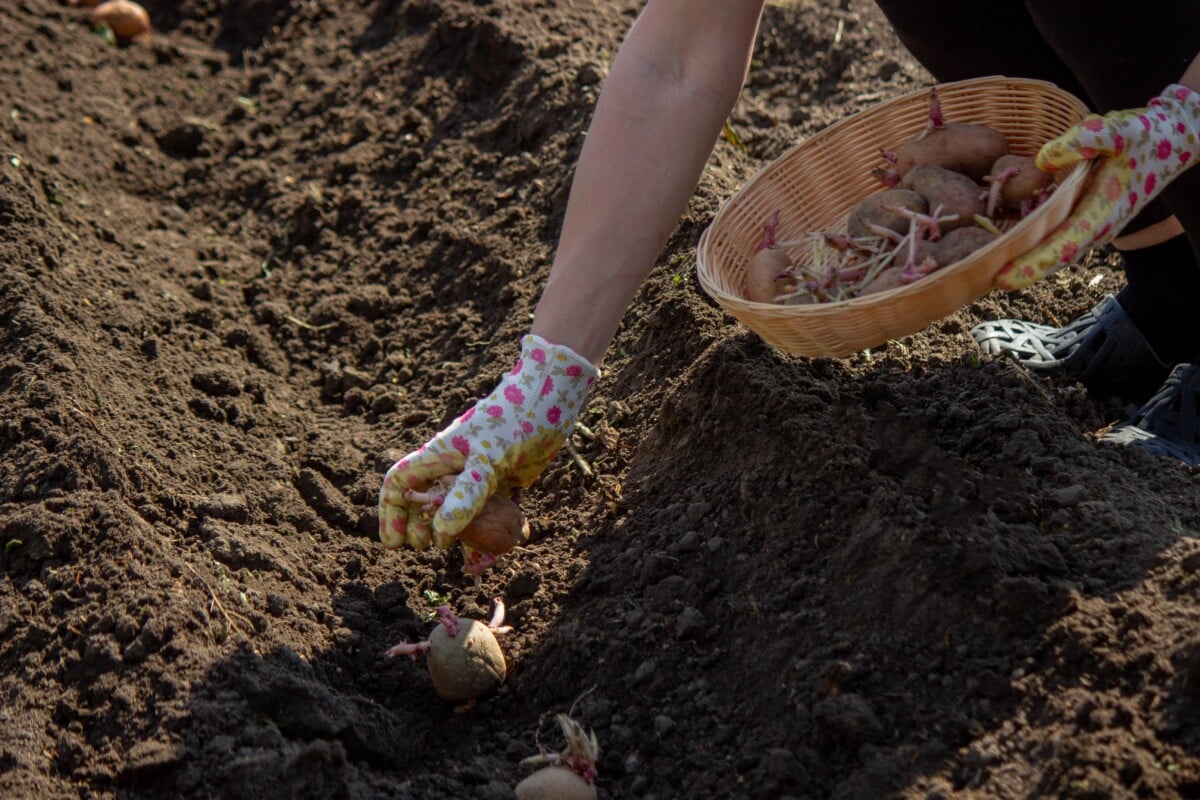
Once it’s time to plant your potatoes, you can cut the seed potatoes into smaller pieces. Each one of those sprouts has the potential to grow a whole new plant and tubers.
Now comes the all-important question.
Do You Have to Chit Seed Potatoes?
Nope. Absolutely not. So, if that’s the answer you were hoping to hear, you can close out this article and go back to what you were doing. (Yeah, I don’t remember what it was either.)
However, (Oh come on, you knew that was coming.) there are obvious benefits to chitting, otherwise we wouldn’t bother. There are also some instances where chitting seed potatoes is necessary.
The Benefits of Chitting Seed Potatoes
Short Season
If you live in an area of the country with a short growing season, then chitting potatoes can be the difference between having enough time to grow them or not.
I live right smack in the middle of the state of Pennsylvania, and I’m in USDA hardiness zone 6b. My growing season is kind of in the middle, not necessarily short, not necessarily long. But I chit my seed potatoes each year because it’s just a bit of insurance if we get an early frost or spring happens to be especially cold. I’m lucky in that if I forget or run out of time, it’s not the end of the world.
Areas more northerly than me would definitely benefit from chitting their seed potatoes, especially if you want to grow second-earlies and main crop potatoes. (More on those terms in a moment.)
You End Up with Stronger Plants
Chitting seed potatoes gives your crop a head start, which means you end up with stronger plants. They are already actively growing when you plant them. Spring weather is unpredictable, and every little thing you can do to shield your plants from Ma Nature’s temper tantrums means more veggies on your table throughout the season.
The first year I tried chitting seed potatoes proved to me why it’s worth the effort. I planted chitted seed potatoes as well as some that didn’t arrive early enough for me to chit. We had a horribly cold and wet spring. The variety that I chitted grew, but the variety that I didn’t have a chance to chit rotted in the cold, damp soil.
More Potatoes!
Remember those nice, strong plants? Nice, strong plants have this funny habit of producing more vegetables for us. By giving your potato plants a head start, you often end up with more potatoes in the end.
Which Potatoes Benefit from Chitting?
In general, earlies and second-earlies benefit from chitting. Chitting main crop potatoes isn’t really necessary since they’re in the ground for so long.
If everything I just said makes no sense to you, you’re not alone. I’ll explain.
Long before I grew my own, I just assumed that potatoes were potatoes. So, when I decided to start growing them in my garden, I was completely perplexed when asked if I wanted to grow earlies, second-earlies or main crops?
“Um, I just want to grow potatoes?”
There are three types of potato varieties, all based on when you harvest them, and all sounding like a hobbit came up with the names. Much like their cousins, the tomato, they can be determinate (early and second early) or indeterminate (main crop). This is an important distinction to consider when buying seed potatoes.
First Earlies, aka. New Potatoes
These little guys are, wait for it, the first potatoes harvested during the growing season. They grow quite quickly. (Again, shocking, I know.) If you live in an area where blight is a problem, grow early potatoes. You will have them harvested before blight shows up.
- Time to Harvest: 10-12 weeks after planting.
- Traits: Small, about the size of a ping-pong ball, tender and thin-skinned. Waxy flesh.
- Best used for: Can you taste that summertime potato salad? Boiling, steaming, salads and grilling.
- Storage: Nope. The skins are very thin. You can easily rub the skin away with your fingers. Eat earlies as soon as possible for the best flavor.
- Varieties to Try: Red Port, Yukon Gold, Natascha
Second Earlies
As the name suggests, these are the next potatoes to come on the scene.
- Time to Harvest: 13-15 weeks after planting
- Traits: Still a waxy-fleshed potato, but larger than your first earlies.
- Best used for: Salads, boiling and light roasting.
- Storage: The skins are a bit thicker, so they will keep longer. When stored properly, second earlies will keep for around a month.
- Varieties to Try: Red Pontiac, French fingerling potatoes, and Kennebec
Main Crop

Finally, we come to main crop ‘taters. These are the more robust potatoes that you grow for storage and longer and higher heat cooking, like roasting and baking.
- Time to Harvest: 15 to 22 weeks after planting
- Traits: These potatoes have much thicker skin that makes them hold up better over time and a floury texture, rather than waxy.
- Best used for: This is your standard baked potato. Roasting, baking, mashed potatoes and frying.
- Storage: With proper curing and storing, they can be stored for months after harvest.
- Common varieties: Russet, Elba, German Butterball
Christmas Potatoes
For some parts of the country, you can even have a fourth type – Christmas potatoes. These are simply earlies or second earlies planted in late summer, so that they are ready to be harvested for Christmas. If you live in zones 7-11, you can grow Christmas potatoes.
Buying Seed Potatoes vs Grocery Store Potatoes
It’s a good idea to buy seed potatoes, as they are certified to be disease-free, and blight and other common potato diseases can be hard to get rid of once they’re in your soil.
That being said, yes, you can use potatoes from the grocery store as seed potatoes. There is a slight risk of disease, but as long as the potatoes are clean and free of spots or mold, you should be good.
People like to point out that most grocery store potatoes are sprayed to keep them from sprouting, to which I always reply, “Oh, really? Tell that to the bag of sprouted potatoes hanging on a hook in my pantry.”
Yes, most grocery store potatoes have this sprout inhibitor on them; however, it only slows sprouting rather than prevents it.
If the thought of spending $15-$20 on a few wrinkly seed potatoes seems silly, let me assure you, friend, you’re looking at seed potatoes the wrong way.
I get it, buying seed potatoes seems kind of spendy for a vegetable that you can buy at the grocery store for a few bucks.
But here’s a little trick that gardeners in-the-know have been using for ages.
There’s really nothing special about those “certified seed potatoes” for sale beyond the fact that they’ve been inspected by the USDA and certified disease-free, which is pretty important where soil-borne diseases are concerned.
But here’s the thing, once you grow those spendy seed potatoes in your own garden, not only have you grown potatoes to eat, you’ve also grown next year’s seed potatoes, too. Save a few from your harvest to plant next year.
You’ll be growing your own seed potatoes from there on out.
So, when you’re looking at the prices of some of those fancy, organic heirloom certified seed potatoes, just remember you’re buying generations of potatoes.
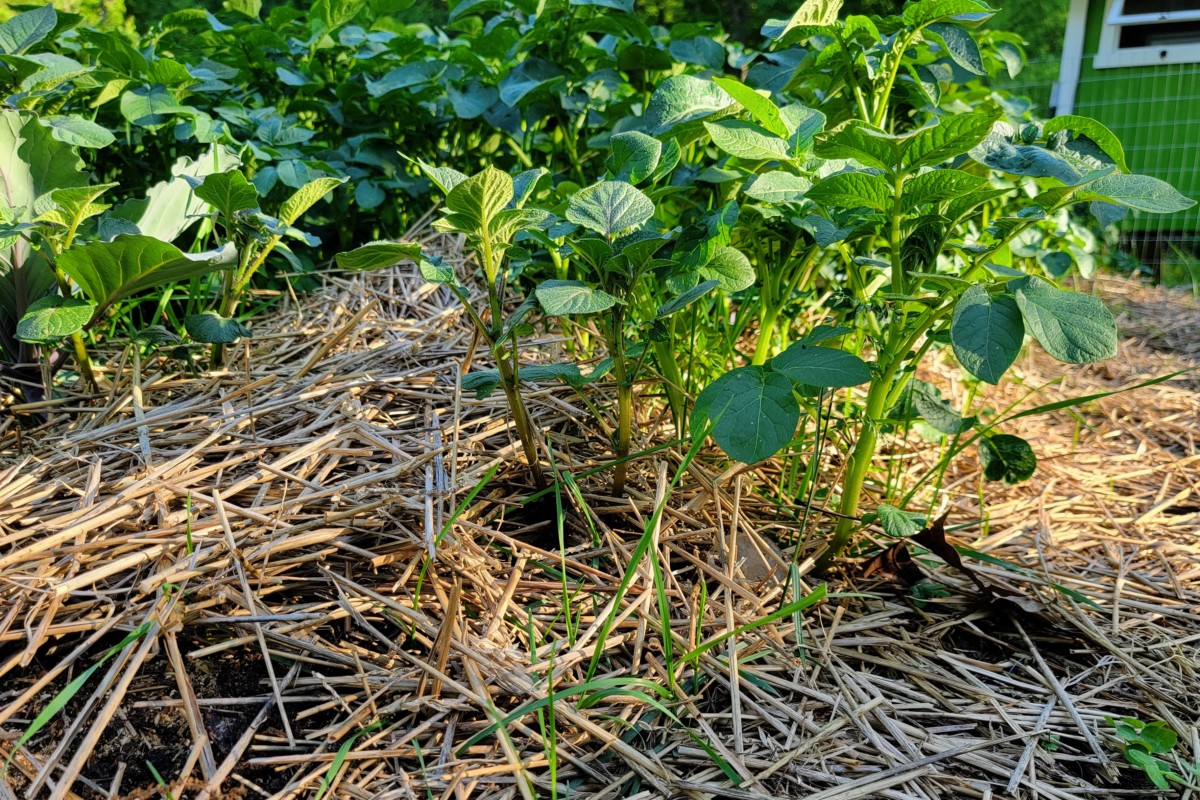
Planting and Harvesting Potatoes
Okay, Tracey, you’ve convinced me. I’ve chitted my seed potatoes, now what?
Grow Potatoes
Great news! Growing potatoes is incredibly simple, and you’ve got options, no matter how big or small your garden is.
Let’s take a look at a few ways to grow potatoes.
Growing Potatoes Above Ground Without Hilling
(This is my second-favorite way to grow potatoes. I’ve had great results with this method year after year.)
How to Grow Potatoes in 5-Gallon Buckets
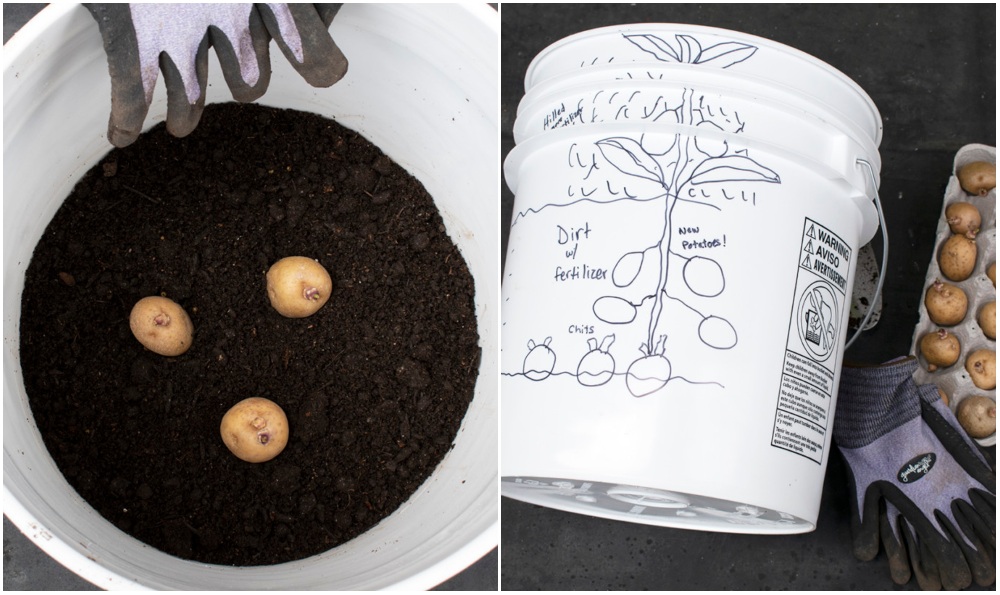
(This is my favorite way to grow potatoes. Harvesting is as easy as dumping out the bucket. It’s like a dirty treasure hunt!)
Got Raised Beds? You Can Grow Potatoes Too
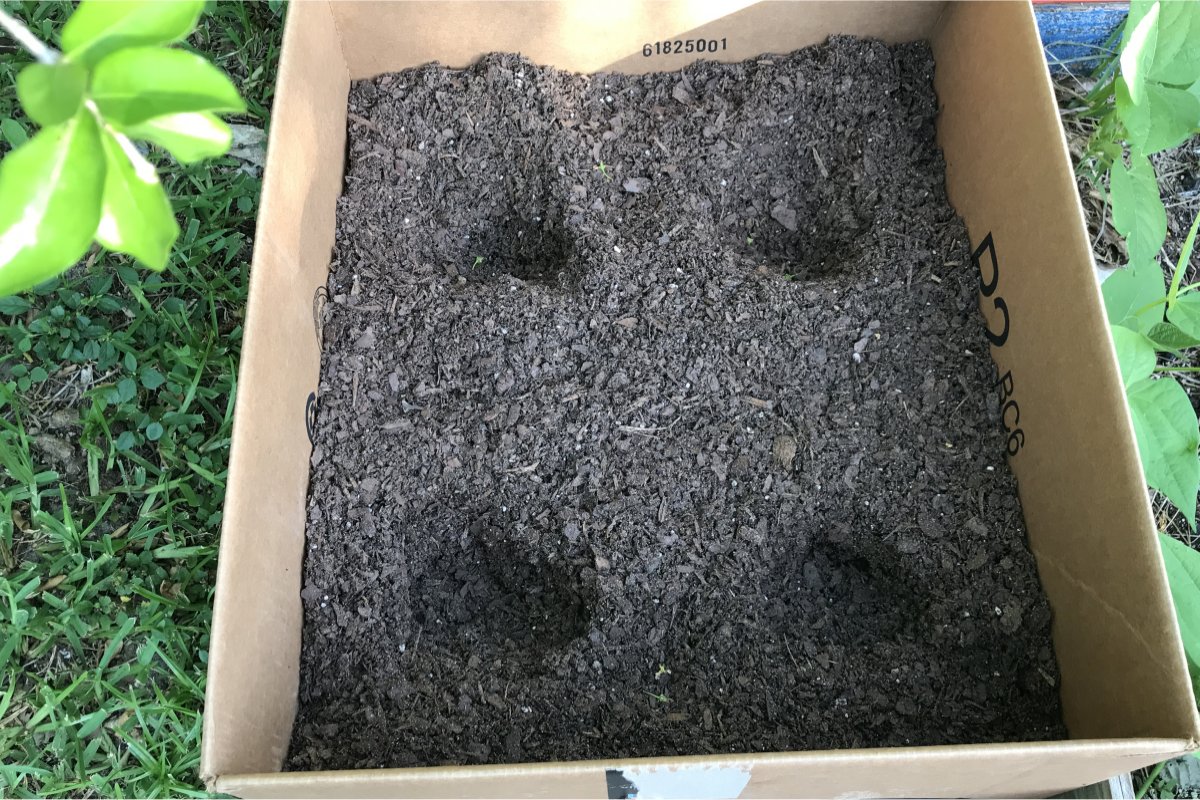
How to Grow Potatoes in a Cardboard Box – yup!
Finally, if you decide to grow main crop potatoes and you’re hoping to store them, there are a few tricks you need to know. (Like leaving the dirt on them when you dig them up.) If this is your first time storing potatoes, I highly recommend giving this a read.
If you made it this far, wow, you were in it for the long haul. You deserve something for being so dedicated to your quest for potato chitting knowledge, so I will leave you with this little treat.

Get the famous Rural Sprout newsletter delivered to your inbox.
Join the 50,000+ gardeners who get timely gardening tutorials, tips and tasks delivered direct to their inbox.