


The roost is a necessity for the chicken run and coop, but it doesn’t need to cost an arm and a leg.
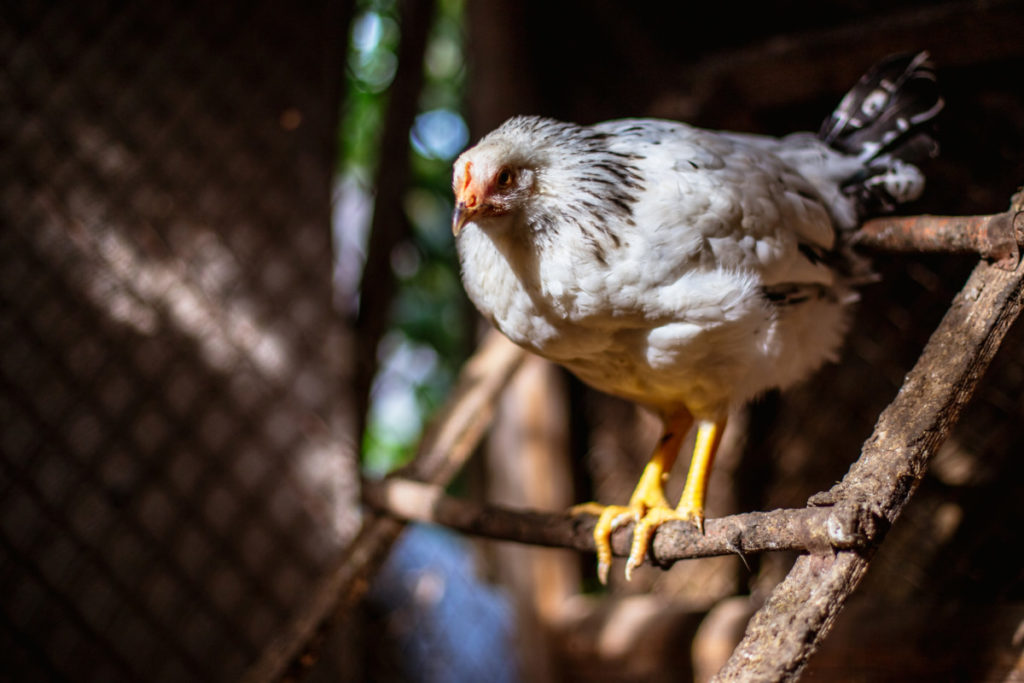
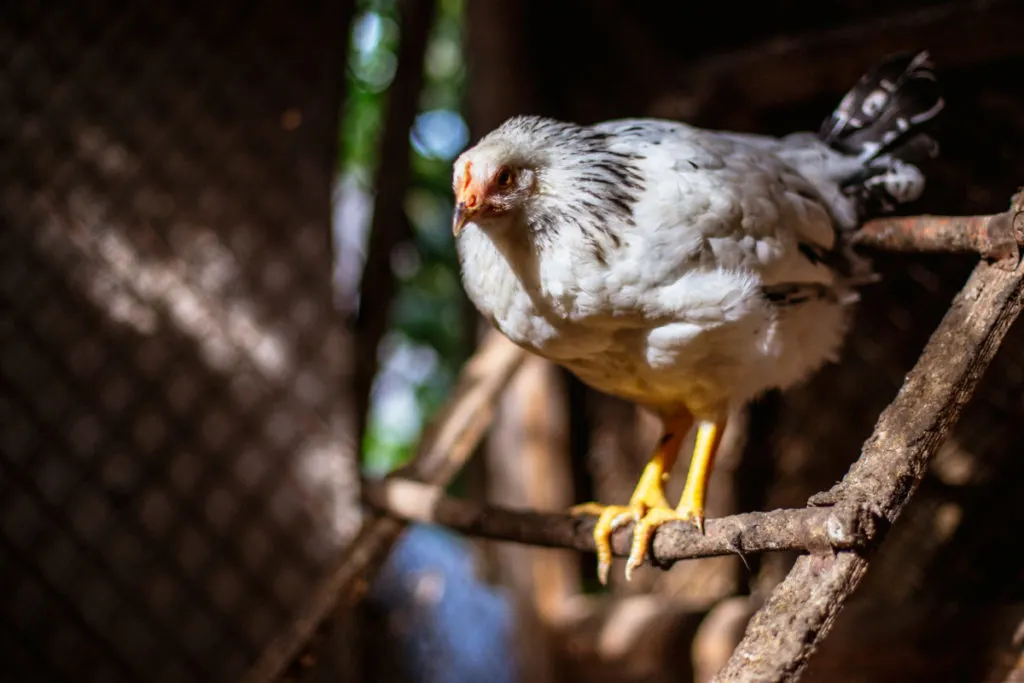
You can make a chicken roost completely free using tree branches instead of lumber. You might even find that your chickens prefer roosting on tree branches as they’re more true to a chicken’s natural environment.
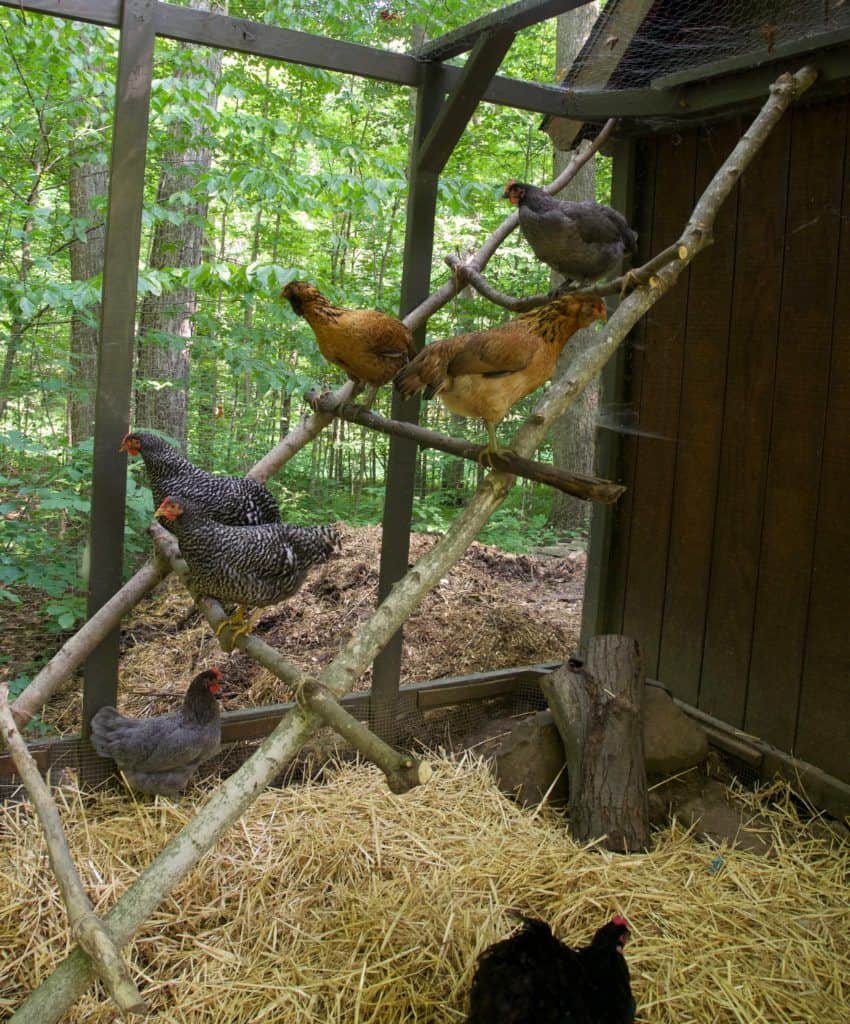
What’s a ladder-style chicken roost?
Roosts come in all shapes and sizes, but one of the easiest roosts to make, and the one we’ll be showing here today, is the ladder style chicken roost.
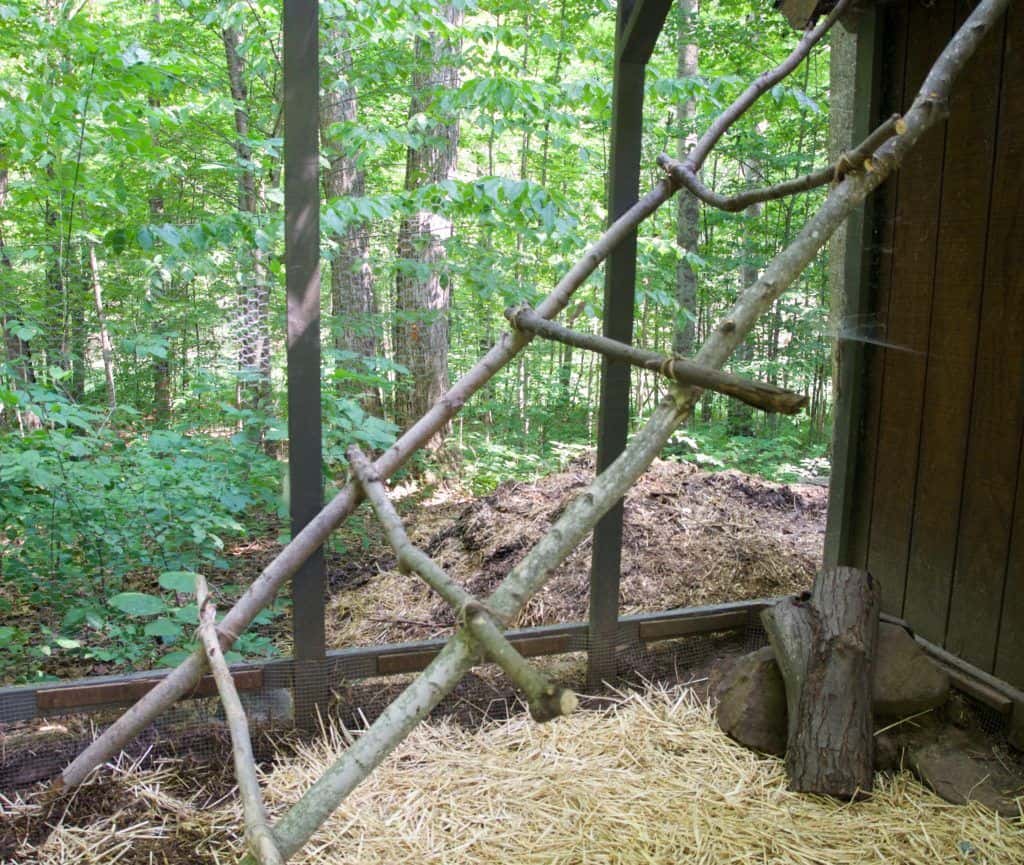
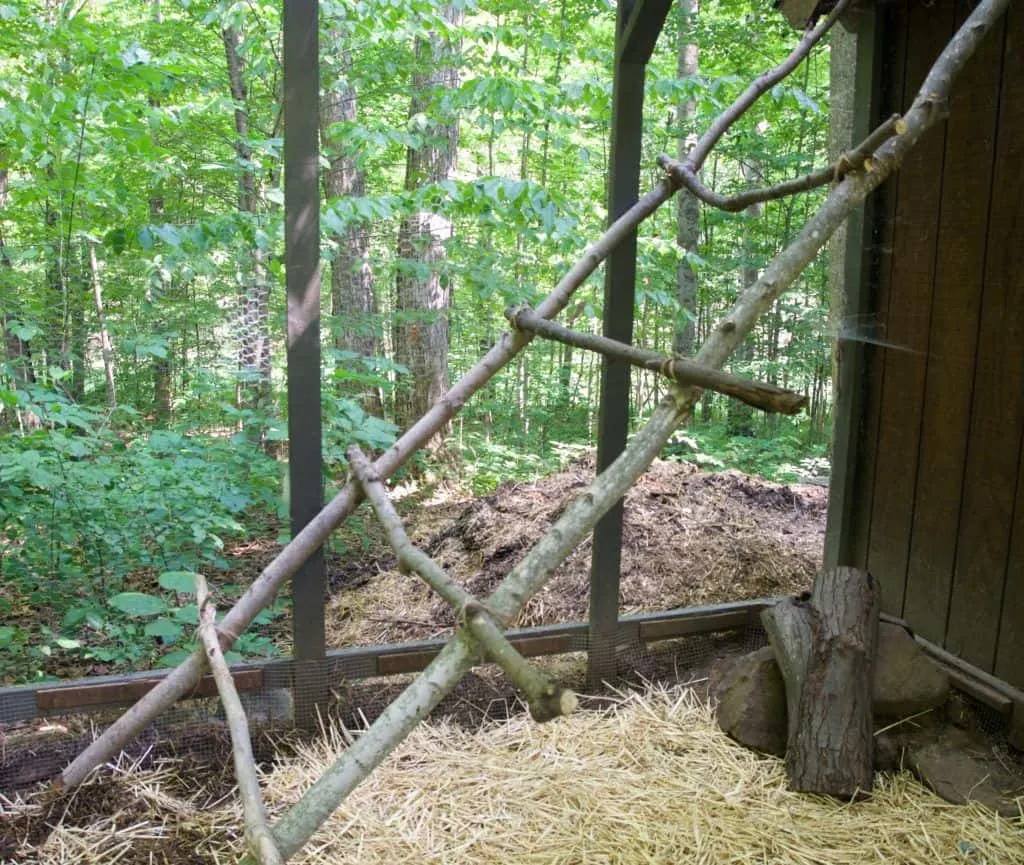
This roost looks exactly like a ladder, it has two side rails with rungs in between for the chickens to sit on. This type of roost doesn’t need to be secured to anything in the coop or run, it simply leans against the wall.
How to Make a Chicken Roost Out of Tree Branches
Step 1: Gather your materials
Roost materials:
- 2 long and straight tree branches for the side rails
- 4-8 smaller tree branches for the rungs
- Saw for cutting to size – handheld or power
Building materials (use any of the following, not all):
- Rope and scissors
- Screws and a drill
- Zip ties
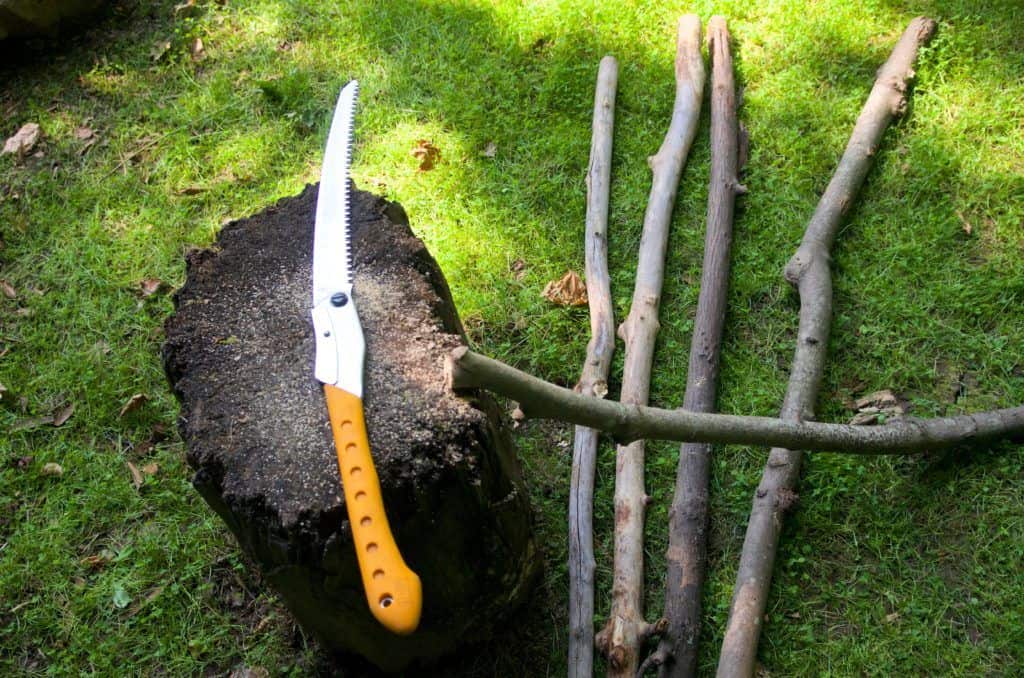

Step 2: Cut all the branches to size
First, you’ll need to prepare the two larger branches that will become the side rails of your ladder roost.
Make sure you choose two branches that are mostly straight, nice and thick, and strong. Small saplings or large branches that have been freshly cut are ideal as they’ll be at their strongest.
Strip those two big pieces of any off-shoots like small twigs or leaves, but you can leave the bark on.

Measure the space in your coop or run where these will sit, and cut them both to that size. Remember they will be leaning against a wall, not standing straight up, so measure accordingly. The side rails in our example were approximately 8 feet long.
Next, lay the two side rail branches side by side, spaced exactly how you would like them to be in the coop.
Gather your smaller tree branches for the rungs and place them on top of the side rails, giving them 1-2 feet of space in between each rung. If needed, cut these rungs so they’ll fit on the side rails.
Though it might be tempting, don’t start assembling them yet.
I highly recommend you assemble this structure inside the coop or run.
Not only is it hard to gauge size and shape for the roost if you’re building it off-site, but it also might be impossible to get it in the doorway and maneuver around the coop once it’s fully assembled. We built our branch roost right in the chicken run, and I’m so glad we did because there’s no way it would have fit through the door fully assembled.
Step 3: Start building
Once your side rails are in place inside the coop or run, you’re ready to start securing the rungs to the rails.
You can either lay the rails down and assemble everything on the ground or if it’s comfortable, assemble it while the rails are set up, leaning against a wall. We did it this way because there wasn’t space in the chicken run to lay the whole thing down.
There are several choices for securing the rungs to the side rails, and all have their merits. The best option is usually the one you’re most comfortable with, or already have the supplies on hand for.
While assembling your roost, be sure to leave enough space between rungs for the chickens to sit comfortably, 1-2 feet should do it.
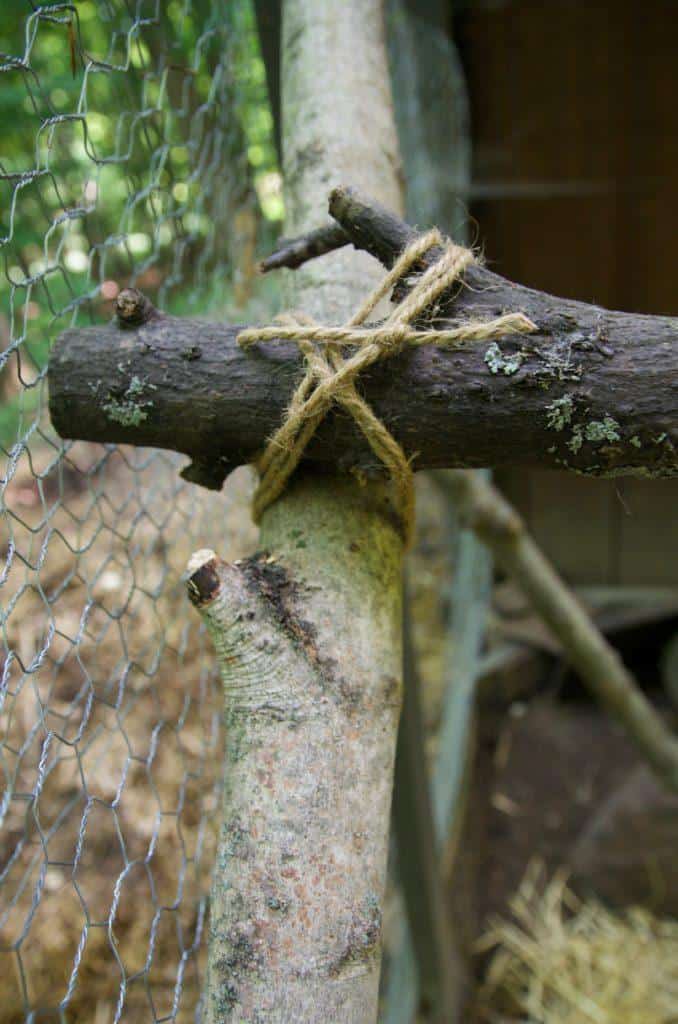
Option 1: Assembly with String/rope
Advantages:
- No power tools needed
- Fully biodegradable
- Beautiful rustic look
- Easy to adjust if needed
First, cut about four feet of rope for each side of each rung.
Holding the rung tightly to the side rail, wrap the rope around the two branches at a diagonal and tie tightly with a square knot, leaving a two-inch tail.
Wrap the remaining rope around both branches in a figure 8 pattern, pulling tightly on each pass. When the branches feel tightly secured, tie another square knot using the tail you left earlier.

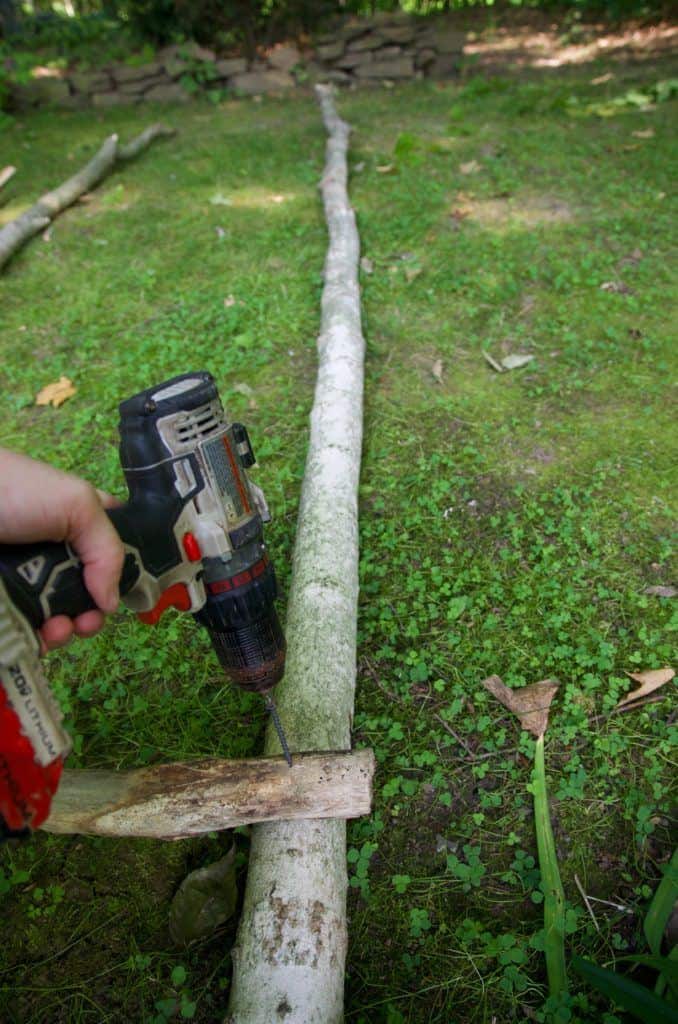
Option 2: Assembly with Screws
Advantages:
- Faster to assemble than rope
- Easy to put together
- Strong, will last a long time
Using screws and a power drill is much faster than rope wrapping, but obviously, you’ll need to have these materials on hand and know your way around power tools.
First, hold the rung and rail tightly together and drill a guide hole through both branches. Next, using 2 or 3-inch screws (whichever size fits your rungs) and the power drill, screw the rung tightly to the side rail. Continue this process for each side of each rung.

Option 3: Assembly with zip ties
Advantages:
- Super fast to assemble
- Can easily dis-assemble
We love using zip ties around the homestead for various projects. They’re easy, fast, super secure, and best of all, with a simple snip of scissors, you can dis-assemble things just as easily.
Zip ties might be a good choice for this project if you know you’ll need to move it at some point or you need to get the project done quickly.
To connect the rungs to the rails using zip ties, simply hold the two branches together tightly, cross the zip tie diagonally around both, and pull tightly. Do the same thing on the other side of the rung for a tight fit.
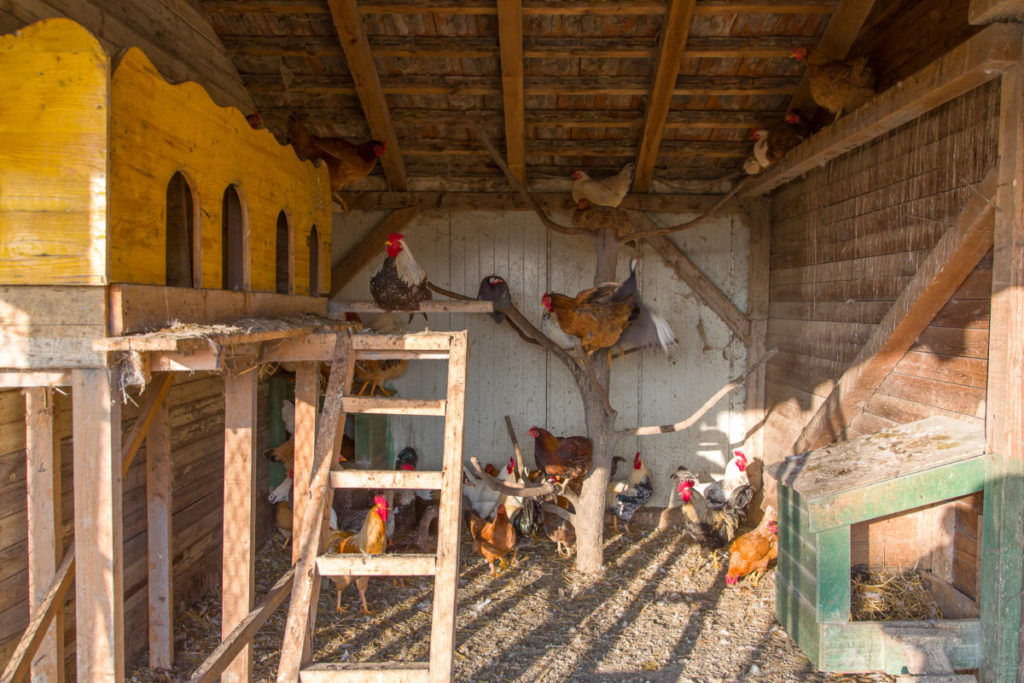
Now that your chicken roost is complete, it’s time to let the chickens have a go at it. If you haven’t already, lean the roost against the wall and watch your chickens delight in jumping from rung to rung.


Get the famous Rural Sprout newsletter delivered to your inbox.
Including Sunday ramblings from our editor, Tracey, as well as “What’s Up Wednesday” our roundup of what’s in season and new article updates and alerts.