

A trellis can be a very useful addition to a garden or growing area. In this article, I want to show you how to make a rustic woven branch trellis that’s perfect for climbing plants.
A trellis like this can have a wide range of uses whether you grow climbing vines loaded with flowers or you have a passion for pole beans and peas.
I made mine to stand wherever I’m growing legumes but you could use yours in a number of different settings, and for a number of different purposes.
Why Might You Need a Trellis?
Before we discuss how to make a rustic woven branch trellis, let’s take a moment to think about why you might want a trellis in the first place. Determining what exactly the trellis is for, and where it will be used is important. When you don’t know these things, you won’t be able to make design decisions about your trellis, or determine which materials to use.
You might need (or choose) to add a trellis:
- To a sunny wall or fence.
- To the edge of a raised bed.
- To grow crops vertically in a square foot garden.
- Freestanding, between different parts of your garden.
- Inside a greenhouse or polytunnel.
- Above a window box or other container on a balcony or porch, or even inside your home.
Wherever it is positioned, a trellis can serve one or more of the following functions. It can:
- Save space by allowing plants to grow vertically rather than horizontally.
- Give climbing or vining plants the structure they need to grow tall and strong.
- Allow you to disguise or screen an ugly wall or fence.
- Create a decorative garden feature.
- Screen off a certain area of your property from view (for example, recycling bins or compost heaps).
- Create a degree of separation between different garden zones. (For example, a trellis can provide a little privacy for an outside seating area).
Why Not Just Buy a Trellis?
Why should you make your own trellis using branches from your garden when you could just buy one? Well, of course, you could simply choose one of the many examples that there are on sale.
If you do decide to go the route of buying a trellis be sure to choose materials that can hold up to the elements where you plan to use it. Wood and bamboo trellises can be great sustainable options, but a metal trellis is strong and durable. Take care with using painted trellis around edible plants – especially if you cannot fully determine exactly what type of paint was used.
Making your own can give you far more control over the shape and size making it much more customizable.
Reasons To Make Your Own Natural Branch Trellis
Of course, when you make your own trellis with branches from your garden or the surrounding area, you know exactly where the materials have come from.
Using natural materials from your local environment can also help your man-made structures blend in more with the natural ecosystem of your property. Using such materials can give your garden a very harmonious and peaceful atmosphere and help your garden feel more rooted in the landscape.
And when your trellis is no longer needed, a natural branch trellis won’t create a waste problem. Eventually, the trellis you create will simply biodegrade, and be recycled into the natural system.
It’s also worth bearing in mind that such a structure will cost next to nothing to make. You might potentially even be able to make one for free.
Determining Your Trellis Design
There are a number of different design ideas to consider when creating a trellis from natural branches. For example, you could create a:
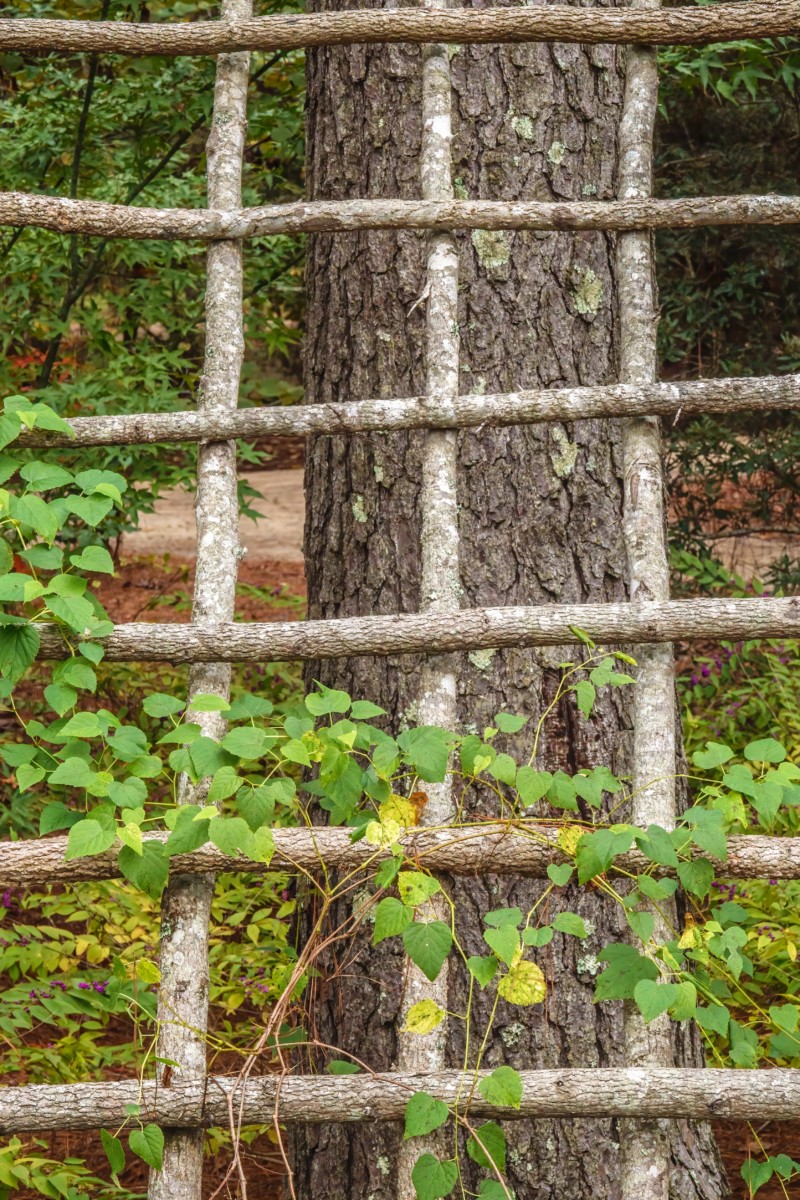
- Ladder type design, with a grid of squares made from vertical and horizontal branches.
- Closer-woven trellis with vertical and horizontal branches.
- Lattice of diamond shapes, with branches placed diagonally across the structure.
Of course, you could get more creative and turn your trellis into a true piece of garden art. But these three designs are the easiest ways to make a structure that is suitable for a range of plants to climb.
Sourcing Your Materials
Branches
The main material you will need for your woven branch trellis is, of course, the branches themselves. For this easy, forgiving project, you can use almost any type of wood you choose. Simply use whichever branches you have on hand. You will need some garden shears or a saw (for larger branches) to cut branches to the right lengths.
It’s easier to choose green wood that is slightly flexible, yet rigid enough to hold its shape. The width of branches you choose will depend on whether the structure is to be freestanding or placed against a wall or fence. It will also depend on how sheltered or exposed the position will be.
To make your life easier, it will be best to choose branches that are as straight as possible. But you can also choose branches that are curved or wavy to create some interesting, rustic effects. By adapting to the branches you have available, you can create some truly unique and beautiful trellises from what you have to hand.
Twine
In addition to the branches you will need some natural twine or string to tie your branches together and make a sturdy structure. (It’s best to use natural twine rather than a twine made from plastic for the obvious environmental reasons. Natural twine is less costly in environmental terms to make, and will biodegrade naturally along with the branches at the end of the trellis’s useful life.)
You could also use strips cut from an old t-shirt.
Choosing to tie branches together rather than undertaking some more advanced wood carpentry/joinery techniques makes this a far quicker and easier project.
How To Make Your Woven Branch Trellis
The time has now come to create your woven branch trellis. The exact technique that you choose will of course depend on where your trellis will be positioned, and the design you have selected. However, the method of construction is more or less the same for all three trellis designs mentioned above.
While this is a project that you can undertake on your own, it may be easier if you have a helper to hold things in place as you go.
The Method:
Part One: Placing Uprights
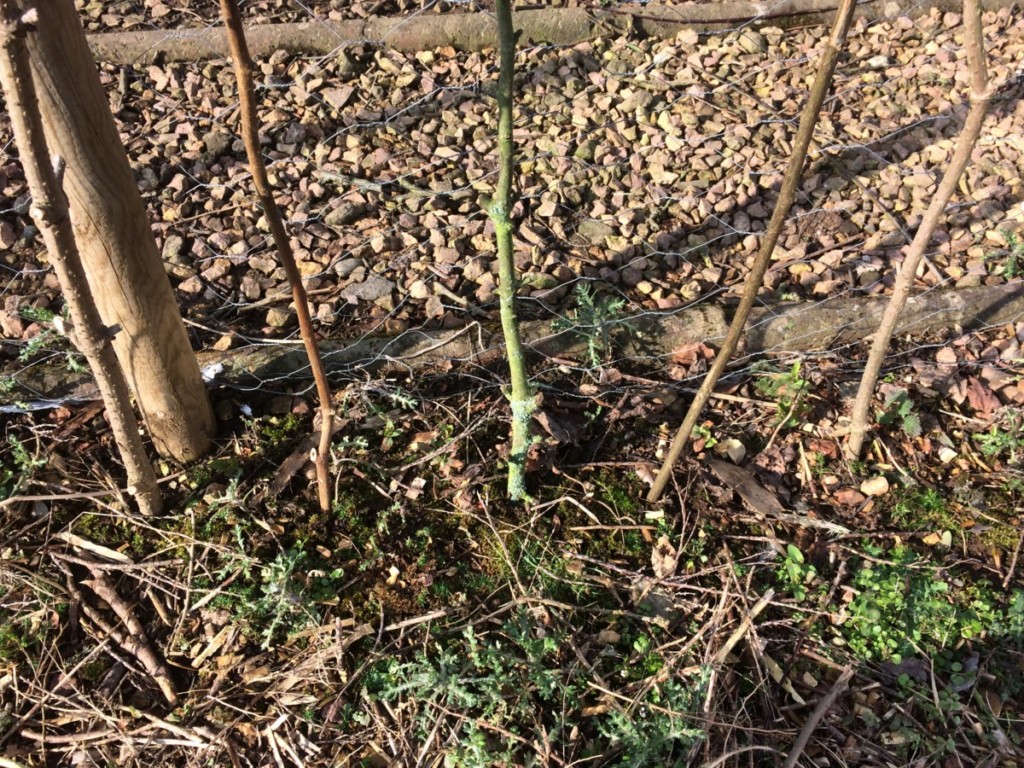
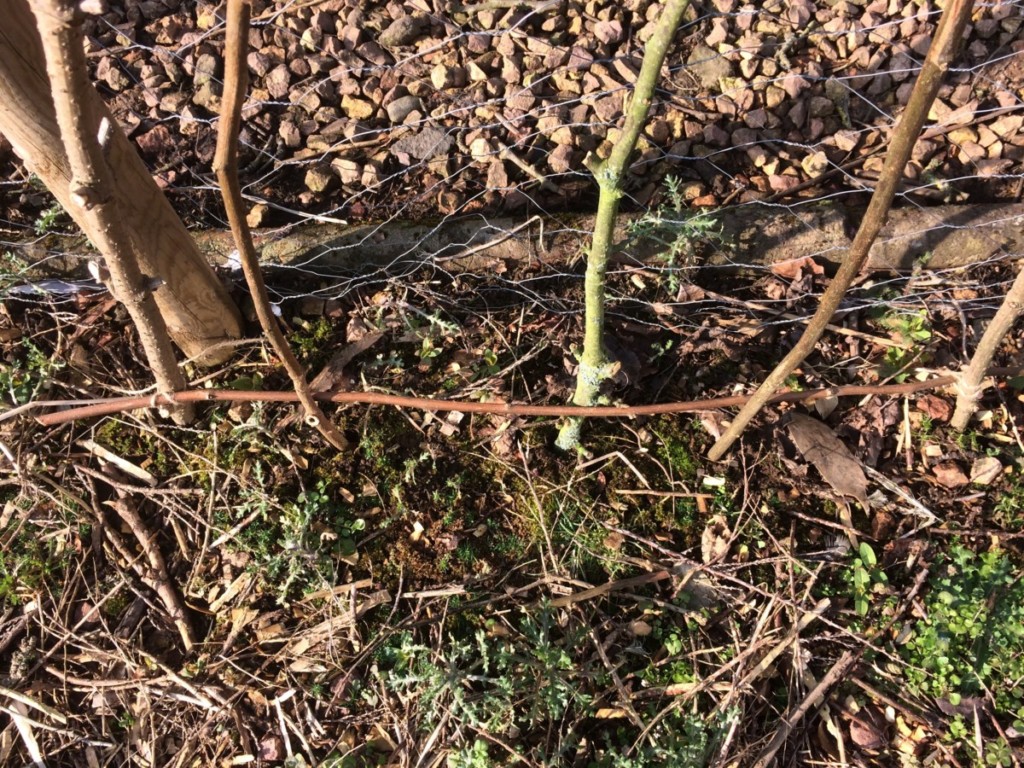
- First, position your uprights into the ground or into your raised bed or container. For ladder type and tighter weave vertical and horizontal strut designs, these will protrude vertically from the ground. How widely spaced these uprights are will determine the tightness of the mesh of the trellis.
For a diamond lattice design, the branches will protrude diagonally. Alternate branches that face diagonally in one direction with those that face the other. To keep things stronger, make sure that all the left facing branches are to the front, and right facing ones to the back (or vice versa) on the first row, then the opposite way round at the next point they join. If you want the trellis to have vertical edges, place vertical uprights at both edges of the structure.
Part Two: Weaving in Branches and Tying Them Together
- Next, for the first two types of trellis design, take another branch and weave it in and out between these uprights. Pass it behind the first upright, in front of the second, behind the third etc. Weaving the branches in this way will make a sturdier structure than simply attaching your horizontal branches to the front or back of the uprights.
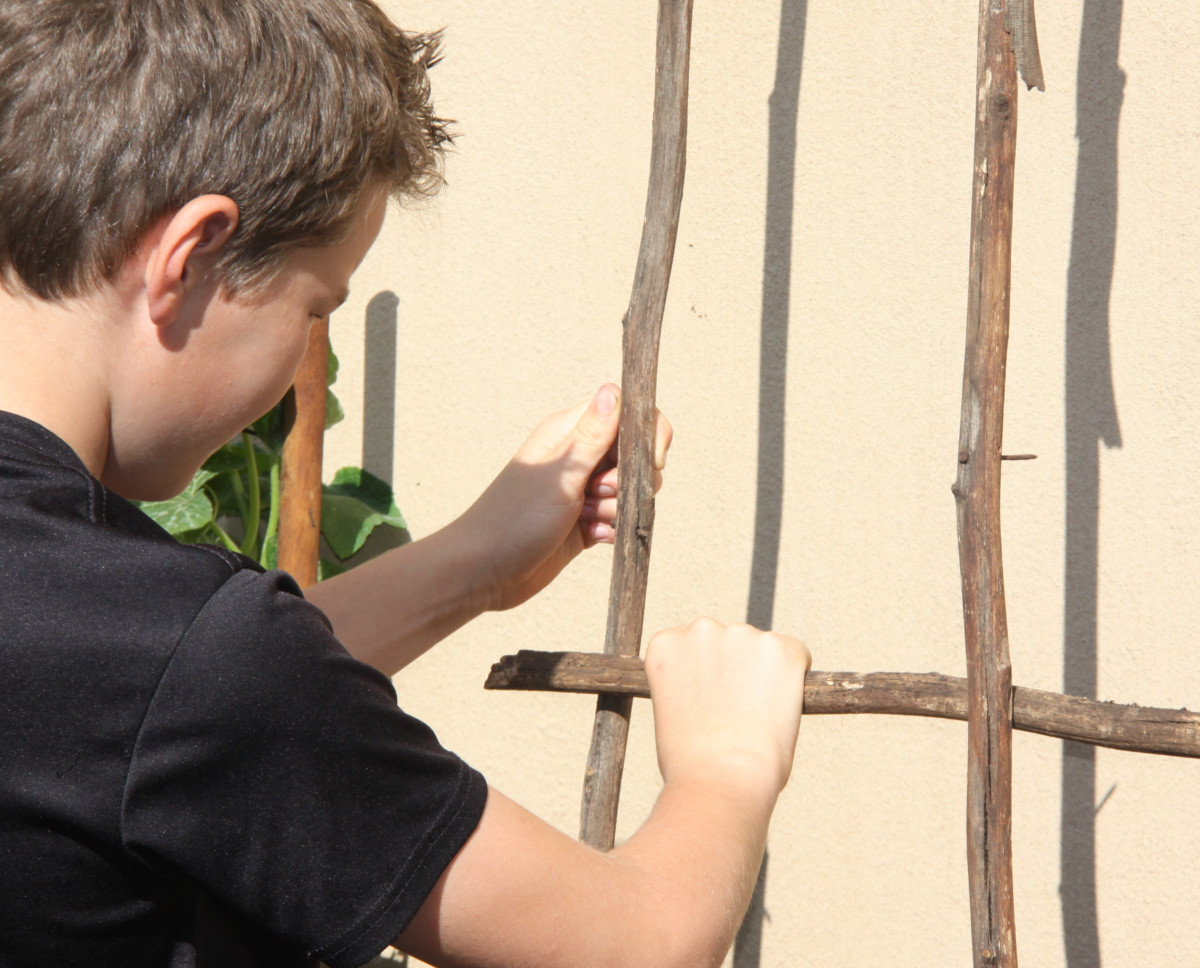
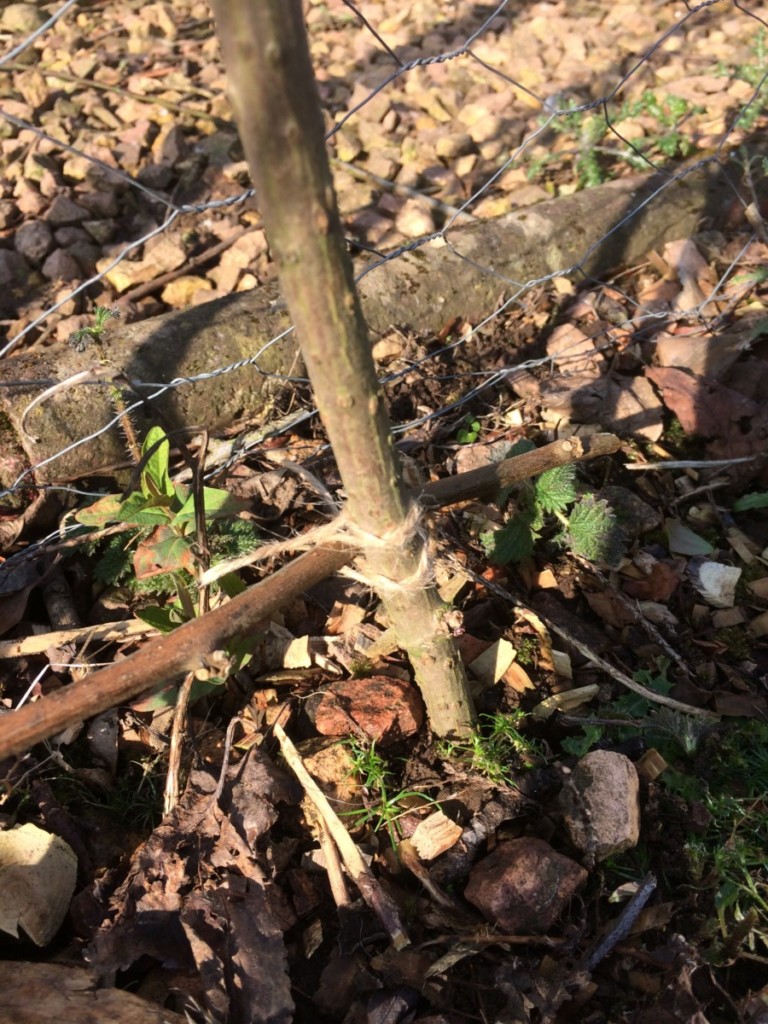
- Now, it’s time to begin tying your branches together to form the trellis structure. Decide how high off the ground to position your first horizontal branch, or to cross over your diagonal struts.
- Now use the twine to tie the branches firmly together. There are a number of different knot and tying methods you could choose. But the key thing is to make sure that the branches cannot slip upwards or downwards, or break free. After passing the twine around the branches, secure them by knotting them. To keep things neater, try to make your knots at the back of the trellis structure. (Leave trailing ends for now. These can be neatened up and cut off later.)
Tip: It is easier to secure the ends first, before tying in branches across the middle of the structure. This is especially true if you do not have a second pair of hands to help you hold branches in place while you secure them. For smaller, lighter trellis, you may find it is not necessary to tie the central cross-overs at all.
Part Three: Continuing to Make a Trellis of the Required Height
- Once you have secured the branches at this first row, it is time to move upwards. For the first two designs, you will now add another horizontal branch, weaving it in and out of the uprights as before, and securing it at the desired height above the last one.
For a diamond lattice, you will tie each diagonal onto the next diagonal that points in the opposite direction, as you move upwards. This will begin to create your diamond shapes. At the sides of the trellis, tie your diagonals onto your uprights. (You can trim off lengths of branch protruding from the edges of the structure later.)
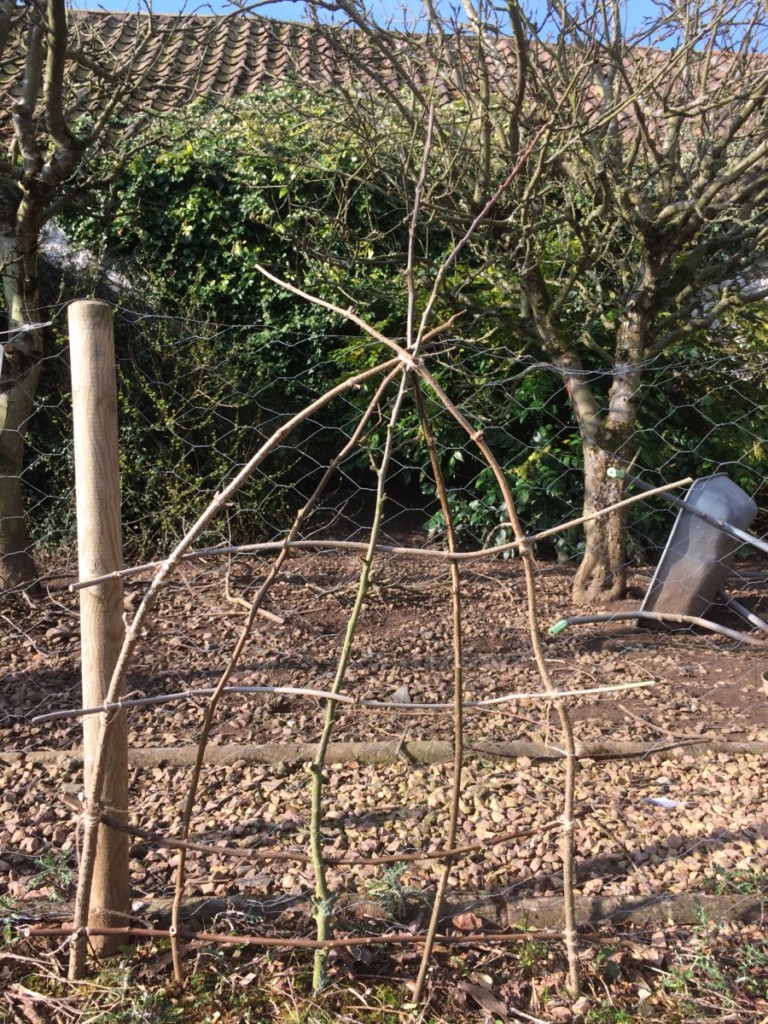
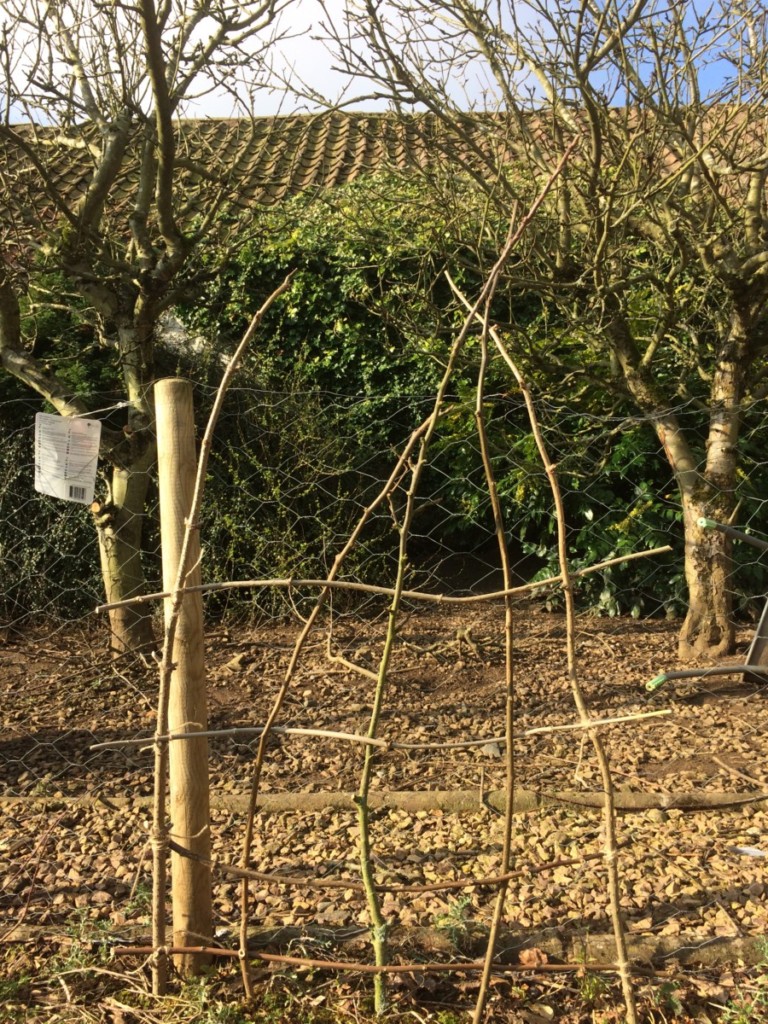
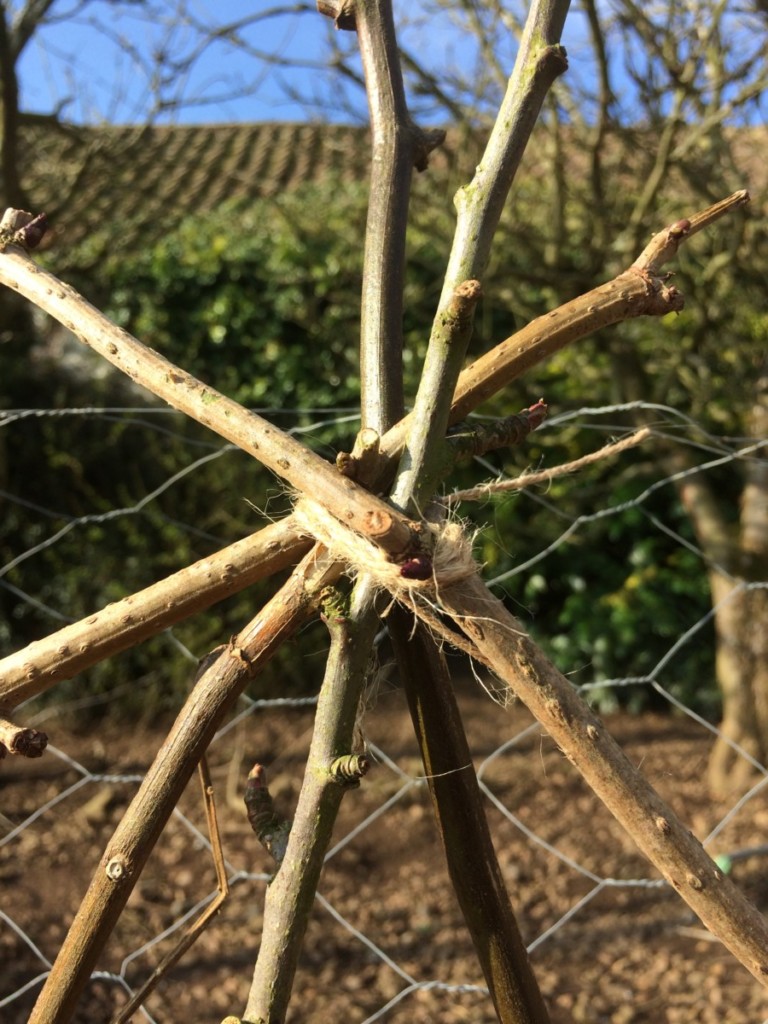
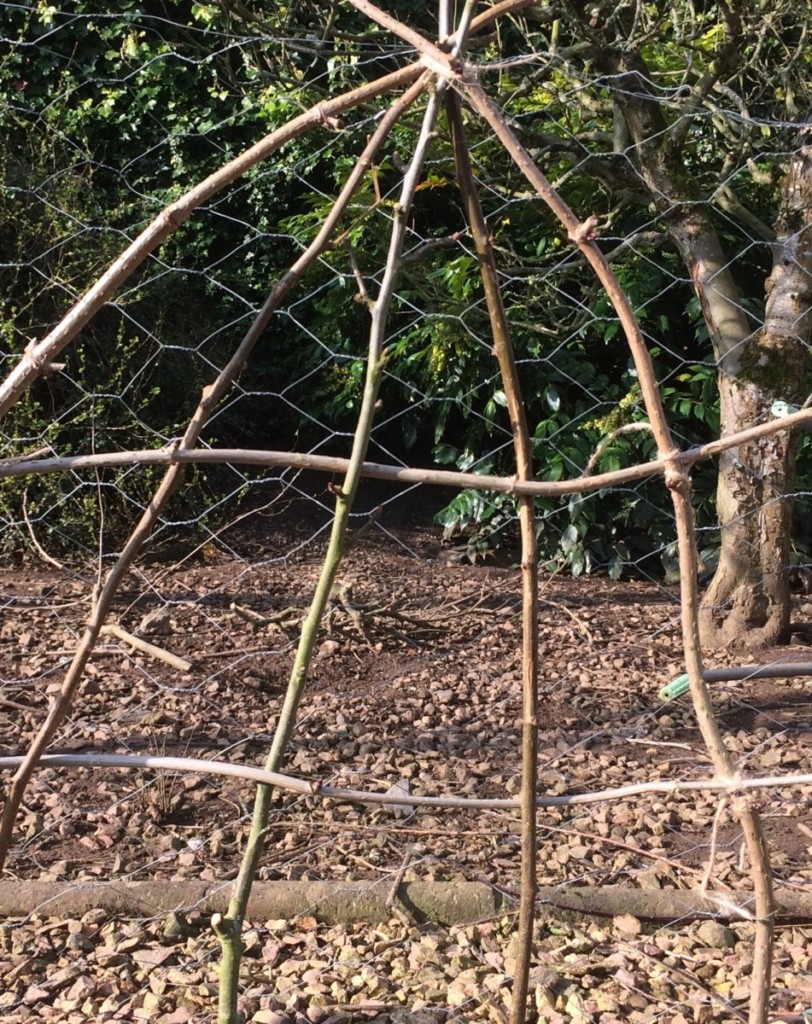
- Continue as above, adding or tying in branches as you move upwards until your trellis is at the required height. As you can see from the image, I chose to tie my upright branches together at the top to make a simple arch-like shape.
If you wish, you can add a horizontal branch at the top of a diagonal lattice to make a square or rectangular structure. (Alternatively, you could leave out the upright sides and horizontal top strut, and instead make a triangular diamond shape lattice trellis.)
Part Four: Finishing Touches
- When you have a fully tied together structure of the right height, it is time for the finishing touches. Trim off any branches that protrude from your trellis.
- Finally, trim off any straggling twine, and neaten everything up. Then you’re done.
Your trellis should now be strong and stable enough to support plants. So you can get planting. Transplant or sow seeds and before long, your trellis will be green with living plants.
This simple project is just one way to enhance and improve your garden in the most sustainable of ways. So why not give it a go?

Get the famous Rural Sprout newsletter delivered to your inbox.
Join the 50,000+ gardeners who get timely gardening tutorials, tips and tasks delivered direct to their inbox.