

You could say we have an obsession with compost around here. And why wouldn’t we? It’s the perfect organic soil amendment – nutrient-rich and filled with microbial life – that we can make ourselves, for free.
When you want to give your plants the very best in liquid organic fertilizers, you better believe we’re going with compost tea!
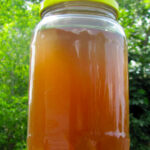
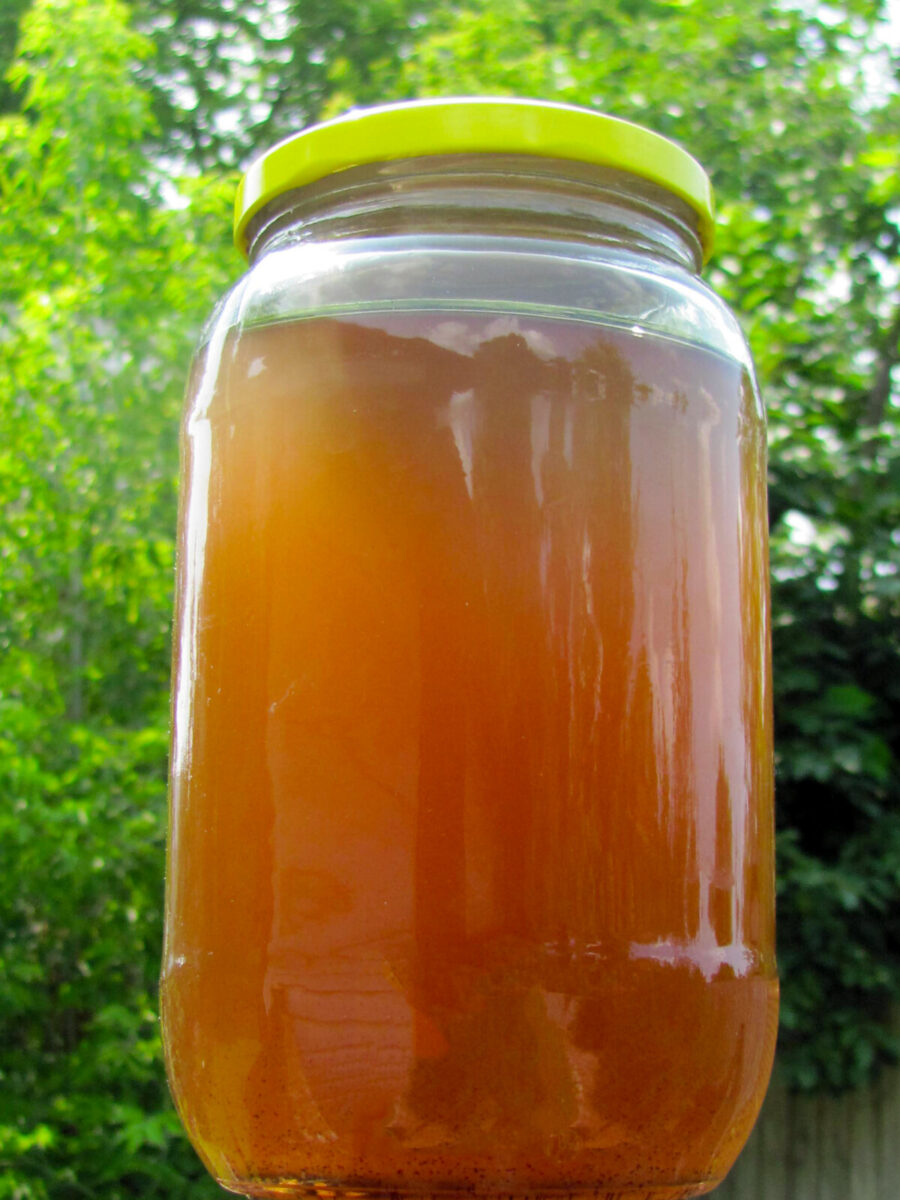
Compost tea is the essence of compost in liquid form– an infusion of water with beneficial microbes, nutrients, and humic acids that feeds plants, enhances the health of the soil, and promotes a vibrant and diverse ecosystem.
The traditional way to make compost tea is by soaking compost, animal manure, or worm castings in water and letting it steep for days or weeks at a time. A passive method, non-aerated teas have been used for centuries to nourish crops.
A more modern approach is to make your compost tea into a supercharged brew.
What is Aerated Compost Tea?
Non-aerated compost teas have a very long history of use that stretches back to ancient times. But with science, improved technology – and microscopes! – we now have a better understanding of the teeny organisms that inhabit the brew.
Since they are passively steeped and stirred only occasionally, the water in non-aerated teas are stagnant. Without oxygen flowing through the liquid, the beneficial organisms that initially populated the compost will die off. The tea will begin to smell awful as it becomes active with anaerobic bacteria. There’s concern that such a mixture can potentially harbor harmful pathogens like E. Coli and Salmonella.
But by introducing oxygen to the process, we can make a better, faster, and safer compost tea.
Actively aerated compost tea (AACT or ACT) involves oxygenating the water with an air pump to preserve the beneficial bacteria, yeasts, and fungal filaments within the compost. The addition of a nutrient during the brewing process encourages these microorganisms to multiply.
Instead of waiting for weeks for the compost to steep, with AACT you can brew it up and use it on your plants in a day or so. And since the air is always flowing, aerated compost tea has zero odor.
5 Reasons to Aerate Your Compost Tea
Compost teas that are continuously oxygenated throughout the brewing process will be teeming with life. When used on plants, it’s a powerful mixture that fortifies their defenses, improves nutrient uptake, and encourages robust growth.
Although spreading compost around the garden in its solid and friable state does all those wonderful things too, there are a few reasons you might want to take the extra step of making a bubbling brew of compost tea.
1. It stretches a lot farther than compost
Compost is a gardener’s best friend because it’s so dang useful. Fertility, moisture retention, pH buffering, and disease resistance are just some of the amazing attributes of compost.
Whether you make it yourself or purchase certified compost, there’s only so much of the good stuff to go around. But compost tea offers a way to stretch your compost budget much, much further.
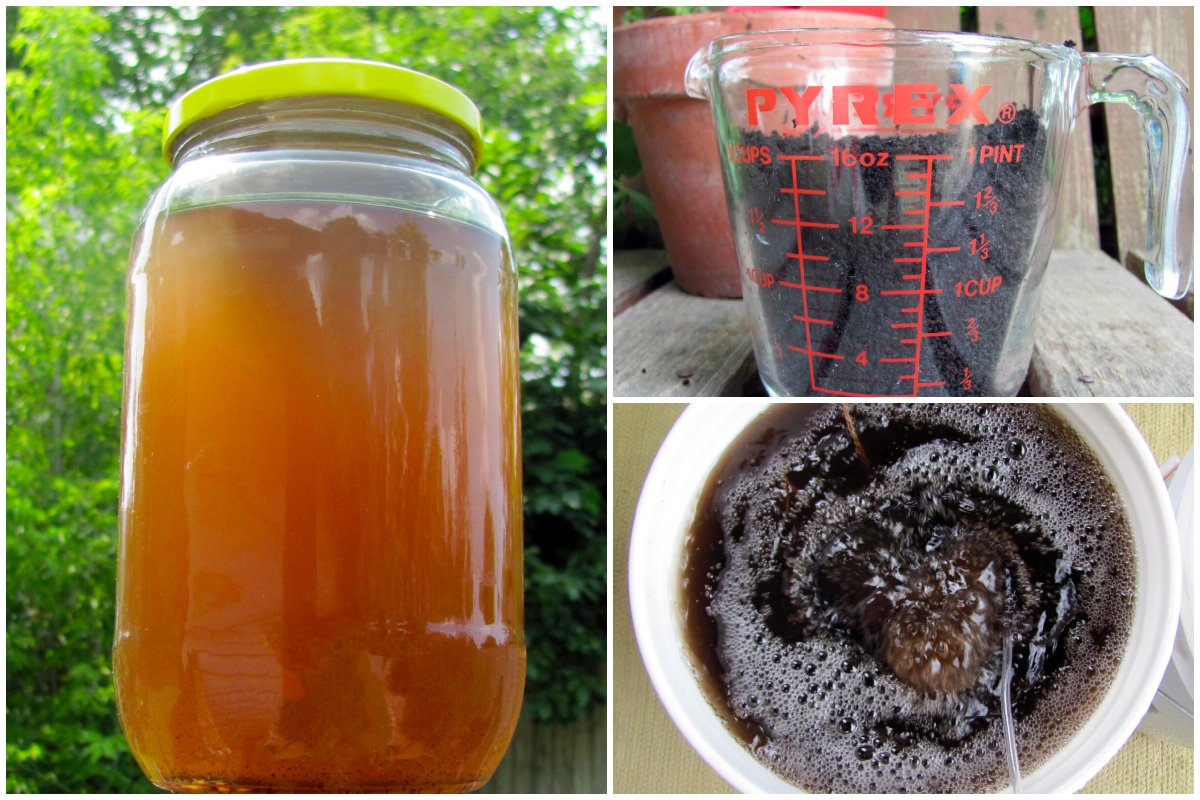
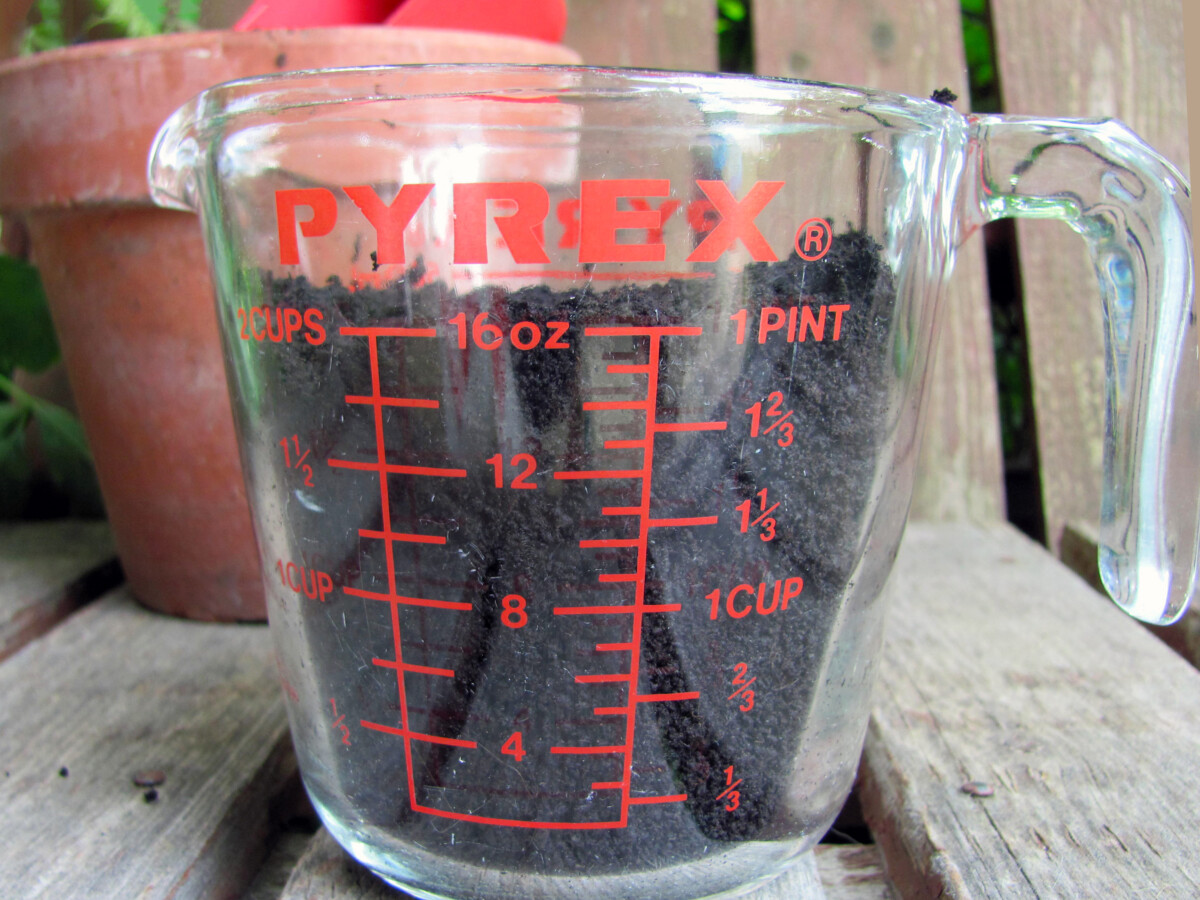
To make a 5-gallon batch of robust compost tea, you only need about 2 cups’ worth of your highest quality compost. A 35-pound bag of compost will yield roughly 140 gallons of compost tea.
As a liquid, a little aerated compost tea goes a long way. The general guidance is to apply 20 gallons of compost tea per acre, so 5-gallons is more than enough to dose the average backyard veggie plot.
Some folks like to apply it weekly, while others find you only need to dose crops with compost tea twice or thrice a season.
2. It’s got more microbes
A well-made brew of aerated compost tea can house 4 times as many microbes as friable compost.
Just as we turn the compost pile to increase oxygen, AACT does a similar thing to the water. Agitation and air creates a liquid culture for aerobic microorganisms to thrive. Essentially, it’s a petri dish in a bucket.
It works like this: compost seeds the brew with microbial life, airflow supplies the oxygen these microbes need to survive, and the addition of a nutrient causes them to multiply by the billions.
A single food source – a small amount of alfalfa meal, unsulfured molasses, kelp meal, or fish hydrolysate – is all that’s needed to kick off a rampant feeding cycle.
As one type of bacteria consumes the supplied nutrient and reproduces, another microbe will arrive to feed on the original bacteria. As these microbes grow and multiply, other microbes will soon follow to feed on them.
Each new microbial inhabitant attracts more microorganisms to the tea, building out a diverse environment for flagellates, ciliates, and other soil-friendly protozoa.
3. It allows for quicker nutrient uptake
Humusy compost delivers fertility to the soil, but does so in a slow and steady fashion. As a gentle amendment, the nutrients in compost are gradually released into the earth every time it rains or the garden is watered.
Aerated compost tea is more like a fast-acting liquid fertilizer.
In freshly brewed tea, the minerals and nutrients from the compost have already been dissolved into the liquid. With no need to wait for water to move through the soil before nutrients can be dispersed, compost tea works quickly to replenish depleted soils and boost plant growth.
Aerated compost teas are jam-packed with microbes too. These tiny guys will rapidly convert the nutrients into an ionized form, which makes them available to plants.
Always remember, we never really directly fertilize plants; it’s the microorganisms in the soil that we’re feeding so that they can supply nutrients to plants.
4. It’s easier to apply
Admittedly, dark and crumbly compost is a delight to work with – it’s so soft and fluffy and earthy. But having your compost in liquid form makes it all the easier to apply it around the garden.
Transferred to a watering can, compost tea is fully portable and mobile. Use it to spot-treat individual plants or drench entire beds.
Aerated compost tea feeds the soil, but it also works beautifully on plants themselves. Contributing to the foliar microbiome – the community of microorganisms that live on the surfaces of leaves – AACT will likewise spur plant growth when applied with a pump sprayer.
Research is still ongoing but there are indications that foliar treatments with compost tea may also help plants resist disease. It’s theorized that the billions of benefical microbes inhabiting the foliage will outnumber and outcompete nasty pathogens like powdery mildew.
Compost tea is a potent plant tonic, yet it’s mild enough that it won’t burn plant roots or leaves. It doesn’t need to be diluted, and you can’t really over-apply it.
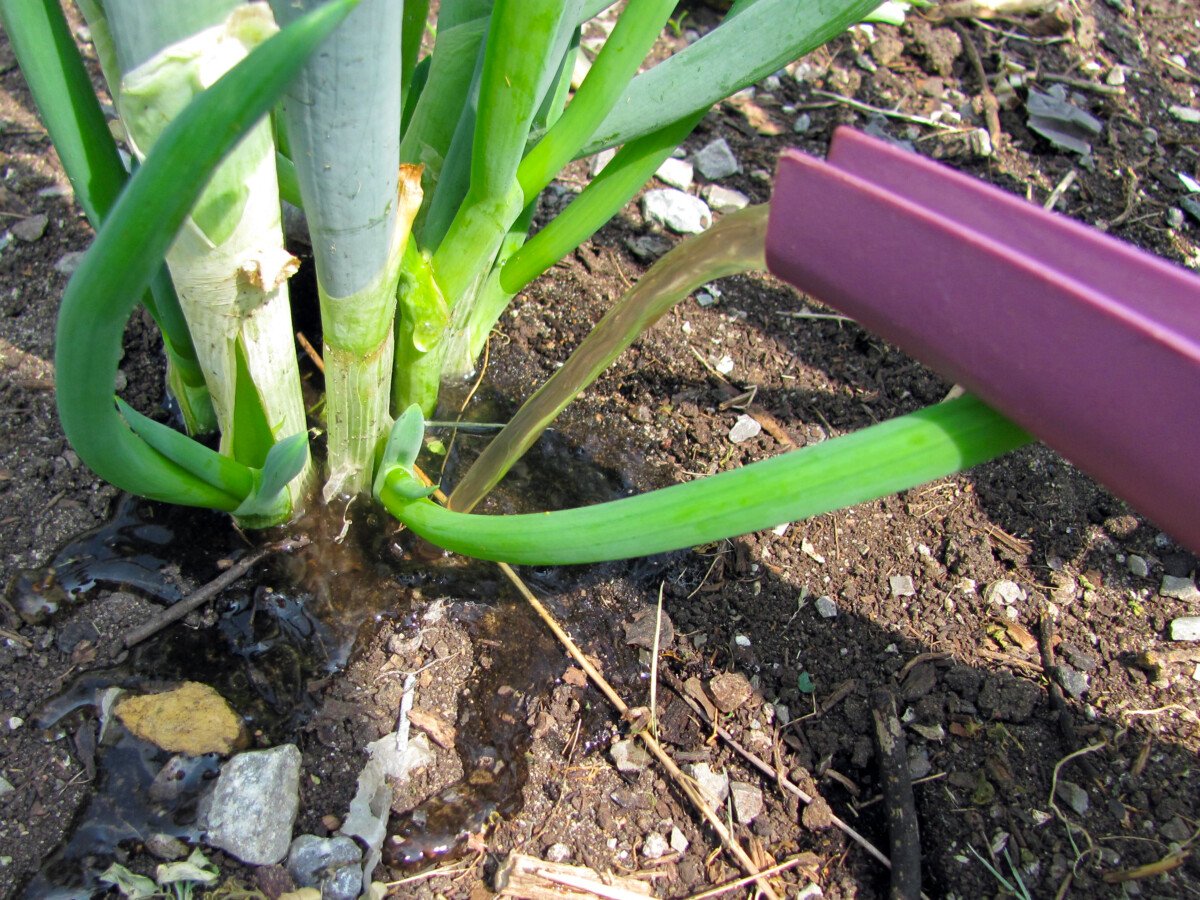
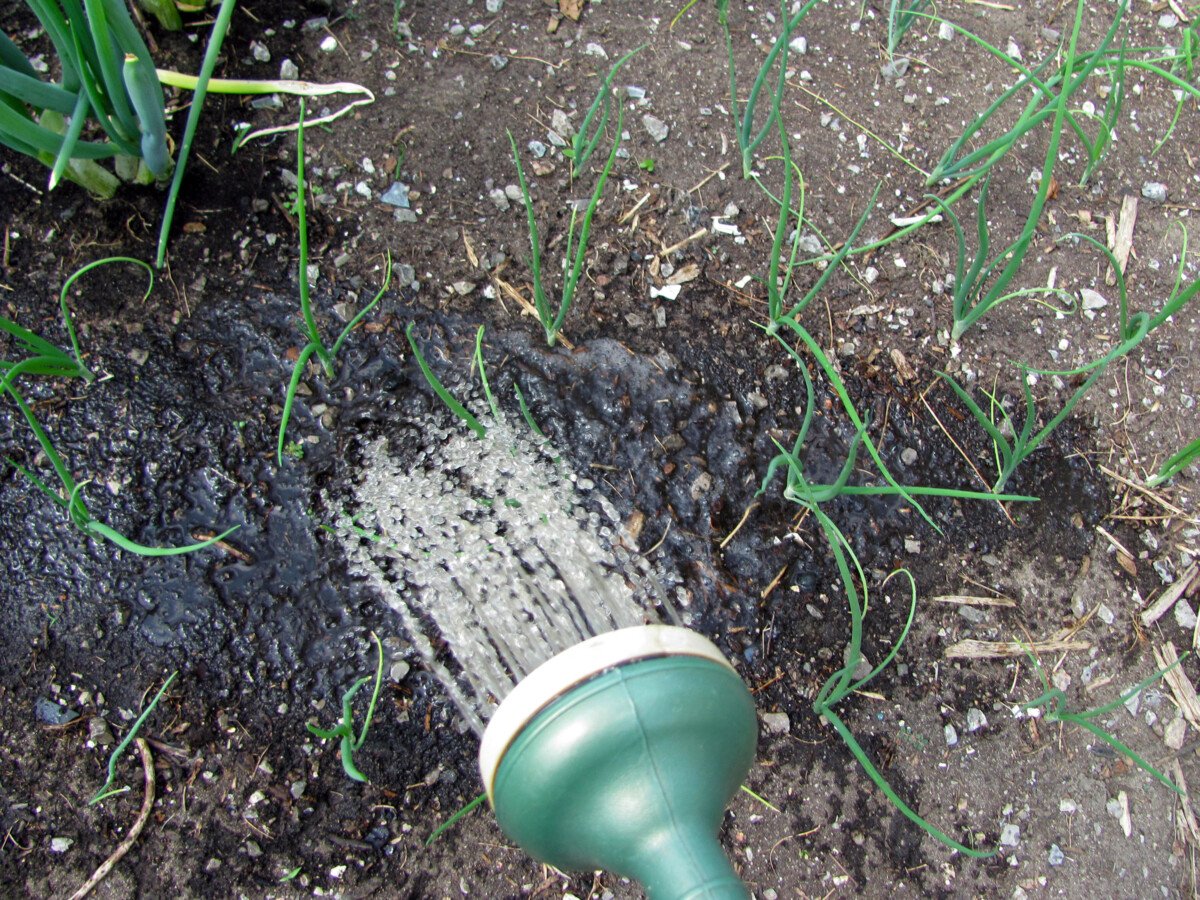
That said, it doesn’t take much aerated compost tea give your crops a real shot in the arm – just pour a pint or two of compost tea around the base of each plant.
5. It’s fun to make
Indeed, aerating your compost tea is a fun little project!
It’s really simple to set up an aeration system for brewing compost tea. With a few basic supplies, you can become a producer of high-quality 100% organic liquid fertilizer from the comfort of home, saving money and practicing self-sufficiency. And frankly, I find that thrilling.
Rewards are quick and you’ll have finished and ready-to-use liquid fertilizer by the next day. From start to finish, the total brewing time is just 24 to 36 hours.
The brewing process is quite fascinating as well. The darkening waters and rigorous bubbling makes the whole thing feel more like we’re doing alchemy. Well, we sort of are – we’re creating an elixir of life!
How to Make Actively Aerated Compost Tea
Supplies You’ll Need:
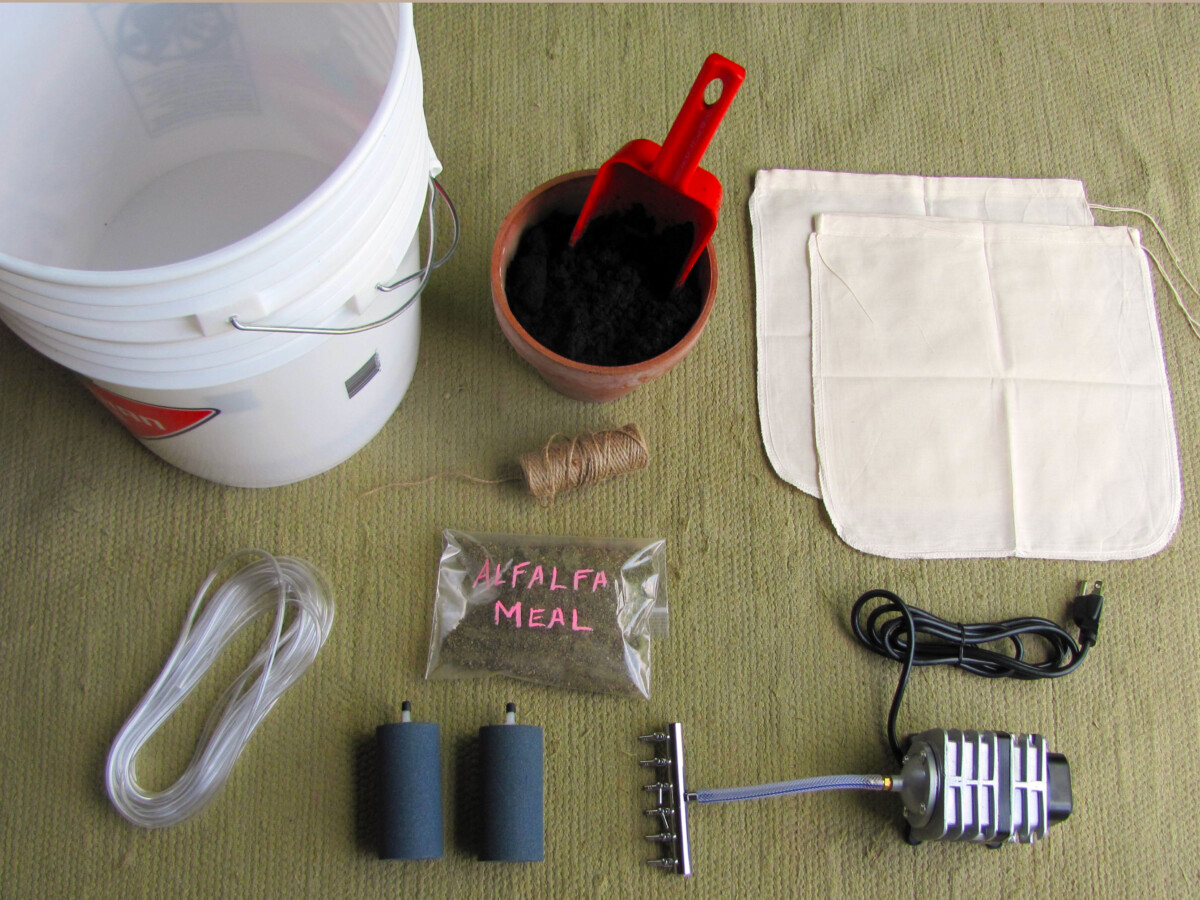
- High quality compost – worm castings, well-rotted animal manure, or hot compost
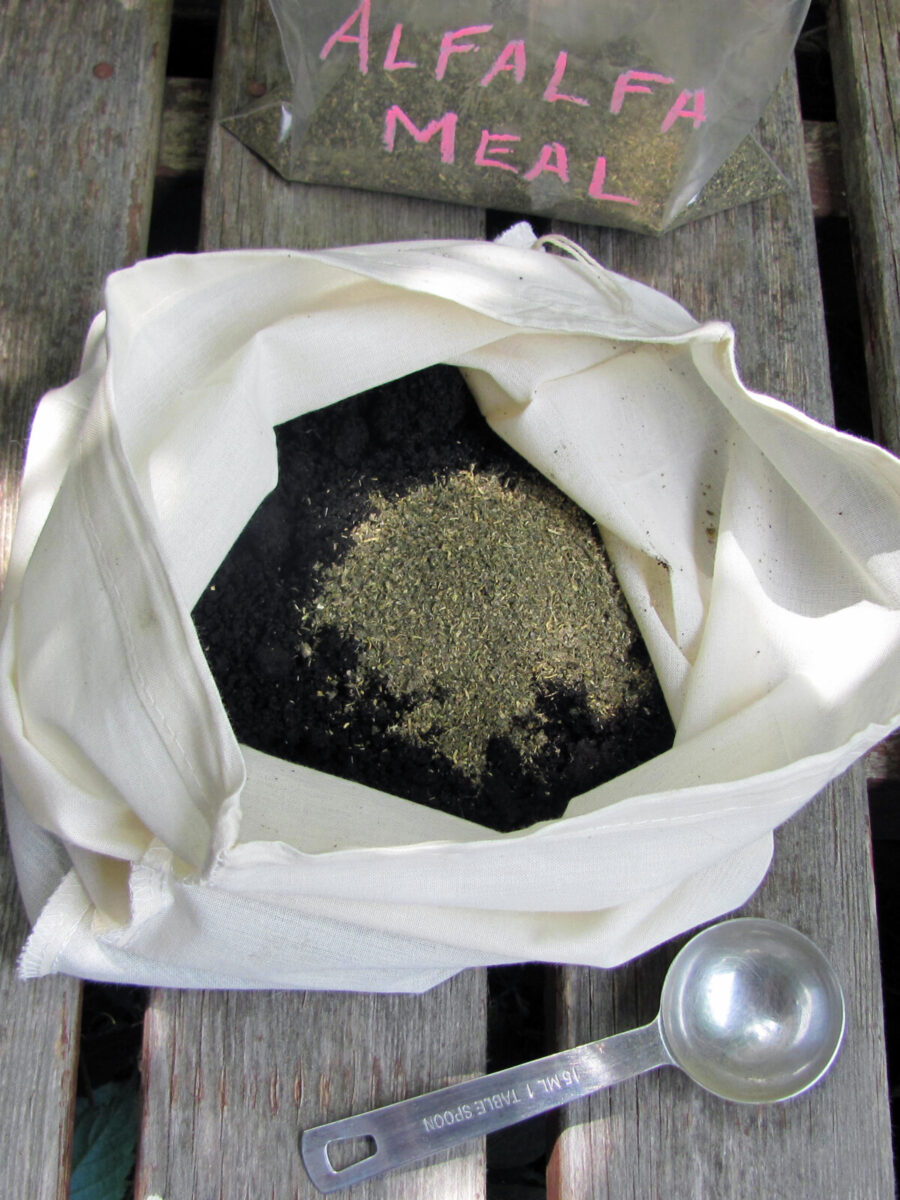
- Microbe nutrient source – organic alfalfa meal, unsulfured molasses, fish hydrolysate, kelp meal, seaweed extract, or oat flour
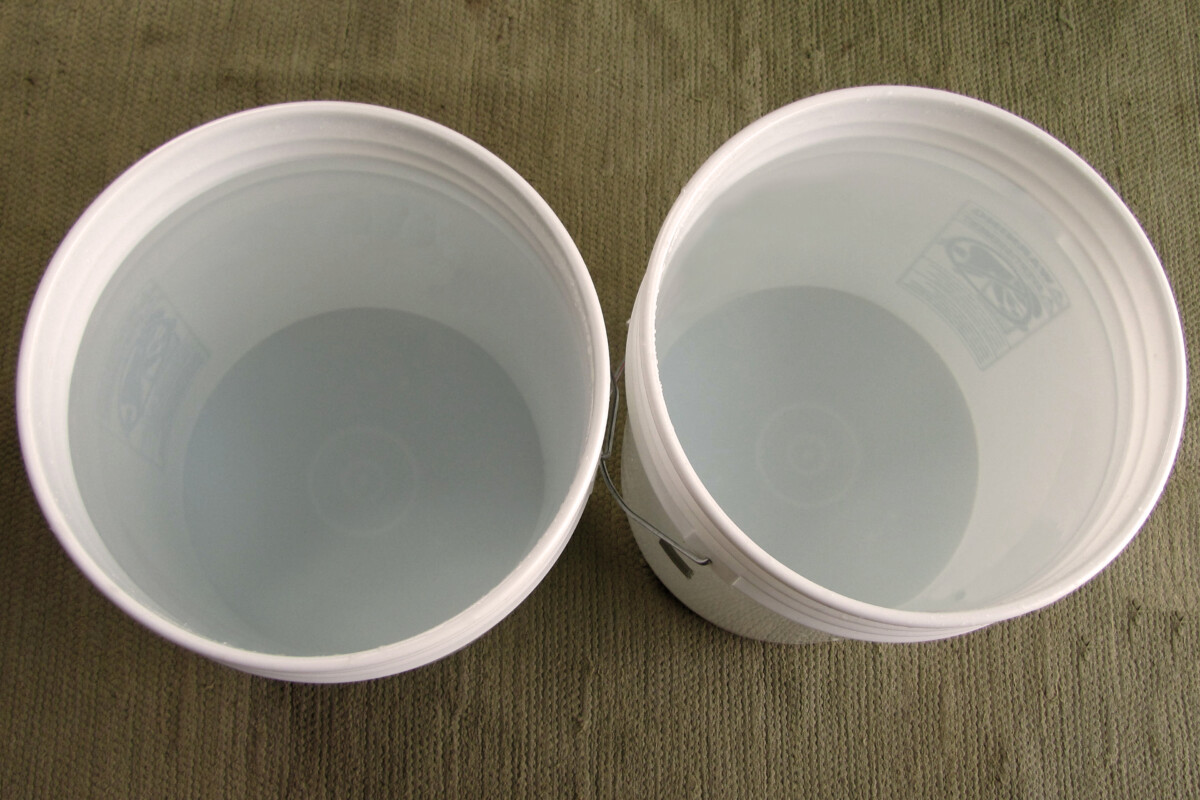
- 5 gallon bucket(s) – made from food-grade plastic
- Commercial-grade air pump – I use the EcoPlus ECOair 1.
- Air stones – 4” x 2” like these.
- Airline tubing – 4 mm diameter
- Steeping bags – use nut milk bags, burlap, an old pillowcase, or several layers of cheesecloth
- Twine
Before each new brewing session, you’ll want to make sure all the items that come into contact with the compost tea are freshly sanitized. Wash the buckets, air stones, airline tubing, and tea bags with 3% hydrogen peroxide to avoid cross-contaminating your brew.
Step 1 – Fill the Buckets with Dechlorinated Water
Set up your compost brewing station in a sheltered spot, out of direct sunlight. It should be warm out, but not too hot – microbe growth is most successful in temperatures between 55°F and 85°F (13°C and 29°C).
Fill the buckets, about 2 inches from the brim, with clean water that contains no chlorine or chloramine. As disinfectants, these chemicals are deadly to the kinds of microorganisms that we definitely want in the finished compost tea.
Rainwater is best, well water is good, but city water would need to be treated to neutralize the chlorine and chloramine chemicals. Methods for removing both at once include reverse osmosis, filtering your water with catalytic carbon, or adding a few drops of aquarium water conditioner.
Step 2 – Prep Your Compost Tea Bags
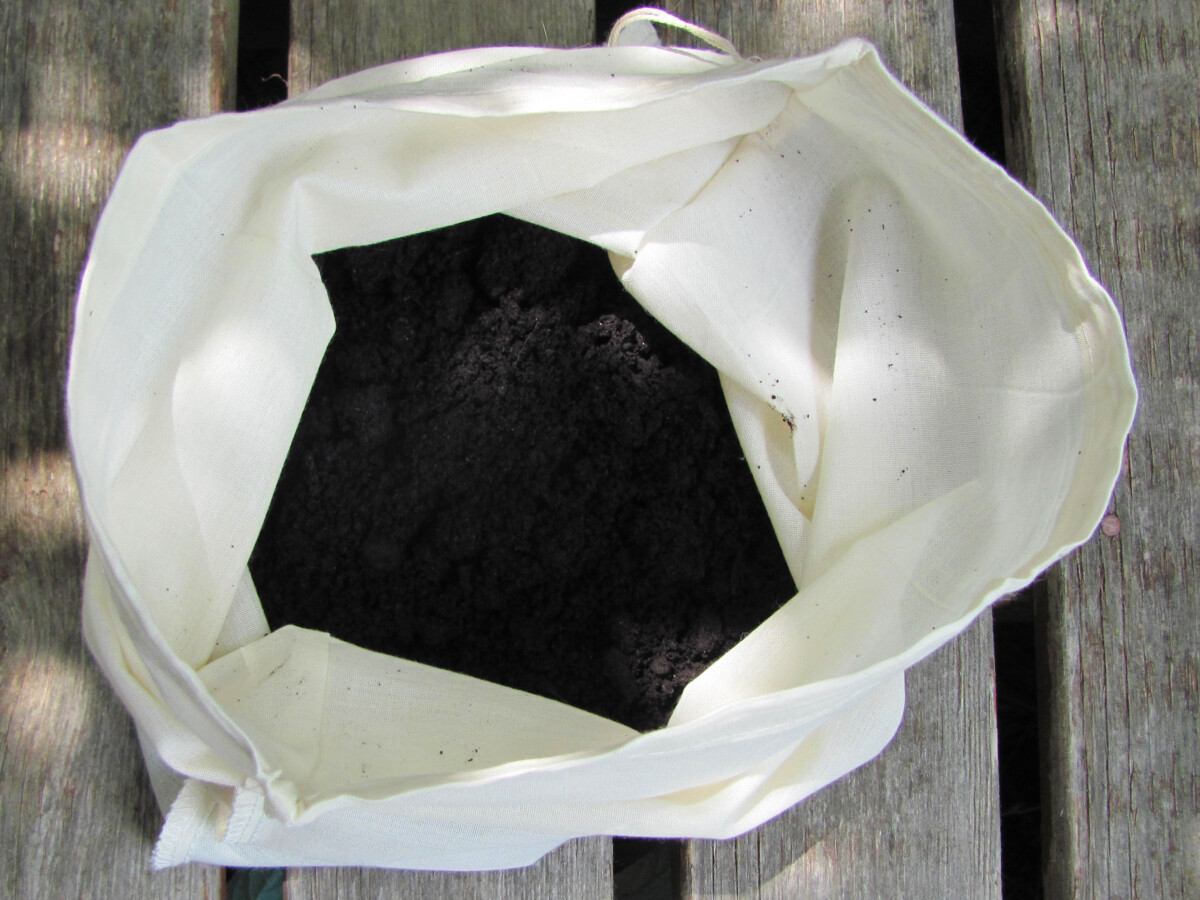
In passive teas, you can just dump the compost right into the water. In aerated teas, using a tea bag to hold the compost is a practical necessity.
The tea sack fabric should be fine enough to keep silt and sediment out of the final product. It also needs to be permeable so the compost makes good contact with water.
Most importantly, keeping your water clear of debris prevents the air stone from clogging up and slowing down your air flow.
Measure out roughly 2 cups of compost and drop it into your tea bag. Prep one tea bag for every 5 gallon bucket.
Step 3 – Add the Microbe Nutrient
There are many different nutrient sources to choose from, and our beneficial microbes aren’t picky!
Anything sugary, starchy, or high in nitrogen will feed at least one type of bacteria. You could use blackstrap molasses, natural sugarcane, maple syrup, fruit juice, oat flour, kelp meal, or alfalfa meal.
Add 2 tablespoons of your chosen nutrient to the brew. For grains and powders, add it to the bag so the bits don’t gum up the air stone.
If you’re using a syrup or liquid nutrient, feel free to pour it directly into the water.
Close up the tea sacks tightly. Keep the bags suspended above the bubbler by tying them to the bucket handles with twine.
Step 4 – Assemble the Aerator
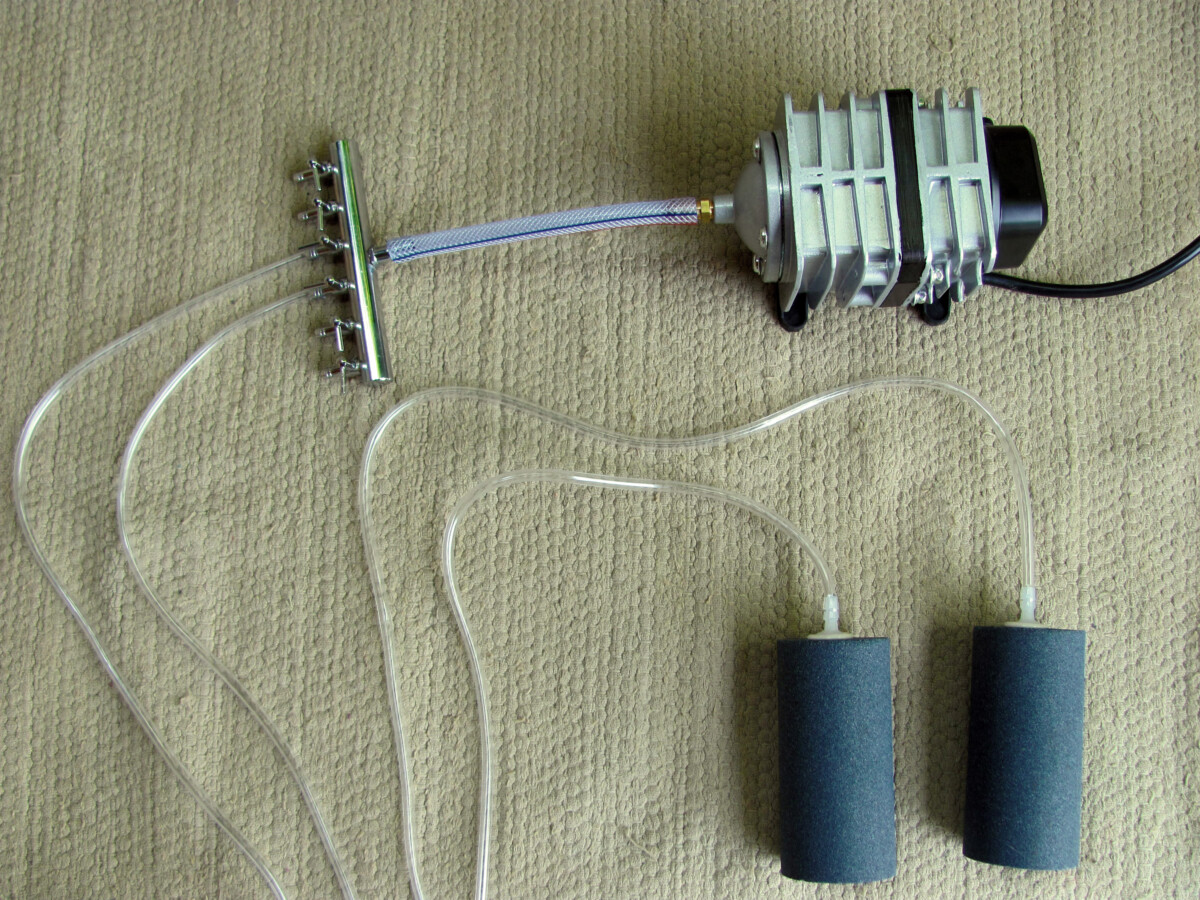
Next, hook up the air pump to the air stones.
Connect one end of the airline tubing to the nozzle of the air stone. Insert the other end into the air outlet from the air pump.
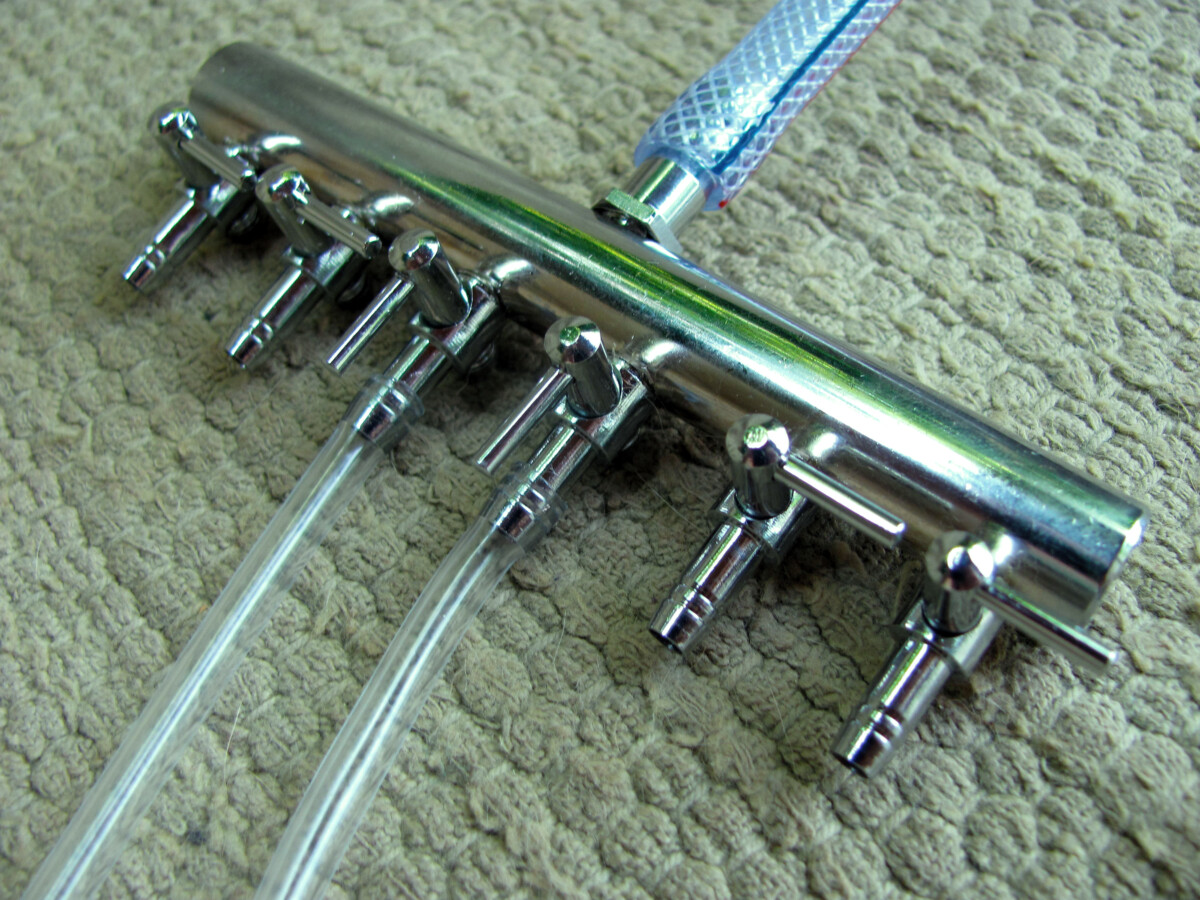
This air pump has 6 outlets for air flow, each controlled with a small valve. There could be six buckets of compost tea brewing at a time – but for today, we only need two.
Step 5 – Dunk and Steep the Tea Bags
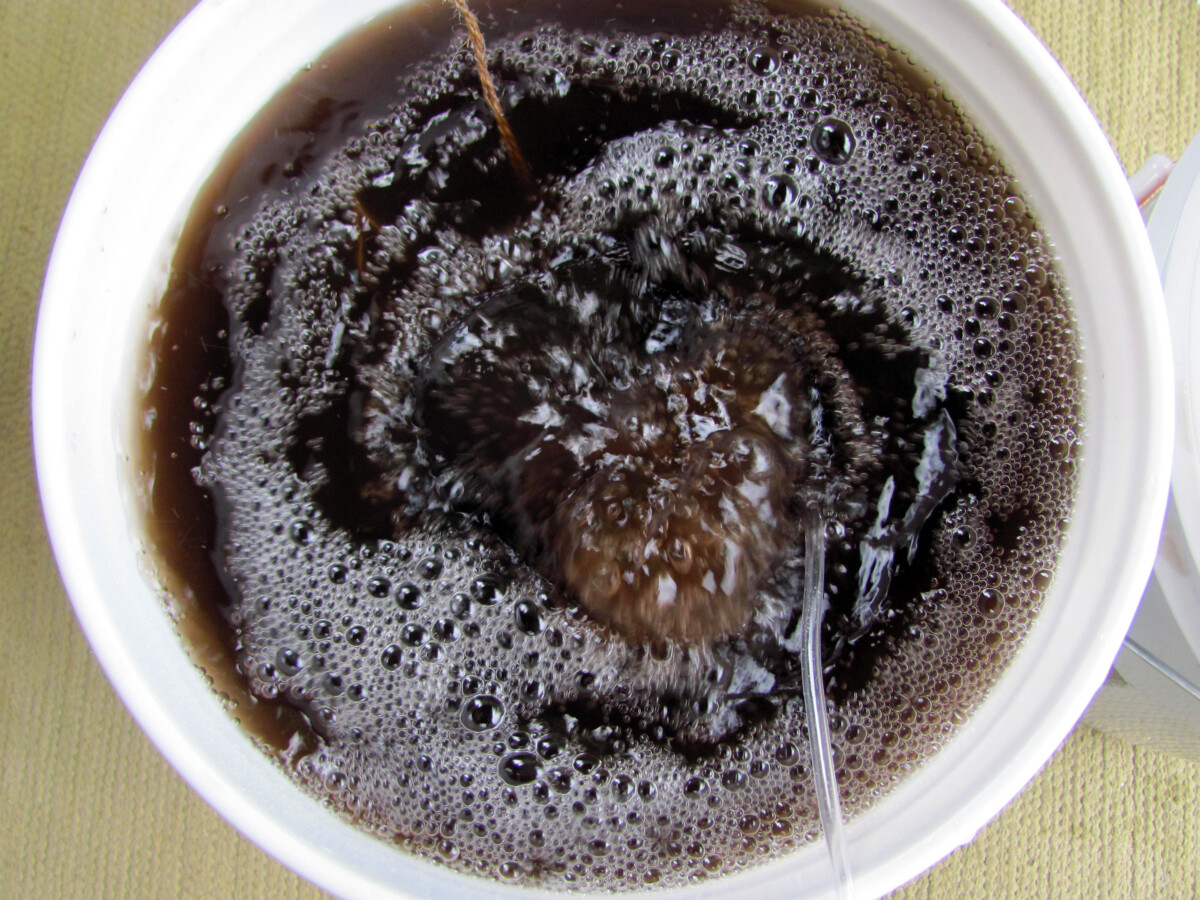
Now, for the fun part – steep the tea bag in the bucket and watch as the clear water becomes a darker and darker shade of brown.
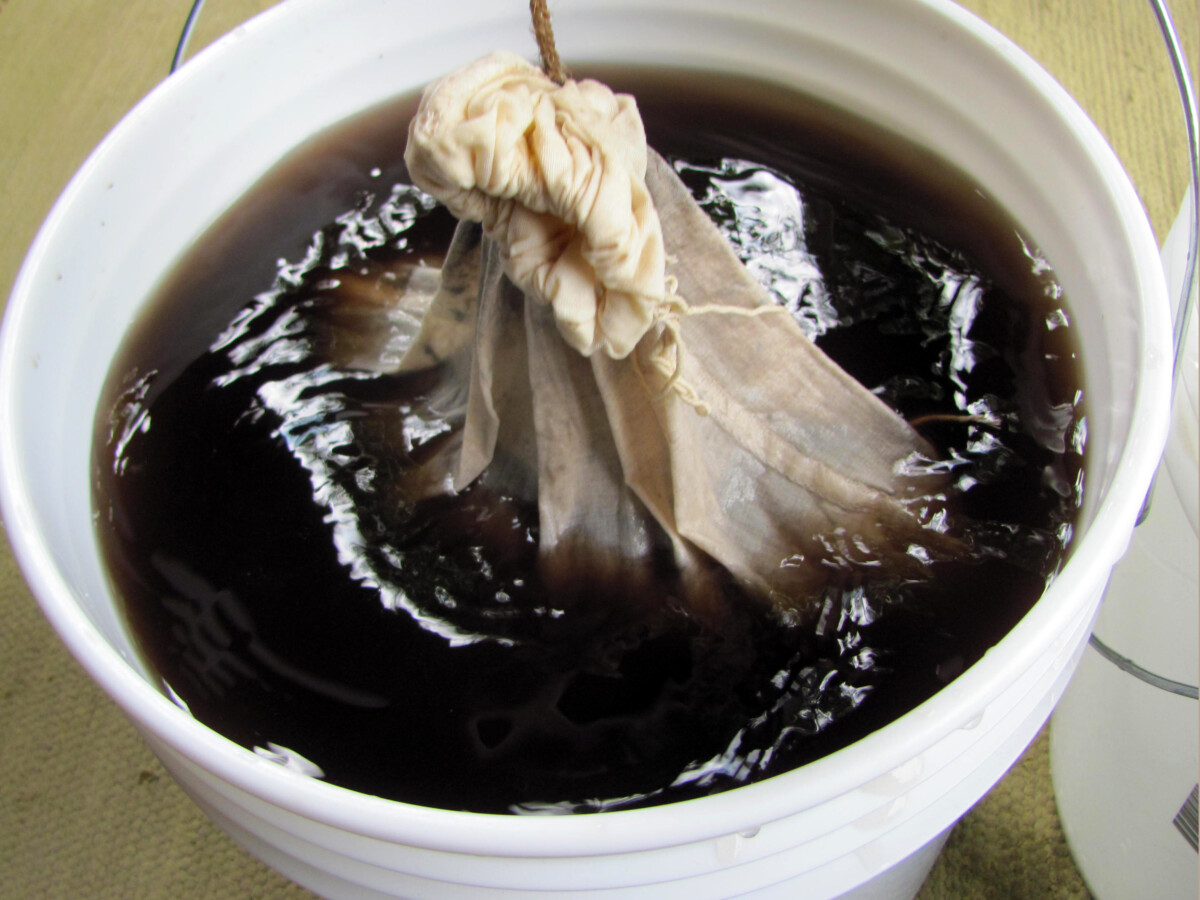
Lift the bag up and down several times until the liquid becomes a rich chocolatey hue.
Step 6 – Fire up the Aerator
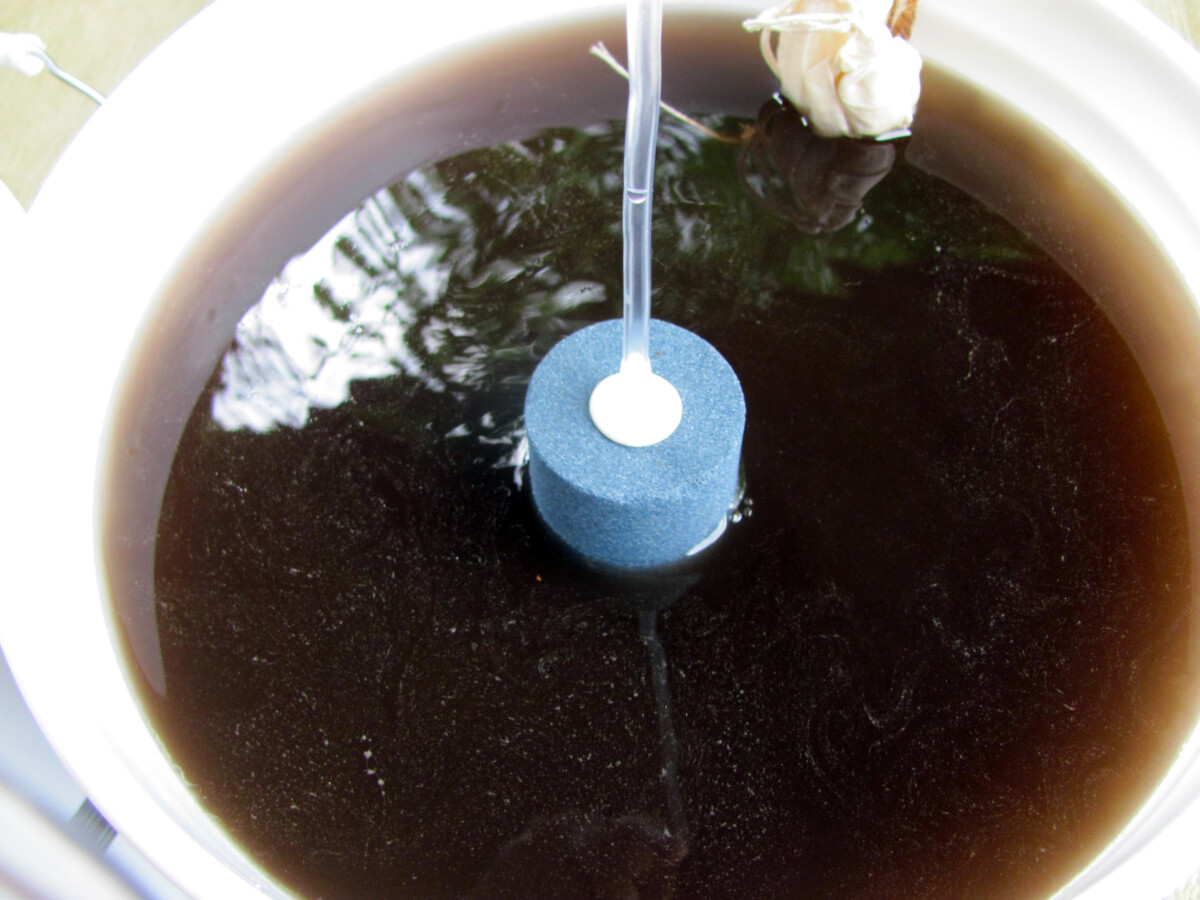
Lower an air stone into the bottom of each bucket, positioning it in the center, below the suspended tea bag.
Move your air pump to an elevated surface. Oxygen will flow more efficiently when the pump is higher than the water level in the buckets.
Now we’re ready to fire up the air pump.
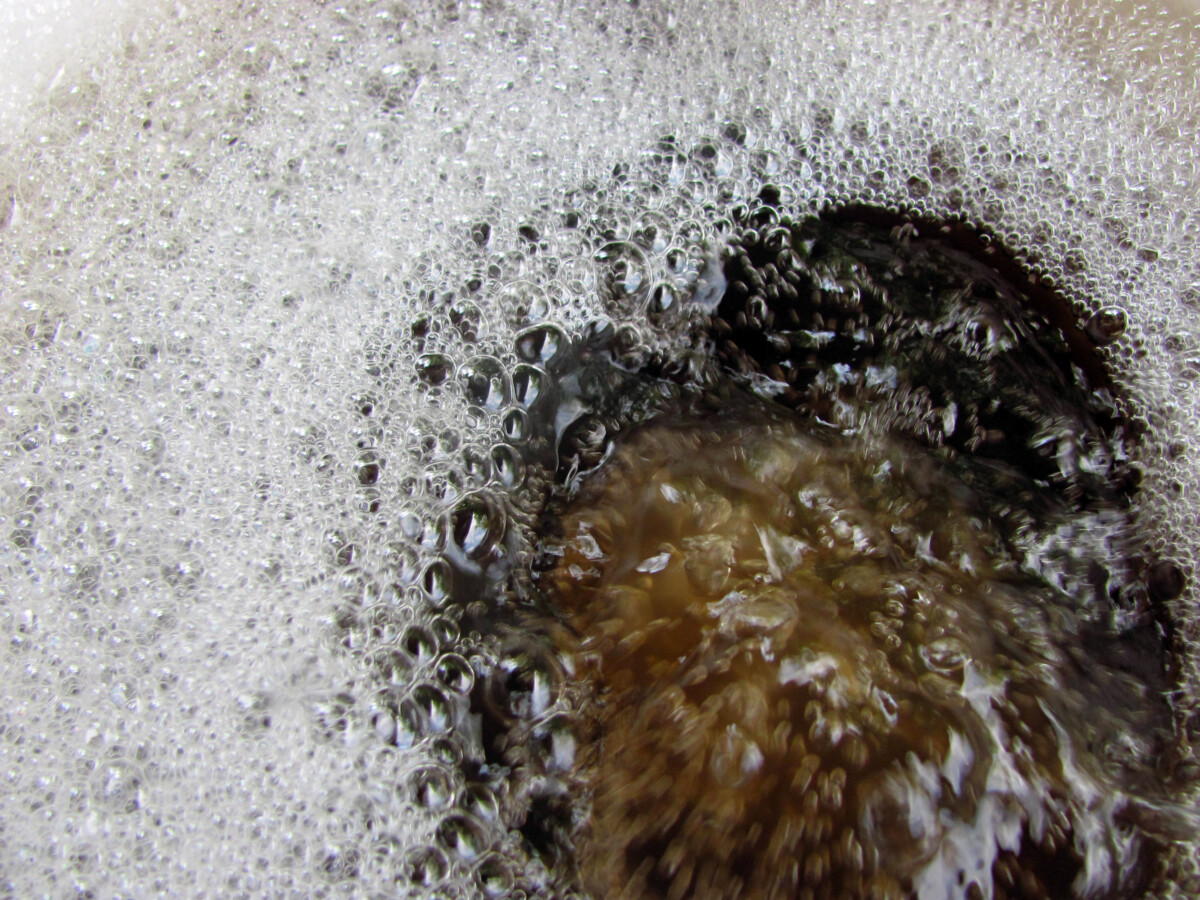
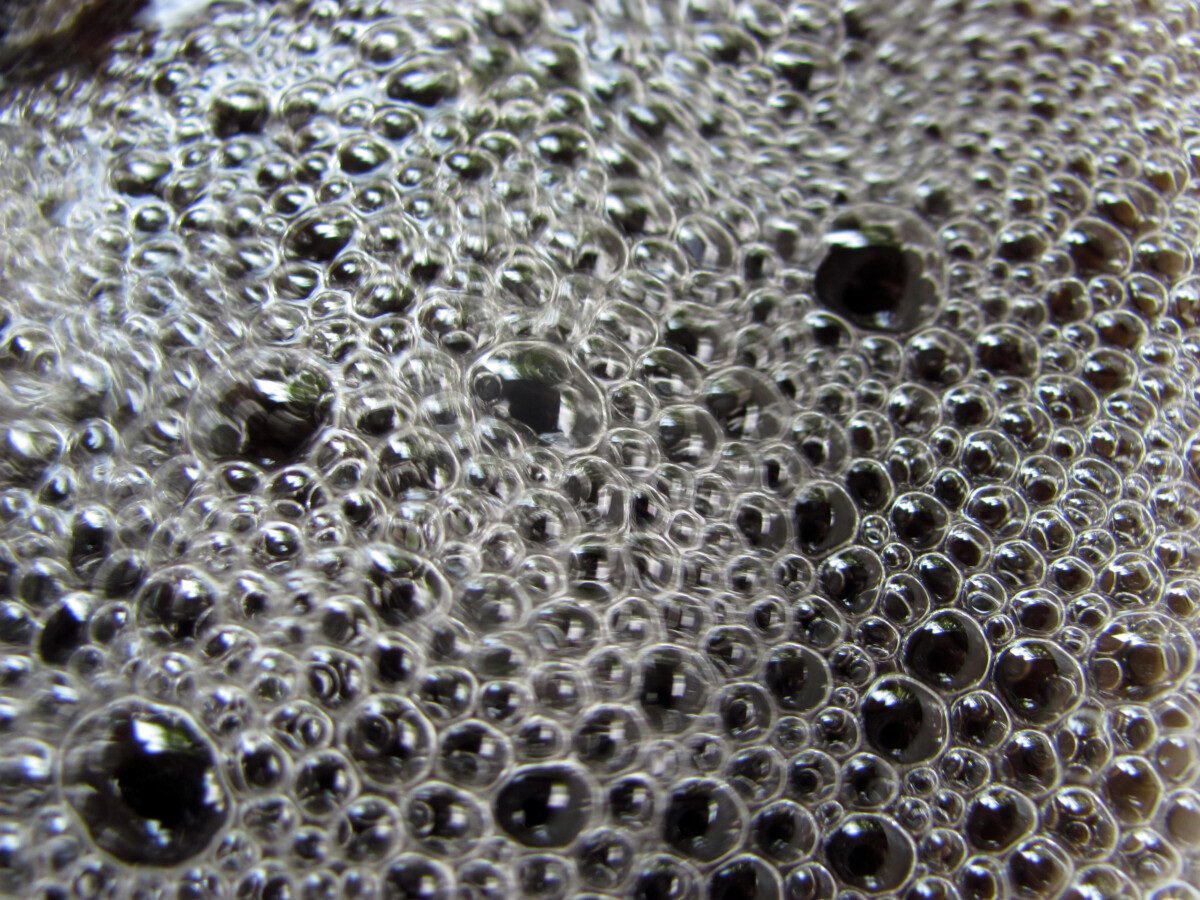
What you want to see is a lively churn. The flow of oxygen through the water needs to be powerful enough to create a roiling boil. The water surface should be active and agitated, with lots of bubbles.
If your aerator setup produces a light simmer or slow burble, you might need to invest in a more powerful air pump and air stone combo. Alternatively, try placing two air stones in one bucket to kick up the air flow.
As it bubbles away, check in on it periodically. If you notice the air flow has slowed after a few hours, lift the air stone and give it a good scrubbing before setting it back down in the bucket.
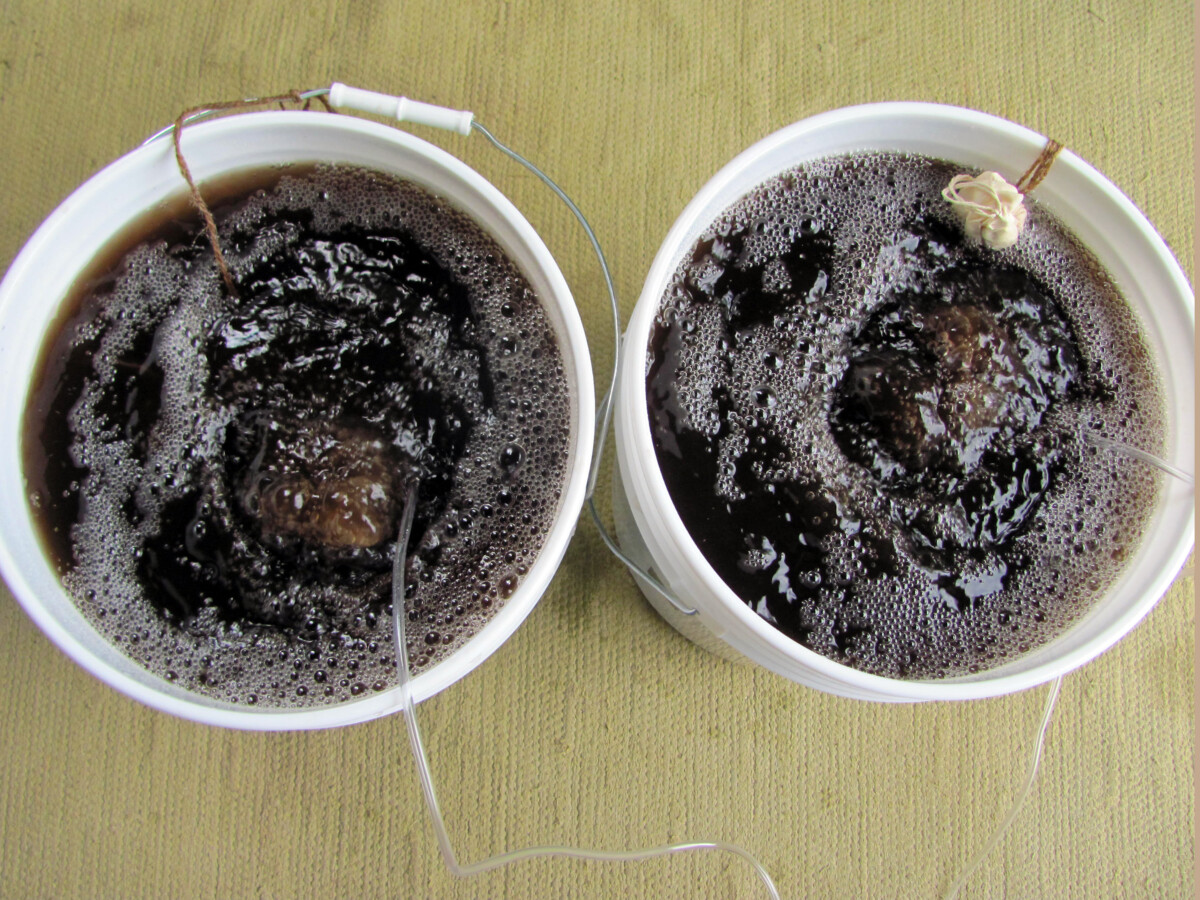
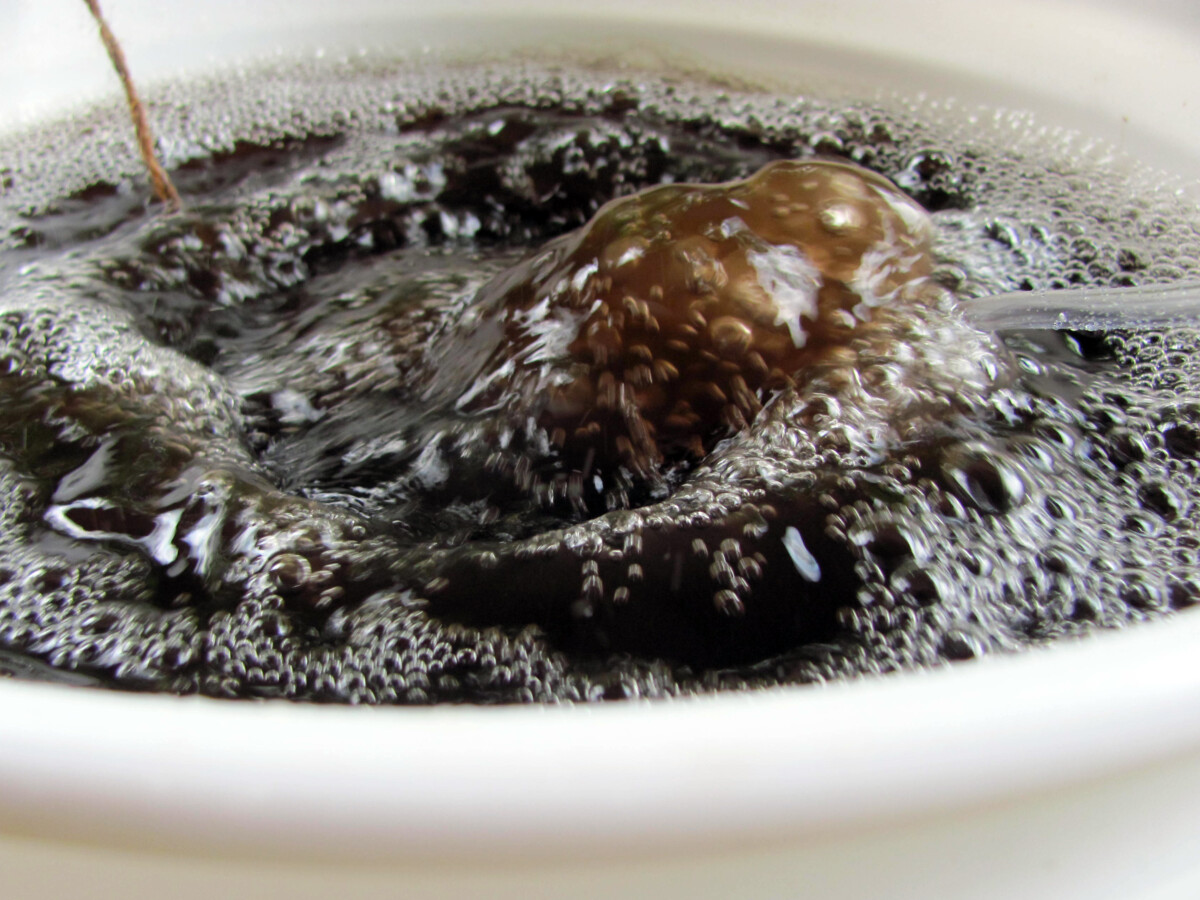
Step 7 – Let it Bubble for 24 to 36 Hours
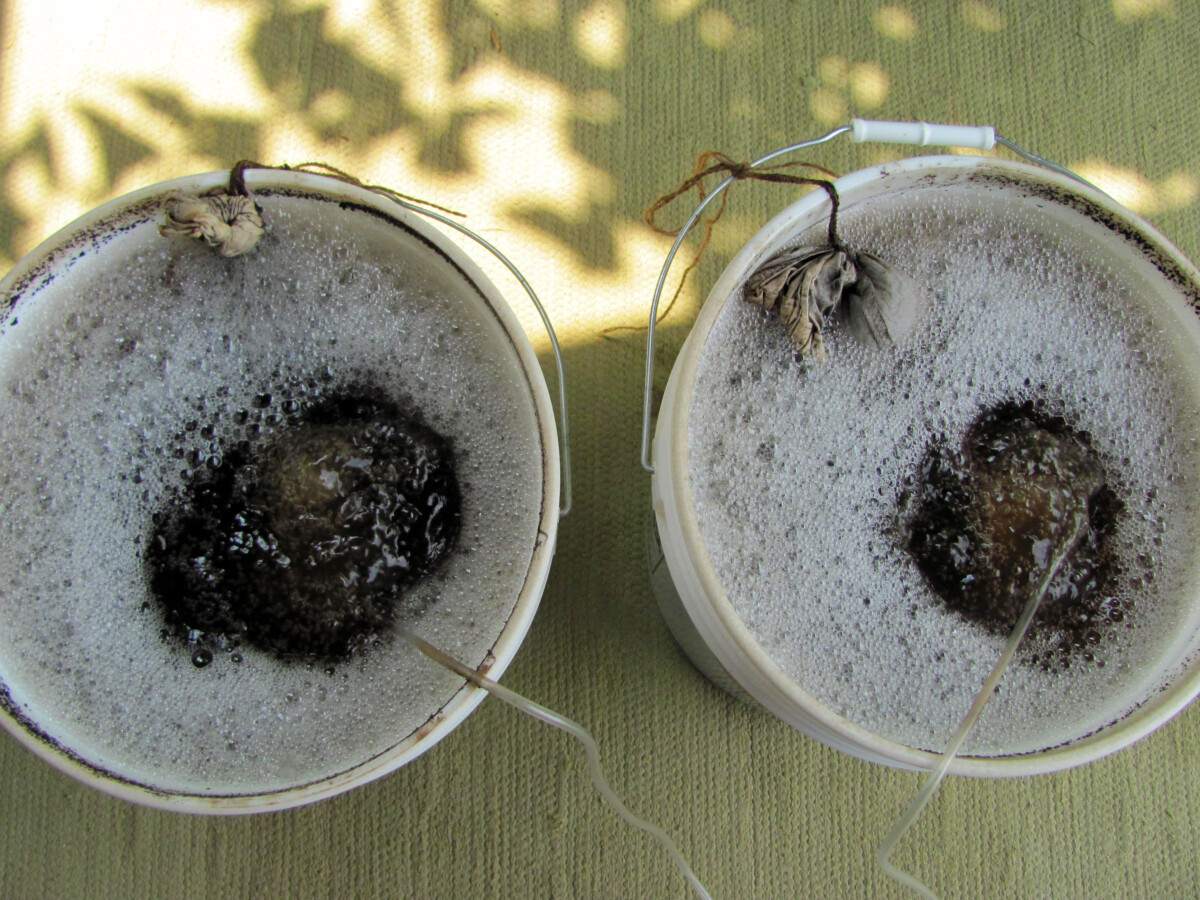
After a day or so of roiling, the surface of the compost tea is covered in a thick foam of bubbles. And although a little detritus escaped the bags, it wasn’t enough to clog the air stones.
Don’t be tempted to let the compost tea continue to brew past the 36-hour mark. At this point, the tea has peaked. The nutrients we added at the start have been all gobbled up and only one type of bacteria will come to dominate the brew. Rather than a lively microbiome, the compost tea would become a monoculture, and we’d lose out on the whole point of this exercise – microbial diversity!
When your tea is ready to harvest, unplug the air pump and remove the air stones from the buckets.
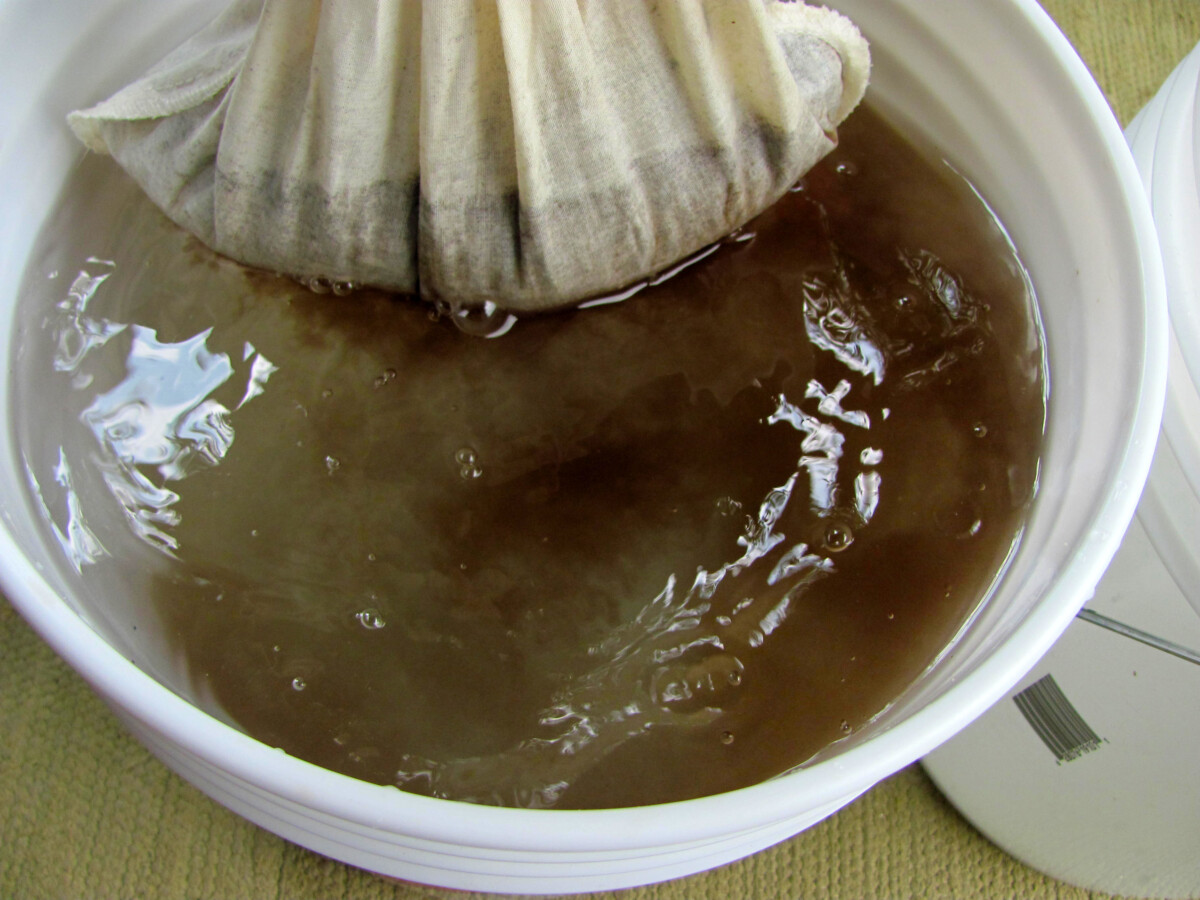
Step 8 – Squeeze Out the Tea Bags
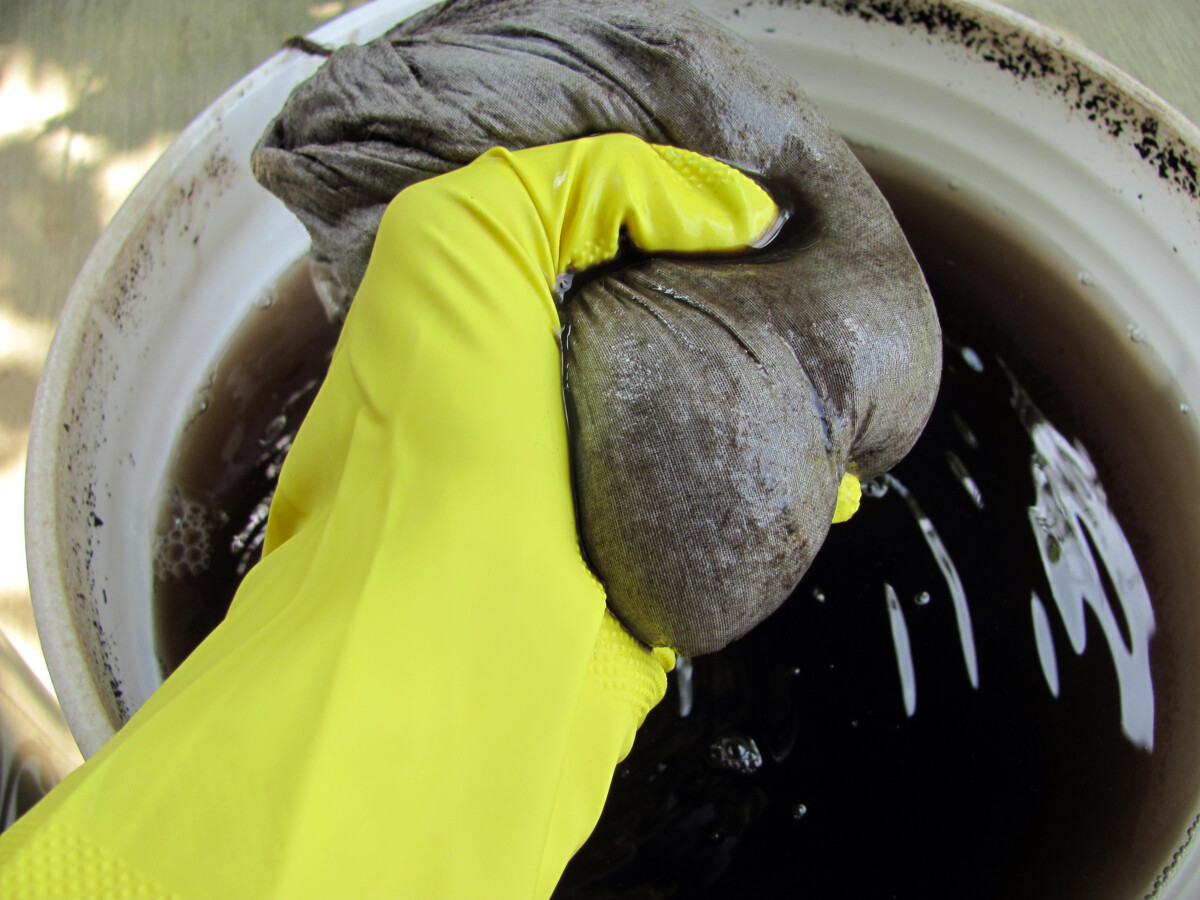
Lift your tea bags out of the brew and give them a good squeeze. Press and wring out as much of that lively elixir into the bucket as you can.
Snip the twine and open up the tea bag. Inside, you’ll find some mushy compost tea dregs.
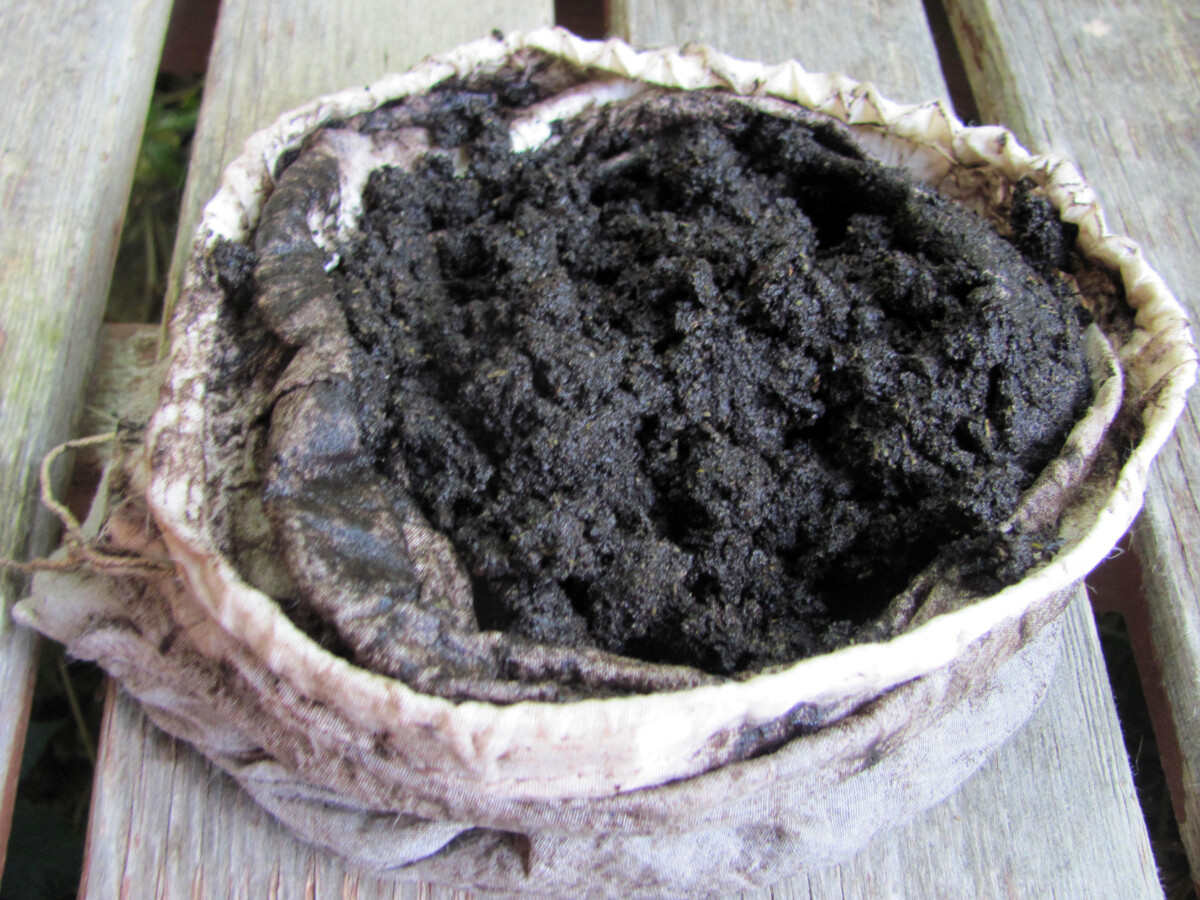
The spent compost still has value in the garden. Spread it around as a soil topdressing or toss it back into your composter.
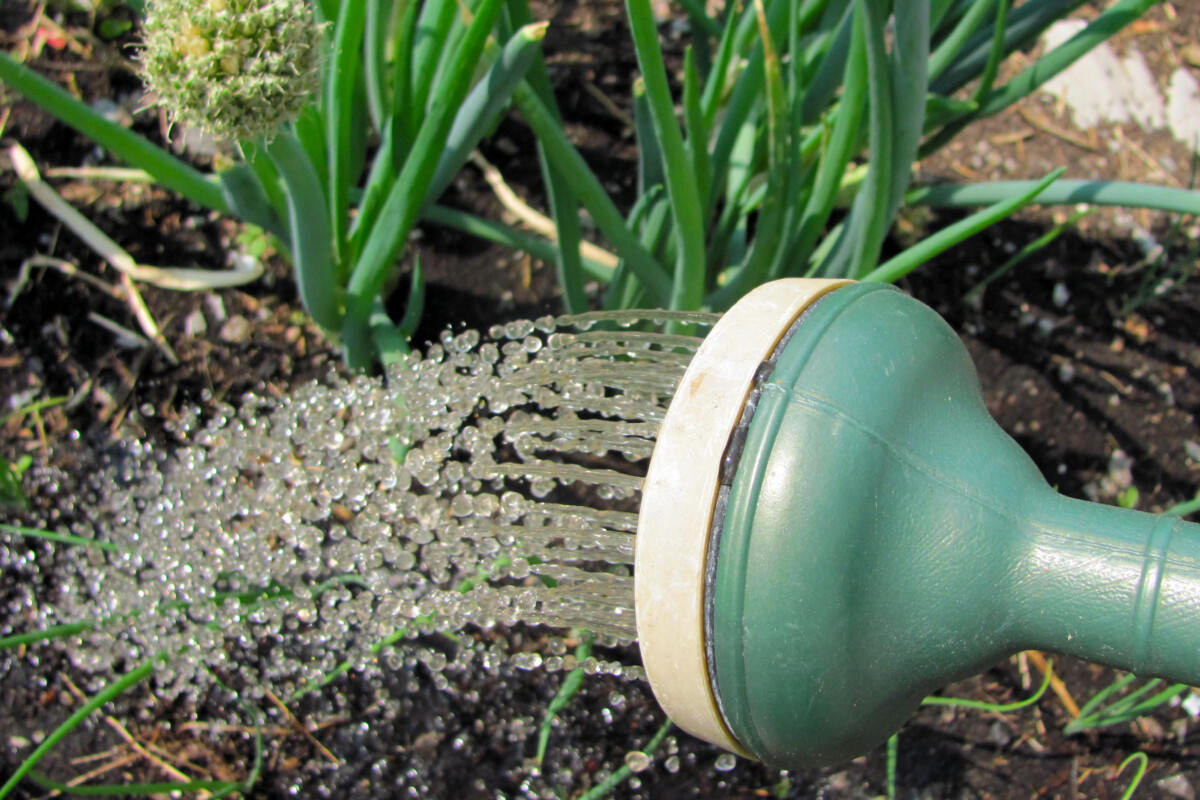
Step 9 – Use Your Compost Tea in the Garden Right Away
There will be no dilly-dallying with aerated compost tea!
The shelf life of the brew is quite short. It takes about four hours for the available oxygen in the liquid to become exhausted. Left longer than that, the still compost tea will become anaerobic.

Because you can’t store it and save it for later, it’s wise to use up all your compost tea at once in a single application.
The best time to dose crops with aerated tea is during in the morning or evening hours. Avoid applying it under strong sunlight, as UV rays kill microbes.
After you’ve nourished your green friends down to the last drop, give all your brewing tools and equipment a thorough cleaning with soapy water. Rinsed and dried, they will be good to go for your next batch of aerated compost tea.

Get the famous Rural Sprout newsletter delivered to your inbox.
Join the 50,000+ gardeners who get timely gardening tutorials, tips and tasks delivered direct to their inbox.