


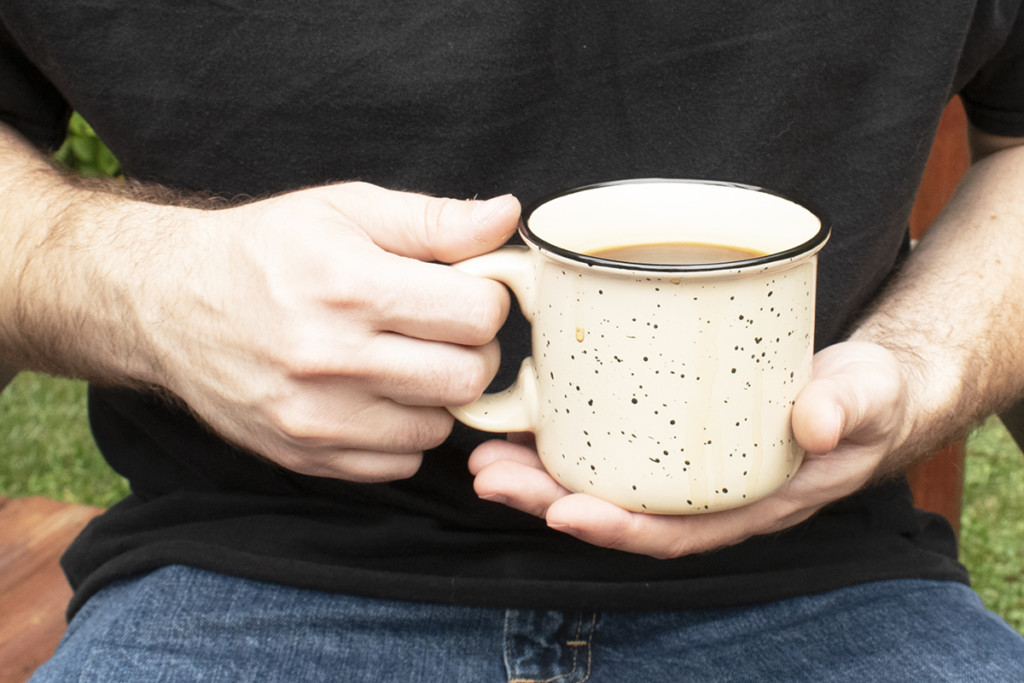
When it comes to coffee, people tend to be very specific.
Some take it black; some people prefer cream and sugar, others just cream. Some people like flavored creamers. Some folks like it scalding hot, and others prefer it iced.
I used to know someone who drank their coffee with three drops of skim milk. I always laughed, but she swore she could taste the difference. Three drops, not a drop more.
I can’t poke fun.
I’m one of those people who it’s best not to talk to until I’ve had that first sip of my morning cuppa. I greet the day by making my first cup of coffee almost as a spiritual rite.
Is that the chanting of monks in the distance? No, that’s just me groaning my way to the kitchen.
The first coherent words of my day aren’t uttered until I have that initial sip, and they’re usually the same, “Ohhh! I love coffee.” There’s been some discussion among my kids as to whether or not I love coffee more than them.
When it comes to coffee, there’s even more variation in what method you brew it rather than what you put in it.
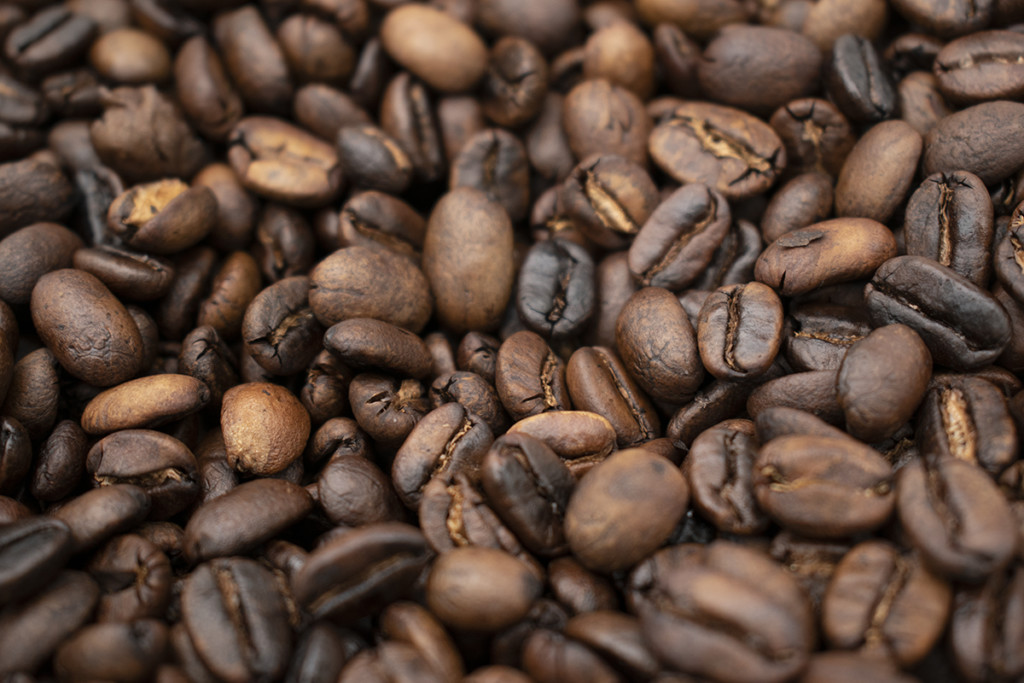
But one thing is clear, no matter what brew method you choose – if you want a good cup, you have to start with freshly roasted beans.
If you ask any pretentious coffee snob, they’ll tell you that for the best cup of coffee you need to use beans within a week of their being roasted.
The coffee you purchase in a grocery store rarely has a roast date on it. And even if it does, it’s well past that magical first week.
Even buying a bag of coffee at a local coffee roaster doesn’t guarantee you’ll get beans roasted within the week. And as someone who likes good coffee, I can tell you that purchasing locally roasted coffee can get expensive.
What’s a caffeine addict to do?
Roast your own coffee beans!
I don’t know why but to me the idea of roasting coffee beans always seemed so magical and impossible-to-do-at-home. But plenty of people do it.
I always assumed there was some sort of large industrial equipment needed or that it was a painstaking and time-consuming process.
Not so, my friends.
Roasting your own coffee at home is easy, takes around twenty minutes, and uses equipment you already have on hand. And the results are great coffee.
It’s cheaper to roast coffee beans yourself too. I like it when doing things myself is more affordable, don’t you?
I can buy a pound of green coffee beans for about $4-$7 dollars. And a pound of green beans will give me roughly 12-13 ounces of finished roasted beans. You can’t beat it!
Give it a try just once. I’ll bet you’ll be amazed at the coffee you produce. And even if you don’t want to roast your own beans going forward, you now have a new skill and a great gift option for those coffee lovers in your life. I love the idea of gifting a custom coffee blend for Christmas this year.
Let’s jump in and give it a try.
Equipment you’ll need:
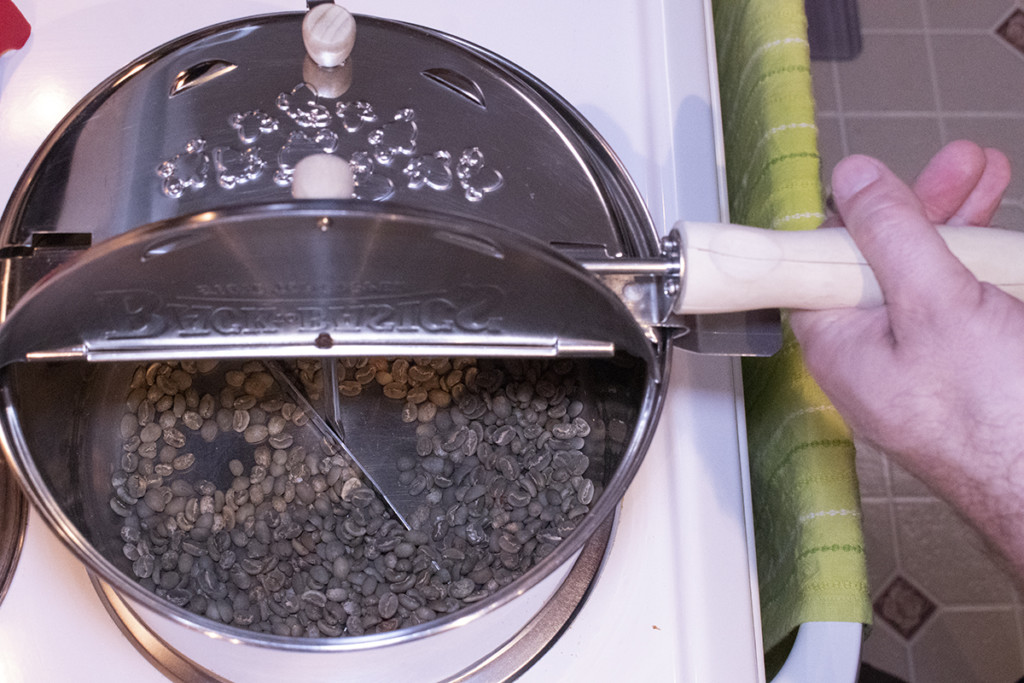
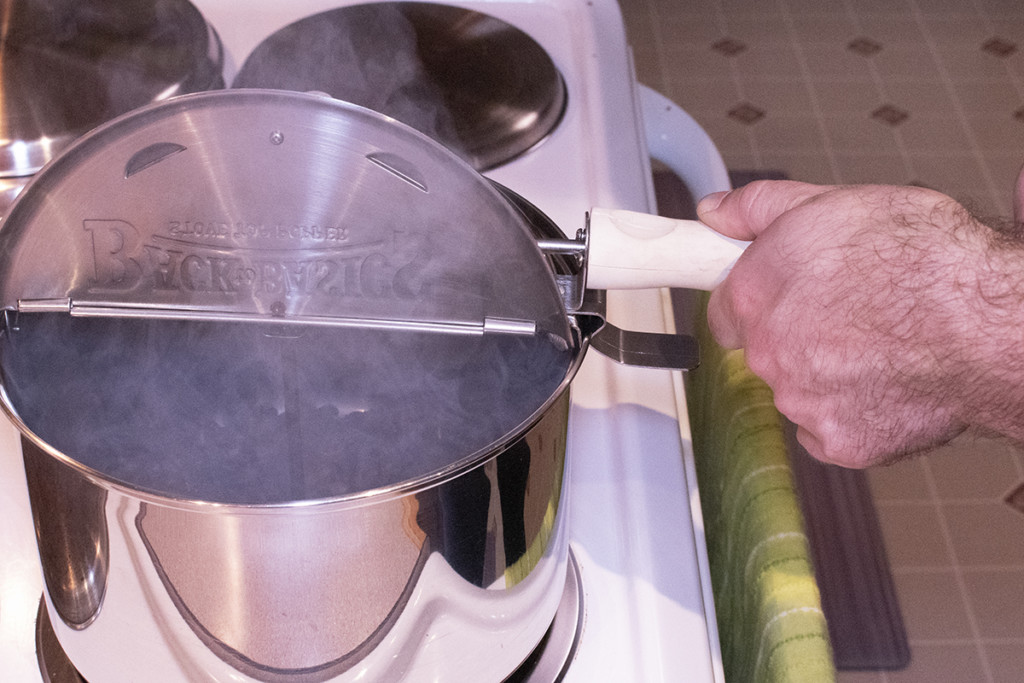
- You can easily roast coffee beans at home using anything from a cast-iron skillet to a pan, or one of those movie-theater stovetop popcorn makers.
- I like to keep it simple and easy, so I opted to go with an old movie-theater style stovetop popcorn popper. That’s what I’ll be using in this tutorial, but the process is the same if you use a pan or skillet. If you plan to repurpose an old popcorn maker, clean it thoroughly. You don’t want popcorn flavored coffee. At least, I don’t think you do.
- A metal colander
- A sheet pan
- A wooden spoon if you’re using a skillet or pan
- Something to store your amazing freshly roasted coffee beans. (I use these stainless steel airtight containers with a built-in CO2 release. They keep my coffee fresh and tasty!)
Ingredients:
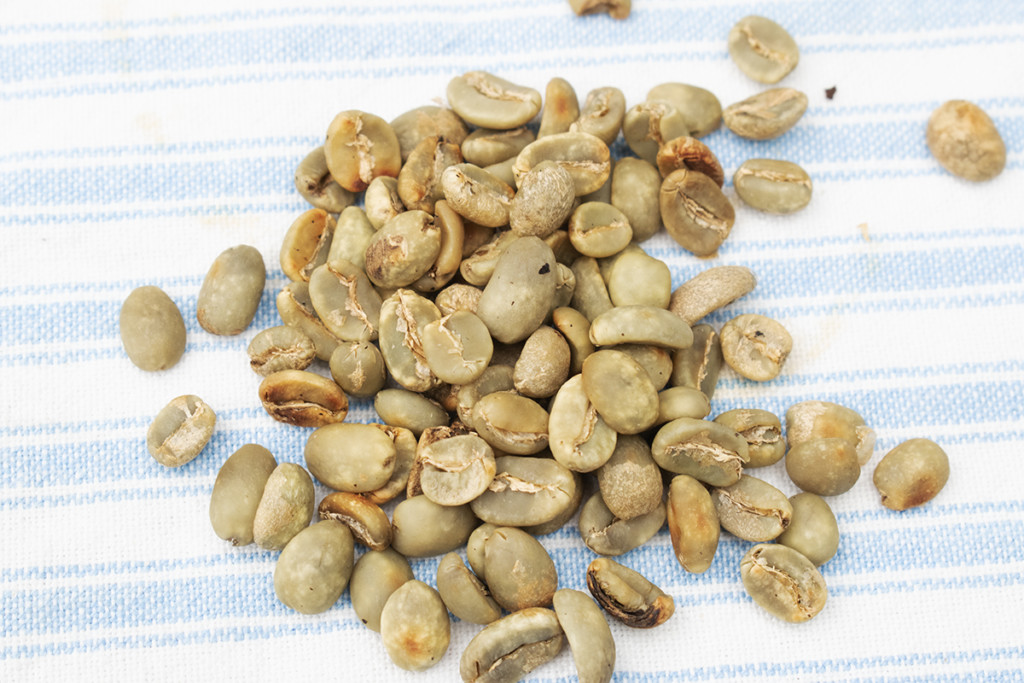
- Green coffee beans
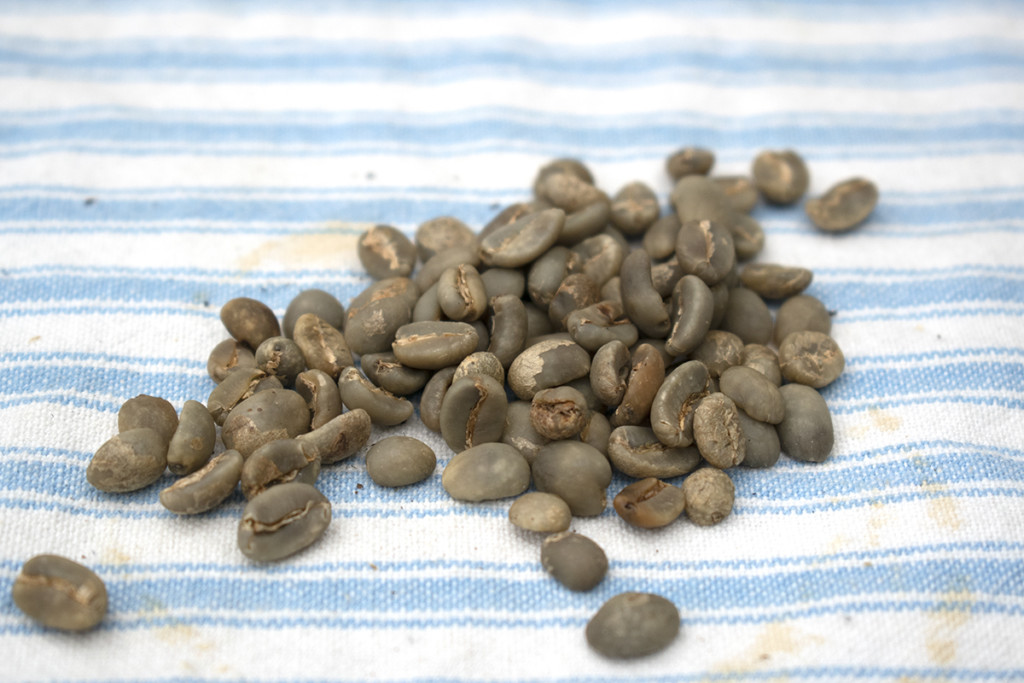
They’re easier to come by than you think. Ask around at a local coffee roaster; many will happily sell you green coffee beans.
If not, you can always find them online. My favorite place to procure green coffee beans is Happy Mug Coffee. Their green beans always come with notes on them about the best ways to roast them, taking the guesswork out of it for me.
Choosing what coffee beans to buy can be overwhelming, so I suggest starting with a bean that you know you already like. Buy yourself a pound to get started. You’ll end up with around 12-13 ounces of finished beans.
Amazon, as always, is a great place to source green coffee beans. This sampler pack of four bags of different green coffee beans is a great option to get started with. Below are some more great options on Amazon:
Roasting Coffee Beans
I’ve been roasting half a pound at a time. I find this amount easiest to work with, and I can use it up while it’s at its peak flavor. Try roasting the two halves of your pound as two different roasts – light, medium, or dark.
That’s the nice part about roasting coffee beans yourself – you can get different brews from the same beans just by changing how long you roast them.
Add your coffee beans to your popper/pan/skillet and set your heat to around medium-low. You’ll need to stir your beans slowly and continuously.
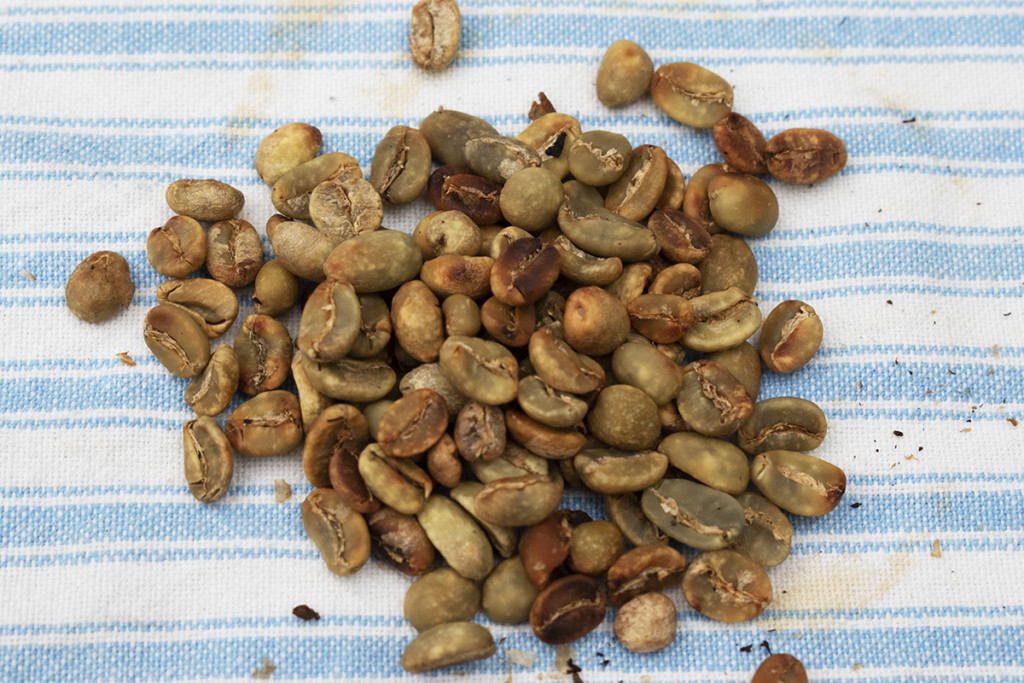
As the beans warm, give them a sniff. They produce a pleasant grassy smell.
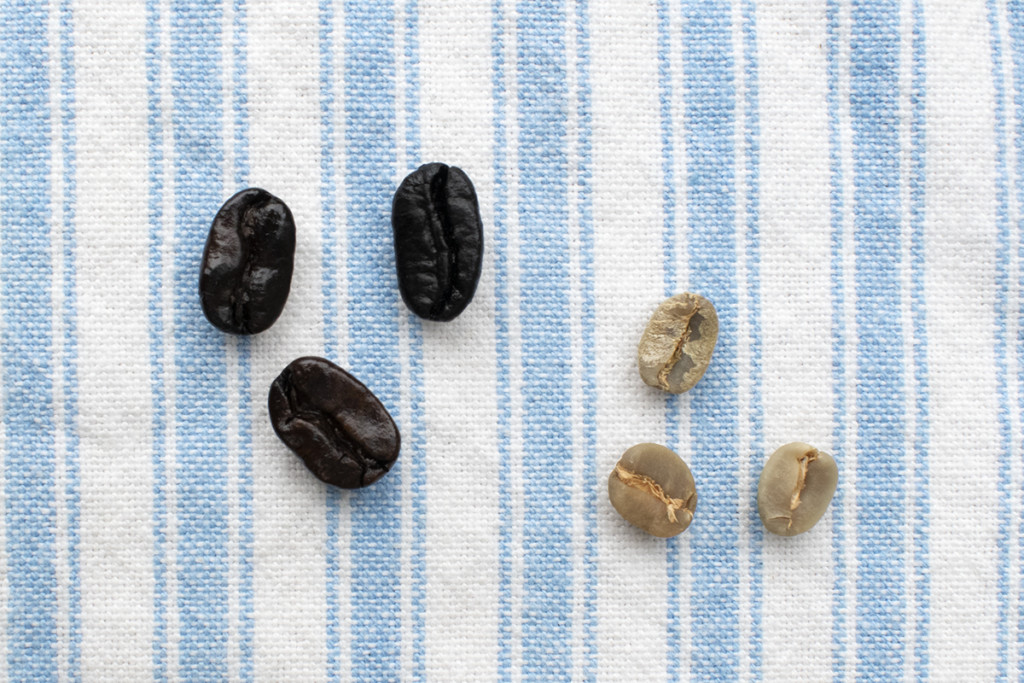
Once they get roasting, the process moves along pretty quickly. The tiny raw coffee beans will go from green to dark brown and puff up nearly twice their original size. The entire process takes between fifteen and twenty minutes.
First and Second Crack
Pay attention to more than just their color. The sound of the beans will tell you when they’re ready. The beans will make a crackling sound while you’re roasting them; this will happen twice. As steam builds up inside the bean, it will cause it to crack. It becomes a continuous crackle that sounds a bit like popcorn, but don’t worry, your coffee beans won’t jump out of the pan. This is called a ‘rolling crack.’
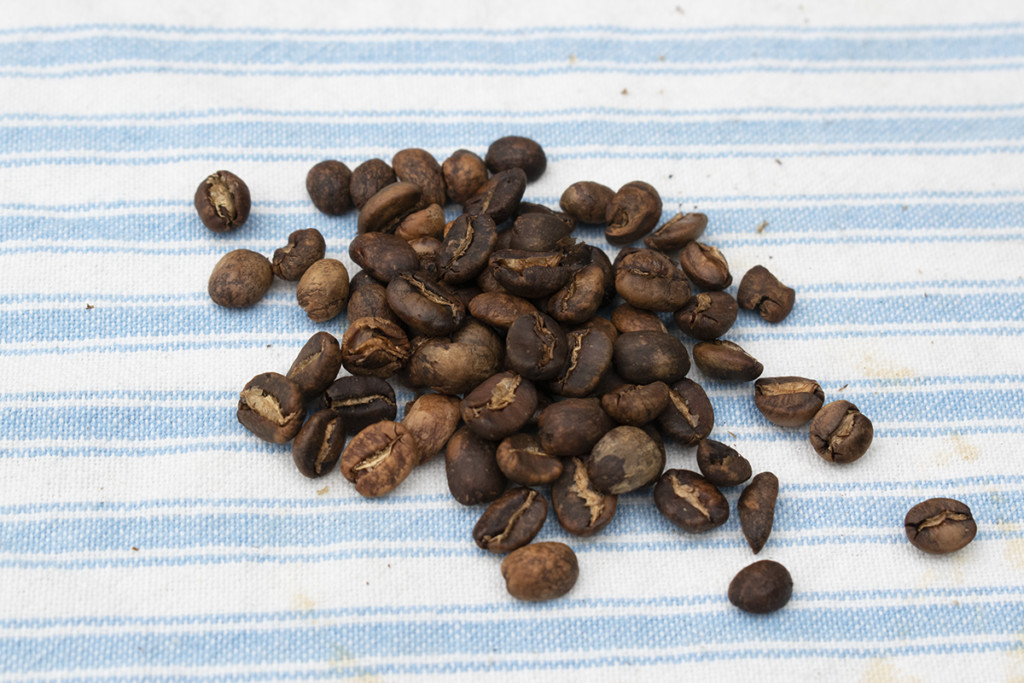
You’ll hear the first crack right around when the beans reach an internal temperature of 385 F. At first crack, you have a light roast. Light roasts contain more caffeine than dark roasts, making them a great breakfast coffee. For some beans, roasting to that first crack is all you need.
If you prefer a medium or dark roast, you’ll keep stirring and roasting past that first rolling crack until you hear a second round of cracking, aptly named second crack. This usually happens around 450 F. Roasting to or just slightly beyond second crack gets you a nice medium roast.
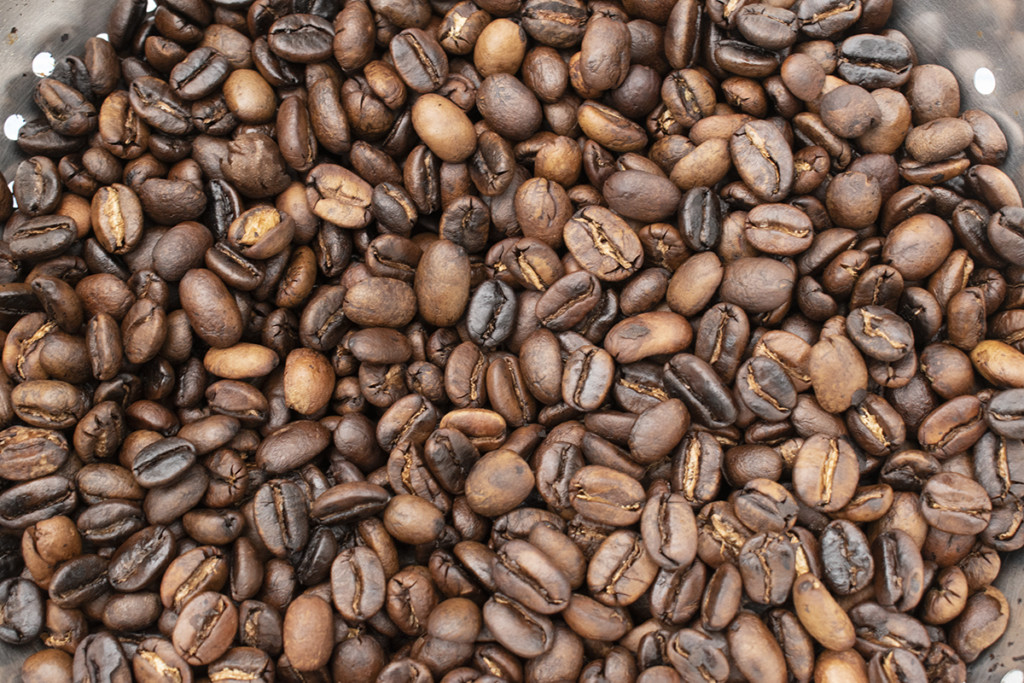
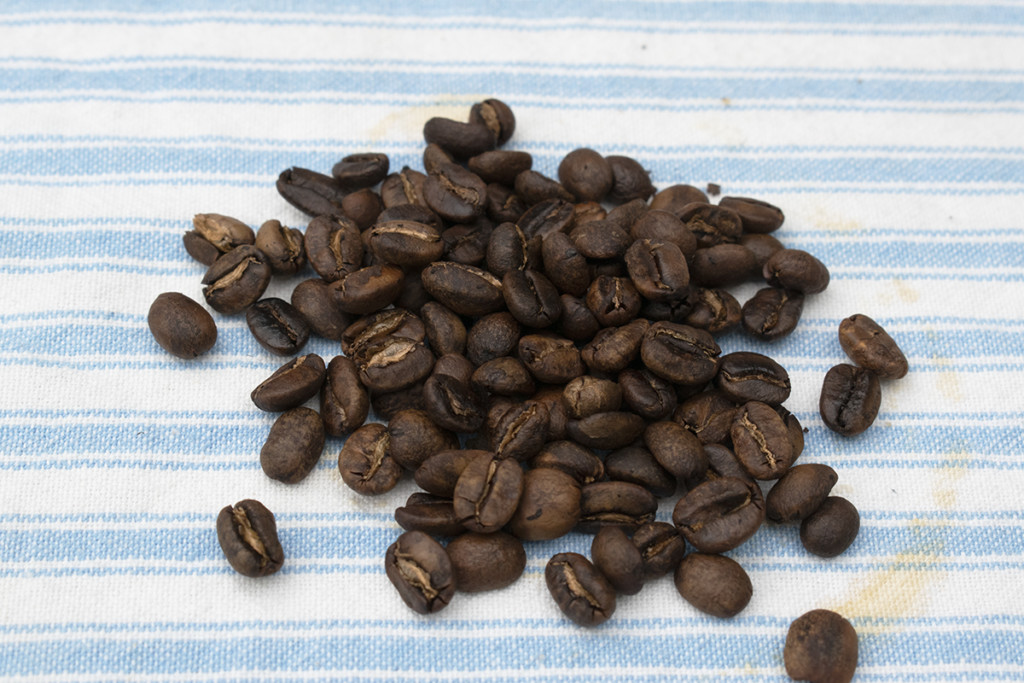
If you take your coffee about 90 seconds beyond second crack, you’re into Italian espresso or Vienna roast territory. Your beans will have a lovely oily shine to them.

Generally, you don’t want to roast your beans too much longer beyond the 90 seconds after second rolling crack.
Otherwise, you end up with burned beans that are more like tiny charcoal briquettes than coffee beans.
Let’s take a look at the color progression of the beans as they roast.
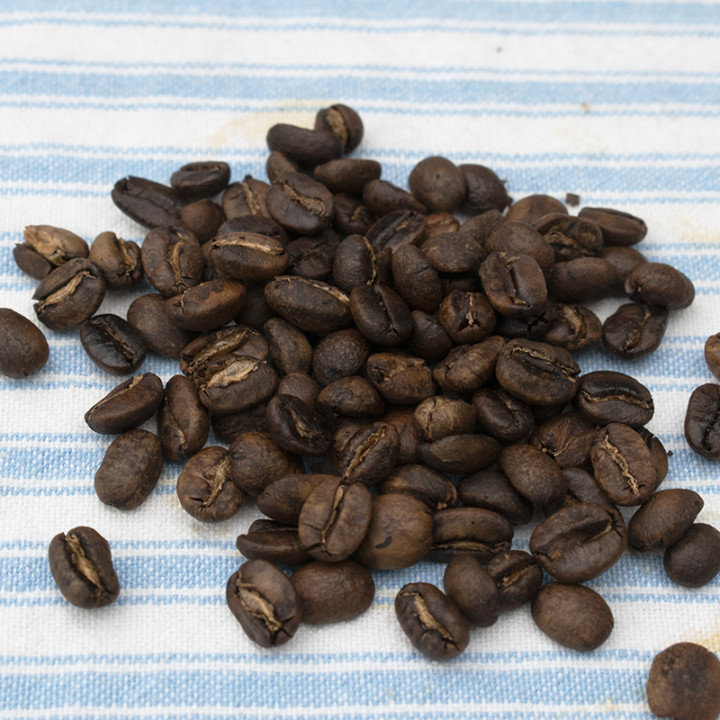
Cooling and Removing the Chaff
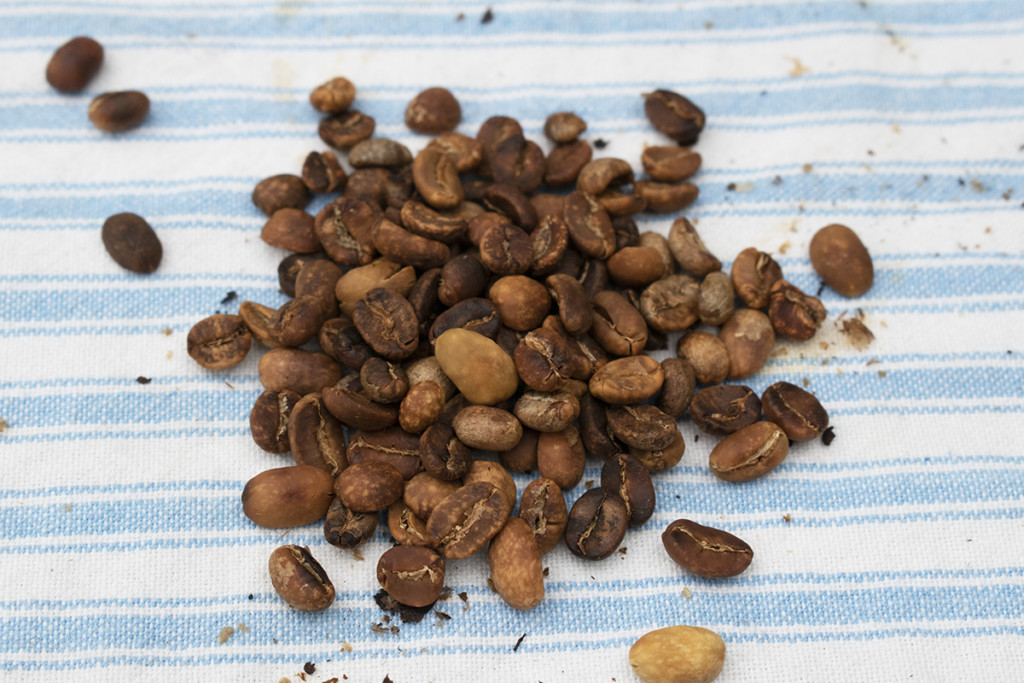
As soon as you’ve reached the desired time beyond first or second crack, dump your beans into a metal colander. Be careful; those tiny beans are HOT!
There is a papery hull on the coffee beans which comes loose during roasting. Swirl your beans around in the colander and blow on them to remove this chaff. Some beans have more of it than others.
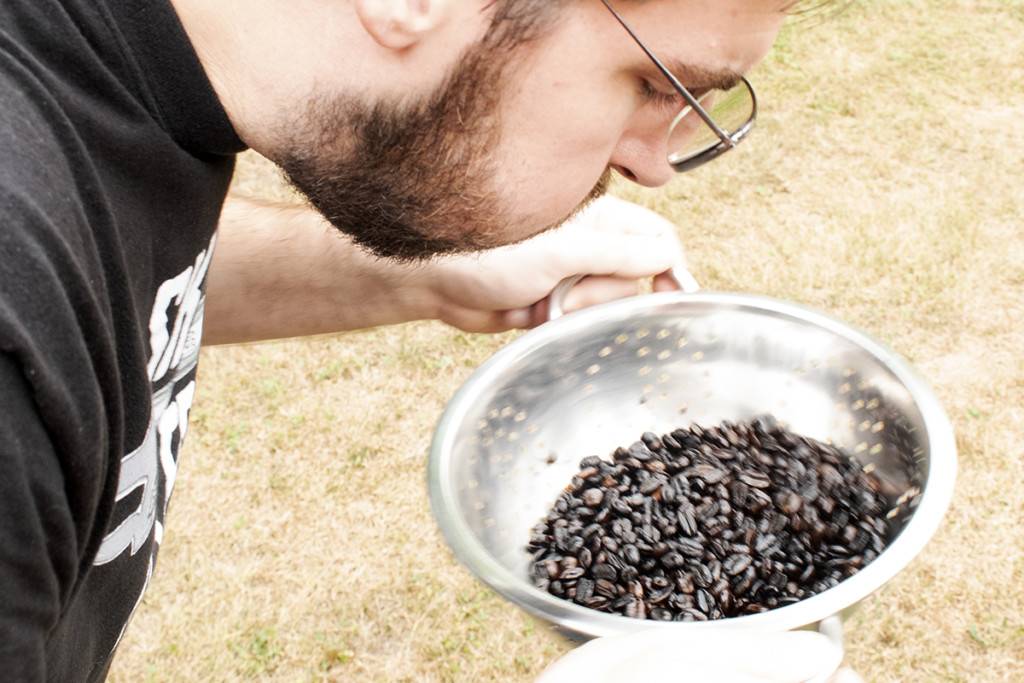
Hint – do this outside. Otherwise, you’ll be cleaning up coffee bean chaff from your kitchen for a month. Ask me how I know.
After you have most of the chaff removed, pour the beans out on the sheet pan so they can continue to cool. Once the beans are completely cooled, store them in an airtight container or a coffee container with a CO2 valve.
You can even reuse an empty store-bought coffee bag that has one of the little CO2 valves on it. Just be sure you use one that you can reseal.
The coffee will off-gas CO2 for a couple of days after roasting.
If you do use an airtight container that doesn’t have a release valve, be sure to burp the container a few times.
A fun little experiment I like to do with each batch is to make a cup of coffee with my beans right after roasting them, then again, a couple of days later. You’ll be amazed at how much the flavor changes as the coffee releases the CO2.
Smoky, smoky, smoky!
Roasting coffee beans is smoky work, especially once you get to the second rolling crack – this is normal. If you’ve got a good exhaust fan above your stove, you’re all set. Otherwise, you may wish to open a window or door.
I put a small window fan in the window above my kitchen sink to exhaust the smoke, and it works quite well. I haven’t set off the smoke alarm yet!
Like most things coffee-related, you can get pretty technical when it comes to roasting beans. Do a quick search on YouTube, and you’ll see there are nearly as many coffee roaster setups as there are ways to take your coffee. It all depends on how involved you want to be. For most of us, this simple tutorial and a few roasting notes specific to your beans are all you need to produce fantastic coffee at home.
And I’ll bet you your home-roasted coffee beans will taste even better simply because you were the one who did the roasting.
One of my favorite parts about the homesteading life is the pride that comes from doing something yourself. Enjoy your cup of coffee – no matter what you put in it.
And don’t forget to recycle your used coffee grounds in one of these brilliant ways.
Coffee not your cup of tea? Learn what herbs to plant to make an herbal tea garden.
How to Grow a Beautiful Coffee Plant Indoors
Easily Roast Coffee Beans At Home For Fresher, Richer Coffee
Roasting your own coffee at home is easy, takes around twenty minutes, and uses equipment you already have on hand. And the results are great coffee.
Materials
- Green coffee beans
Tools
- - A cast iron skillet, a pan, or a stovetop popcorn maker
- - A metal colander
- - A sheet pan
- - A wooden spoon (if using a skillet or pan)
- - An airtight container with CO2 release
Instructions
- Add your coffee beans to your popper/pan/skillet and set your heat to around medium-low.
- Continually stir your beans.
- For light roast, remove your beans after your hear the first crack.
- For medium roast, remove your beans after you hear a second round of cracking.
- For dark roast, continue roasting for a further 90 seconds until the beans take on a dark, oily appearance.
- In each instance, dump your beans into a metal colander when they are ready. Swirl your beans around and blow off the chaff.
- Once most of the chaff is removed, pour the beans onto the sheet pan to continue to cool.
- Once cooled, store in a coffee container with CO2 release valve.

Get the famous Rural Sprout newsletter delivered to your inbox.
Join the 50,000+ gardeners who get timely gardening tutorials, tips and tasks delivered direct to their inbox.