

I’m always nervous when I have to repot a cactus. I despair. Then I prepare. Then I collect everything that could ever be of use to transplant my cacti safely.
Do you know that internet trend of experiential articles following the formula “I did such and such, so you don’t have to”? I briefly considered the following title for this cactus repotting guide: “I got pricked, so you don’t have to.”
Luckily, all the methods I experimented with for safely transplanting my cacti worked like a charm. All the cacti and both of my hands remained unscathed. And I want to teach you how I did it. Because pricks are never welcome.
5 Steps to Repot a Cactus Without Getting Jabbed
I’ll show you a few methods to handle cacti safely. You can experiment with them and see what works for you. Keep in mind that it will largely depend on the type of cactus you’re repotting.
There are hundreds of types of cacti that we grow as houseplants, of different shapes, sizes and “levels of prickliness,” so one method may not work for all of them.
Other factors that will influence how easily you can remove and repot a cactus include:
- The type of container that it’s potted in;
- How long it’s been in this container (since cacti can live for years in the same pot);
- The type of soil your cactus is currently growing in;
- How large the roots have grown.
Step 1: Get the cactus out of its old pot.
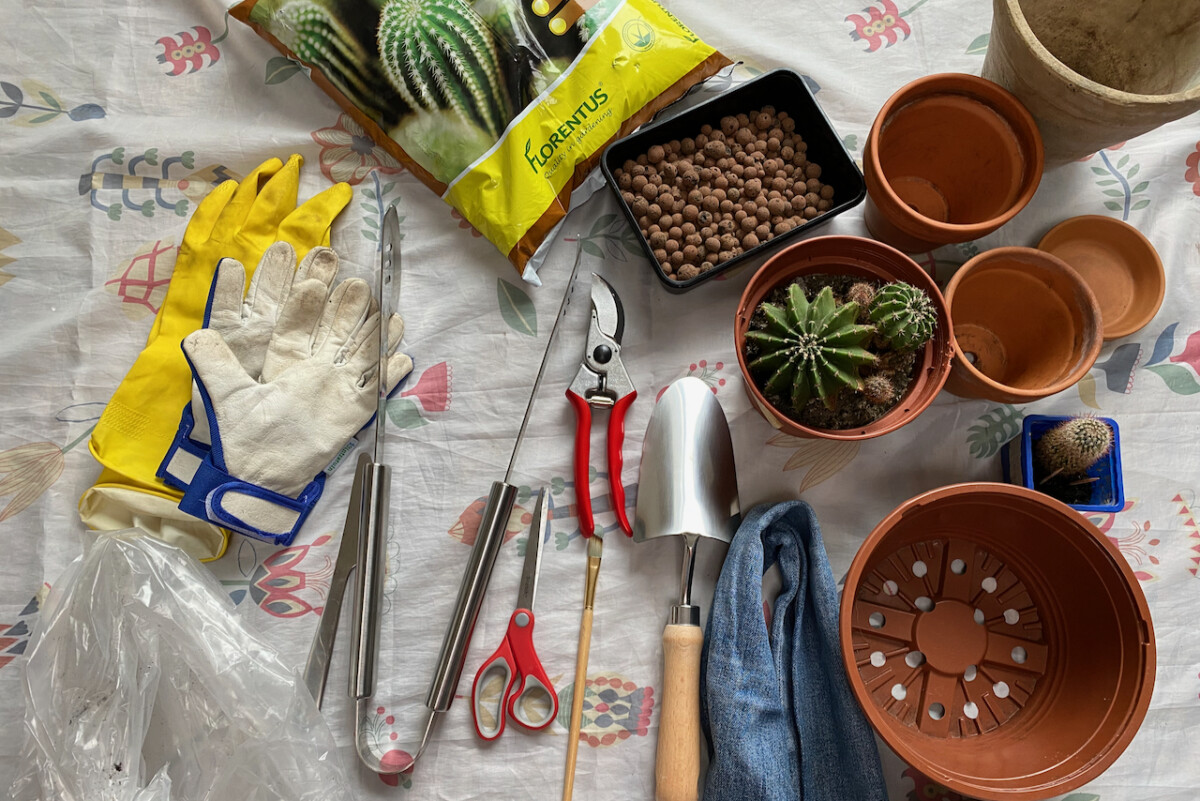
Before we get started, I’d advise you to collect the extra materials for at least a couple of the methods below, just so you’re prepared if things don’t work out the first time. As you can see, I started with quite an arsenal of tools, but I didn’t end up using all of them.
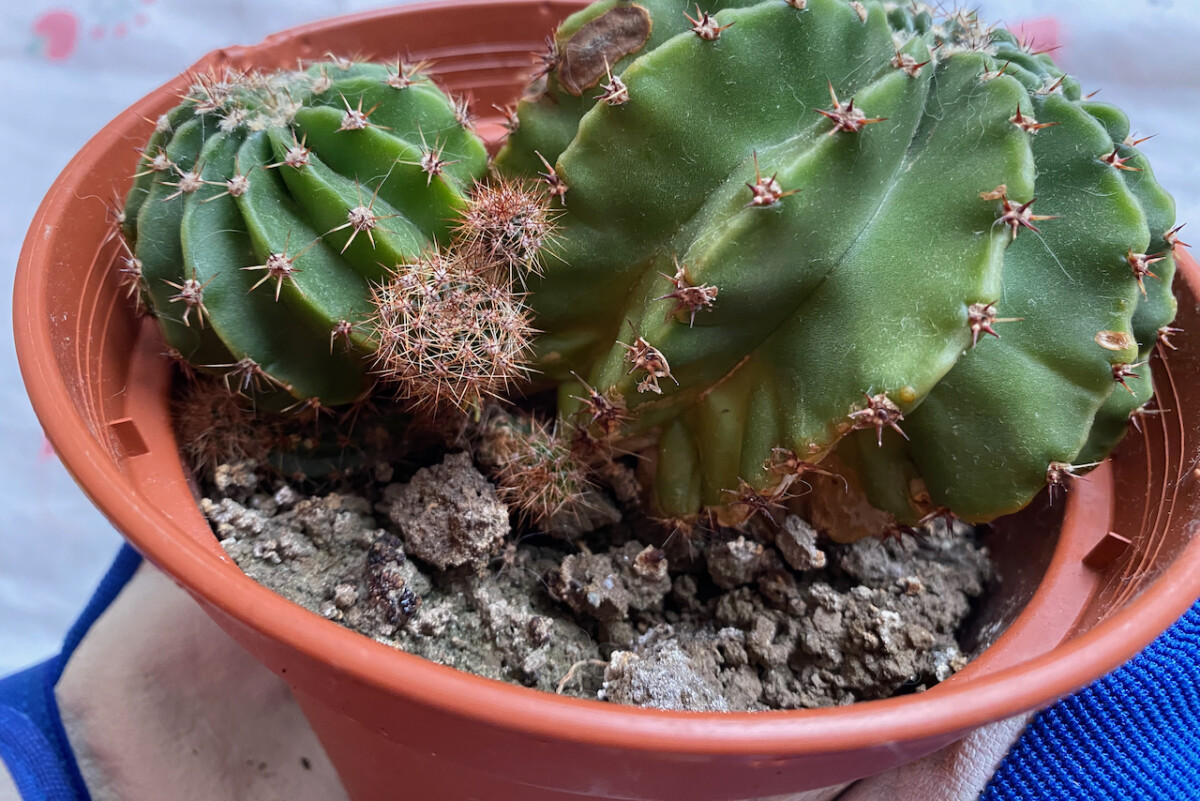
1. Loosen up soil around the cactus first.
Before you try any of the methods below, loosen up the soil to make the removal of the plant easier. By this point, I had already let the potting soil dry up for at least a couple of weeks in order to make it easier to remove the plant from its pot.
Your cactus shouldn’t be swimming around in waterlogged soil anyway, right?
I used a blunt butter knife to loosen up the soil, working all around the edges of the pot in a circle. This helped dislodge any clumps of soil that may have compacted. If your plant is in a plastic container, give the pot a little squeeze and a tap to help loosen up the roots.
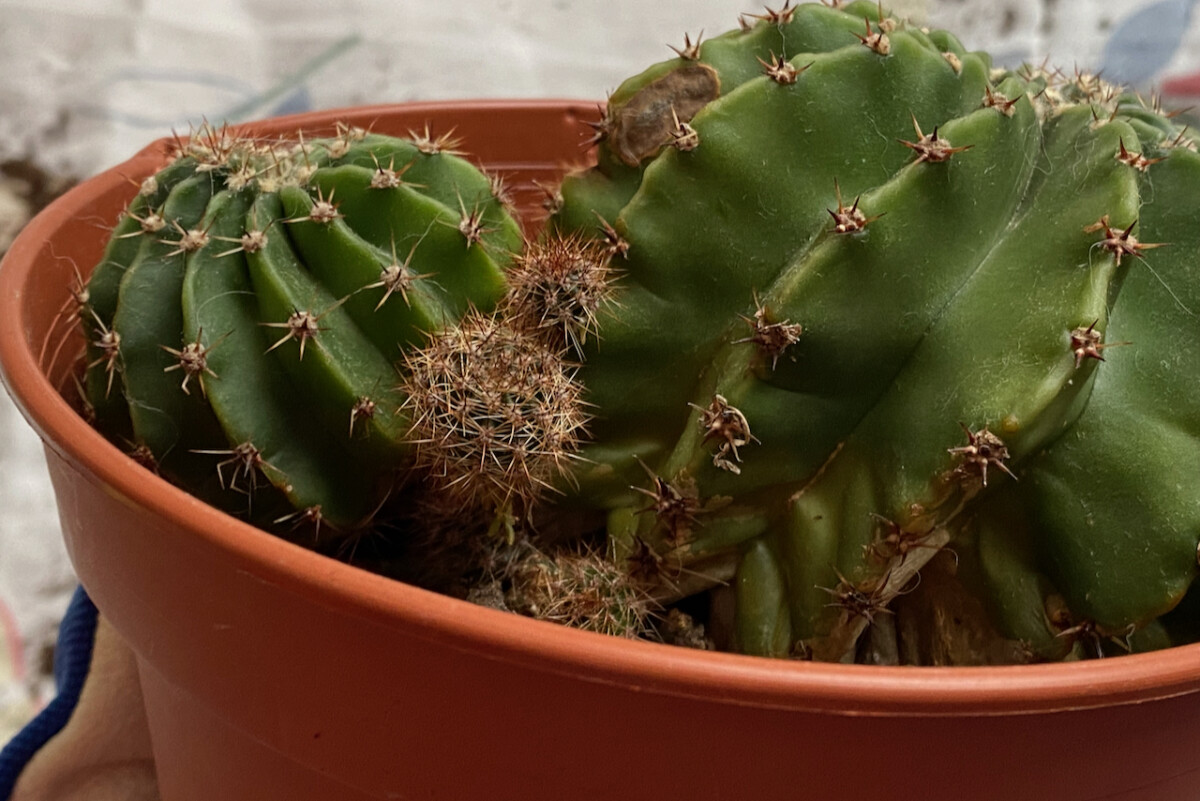
Some cacti may become overgrown, either because we haven’t transplanted them for a long time or because we’ve been using too much fertilizer and the plant just overdeveloped in a short amount of time.
Both of these scenarios mean that there might be roots sticking to the inside of the pot. (This is especially common with terracotta pots.)
Since cacti generally have a small and shallow root structure, this overgrowing is not very common, but it does happen. You can use the same blunt knife to get the roots unstuck.
2. Handle the cactus with thick gloves.
Ok, now that the soil and the roots are a bit loose, it’s time to get the cactus out of the pot.
Whatever you do, do not start repotting a cactus without putting on a thick pair of gloves. The operative word being “thick.” My regular gardening gloves made of rubber wouldn’t stand a chance against the needles. Not to mention the fabric gardening gloves, which are completely pointless for this job.

I’m going for sturdy leather or pleather gloves. While they reduce mobility and tactility a bit, these gloves are also the best protection against cactus needles. (By the way, these are also the best gloves for gardening jobs that involve roses.)
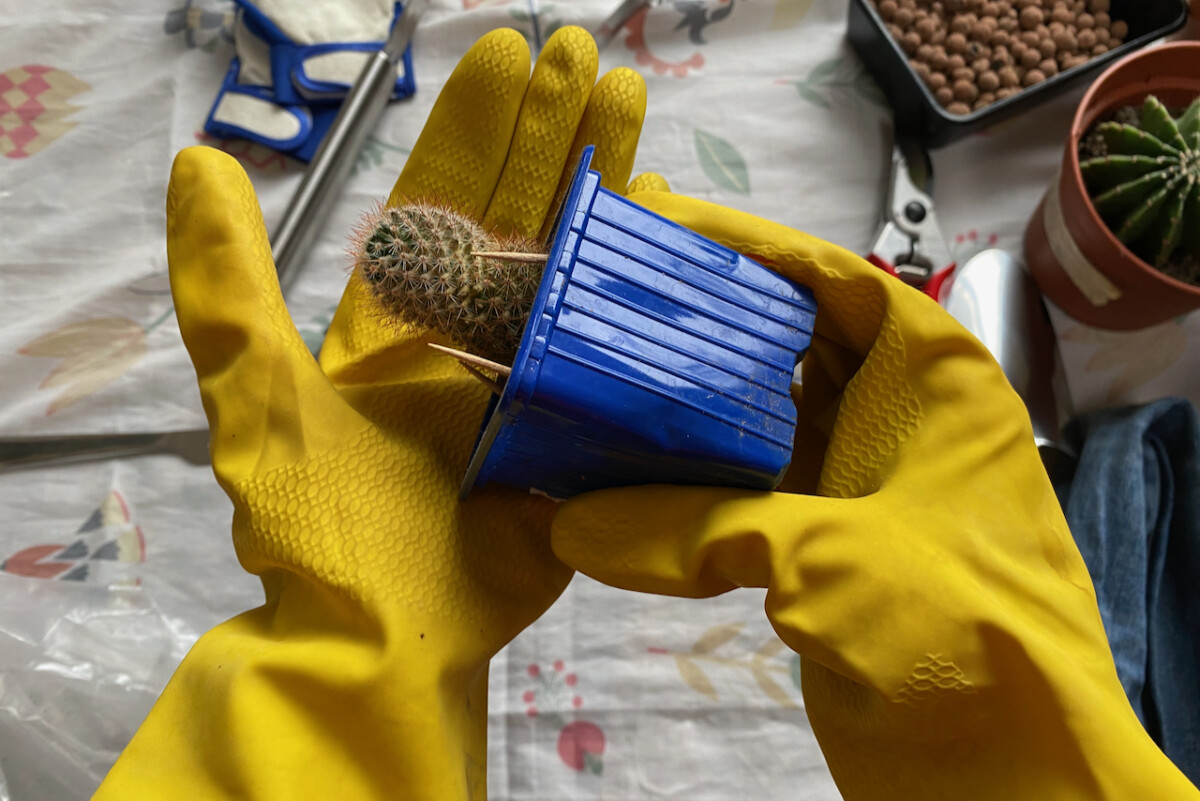
If you don’t have sturdy gardening gloves, I found that the next best thing is using thick rubber cleaning gloves. Make sure they’re not ripped before using them (one of my pairs was).
For the smaller, fuzzier cacti, you can tip the plant straight into your gloved palm and handle it this way. I still prefer using tools, though, even for the small plants.
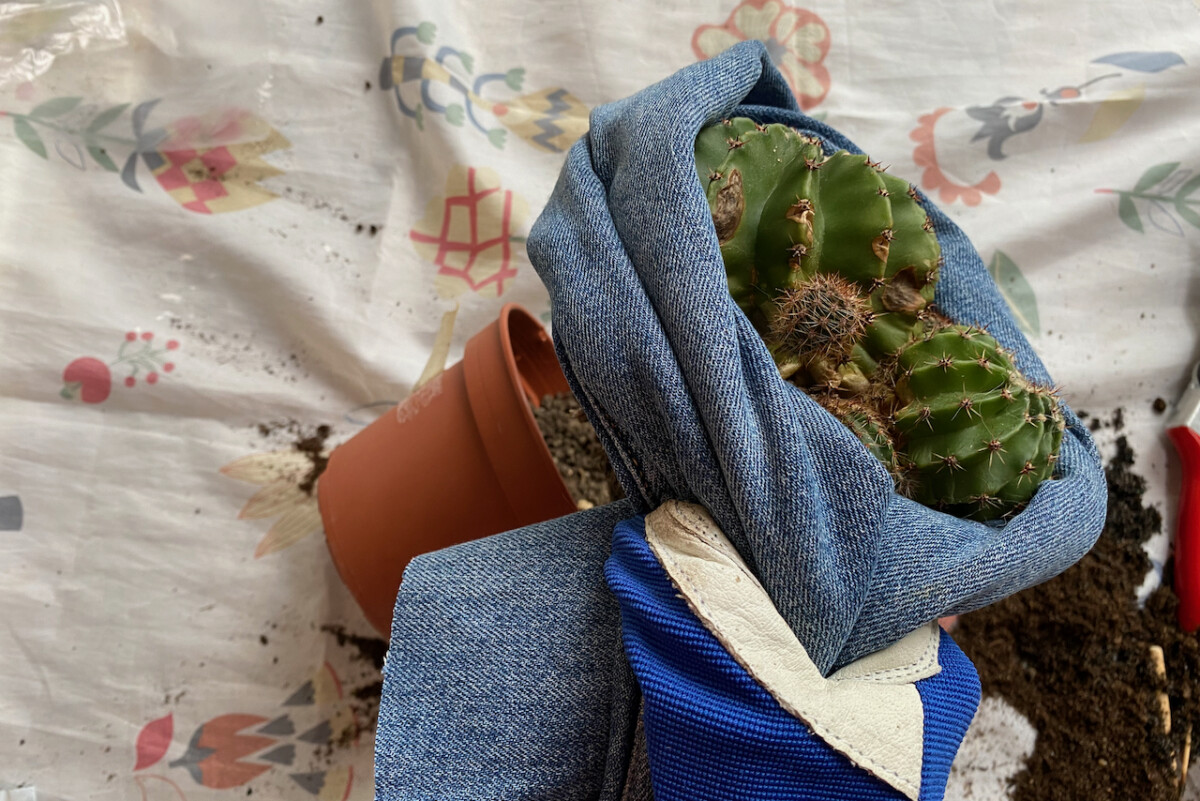
3. Lasso the cactus using a rolled-up piece of denim.
Speaking of tools, let’s have a look at a few options.
Our goal is to use a tool that’s rigid enough to maneuver the plant without us having to touch the pricks. I found that a lasso-like setup works great. You can make it either out of:
- A piece of thick fabric, such as denim;
- A rolled-up newspaper or thick brown paper (the kind you get as packaging filler);
- A rolled-up thick plastic bag;
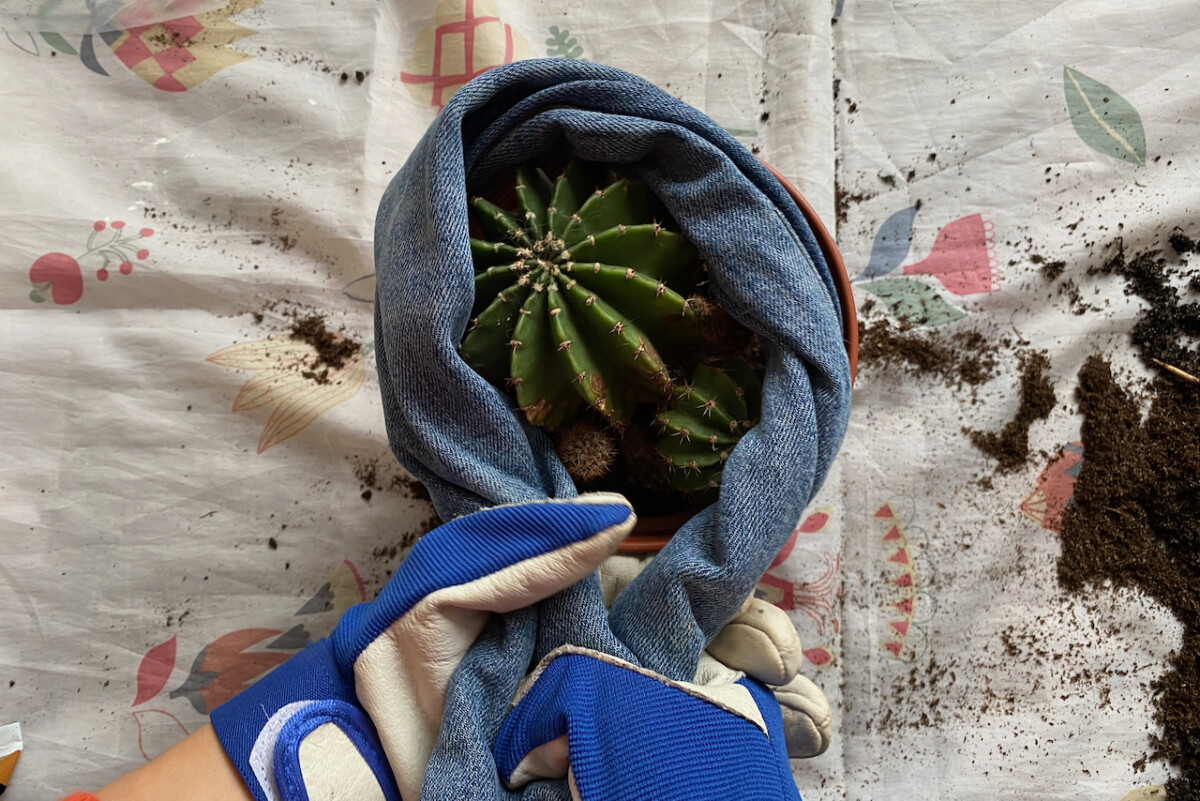
I used the leg of a pair of old jeans that I had waiting around for an upcycling project. I simply rolled it up to make it stiffer, wrapped it around the cacti and held it tight with one hand. Then I grabbed the pot and tipped it sideways while I pulled out the plant.
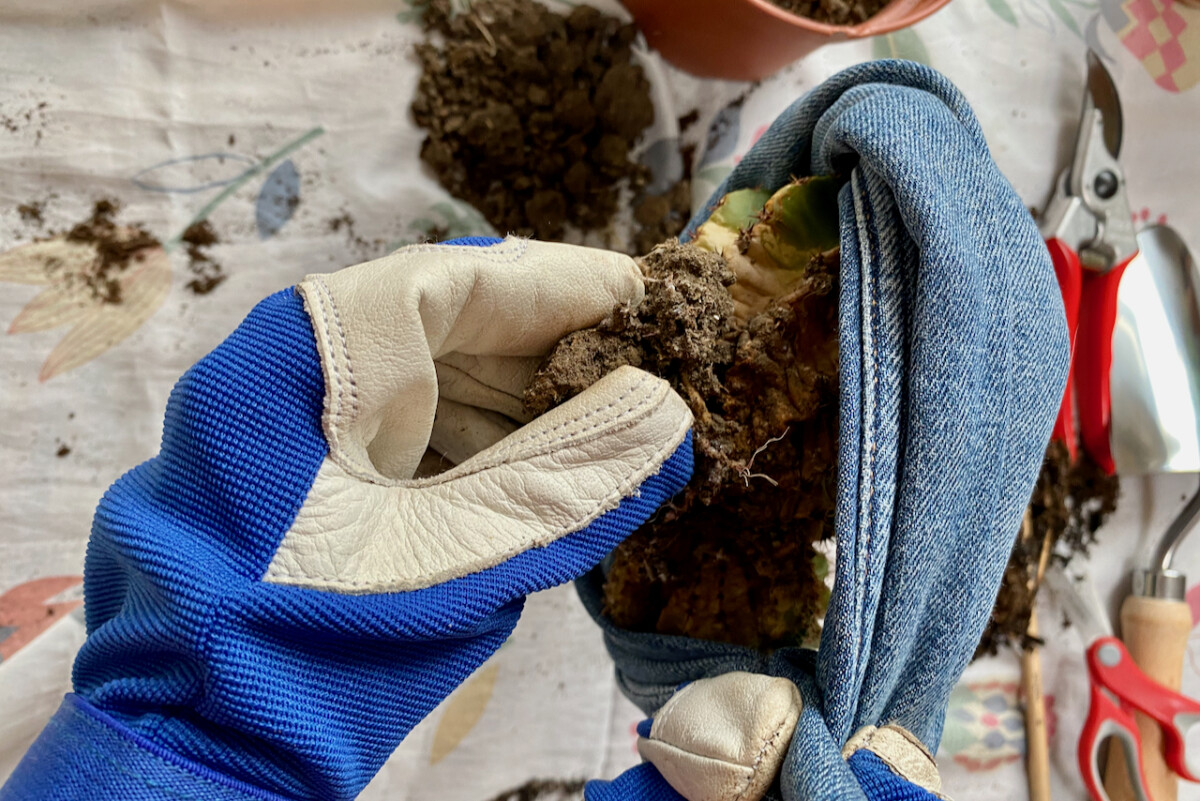
The advantage of this method is that the lasso acts as a handle that you can use throughout the repotting process. You can use this containment method to inspect the roots of the cactus and to lower the plant back into fresh potting soil (more on that later).
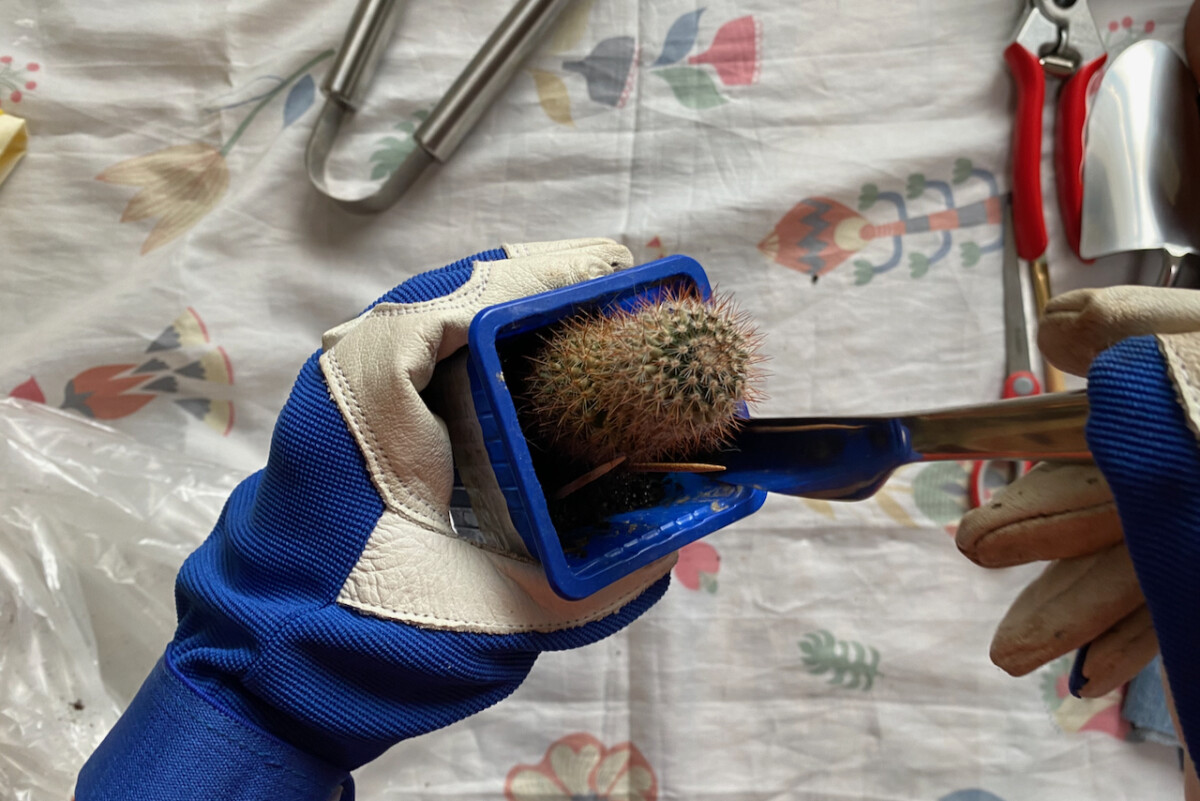
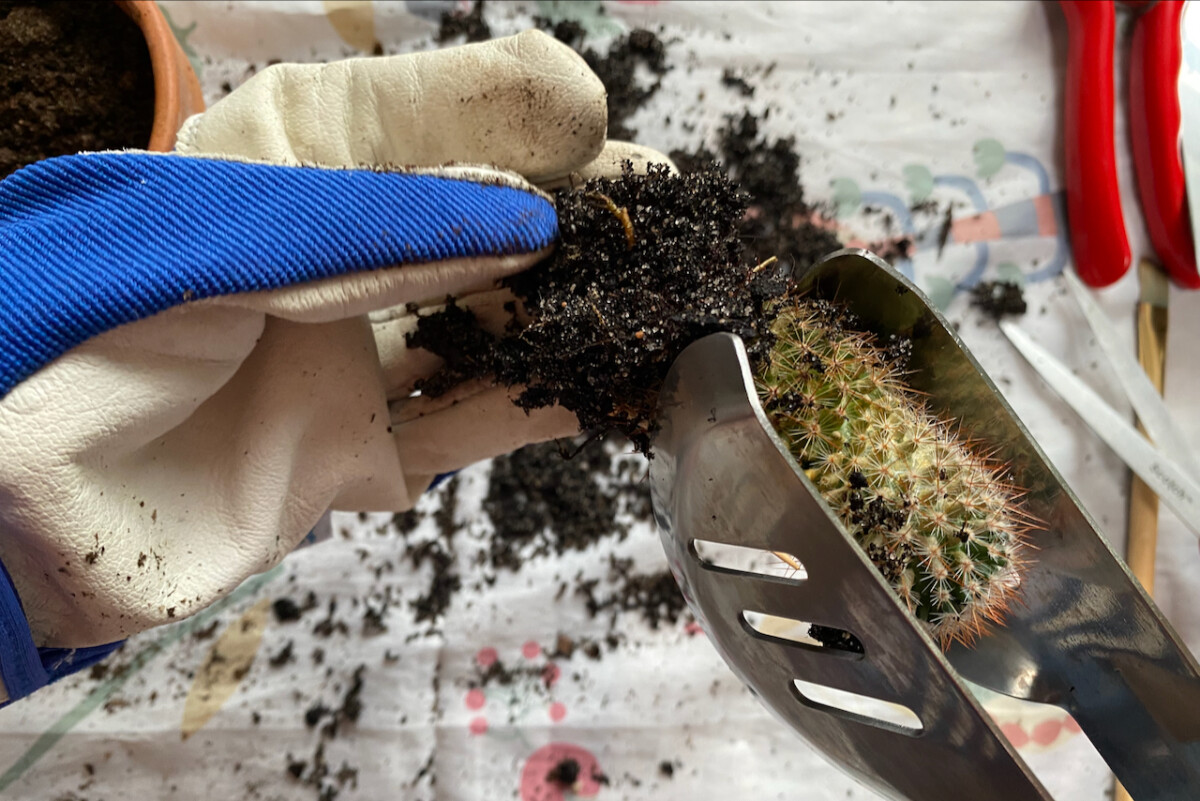
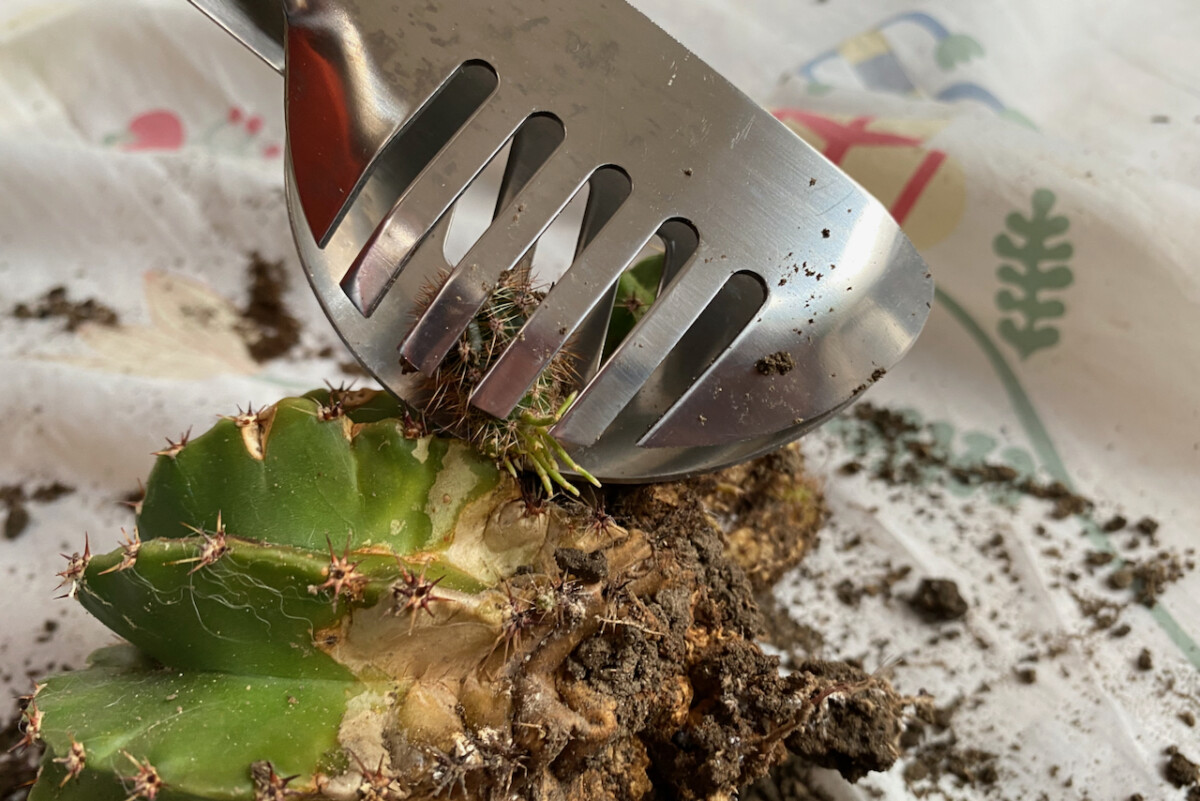
4. Use barbecue tongs to grab and move the cactus.
A pair of stainless steel barbecue tongs is also a great tool for repotting small and medium-sized cacti. Simply grab the cactus (don’t squeeze) and lift it up. This will work great if you’ve followed my advice of letting the soil dry up and loosening it up before you get started.
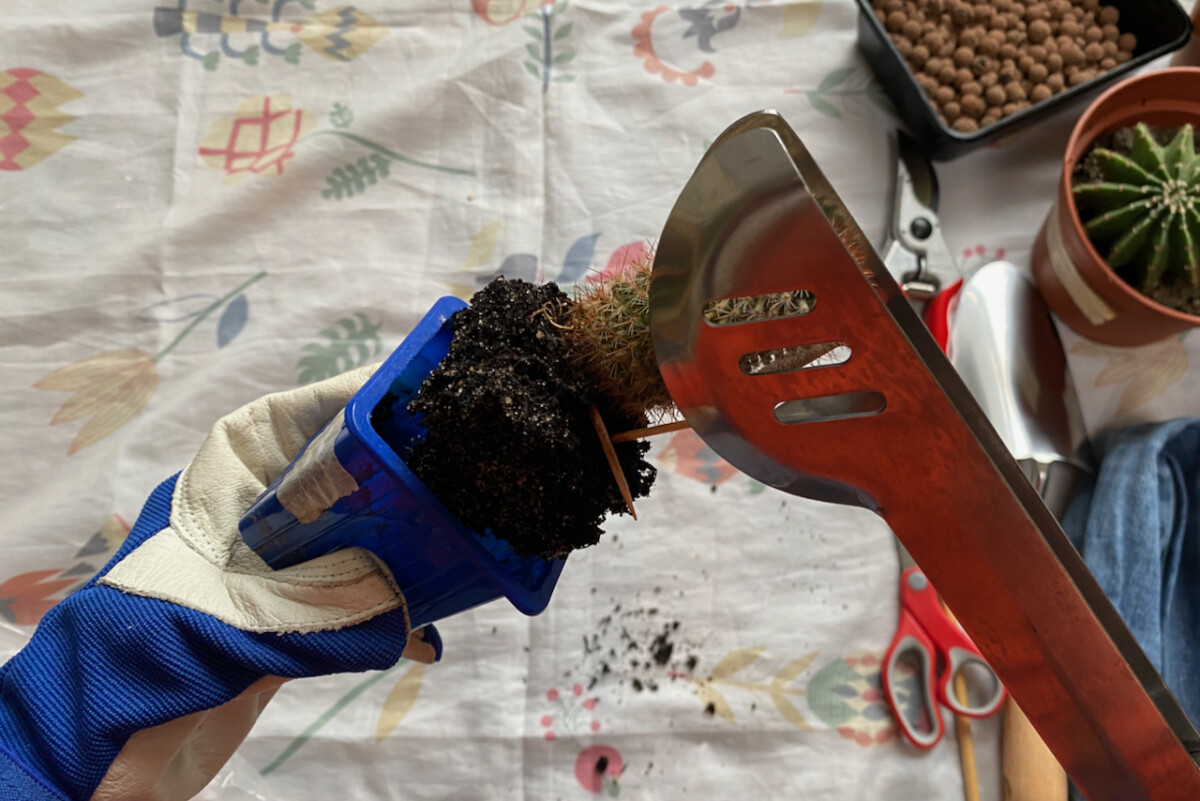
If you don’t have barbecue tongs (how do you even fire-roast peppers?) regular kitchen tongs will work too, especially for handling small cacti.
But there is one exception, and I’d like to steer you away from it. Don’t use kitchen tongs that have a silicone grip, as the spikes might get stuck in the soft silicone when you apply pressure. If that’s all you have, then cover the silicone with some cardboard or cardboard rolls.
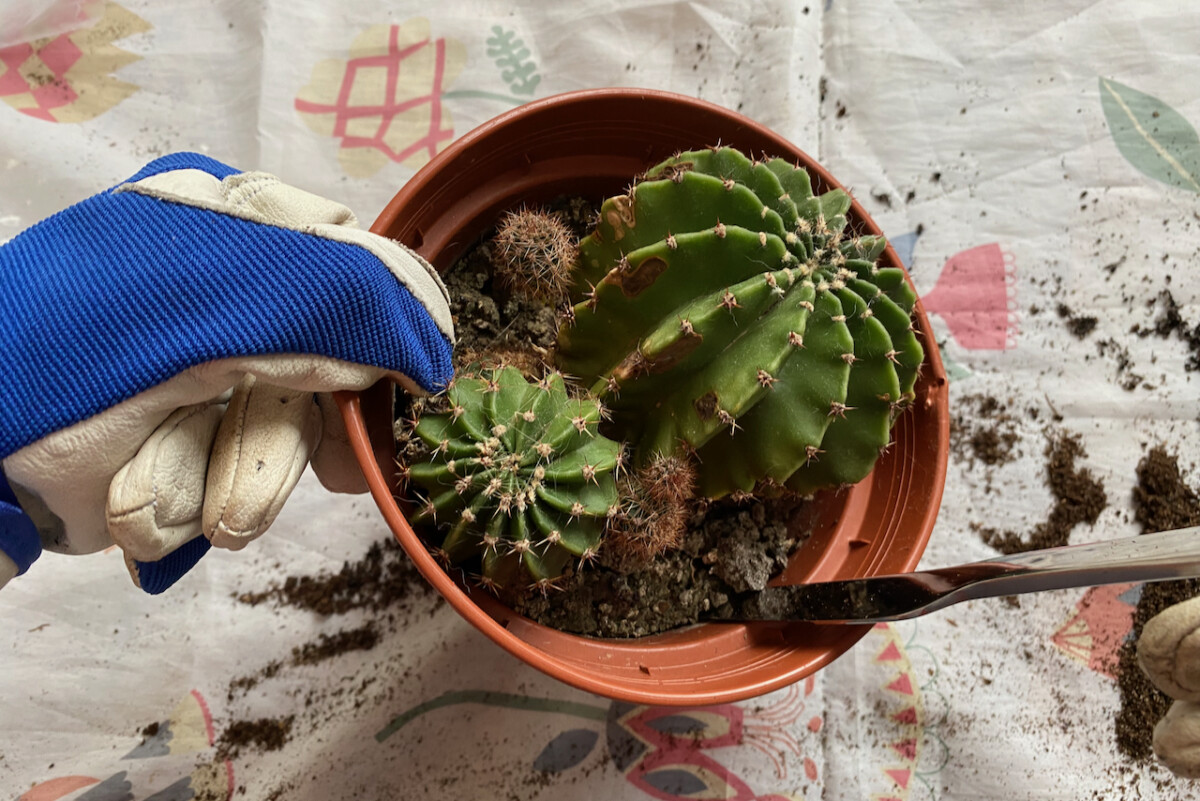
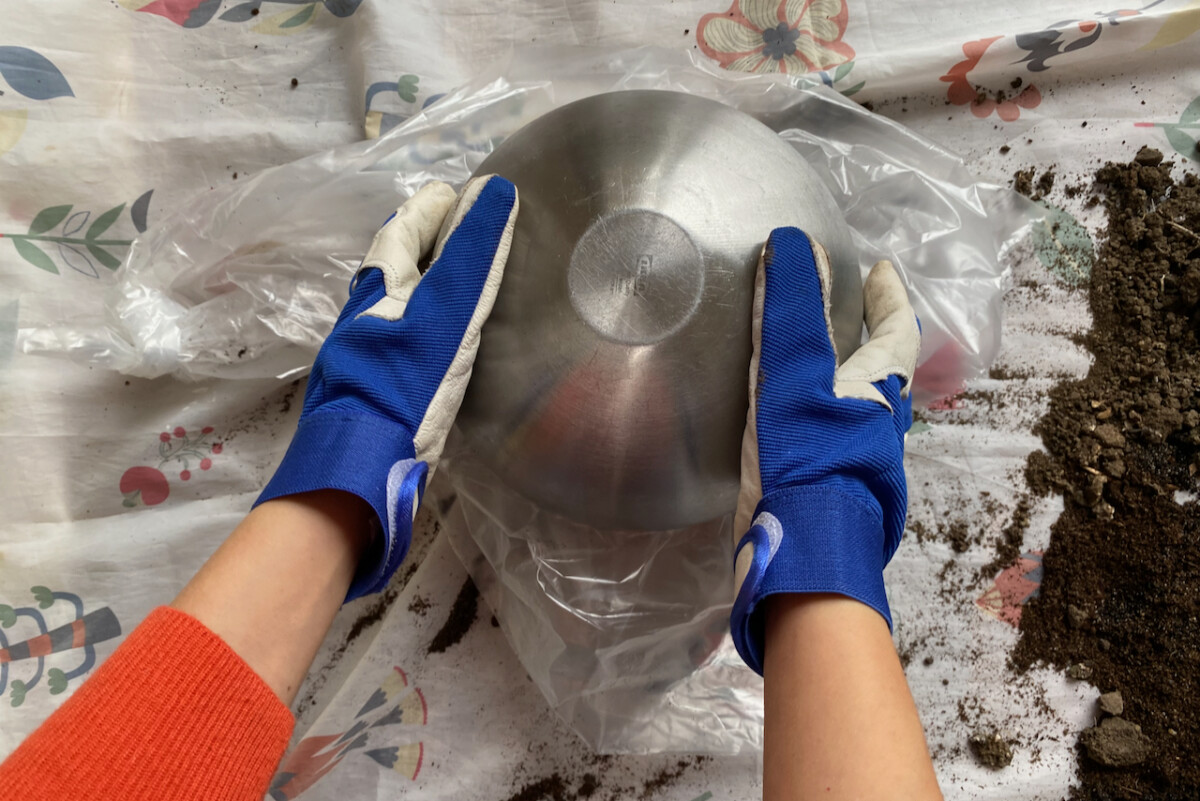
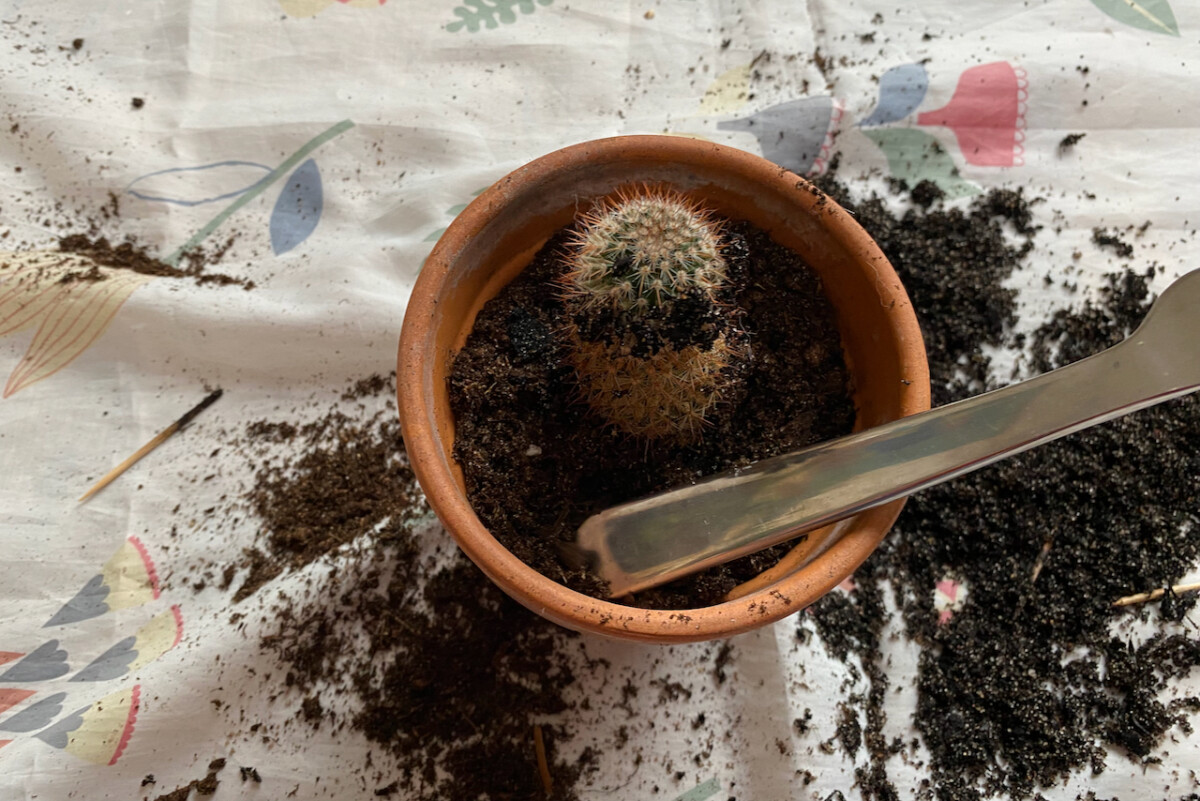
5. Tip the cactus into a bowl.
I want to illustrate this method, just in case you’re repotting large cacti that you can’t lift as easily with fabric rolls or tongs.
Start by placing a plastic sheet on top of the cactus. This will contain the mess and the spillover soil. Then place a bowl on top of the plastic sheet.

It’s important that the diameter of the bowl roughly matches the diameter of the plant pot. This will help with a smoother transition which is good news if you’re not into cleaning up potting soil mess.
Tip the bowl right side up again, then lift the pot while tapping on the sides to help release the soil. Right, now you just have an upside-down cake. I mean, cactus.
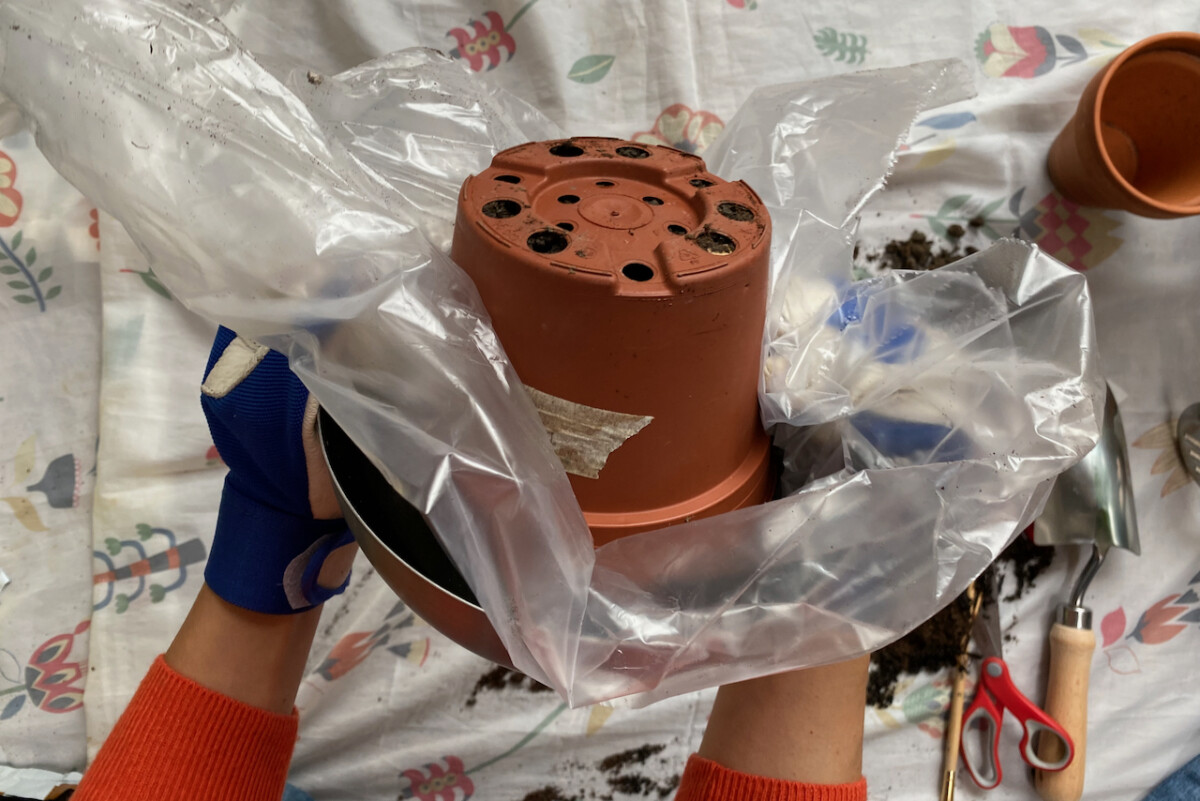
Place the new pot – the one that you’re using for repotting – on top of the bowl and its contents and flip the bowl one more time. This time, the cactus should be facing up again. I won’t sugarcoat it. This method is pretty messy. But it saves you from having to touch the cactus (even with gloved hands) at any point during the repotting process.
Step 2: Prepare the new pot.
Ok, now that we’ve managed to get the cactus out of its old container, time to get on with repotting it. Remember that cacti have evolved to grow in hot and dry soil, so they don’t have an intricate or large root structure. That means they won’t need deep pots to be happy. A container that’s shallow and has plenty of drainage holes is just perfect.
I usually like to make my own potting soil mix. But when it comes to cacti, it’s so easy to just pick up a bag of soil specially mixed for cacti. As a random observation, I noticed that cacti do better in soil that’s just for cacti, not for cacti and succulents.
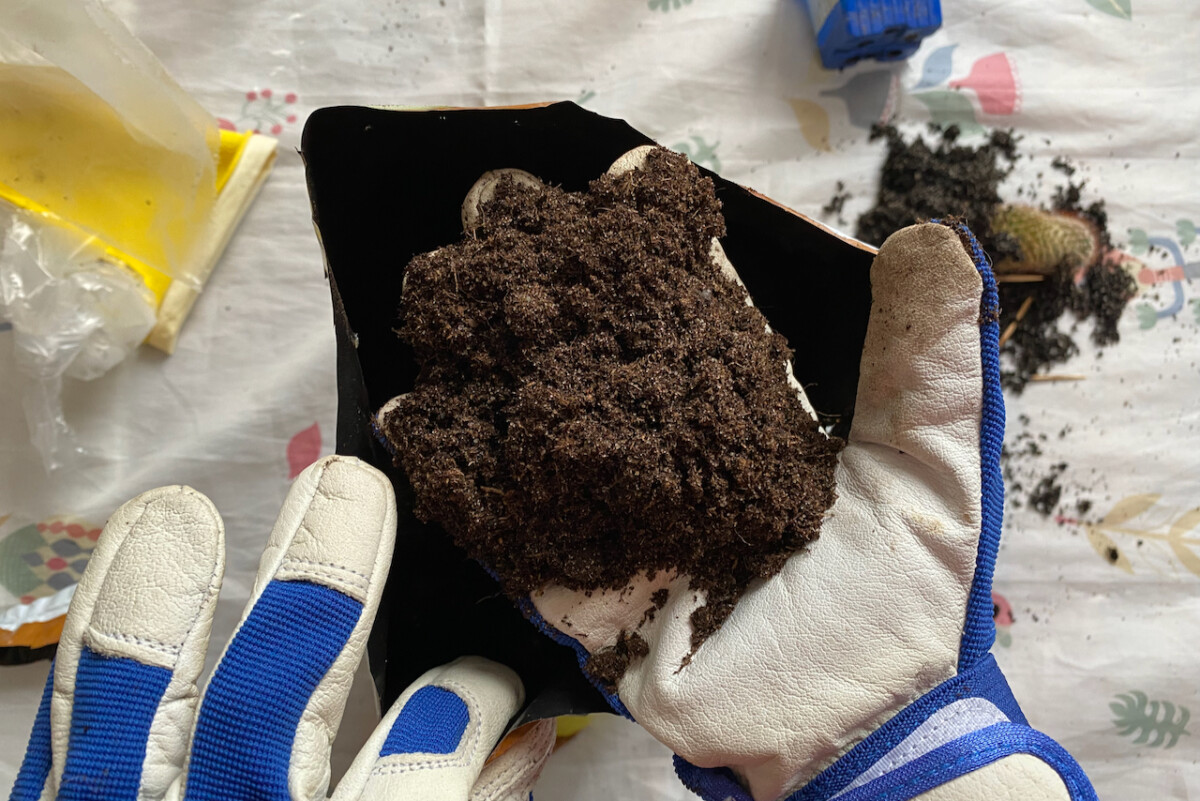
You can’t really see it very well in the photo, but this commercial mix has plenty of coarse sand to keep the soil free-draining and porous. Cacti soil mixes are also lower in nutrients, by default, compared to regular potting mixes for houseplants.
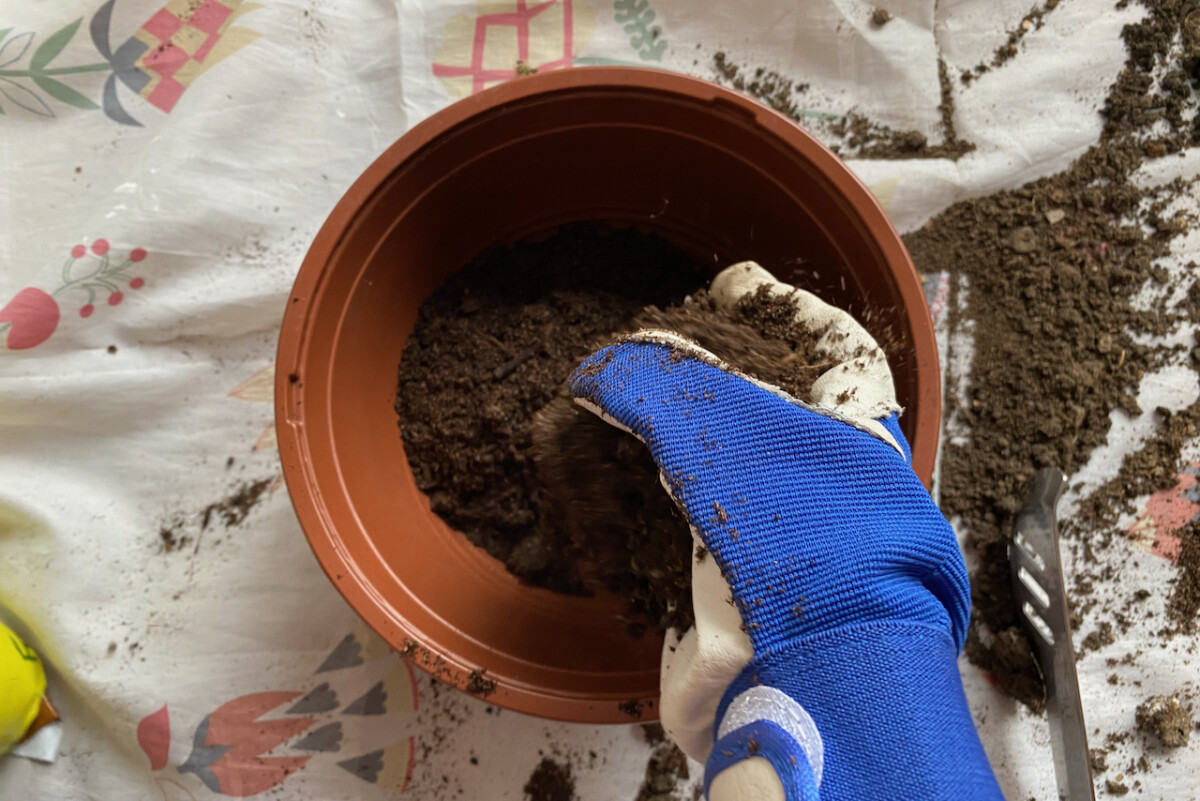
I start by filling up the pot with soil about a third of the way up, depending on how shallow the pot is.
Some people choose to add gravel at the bottom of the pot to improve drainage. I’ve done that in the past too, but I honestly didn’t see any difference in drainage for cacti since I don’t water them too much anyway. So I now skip this step altogether.
Step 3 (optional): You can separate any bonus cactus babies when you repot.
Since I’m an efficient and (read lazy) plant parent, I took advantage of having all the tools out and did a bit of propagation.
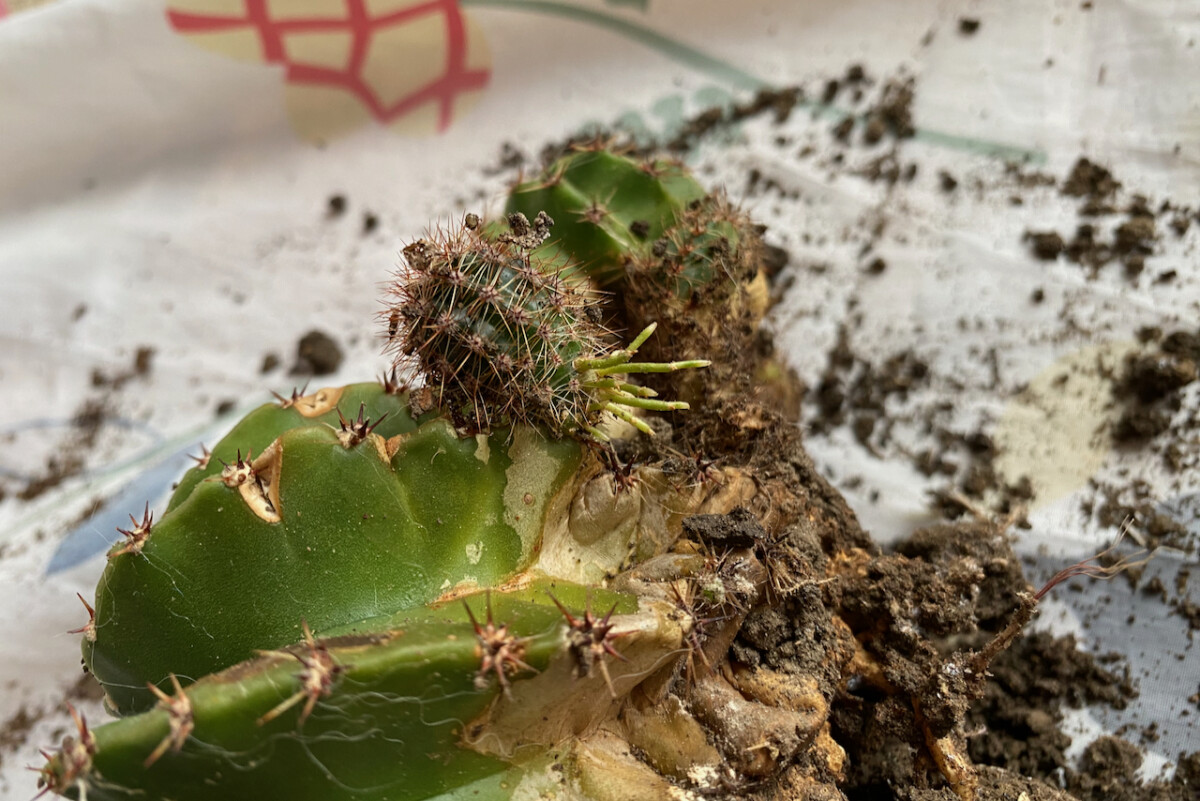
I simply took the baby cacti that were growing alongside the main one and separated them from their plant parents. First, I thought I would need sharp shears. But after giving them a bit of a wiggle with the trusty tongs, they came right off. Another successful experiment.
The baby cacti will end up right next to the main cacti. But this time, their roots will actually reach the soil rather than be air-bound.
Step 4: Lower the cactus back into position.
Here comes the second (hopefully also the last) tricky part of cactus repotting. Adding the plant back into the equation.
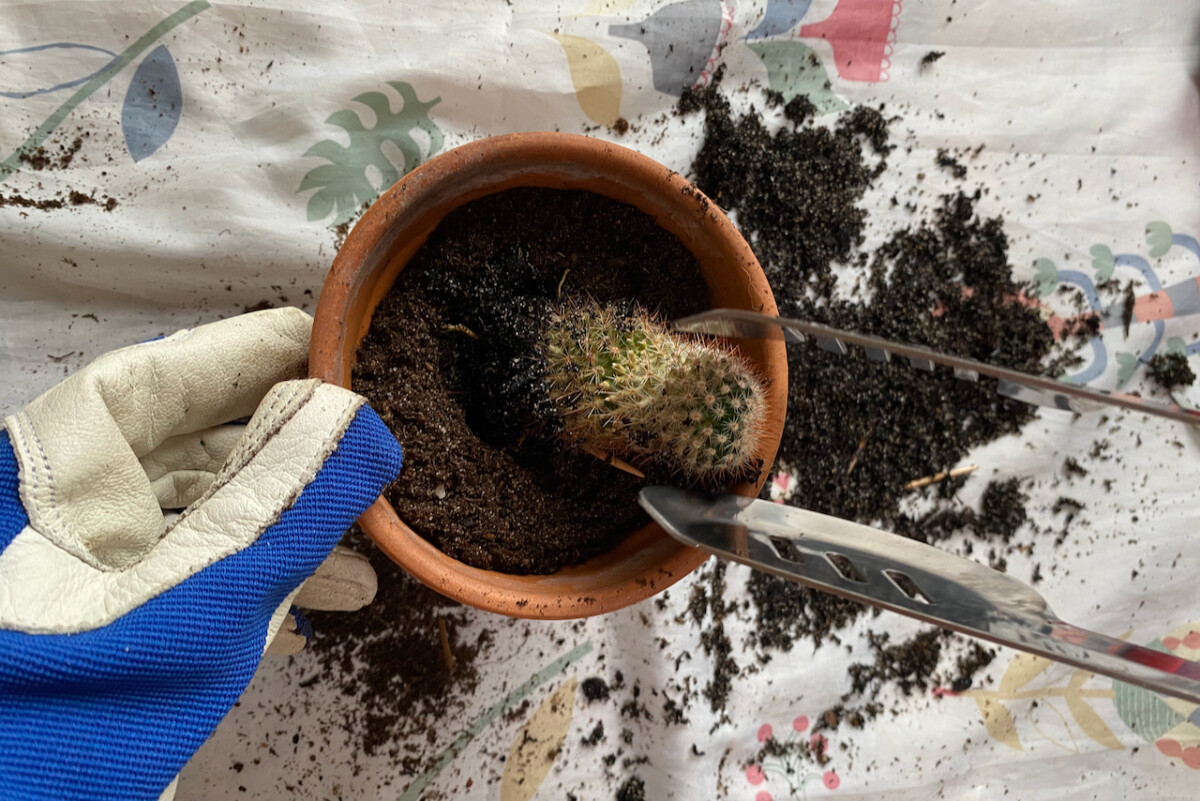
You can use the same method that worked to lift it up. For my small cactus, the barbecue tongs worked like a charm again. The roots are very small, so I had to manually adjust them a little bit in order to center the plant.
For the larger cacti, the rolled-up denim hook worked again to lower the plants back down. Since I had left the fabric rolled around the plants, it was easy to use it as a makeshift handle. Out of curiosity, I also tried to recenter it with the stainless steel tongs. This also worked really well.
I then topped everything up with potting soil. For cacti, make sure you always repot them at the same depth as they were in their old container.
Step 5: Add the finishing touches.
I always end my repotting and propagating guides with a reminder to water the plants in order to help them recover from the shock of the transplant. But cacti are the exception to this rule.
Do not water your cacti as soon as you’ve repotted them.
The roots need some time to heal and close any wounds, especially if they’ve been damaged in the process. A week to ten days should be enough time. You can resume regular watering after that but remember never to overwater a cactus.
So if it’s not about watering, what are the finishing touches?
Help your cactus to anchor.
My larger cacti were heavy enough to keep themselves in place. But my smaller cactus, with its feeble roots, needed a bit of a prop up. I used the handle of the same heavy butter knife to press down the roots and the soil before I topped it up again.
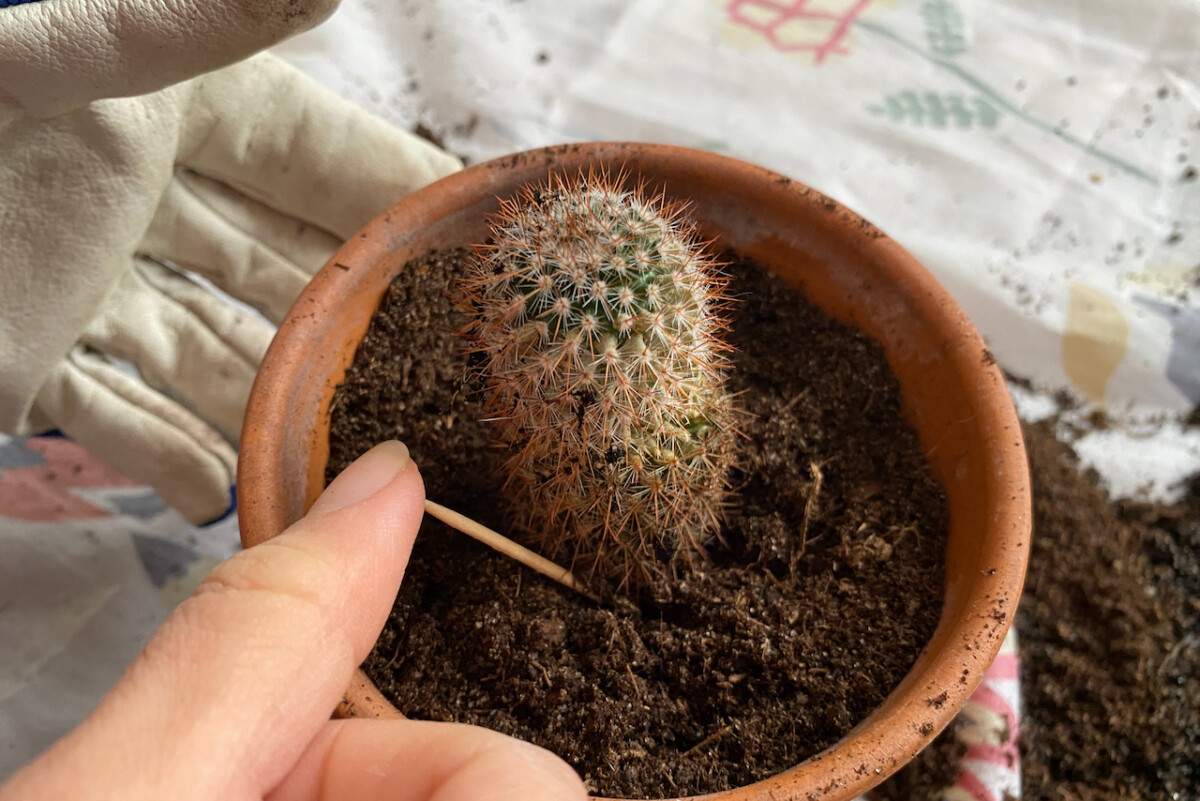
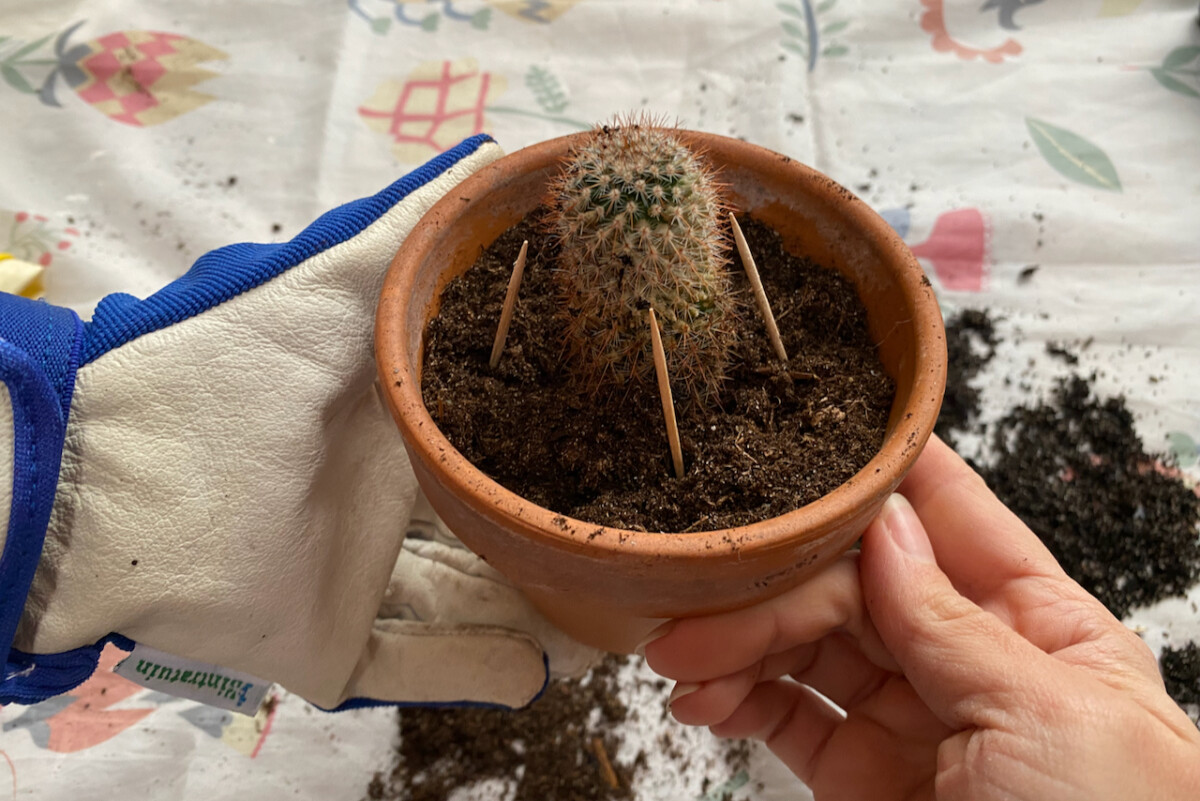
Another trick – one that I learned from my mom – is to prop up small cacti by making a “toothpick fence.” I stick the toothpicks in the ground on at least four sides of the cactus, making sure they’re tilted towards the plant.
If you have a more robust plant, you‘ll have to build a stronger support out of chopsticks, pencils or twigs.
Clean up the loose soil.
Cacti are the plant equivalent of velcro. Everything gets stuck to them, including plenty of loose soil while you’re repotting them. I use a brush to clean up the soil and the dust (and the inevitable cat hair) when I’m done repotting my cacti.
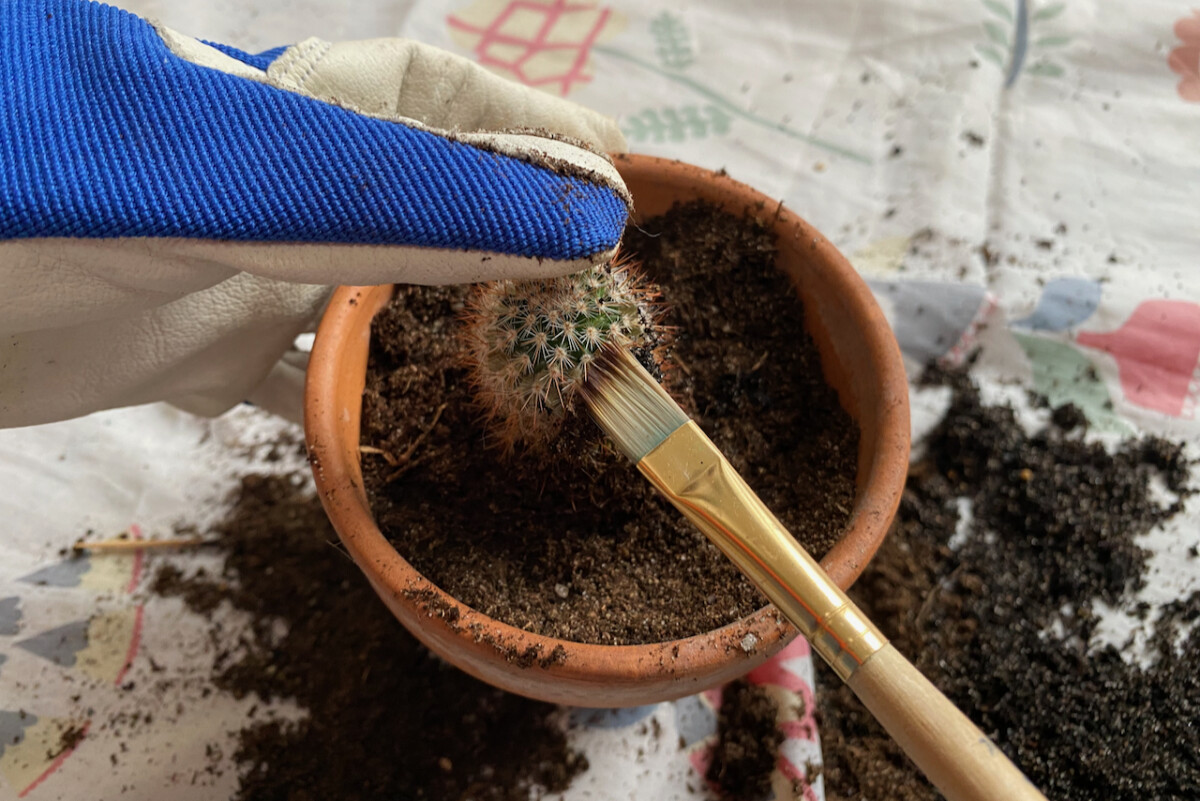
Use something soft that can get in the crevices and around the spikes. A makeup brush or an acrylic brush will work wonders on that layer of soil.
Add top dressing (optional)
Every single time I see cacti arrangements, they always have top dressing. This is a layer of gravel, sand or pebbles that covers the soil and makes it look like the cactus is just sticking out of a desert scene. With cacti, as well as with succulents, the top dressing completes the arrangement.
Top dressing is not just decorative, but it also has a practical purpose. If you’re using potting soil that has perlite added, the dressing will prevent it from floating to the top when you water it.
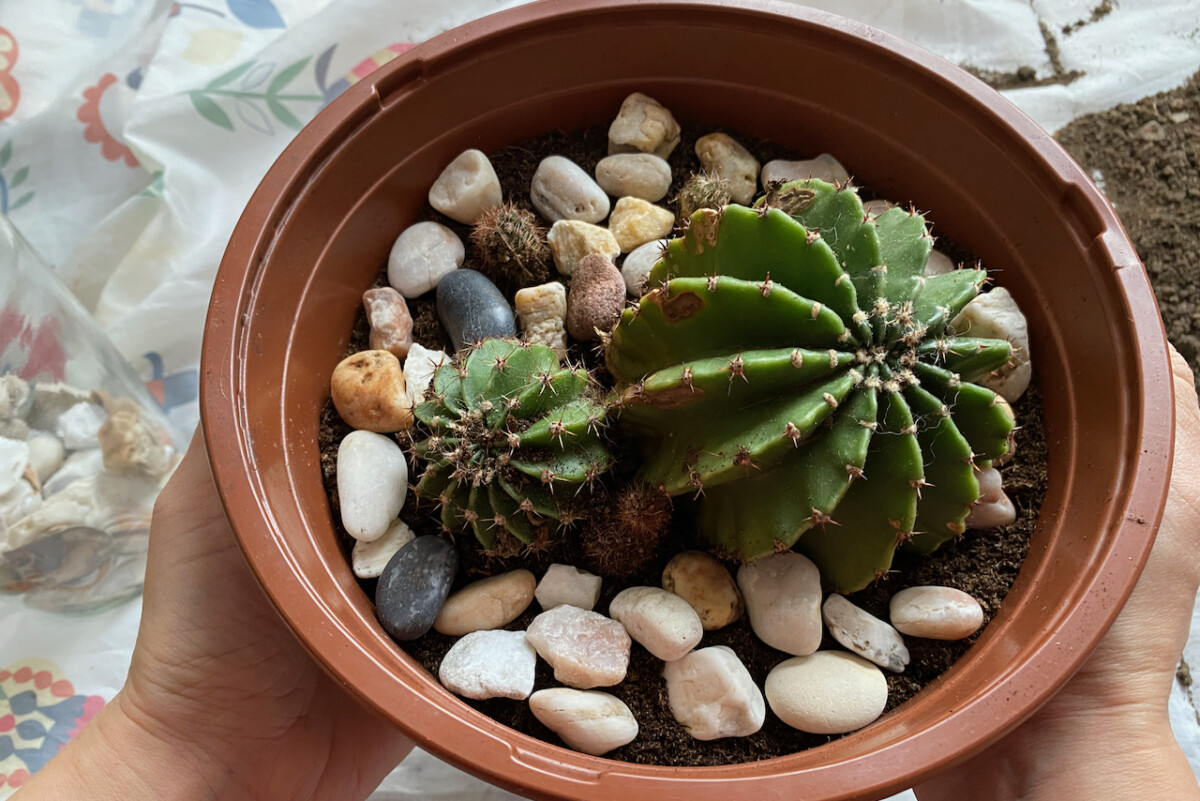
Unfortunately for me, one of my pets really has a fascination with gravel and will start digging through it. So I have to use bigger pebbles that don’t seem as enticing as smaller ones. Luckily, the potting mix I’m using doesn’t contain buoyant perlite or vermiculite, so there’s nothing to float at the top.
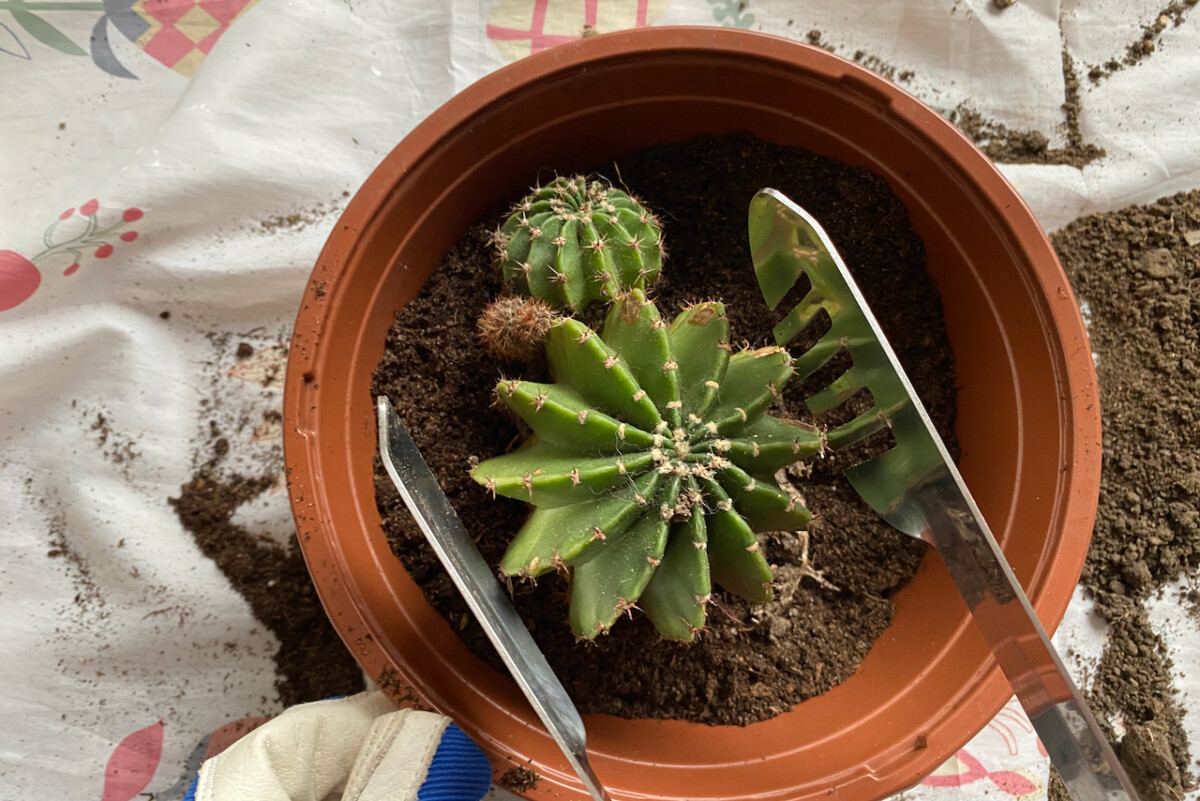
Overall, I think the new cactus setup looks really nice. It’s certainly healthier than what I started with. Do you have any secret tips for repotting cacti?

Get the famous Rural Sprout newsletter delivered to your inbox.
Join the 50,000+ gardeners who get timely gardening tutorials, tips and tasks delivered direct to their inbox.