


The ability to weave your own baskets is one of the many self-reliant skills that you shouldn’t be missing out on.
Why?
Because basket weaving requires few tools, making it simple to get started. It’s relatively easy to learn when given the right instruction (or access to a course/instructor). And it’s a great way to keep your hardworking hands busy offline.
Besides, baskets are made from all-natural materials, putting your efforts of zero-waste into good practice.
Baskets in all shapes and sizes come in extremely handy throughout the year and on many occasions. For example, when you go out to harvest crops from your backyard garden.
You can also use them while out foraging for wild plants, for bringing in firewood or for more decorative purposes around your home.
Best of all is when baskets combine function with beauty.
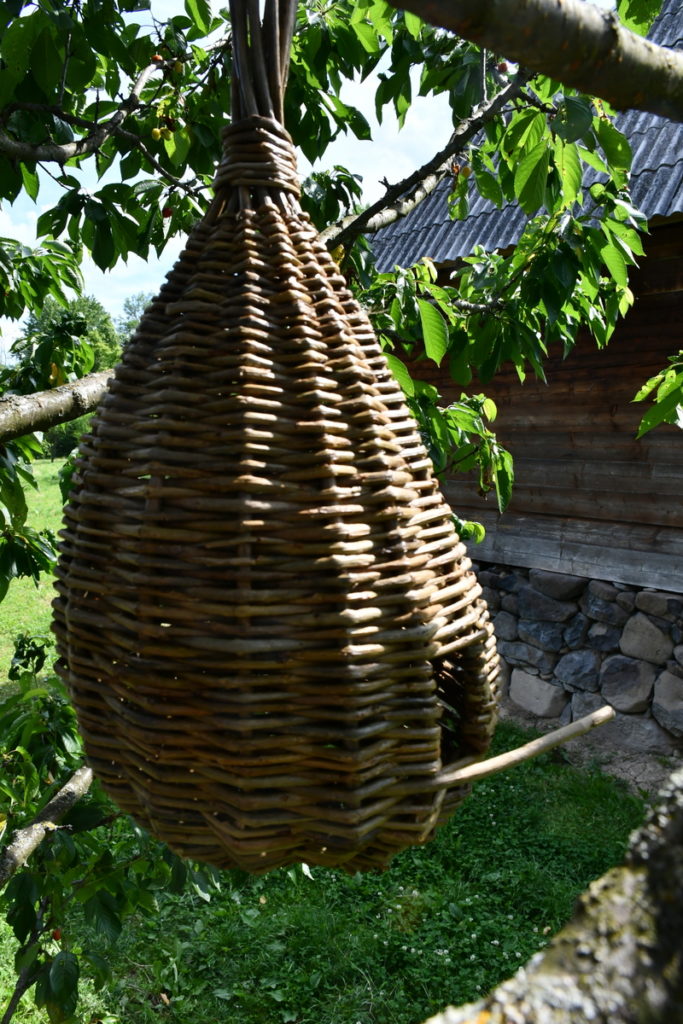
And that’s what we have for you today, a woven basket just for the birds.
Fill it with moss and perhaps a bird will call it home.
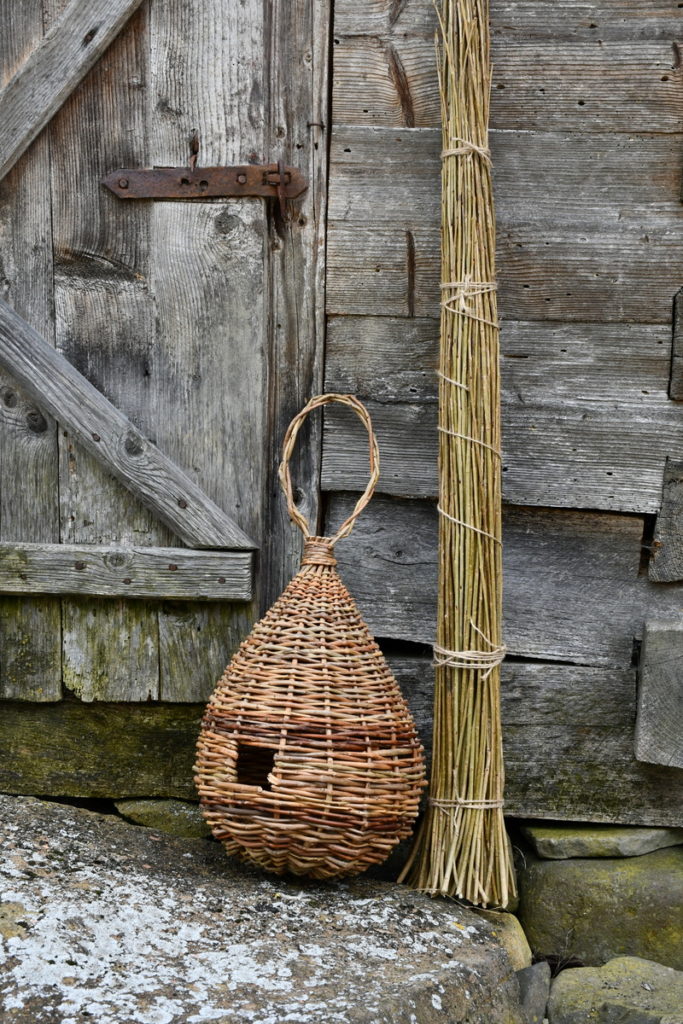
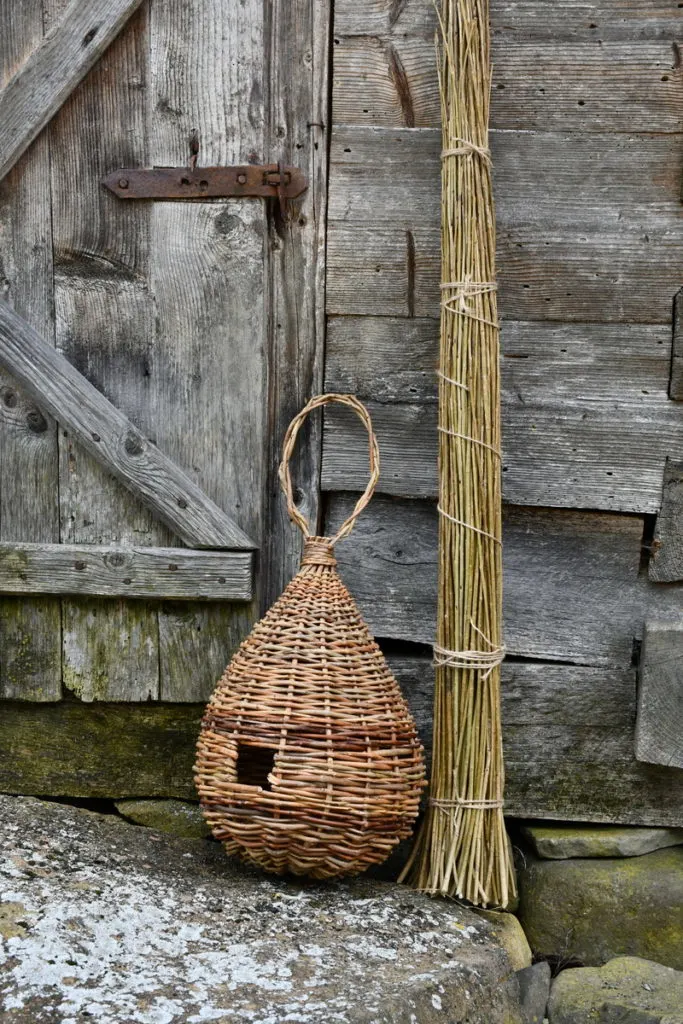
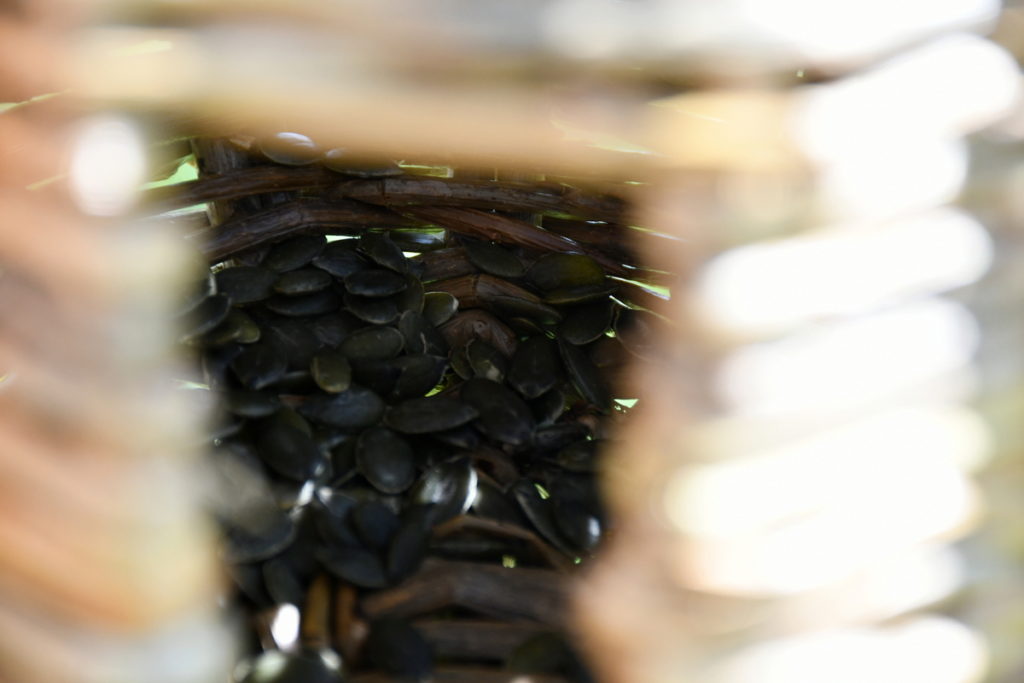
Toss in some birdseed and they may find a safe place to dine. Or maybe people will gawk and comment on that strange thing hanging from a branch.

Woven structures are always something to look at in the landscape. Let them talk and wonder how they can get one for themselves.
Tools for Basket Weaving
In order to weave your own bird feeder, you’ll first have to procure some tools.
The first time we wove a bird basket, we didn’t have any tools other than a pair of pruners, a garden knife and a homemade bodkin. The latter was merely a sharpened branch that needed to be replaced each time it broke.
If that’s all you have, you can make do with what you’ve got. You don’t need fancy tools to weave baskets. But, it doesn’t hurt if you do.
To make work go easier, it always helps to use quality tools. This applies to everything in life. Knitting, cooking, weaving, etc.
Basket Weaving Tools for Willow Bird Feeder

If you’d like to know where we purchased these beauties, here’s the online shop. Tip: It’s easier to order if you speak French.
Of course, feel free to purchase from small online stores that are closer to you.
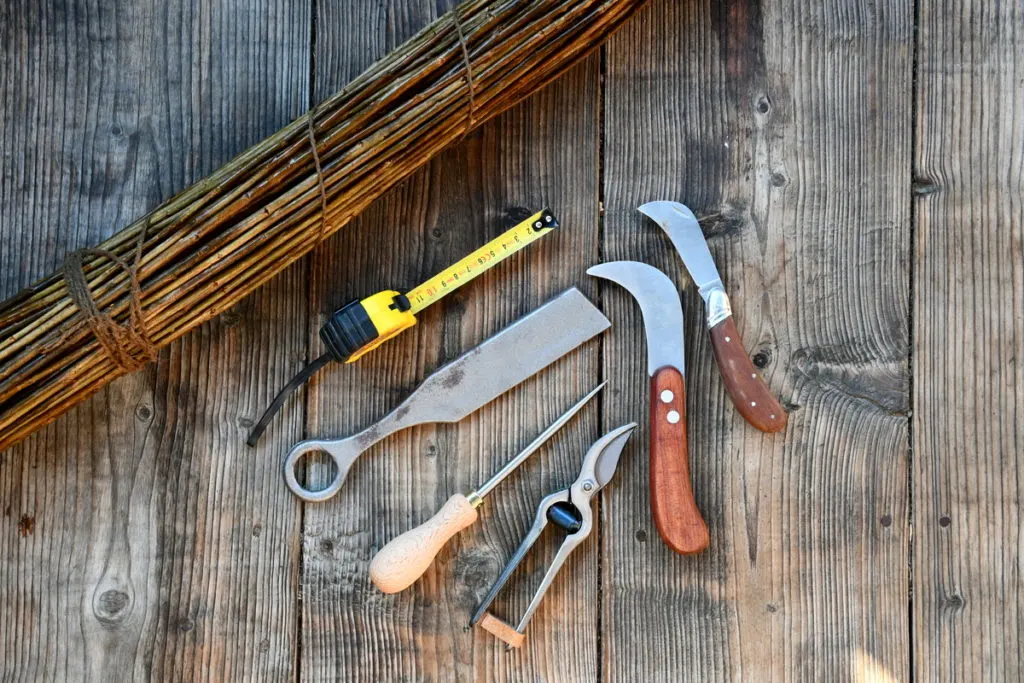
Tools recommended for this project:
- pruners
- bodkin
- knife
- measuring tape
- rapping iron, optional
Outside of that, you’ll need a bunch of dry willow branches, some strong hand muscles and several hours of uninterrupted time.
Harvesting Willow for Basket Weaving
The hardest part about basket weaving is the necessity to think about harvesting more than enough willow twigs well before the time comes for you to sit down and weave with them.
In essence, preparation is key.
You can’t just decide, it’s a great day to weave a basket. The sun is shining, I have a whole day off of work, let’s have some fun.
Long before weaving a basket you have to find your weaving materials. This could come from your backyard, or from a park – with permission of course. You can even purchase some branches for weaving online. There is something for everyone whether you live out in the country or in the heart of the city.
So, when to harvest willow branches?
Winter is the best time for harvesting willow branches, before they begin to open their buds.
To further expound upon that knowledge, it’s worth noting that some willows are more suitable than others for weaving. For this tutorial, we’ve gone with the common willow that grows rampant in hedgerows in our area.
It has its downfalls, however, compared to those willow branches that are grown specifically for basket weaving. Common willow doesn’t bend quite as easily, giving it a tendency to break if forced too much.
But again, I always encourage you to work with what you have.
You never know what you can do if you never give it a try.
With harvesting or purchasing done, you are well on your way to weaving.
Take it one step at a time. First, you need to soak your branches.
Soaking Willow Branches for Basket Weaving
The general rule of thumb for soaking branches says to submerge the branches one day for every foot of length.
Soak them for too short a time and they will break easily. Too long and they may become slimy. The length of time to soak them also depends on how dry and what kind of willow they are.
If you have an outdoor tub for soaking the branches in, then great.

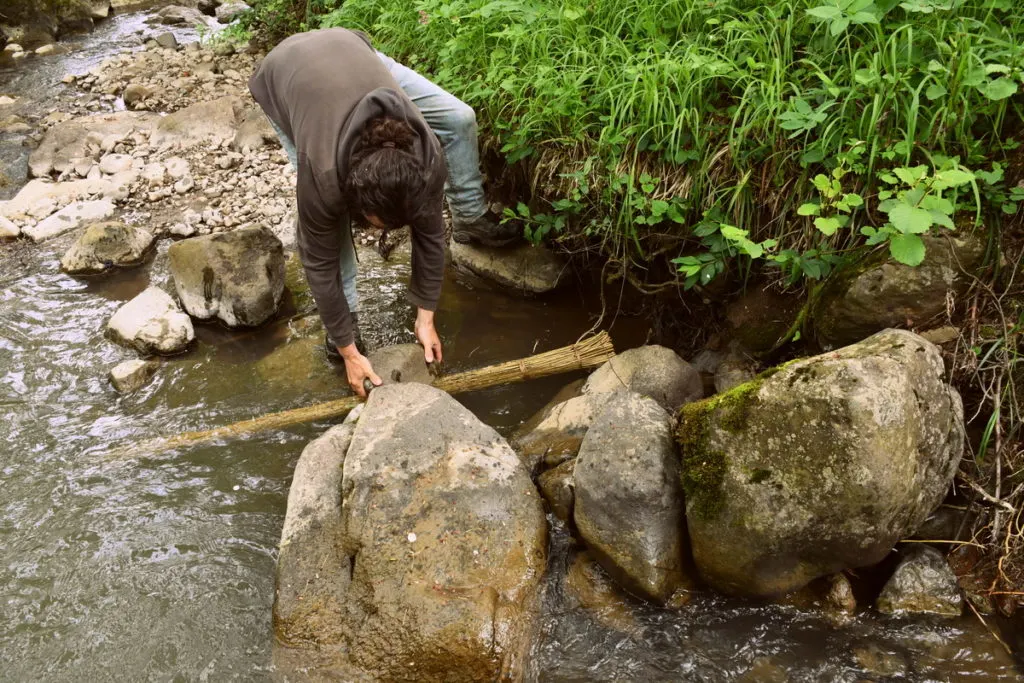
Creeks work too, so long as you make sure to tie up the bundle in case of rain. They can float away if not restrained.
Once your willow is thoroughly soaked, it is time for weaving your bird basket.
When weaving a basket, don’t reinvent the wheel.
Did you know that people have been weaving baskets for more than 10,000 years? There is even evidence of baskets in the Egyptian pyramids.
Wherever hunter-gatherers traveled, they could make baskets anew from local materials that they found along the way. Not just willow, but brambles, vines, hazel, straw, bark, rushes and roots.
It’s said that certain baskets were also lined with clay to make waterproof bowls. Clay being another fantastic and natural material that we absolutely love to work with. You can even use it to make an earth oven.
Related reading: How To Harvest Clay For Pottery & Natural Building
Woven Bird Feeders
Again, the weaving of baskets, and bird feeders, is nothing new. Yet, our skills and comprehension of weaving grow over time and as we emulate the work of others.

The woven bird basket that you are about to see (and hopefully recreate) is from the work of Jonathan Ridgeon at Jon’s Bushcraft.
If you are a beginner interested in learning how to weave, Jon’s site has fantastic information and unlimited inspiration.
In his 124-page eBook Willow Craft 10 Bird Feeder Projects you’ll discover much more advice on selecting willows for weaving, frequently used weaving techniques, along with simpler starter projects for the novice weaver.
The bird basket that follows is an interpretation. You’ll want to purchase the PDF for the full experience.
Getting Started with Weaving a Bird Basket-Feeder
Difficulty Level: Intermediate
Size: As small or large as you want to weave it
Branches soaked and pliable?
Tools by your side?
Plenty of time on your hands?
If you’ve got all three of these, then you’re good to weave.
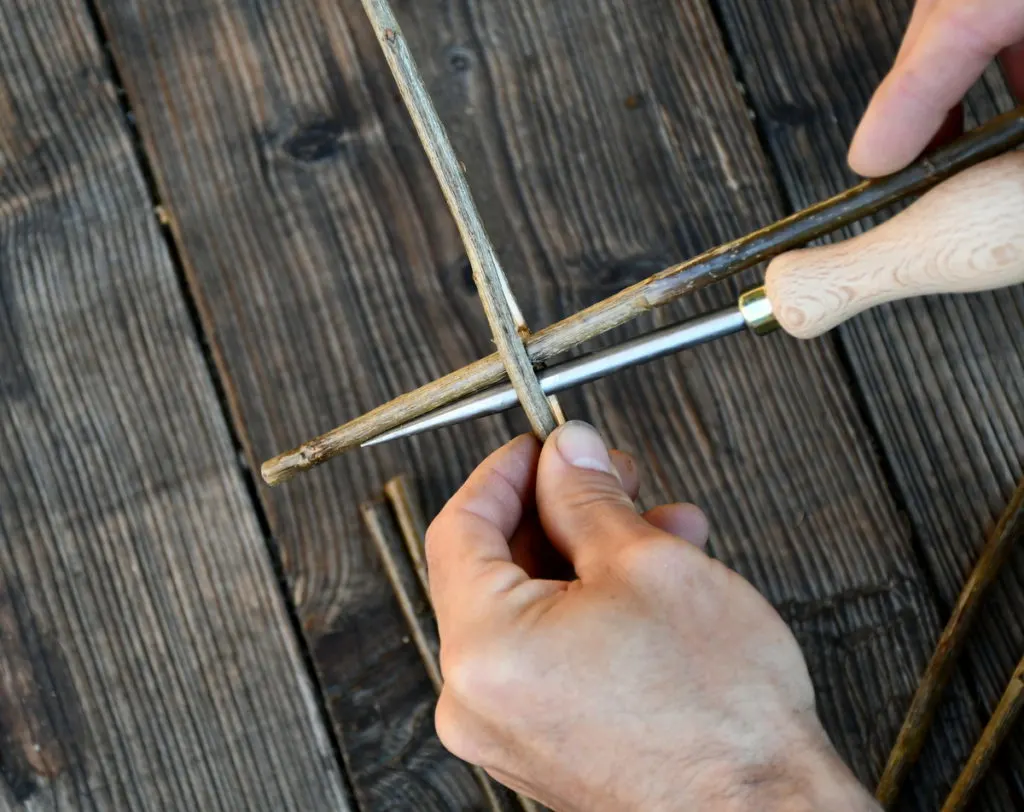
Step 1: Preparing the Base
Grab 6 pieces of branches, all similarly large in girth, and cut them to 11″ (28 cm) in length. These will form the base of the hanging basket.


With your sharp knife make a slit in 3 of the branches, directly in the center. Make sure it is just long enough to slide the remaining 3 branches in.

Step 2: Making the Slath
Use your bodkin, or screwdriver, to open up the slits in the branches. Slide the other branches through, one at a time.
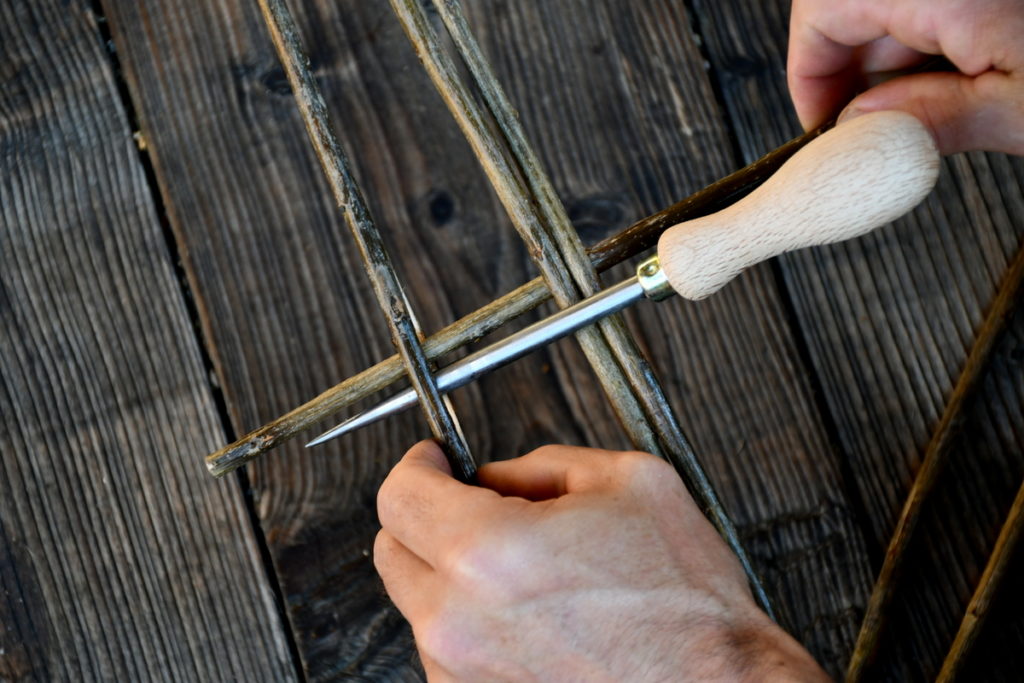
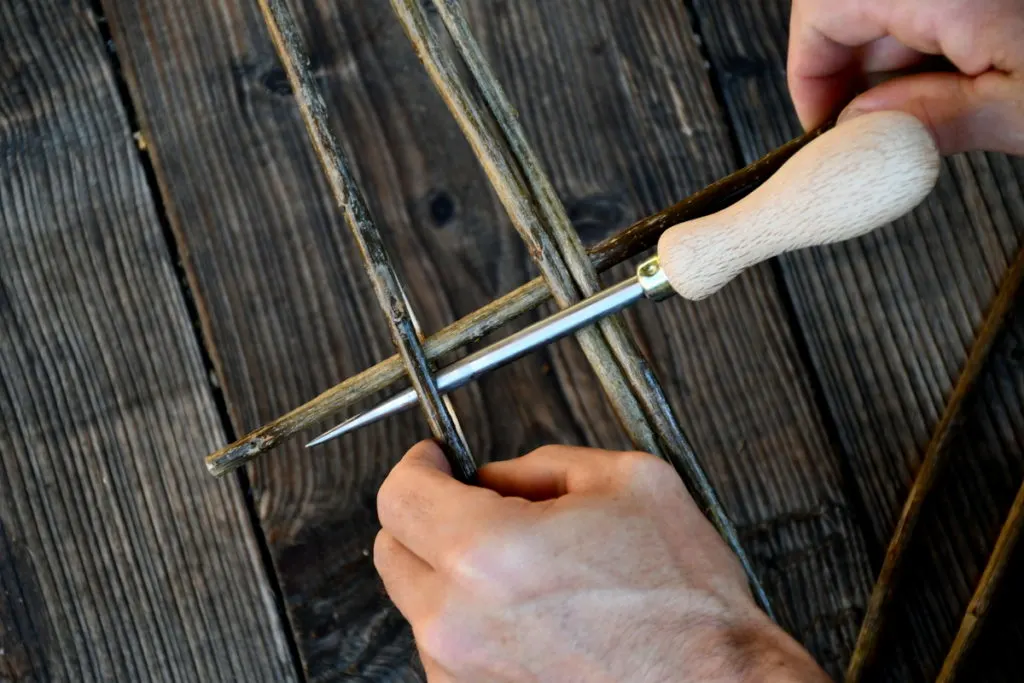
To do this you can use the help of other tools to widen the gap.
At any stage of basket weaving it is important to go slow and steady, so as not to break/crack the branches.
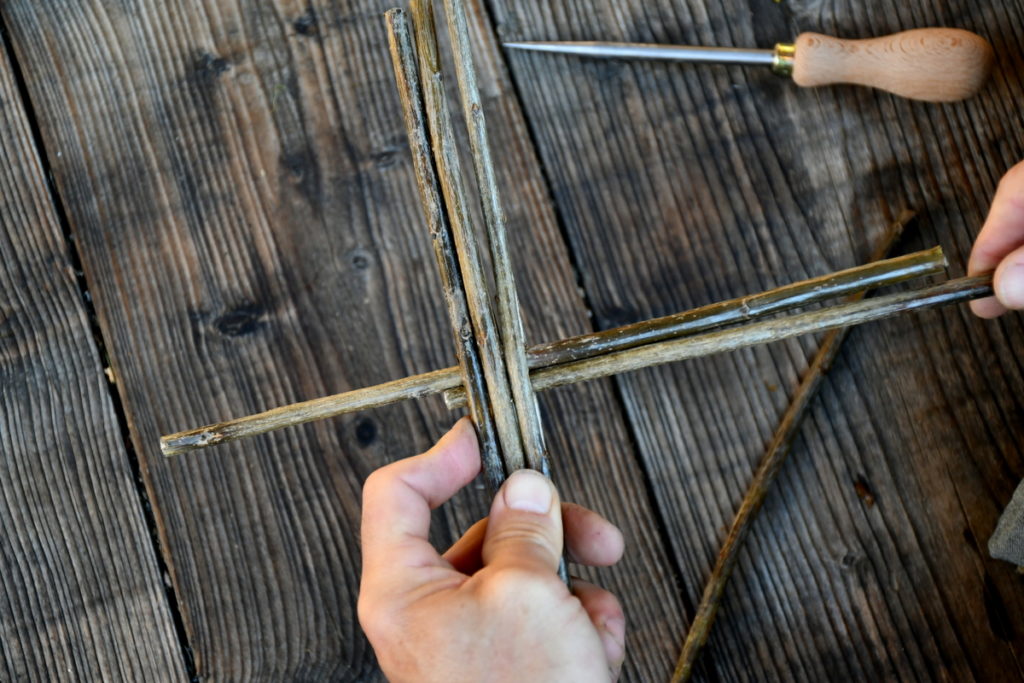
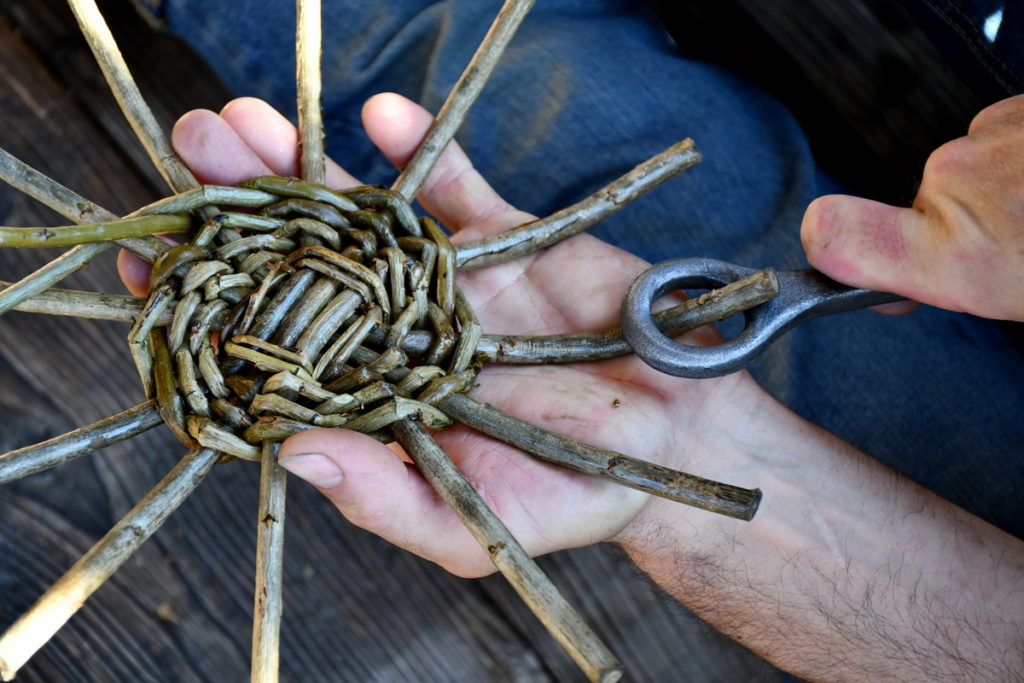
Once all branches are safely through, it is time to locate the exact center.

Make sure the center branch is about 5 1/2″ (14 cm) from either end.
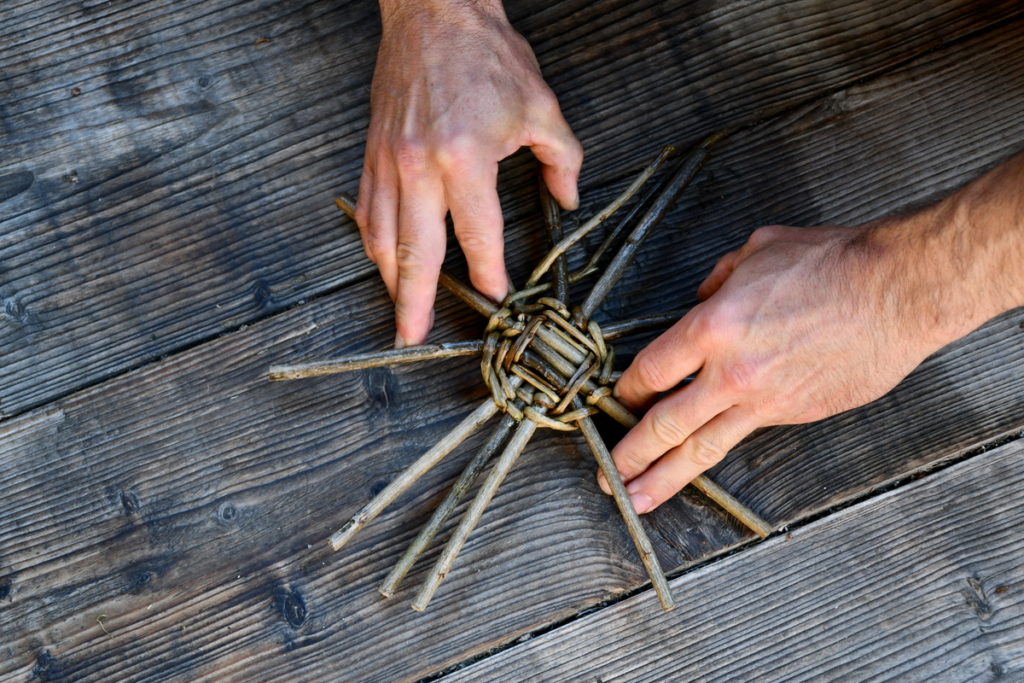
Step 3: Beginning to Weave the Bird Basket
Now the fun begins!
Take two of your thinnest branches and insert the tips into the slit.


Weave around each set of three branches, pulling tightly as you go.
Over, under, over, under. Repeat
Make 2 full rounds before starting to separate the branches.

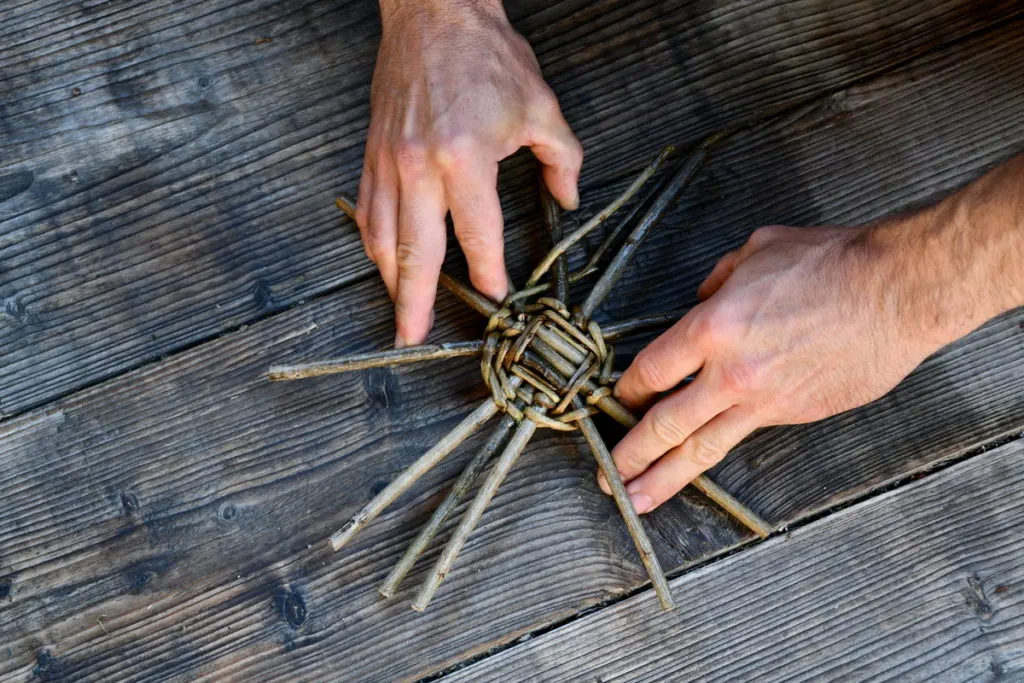
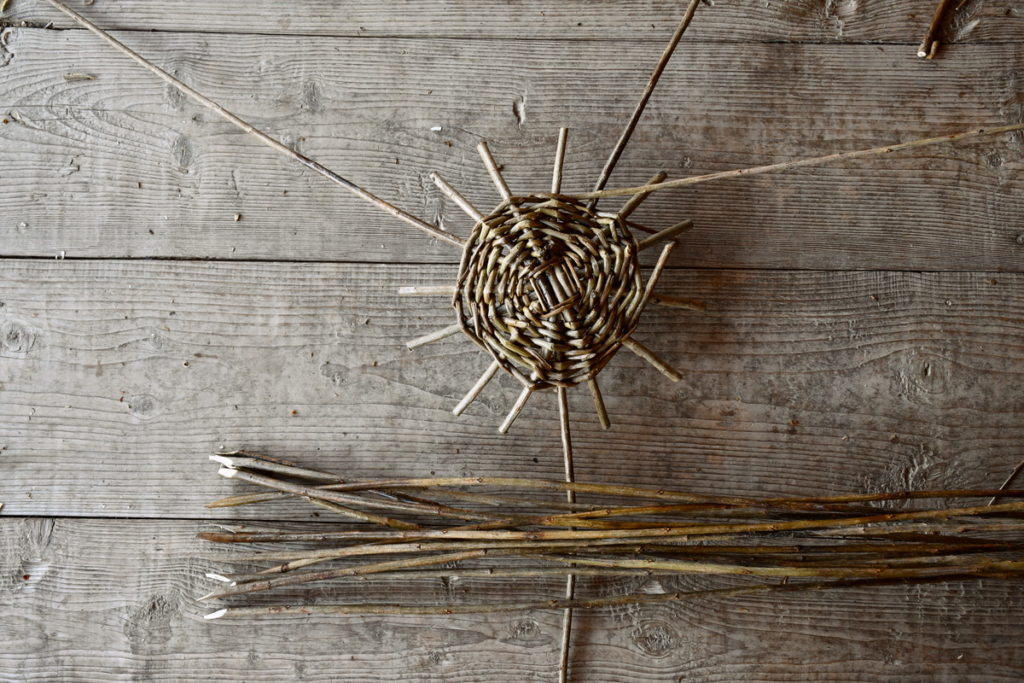
Step 4: Separating the Branches
Up till now, things have been relatively easy.
Now it’s about to get a tiny bit more complicated. You can handle it, just keep a firm grip on what you’ve already completed.
Continue with the same slim weaving branches, as you start to separate each branch.

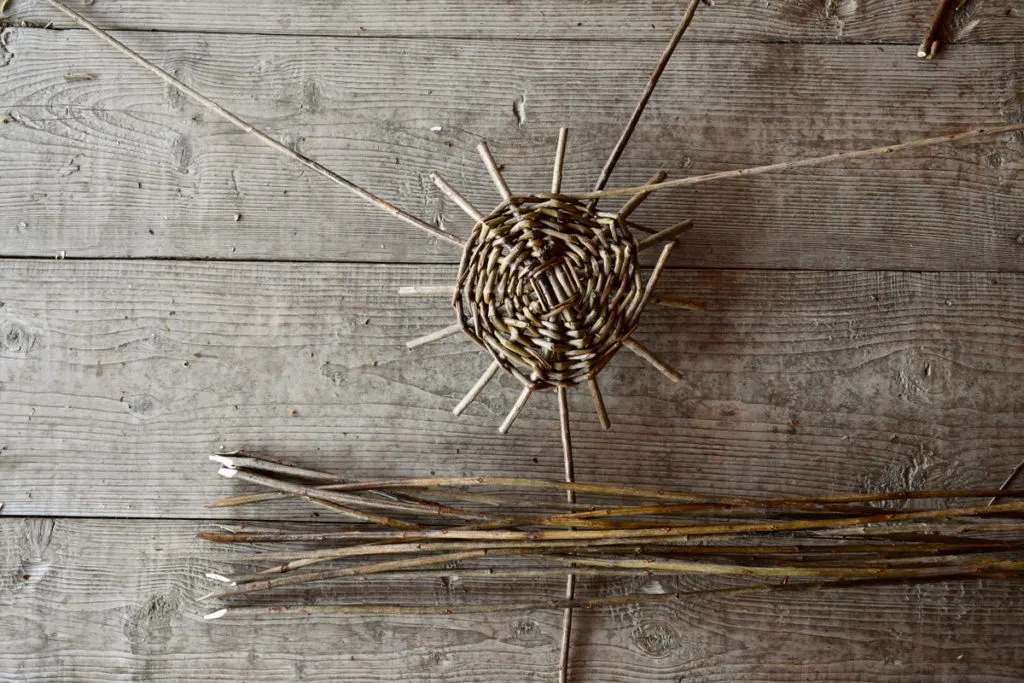
The end goal of this stage should be that of a wheel with spokes.
As you come to each set of three branches in the cross, bend and weave around (over-under) each one.
Depending on the girth of your branches, your basket may be smaller or larger. If you don’t end up with what you expected the first time around, take a break and start again. In the meantime, you’ll have picked up a lot of information through trial and error alone.

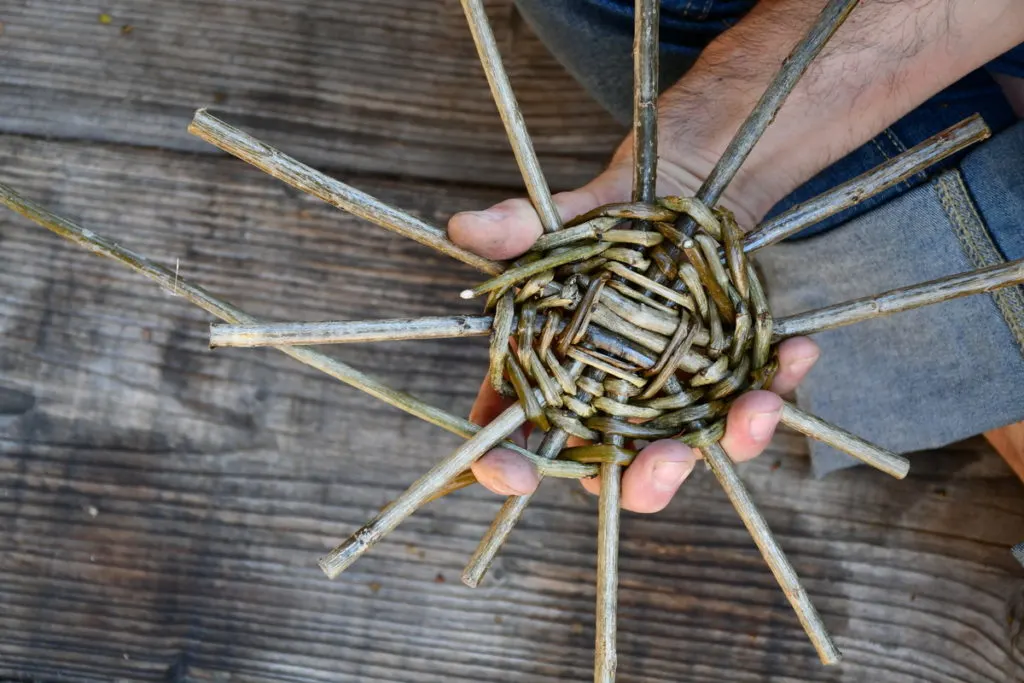
Try to place the spokes evenly around the center as you weave. And always make sure to pull as tight as you can with every movement. When a spoke slides a bit out on one end, take note and knock it back into half-and-half position around the center.
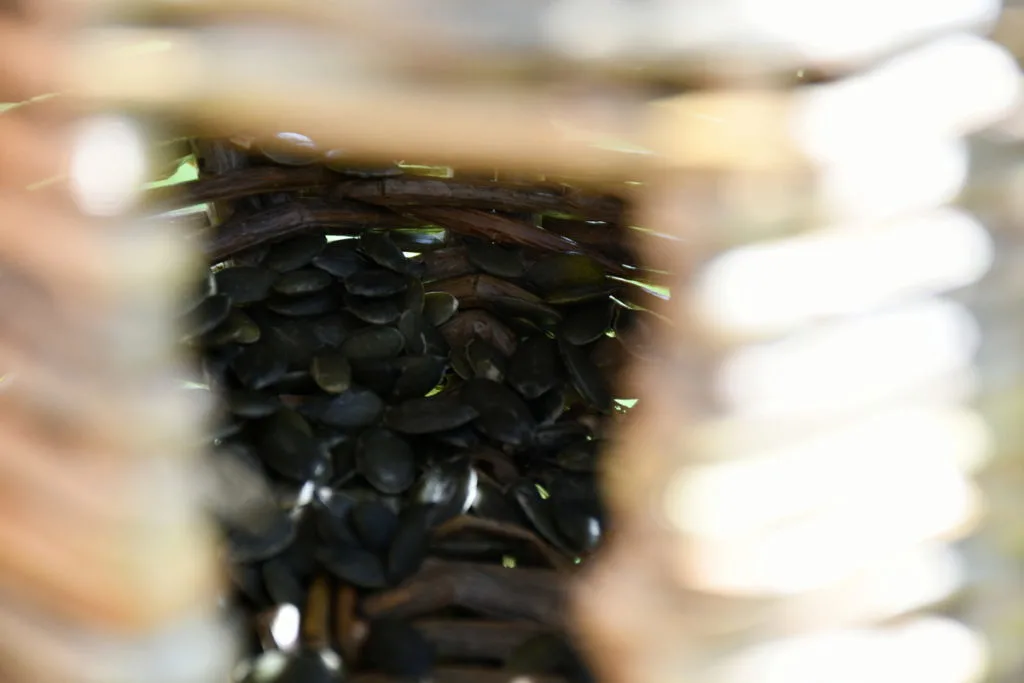
If you intend to use this as a bird feeder, make sure the base is as tight as possible so that the seeds do not fall through. However, once the basket is complete, it could be lined with foraged moss as a safety net.
To Add New Weaving Branches
At some point, the branch you are weaving with is going to run out, break off or become too thin to weave with.
Adding a new one is easy enough. For the best possible look, match up the thickness of the ends. Tip to tip, butt to butt.
Place them alongside each other with a sufficient overlap and continue weaving. Weave far enough before trimming the ends.
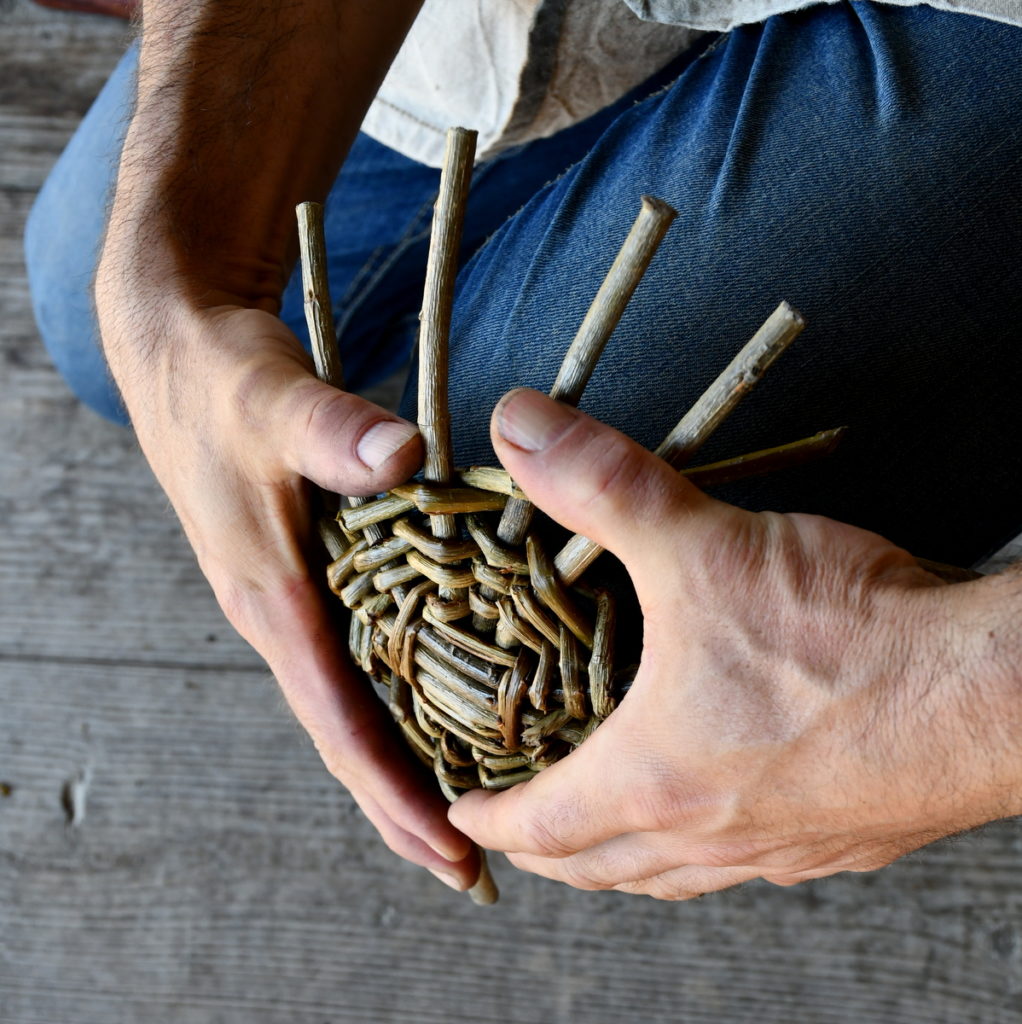
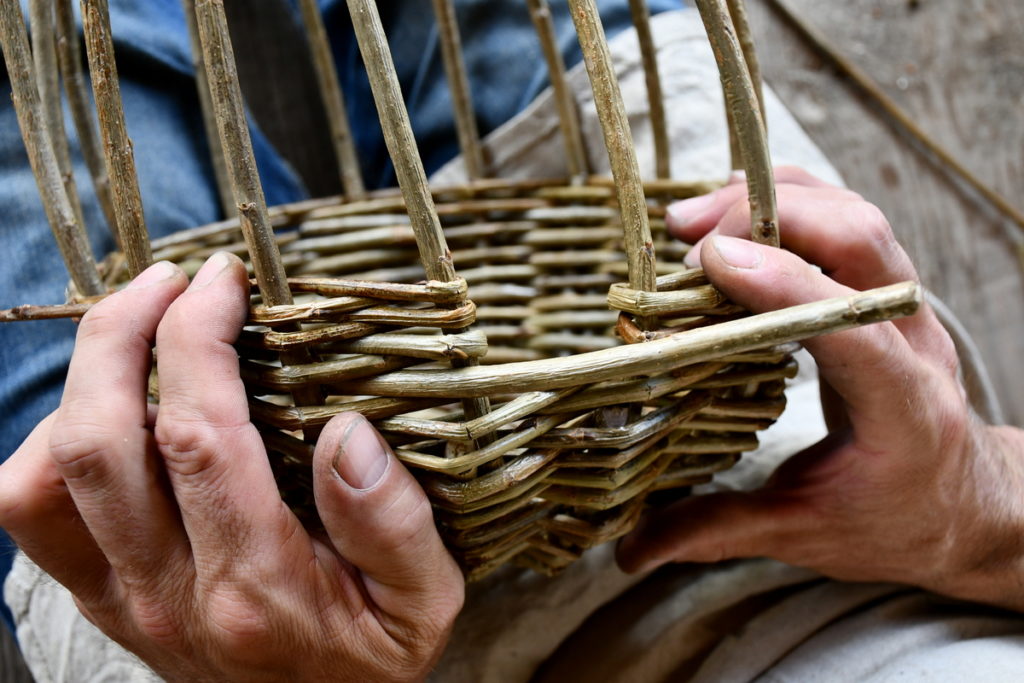
Step 5: Rounding the Base
When the base reaches about 4″ (10 cm) in diameter, it is time to encourage it to form a cup/bowl shape.
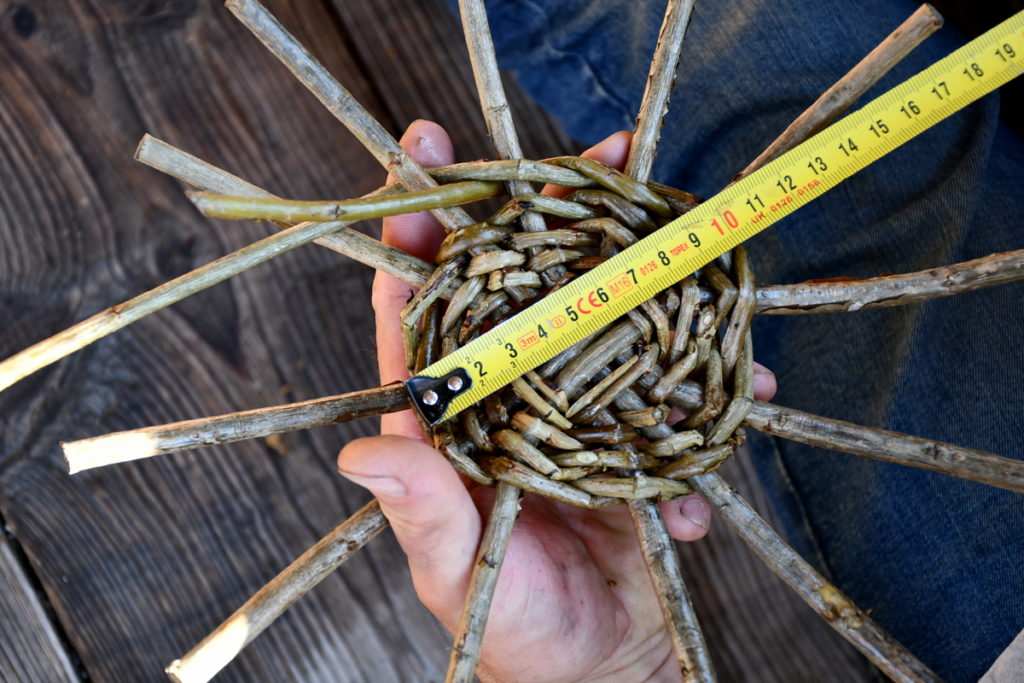

You can do this by placing it over your knee and bending the branches up in one direction. It’s also possible to form it by hand, gently forcing each branch individually. Another way to accomplish this is by using the end of a rapping iron.


Step 6: Sharpening and Inserting the Leader Branches
Now it is time to start weaving up.
Before going further, be sure that your branches are still moist and supple. Run them between your fingers from time to time to bend them in the direction that you want them to go.


Now, that the base of your bird basket looks like a multi-legged spider, it is time to add 3 more branches, spaced evenly, to the mix.
Using full length branches, sharpen the thick end and insert them into the base, using a bodkin to widen the hole. Make sure that they are inserted more than 1″ (2.5 cm) deep.
Continue to weave, pulling those three double spokes apart.
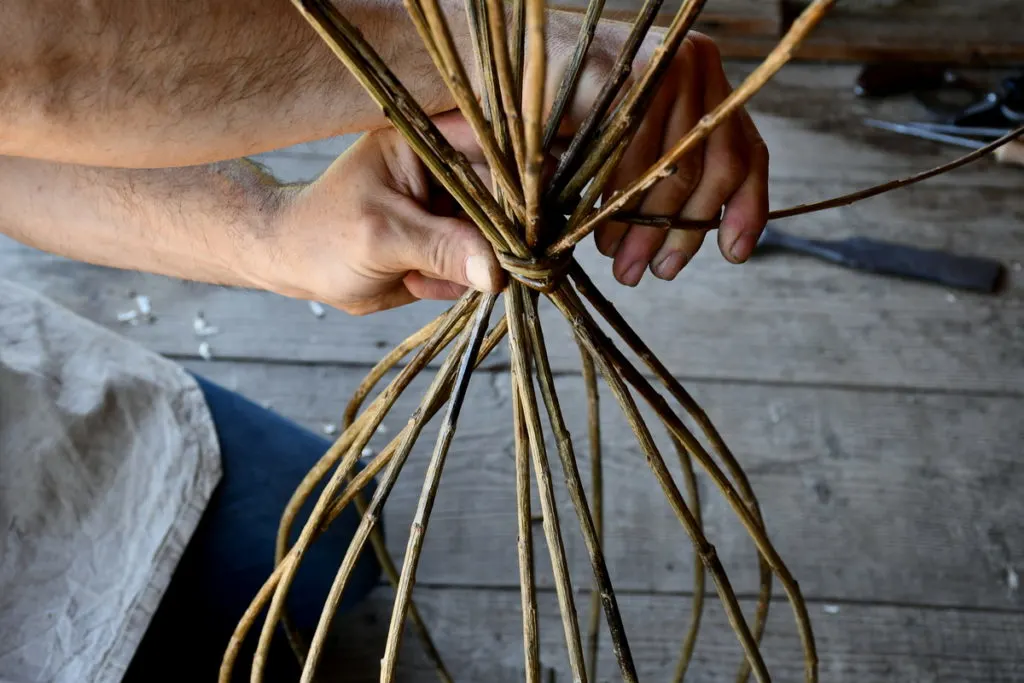
Step 7: Adding More Branches
To form the bulbous shape of the willow basket, you’ll need to add more branches. 12 of them to be exact. Make sure they are as long as possible.
As soon as your weaving is slightly over 5″ (13 cm), insert each sharpened branch right next to the original slath members.
You’re totally right in assuming that weaving baskets takes plenty of space.
Luckily, things are about to simplify again.
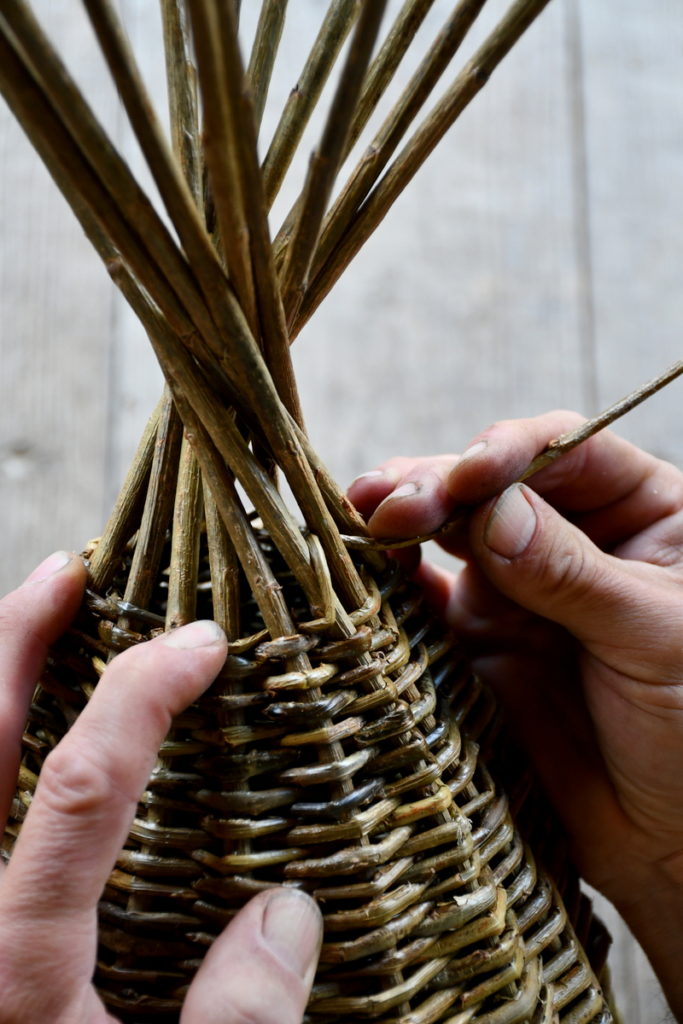
Once all 12 branches are inserted, it is time to tie them up with another small piece of willow.

Tying them up will help to determine the shape of your finished basket.

Step 8: Continuing to Weave
As you weave up the basket, be sure to add branches before they become too thin. What you are after is an overall evenness in the appearance.
Again, this is a simple weaving pattern: over, under, over under.

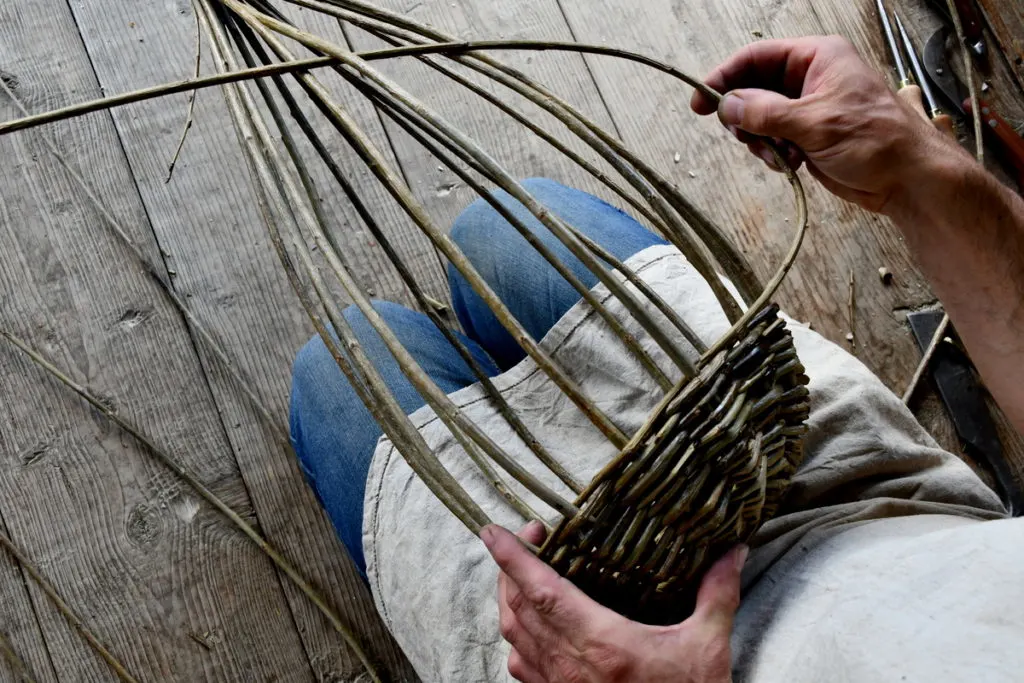
For the rest of the project you are weaving with just one branch at a time.
Over, under. Repeat. It’s that simple.
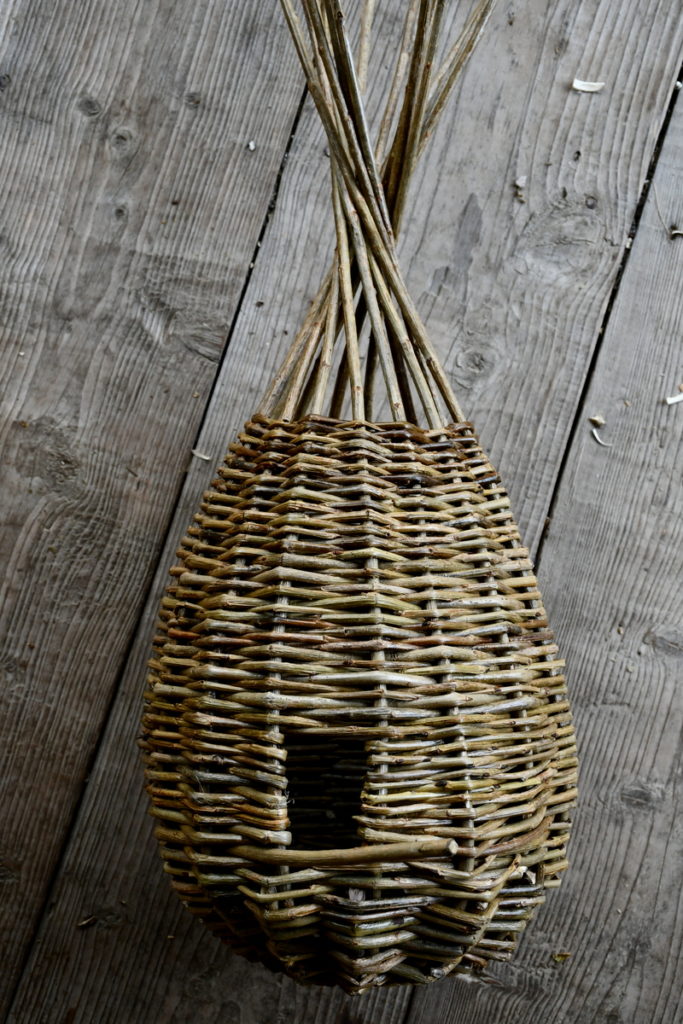
When you get to the opening of the bird house, be sure to leave a thicker branch sticking out as a perch. Cut it to a proportionate length.

When you get to the “door”, go around the “door frame” and continue weaving back the other way.
In order for the weaving branch not to break, run it between your fingers several times until it is as pliable as it gets.
When you are satisfied with the size of the door, continue weaving in the same direction with one branch at a time.
Weave tightly and be sure to compact the branches as you go.

Step 9: Weaving To the Top
As you weave higher and higher, the space gets tighter and tighter.

One trick to make this easier is to now remove the tie from the top.
Another thing you can do is switch to weaving with your thinnest willow branches.

Step 10: Nearing Completion
There is more than one way to finish a basket. It’s merely a matter of taste or artistic flair.

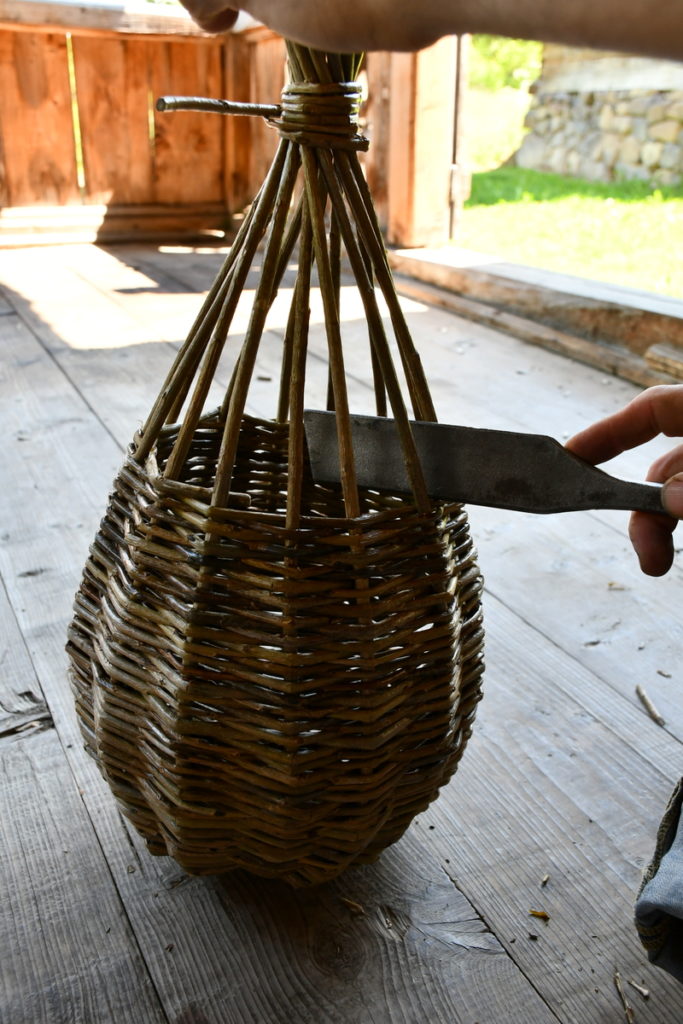
Before making the hanging loop, it is best to decide how long the hanger should be. This may be dictated by where you wish to hang it, on what branch, etc. If you are thinking of gifting someone a woven willow bird basket, you might want to weave a smaller, rather than larger, one.
In any case, to finish off the top of the basket, tightly wrap one last willow twig around the many ends. Be sure to weave in the small end.
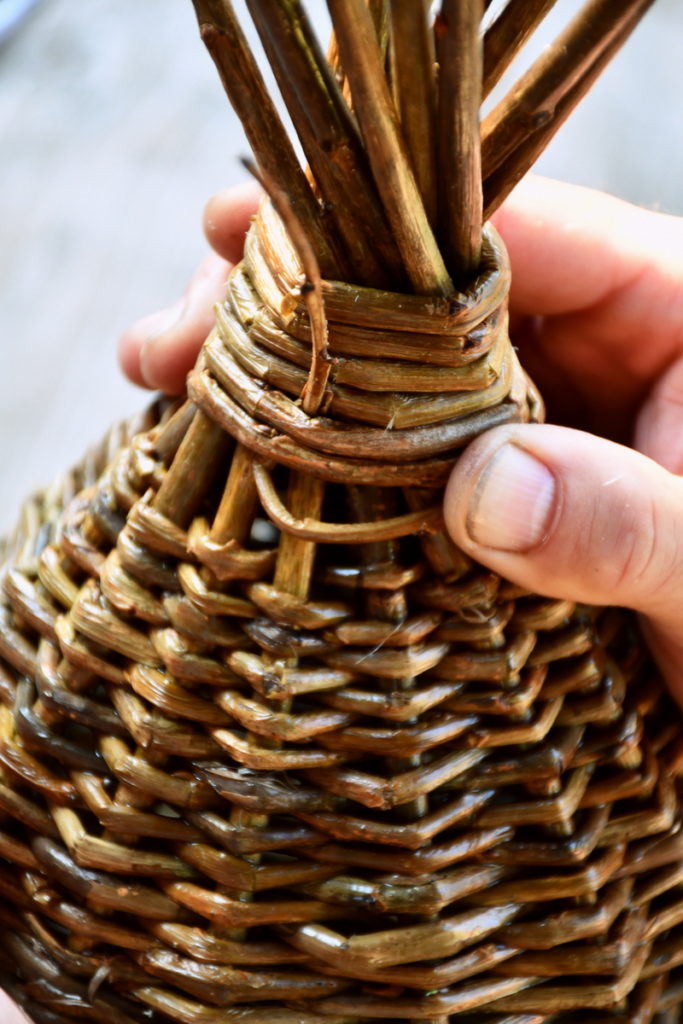

Take every opportunity you have to use the tools around you. For example, to weave in the small end and pull it through, you don’t need to force it. Simply insert your bodkin between the branches, making a “hole” to pull the branch safely through.
It will dry nice and tight.
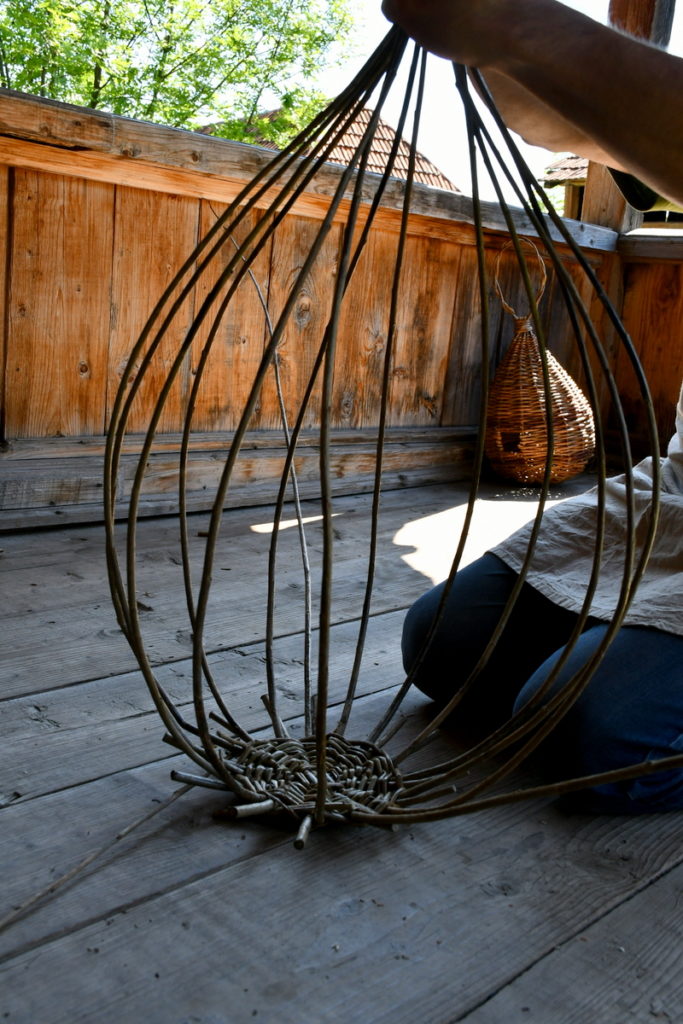
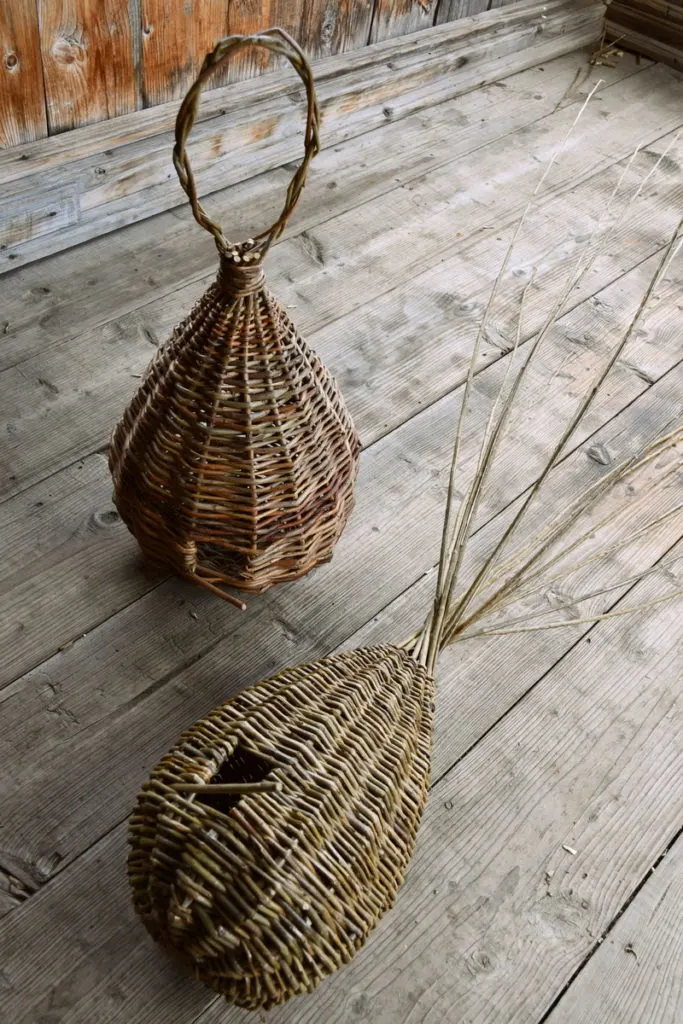
Step 11: Making a Hanger
We’ve decided to go more artistic with this hanging pod and use the full length of the branches to form a loop.

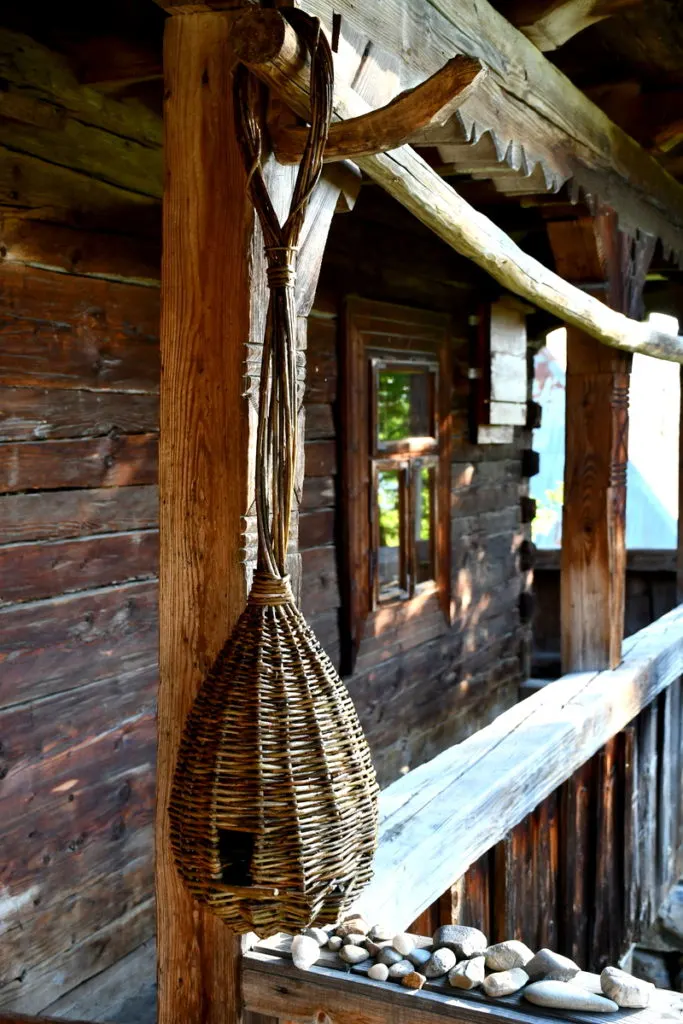
Bend the branches any which way you want. Just be sure to keep it natural and without glue, metal ties or plastic twine.
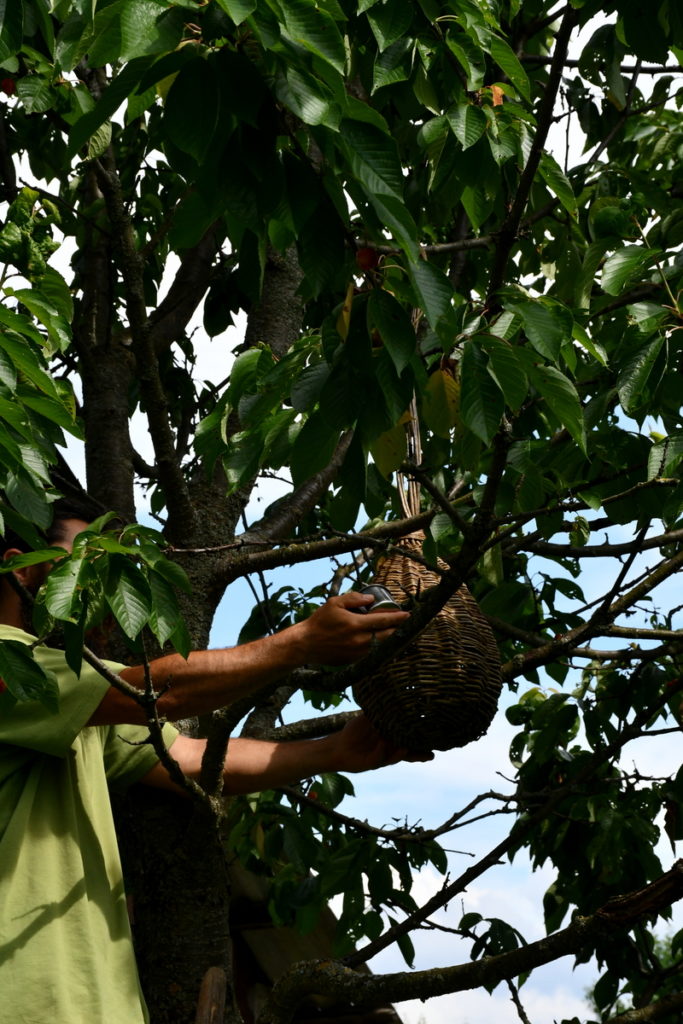
Now it is ready to hang in your favorite tree.
Watch out for any cats that may be around.
Quick Weaving Tips
Be sure to trim all excess ends as you weave. That way you won’t end up with a hedgehog of a basket.
Have a spray bottle of water handy to keep the basket moist as you weave.
Or have a large tub of water close by for keeping everything damp while you take a rest.
Work quickly, yet not rushed.
And that’s it.
Like with any knitting project, don’t ask how long it takes. Just relax into it and enjoy the process, for it will take varying hours depending on your hand strength, materials and weaving skills.
Get creative and weave one for the birds!
If you’d like to weave a bird feeder that is easier and less time consuming, you can sample some pretty and practical projects here: Willow Craft 10 Bird Feeder Projects
You can buy the paperback version here.
Don’t forget to pick up a copy of Willow Craft: 10 Simple Projects at the same time to help decorate your home in a natural style.

Get the famous Rural Sprout newsletter delivered to your inbox.
Including Sunday ramblings from our editor, Tracey, as well as “What’s Up Wednesday” our roundup of what’s in season and new article updates and alerts.