


Choosing the right layout ideas for your vegetable garden can make a big difference. Create growing areas and locate plants to make the most of your space. When you do, you can find that your yield is much higher than you may have imagined possible.
Of course, there are a number of different things to consider when it comes to vegetable garden layout.
You need to consider the climate and soil conditions where you live. You also need to think about your own needs. And of course the needs of the plants you wish to grow. It is also important to consider the practicalities involved in actually creating and managing your garden.
There is no one ‘correct answer’ when it comes to layout ideas for your vegetable garden. There are a huge range of different options for dedicated annual vegetable areas.
When we are discussing layout, we are talking about:
- The shapes, sizes and positioning of beds, containers or growing areas.
- The positioning of pathways and access points, so you can manage your garden without stepping on and compacting the soil in your growing areas.
- The positions of plants within the scheme over the course of the year.
It is important to think holistically when it comes to garden design. You should think about patterns, both natural patterns and human movement. And you should consider how the garden operates as an integrated system, rather than just thinking about one element at a time.
To help you come up with a layout plan for your vegetable garden, here are seven interesting design ideas for you to consider:
1. Traditional Row Gardening Layout
In this first layout, the idea is to adapt the most traditional approach. This is traditional row gardening, but also incorporates ideas relating to companion planting and intercropping.
To optimise use of space, while still allowing for easy access to the growing areas, the idea is to create pathways or walking strips no more than 4ft wide, so you can reach them from one side or the other without too much of a stretch.

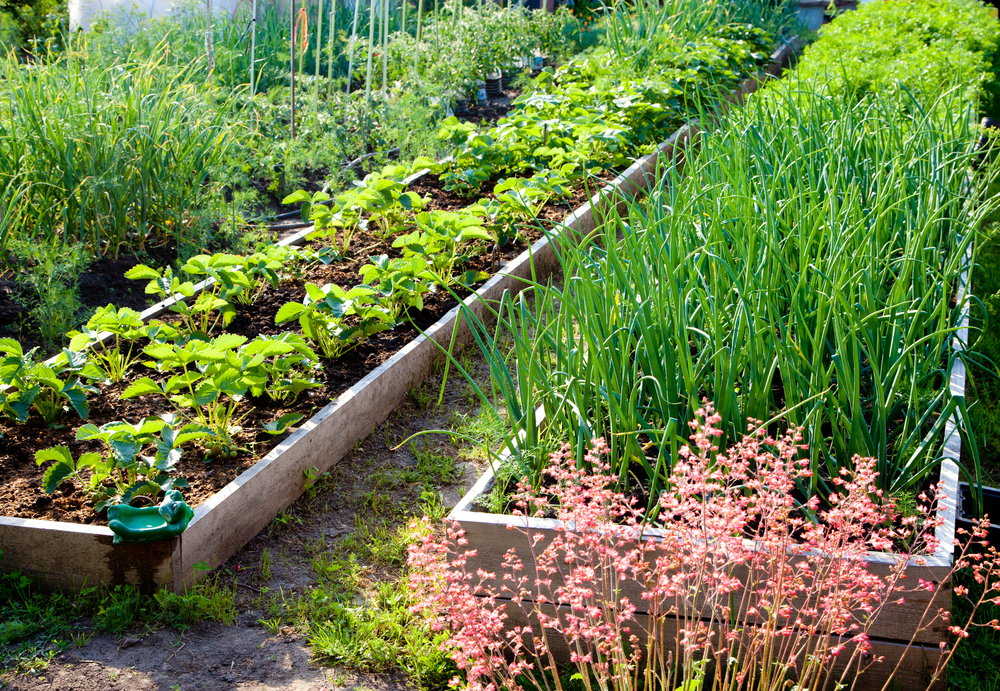
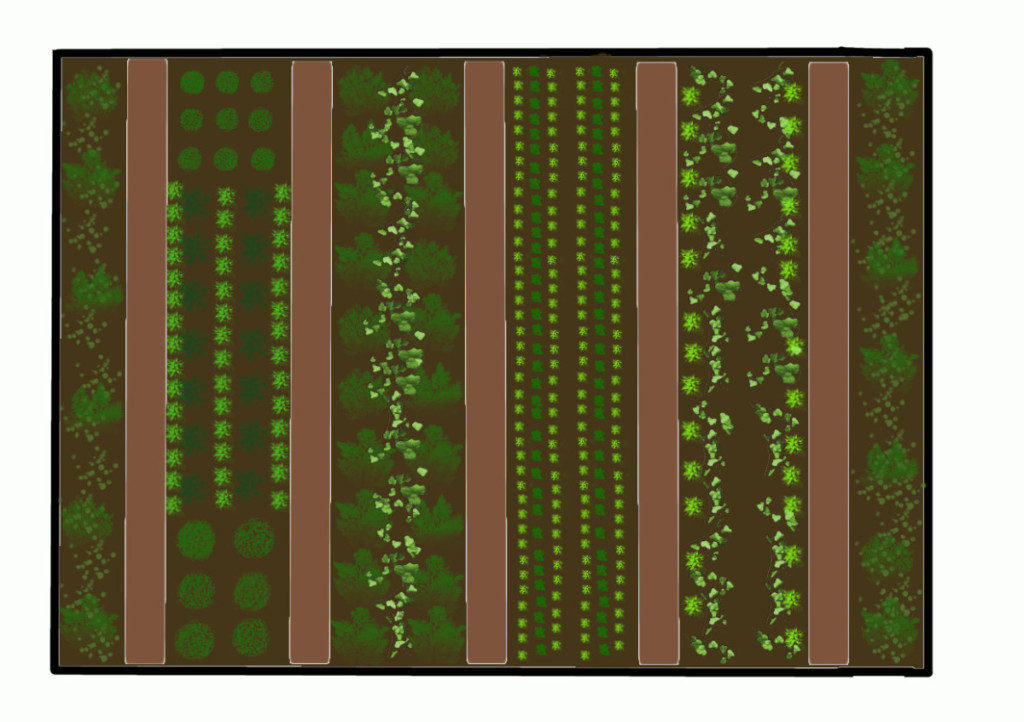
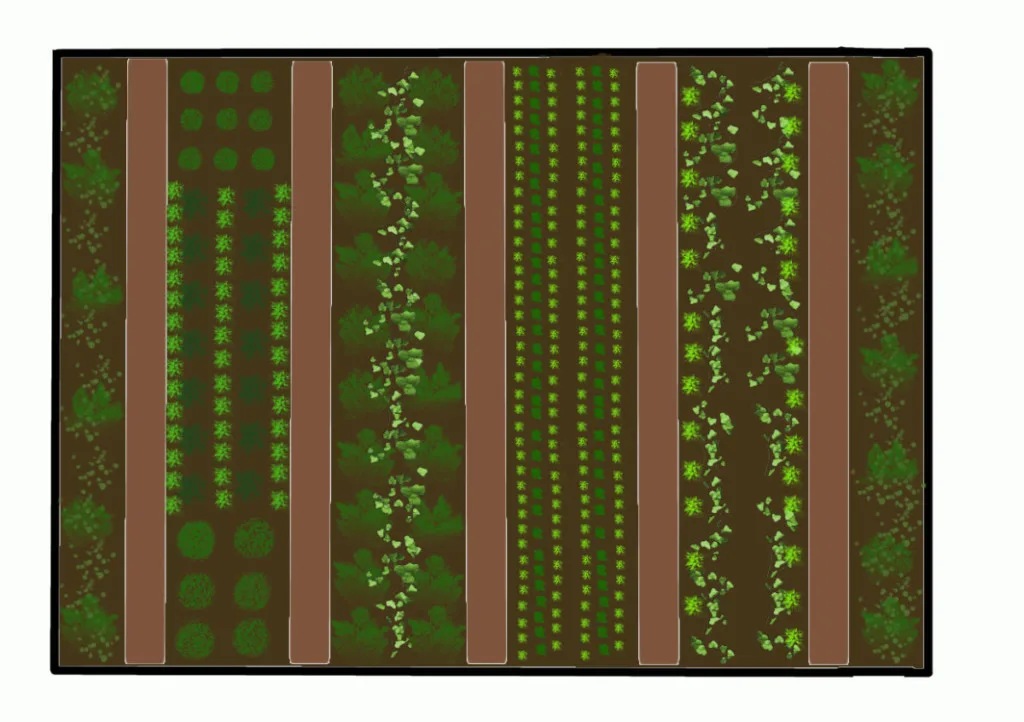
In order to implement a crop rotation plan, it is best to create at least three, and better yet, four different zones. In the image above, you can see four long beds, with the addition of two flower and herb planting strips along the sides.
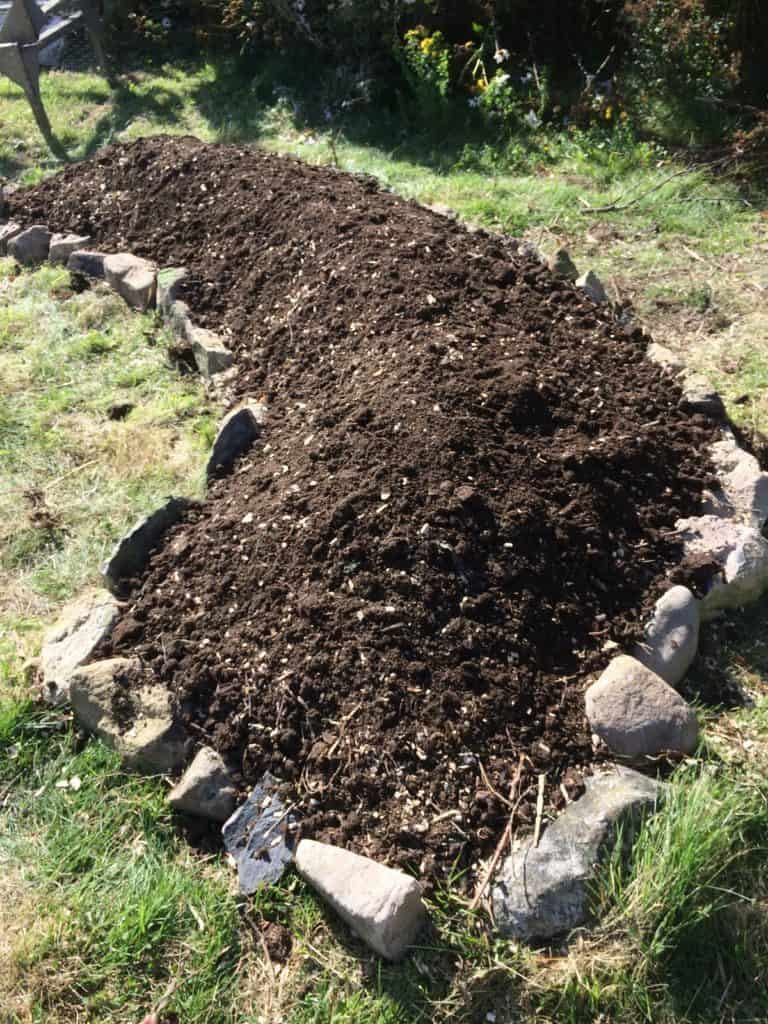
One interesting thing to note is that these beds can be raised, or in the ground. One interesting idea is to use hugelkultur mounds to create sustainable and productive growing areas.
Whether you are growing in the ground or in raised beds, think about implementing ‘no dig’ gardening, and creating your beds by composting in place, and building up layers of organic matter to make a ‘lasagna garden’.
Planting Layout
From left to right, the suggested planting layout is as follows:
Bed One: Brassicas and companion plants. (To be followed by fava beans for overwintering)
Two: Potatoes and peas. (To be followed by successional peas, and brassicas for overwintering).
Three: Onions, carrots and other root crops. (Successional plantings, followed by peas and potatoes in spring.)
Four: Fava Beans underplanted with spinach, other leafy greens, and other companion plants. (To be followed by tomatoes/ squash, beans and corn when the weather warms.)
In the following year, Bed one’s plan will move into bed two, bed two into bed three etc..
Of course, the plants you choose will depend on where you live, and your own tastes and requirements. But this plan should inspire you. And you can adapt it to your own particular circumstances.
2. Square Foot Gardening Layout
If you only have a small space in which to create your vegetable garden, square foot gardening may prove to be a better solution. It can take up less space than gardening more traditionally in rows. Square foot gardening is great for container gardens and raised beds.
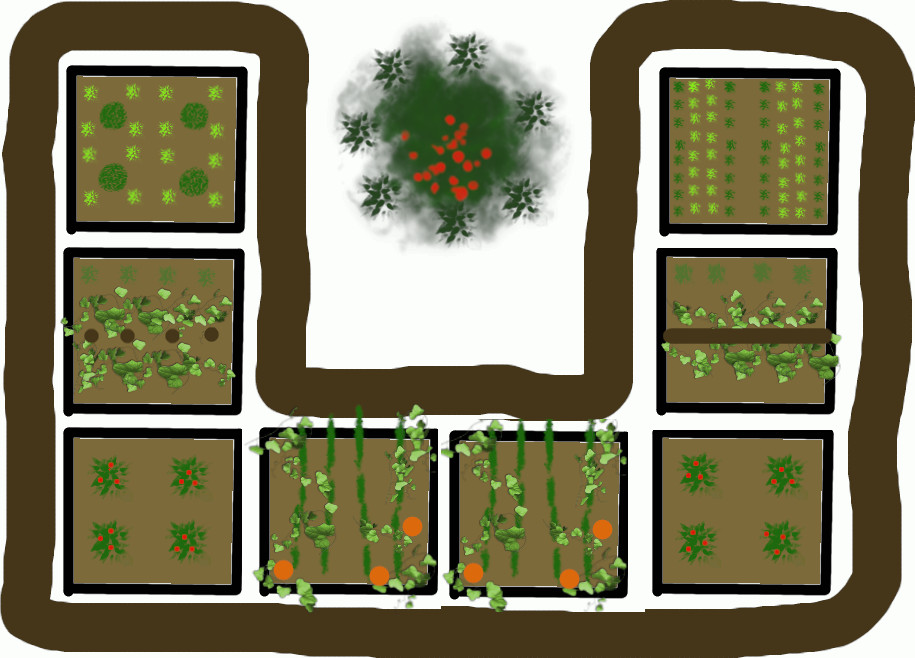
There are plenty of layout ideas to consider, and you do not even necessarily have to restrict yourself to square or rectangular shapes. However, if you are new to gardening, and growing your own for the first time, you may like to keep things simple. The image above shows one potential layout idea for a square foot garden, with eight raised beds (each 4ft x 4ft in size).
The benefit of laying out the square raised beds in a horseshoe shape, as shown, is that there is space in the centre to plant a tree.
This could potentially be a small fruit tree plus its surrounding guild of beneficial plants. (Note: this gap should be to the north if you plan on adding anything that will cast shade.) There could also be space inside the ‘horseshoe’ to create your composting area, or a pleasant seating area for your garden.
Planting Layout
From the top left bed down and round:
Bed One: Brassicas (intercropped with fast-growing lettuce).
Two: Trellis down the centre of the bed with garden peas. Leafy greens/ radishes around and beneath them.
Three: Tomatoes (and companion plants).
Four: ‘Three sisters’ (corn, beans, squash)
Five: More corn, beans, squash or different legumes and zucchini/ summer squash.
Six: More tomatoes or other member of that family (e.g. sweet peppers, chilli peppers etc..)
Seven: Movable trellis for climbing beans/ cucumbers, underplanted with leafy greens etc..
Eight: Alliums, carrots and other root crops.
Rotate your crops to ensure especially that legumes are spread around different beds to fix nitrogen. You should also try to ensure that tomatoes and other members of the family, brassicas and alliums are not grown in the same place on subsequent years.
3. Raised Bed Perennial Polyculture Layout

Even if you are sticking to raised beds, you don’t have to have a traditional annual fruit and vegetable garden at all. Instead, you can create perennial raised beds with perennial herbs, flowers and vegetables.
While you may need to alter your diet a little, a perennial vegetable garden could be a great solution, and provide you with plenty of food for you and your household.
Planting Layout
From the top left bed down and round:
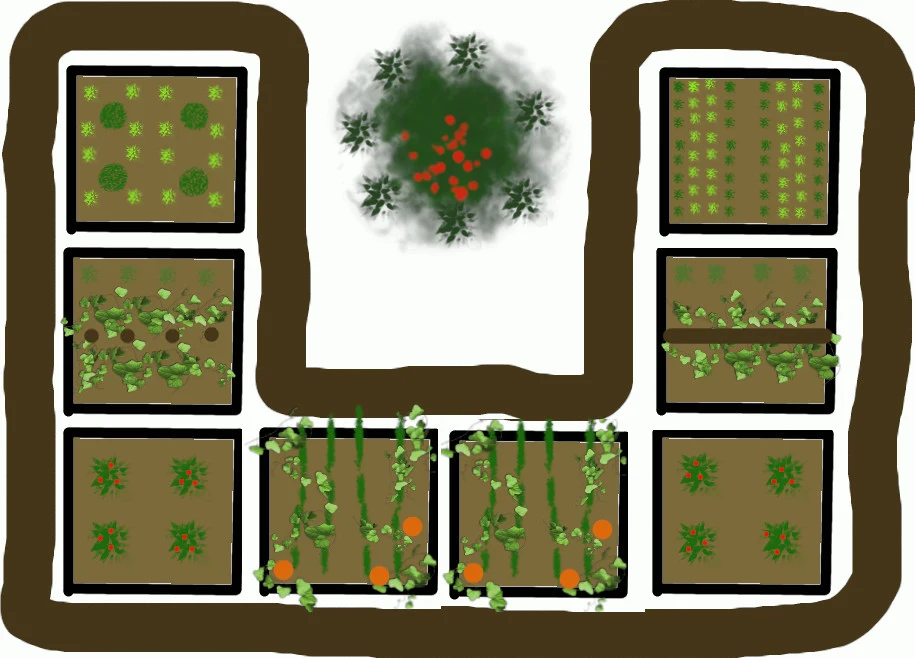
In the image above, you could switch out the plants described for each of the raised beds with perennial plant options.
At the heart of a 4×4 bed, you could place a fruiting bush. For example, you could choose currant bushes, gooseberries, or create a tipi to support cane fruits like raspberries. On the sunnier side of each bush or tipi, you could plant strawberries, along with perennial Mediterranean herbs. You can also fill several more of your raised beds with perennial brassicas, perennial alliums and a range of non-traditional leafy greens. You could also grow rhubarb, globe and Jerusalem artichokes, asparagus, and more.
For example, from the top left bed down and round:
Bed One: Raspberries tipi, with strawberries, and a range of aromatic herbs.
Two: Gooseberry bush, with mint, chives, thyme and lavender.
Three: Currant bush, with sorrel, herbs, strawberries.
Four: Perennial kale/ cabbages with elephant garlic, walking onions, bunching onions and other perennial alliums .
Five: Asparagus, Globe and Jerusalem artichokes, with parsley and other herbs.
Six: Another currant bush with sorrel and other leafy greens, strawberries and herbs.
Seven: Gooseberry or other berry bearing bush with underplanting, or rhubarb.
Eight: Thornless blackberry or more raspberries of different varieties, plus companions.
Perennial flowering plants can also be planted throughout.
Bear in mind that when you grow perennial plants, these will remain in place and should provide food not just for one season, but over several.
4. Mandala Garden Ideas

Raised beds do not have to be square or rectangular. Nor do you necessarily have to rigorously plant within square feet sections. Square foot gardening can be great to give beginners an idea of plant spacing, and give them a framework to work in, but you can break away from that, and from traditional row cropping, when designing your vegetable garden.
If you want to try something entirely different then a mandala garden might be just what you are looking for.
A mandala garden, or circular garden, is a beautiful idea that can let you break out of the box. Mandala gardens are not necessarily the most efficient use of space, but they can be truly beautiful.
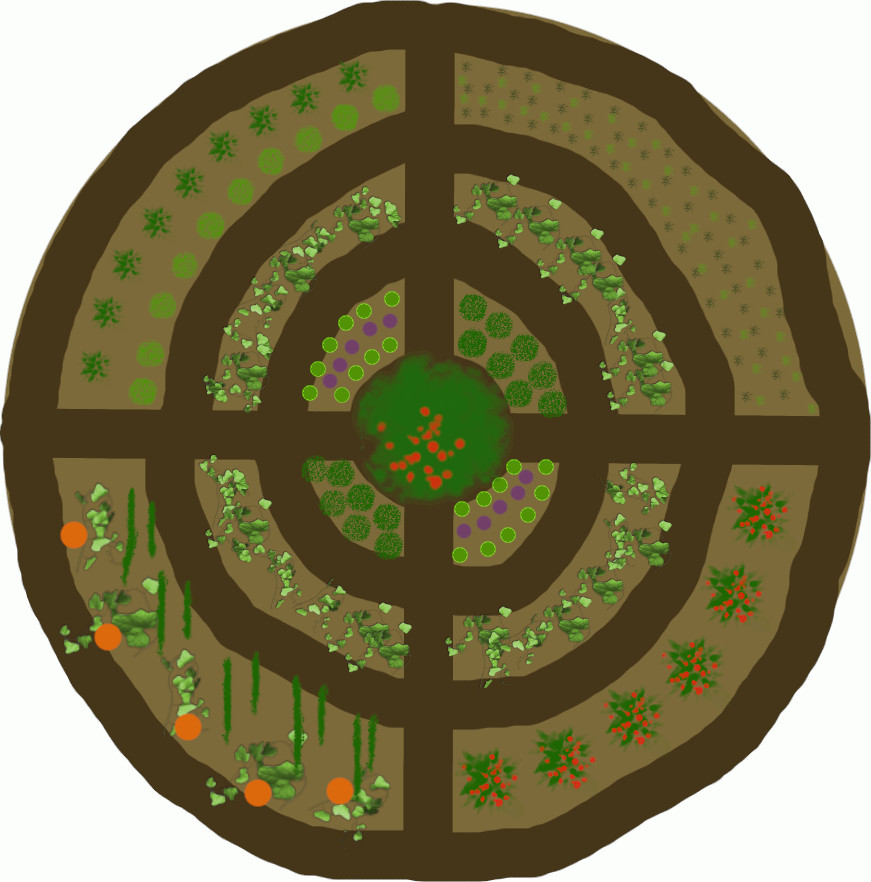
The image above shows a simple mandala garden. Growing can be in raised beds, or in the ground, depending on the gardener and the restrictions of the site. This plan shows how you can make a series of concentric growing areas, with paths going between them like the spokes of a wheel.
Planting Layout:
At the heart of a mandala garden, it can be a good idea to plant a dwarf fruit tree. It is important to consider the shade this will cast. But when you plan correctly, a fruit tree and its build can be the ideal heart for your garden. The plan above shows a mandala garden with a fruit tree at the centre, and a mix of perennial and annual crops.
Moving outwards from the tree and its guild, the inner circle is planted up with lettuces and other shade-tolerant leafy crops. You could choose a mix of annual and perennial greens for these sections. In this plan, I show the next ring out planted with a range of legumes (nitrogen fixers like peas, beans, lupins etc..) The outer four sections are then shown with annual crops for rotation.
Top left: Brassicas and companion plants.
Top Right: Alliums, carrots and other root crops.
Bottom Right: Tomatoes and companions. (OR potatoes in cooler zones).
Bottom Left: The three sisters – corn, beans, squash.
A similar layout could also be employed on a slightly different circular bed layout. For example, you could create a central bed, surrounded by a series of wedge shaped beds radiating out from it. You could also create a spiral form garden swirling our from the hub of the wheel or the centre of the circle.
But another top layout idea for a mandala garden is to make a large, circular growing area which is reached by means of keyhole paths, which allow easy access to all parts of the zone.
5. Keyhole Bed Layout
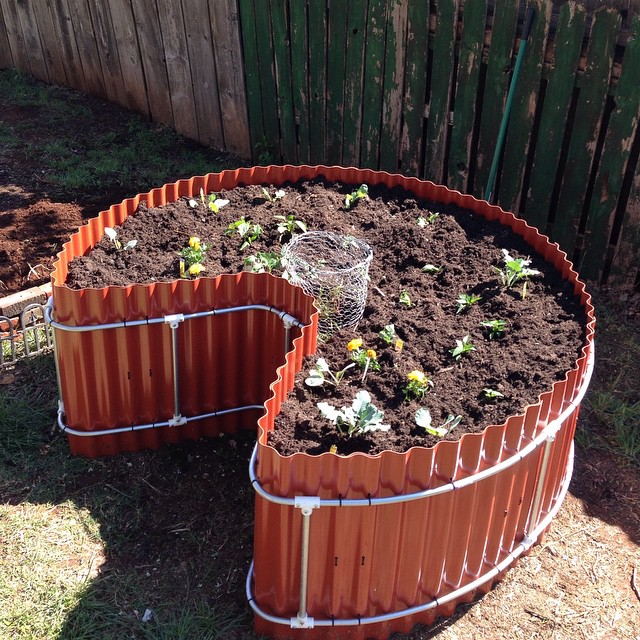

A circular bed could also be a keyhole garden. Keyhole gardens offer a great way to grow more in relatively small spaces. They can be made in a range of different shapes, but are often circular in form. But the thing which distinguishes them is that they have a path leading to a compost bin/ watering point in the centre. A passageway is cut into the bed on one side to allow access to that composting area.
These beds are called ‘keyhole beds’ because they have a shape which resembles a keyhole when viewed from above.
Yield is increased by this layout. The higher yield is achieved by the high-fertility provided by the compostable materials added at the centre. The shape also maximises edge – the most productive part of any ecosystem which also helps boost plant growth. Since water is also added through the central composting area, one of these beds can also reduce the water use in a garden.
These layout ideas, therefore, can be particularly beneficial in areas with poorer soil, or where rainwater is in short supply.
When creating a keyhole bed, it is important to make sure that you can easily reach each section of the new growing area. They can be different heights, and have edging made of a wide range of different materials.
Planting Layout
The planting layout within a keyhole bed can incorporate both perennial and annual crops, depending on your personal preferences and needs. There are two things to bear in mind when choosing which plants to grow, and where exactly to grow them.
Firstly, you should consider how plants grown in close proximity to one another will aid or hinder one another. Think about how plants will be beneficial as companion crops. Consider how certain plants may restrict the growth of others grown nearby due to their root systems and fertility requirements.
It may also be beneficial to think about how you can split the bed into sections, which can be used to rotate certain crops. It is best to avoid growing members of certain plant families in the same soil year after year. Even if you only have a single keyhole bed, it may be helpful to split it into four sections so as to minimise the risk of certain pests and diseases over time.
Read more about keyhole raised beds here.
6. Organic Form Garden Layouts

Sometimes, it can be very useful to mimic natural, organic forms when planning a layout for your garden. We can learn a lot from nature in garden design. This includes not only thinking about how nature’s cycles work, and how elements of an ecosystem interact. It also includes thinking about the forms found commonly in nature.
Circles and spirals are certainly forms found commonly in nature. So they can help give a garden a calm and naturalistic feel. However, there are also other organic shapes to consider. Waving and sinuous shapes can often be a great choice for a vegetable garden. These shapes can help you move away from the traditional straight lines and rows of a kitchen garden.
By thinking outside the box you may be able to create a number of unique and beautiful garden designs. You may still be able to plant in rows, though the rows may be curving rather than straight. Again, this can be a great way to maximise edge and grow more productively where you live.
But curving and sinuous forms lend themselves well to a polyculture approach to planting. In polycultures, a range of plants are grown amongst and between each other. Planting is built up in layers. This approach is more common in forest gardens and perennial beds, but you can also apply it in your vegetable garden.
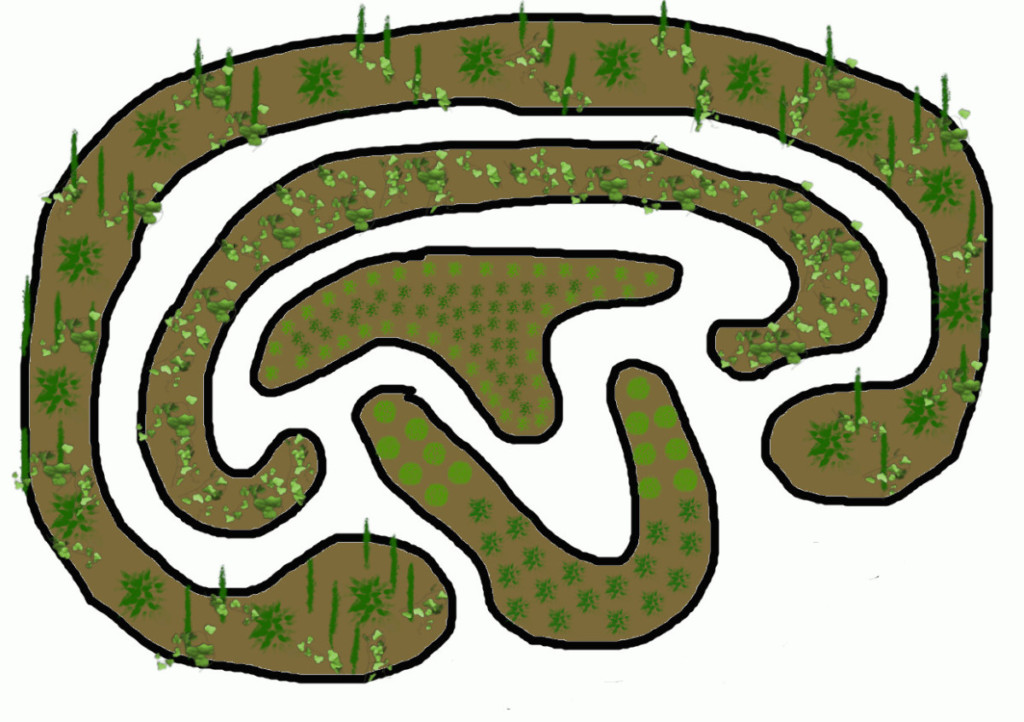
Planting Layout
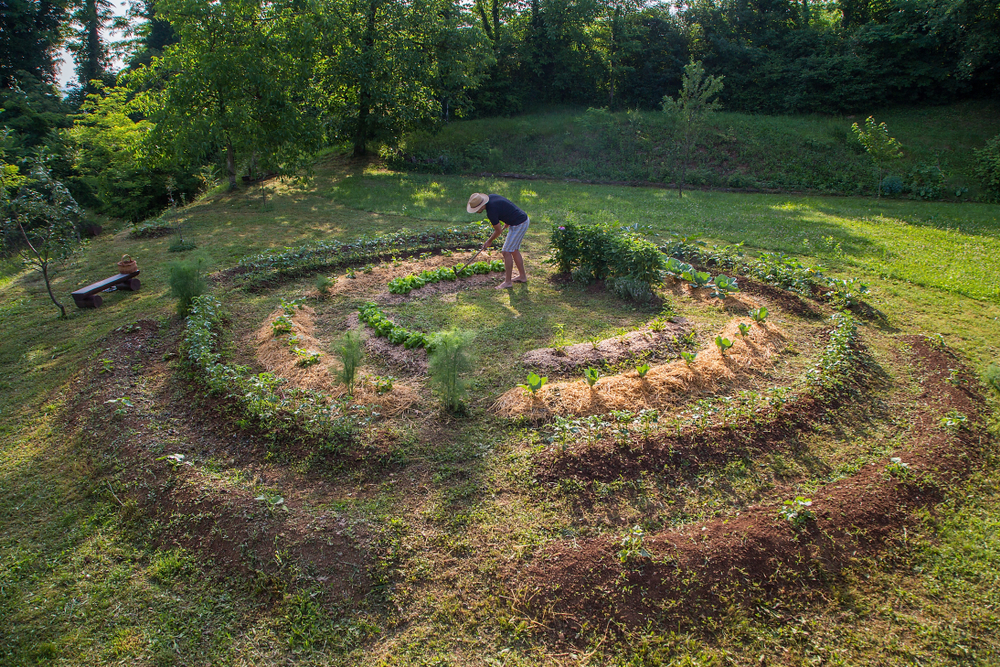
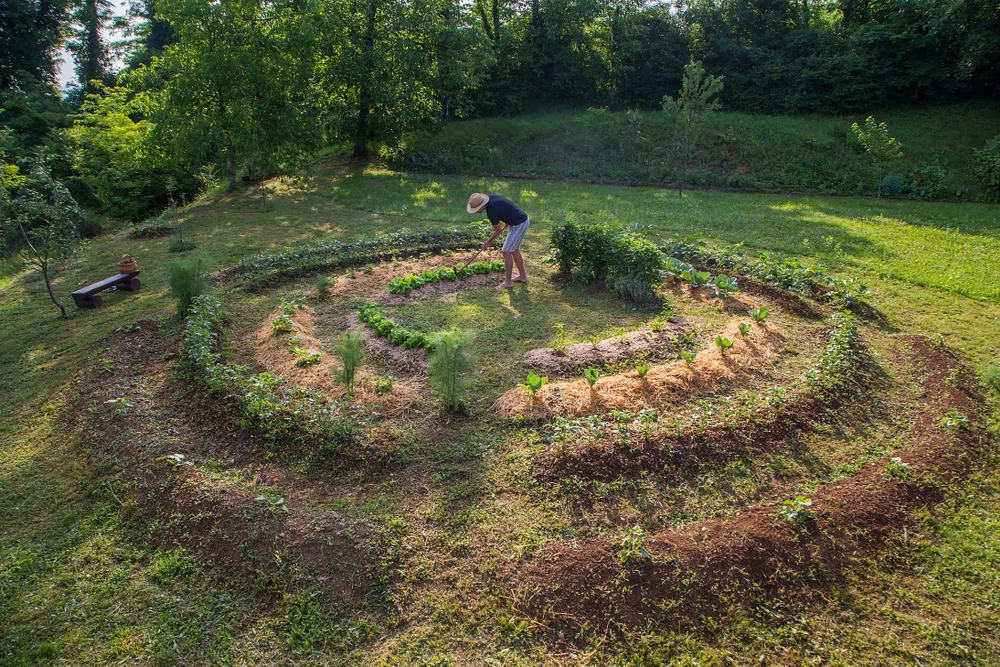
The image above depicts one possible layout design. It shows a series of irregular organic form beds which are created using the hugelkultur method.
By using the mounds, rather than growing in the ground or in flat topped raised beds, you can maximise the number of different growing conditions that can be achieved in the same area.
Following the contours of the site can help to retain moisture, preventing erosion and rainwater run off. The beds surrounding the vegetable growing area can be planted up with native flowers and herbs to create a good biodiversity and natural balance on the site.
Here is one suggested planting layout for the beds (from the outside in, top to bottom).
Bed One: Tomatoes and companions, and the ‘three sisters’.
Two: Brassicas, and companion plants.
Three: Legumes (underplanted with leafy greens).
Four: Root crops & alliums.
7. Vertical Garden/ Container Vegetable Garden Idea

Now let’s imagine, for a moment, that you do not have an area of horizontal space that you can devote to a vegetable garden. Imagine that you only have a thin strip of land against a vertical wall or fence.
Interestingly, you could still consider growing a wide range of crops, even when you have very little space available. You can use vertical gardening techniques, and think in the vertical plane as well as the horizontal one.
Related Reading: 10 Fruits And Veggies To Grow Vertically For Epic Yields In Tiny Spaces
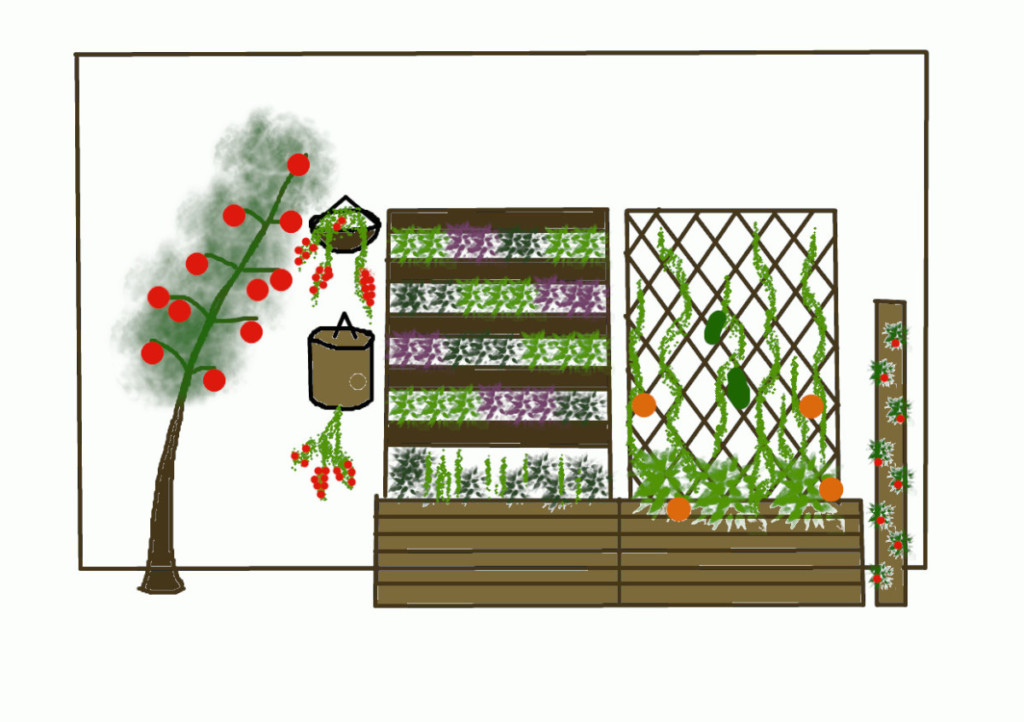
By using trellis, shelving, planters and hanging containers in a range of innovative ways, you could still grow plenty of food against a sunny wall or fence. The image above shows one potential layout idea for a vegetable garden of this type.

Planting Layout
In this image you can see:
- A fruit tree trained against the wall, underplanted with perennial herbs etc.. to form a guild.
- Hanging planters for a range of tumbling tomatoes, or tomatoes grown upside down.
- A vertical garden made from a wood pallet, planted up with leafy greens, placed within a planter, used to grow radishes and other root crops like carrots, and alliums.
- A second planter with trellis, with climbing beans, peas, squash and cucumbers growing up it.
- A strawberry planting tower.
Creativity is Key
Of course, this is just one potential layout for this type of vegetable garden. You can be inventive and find a range of innovative ways to grow more food in less space.
There are plenty of other ways to create layouts that work well for you, and for your plants. But these interesting layout ideas for your vegetable garden may help you work out a garden design that is perfect for you, and for where you live.
When you get the design and layout right, you will create a foundation that you can continue to build on for years to come. And your garden may be able to provide you with more food than you ever imagined.

Get the famous Rural Sprout newsletter delivered to your inbox.
Including Sunday ramblings from our editor, Tracey, as well as “What’s Up Wednesday” our roundup of what’s in season and new article updates and alerts.