


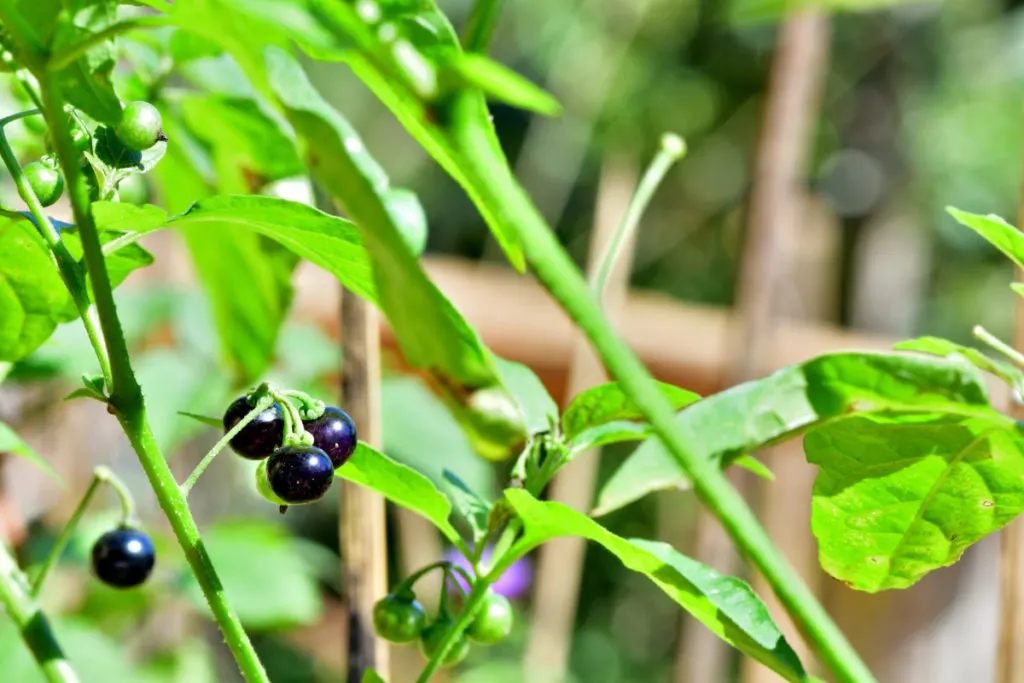
Tomatoes are a pain in the butt to grow.
They are, let’s not deny it.
If there is one plant in my garden that gives me problems year after year, it’s tomatoes.
Radishes? I’ve got those figured out.
Potatoes? Not nearly as hard as I thought they would be.
Lettuce? With a little care, you can say goodbye to grocery store lettuce forever.
But tomatoes?
- What’s that spot on the top?
- What’s that spot on the bottom?
- What’s that spot on the stem?
- Why are my leaves yellow?
- Where did all my leaves go?
- Is that a tomato hornworm?
- Why are my tomatoes still green; it’s nearly September?
And yet, I don’t think I’ve ever had a garden without tomatoes. Life would be so much easier if I were one of those people who didn’t like tomatoes. I’m sure you can relate.
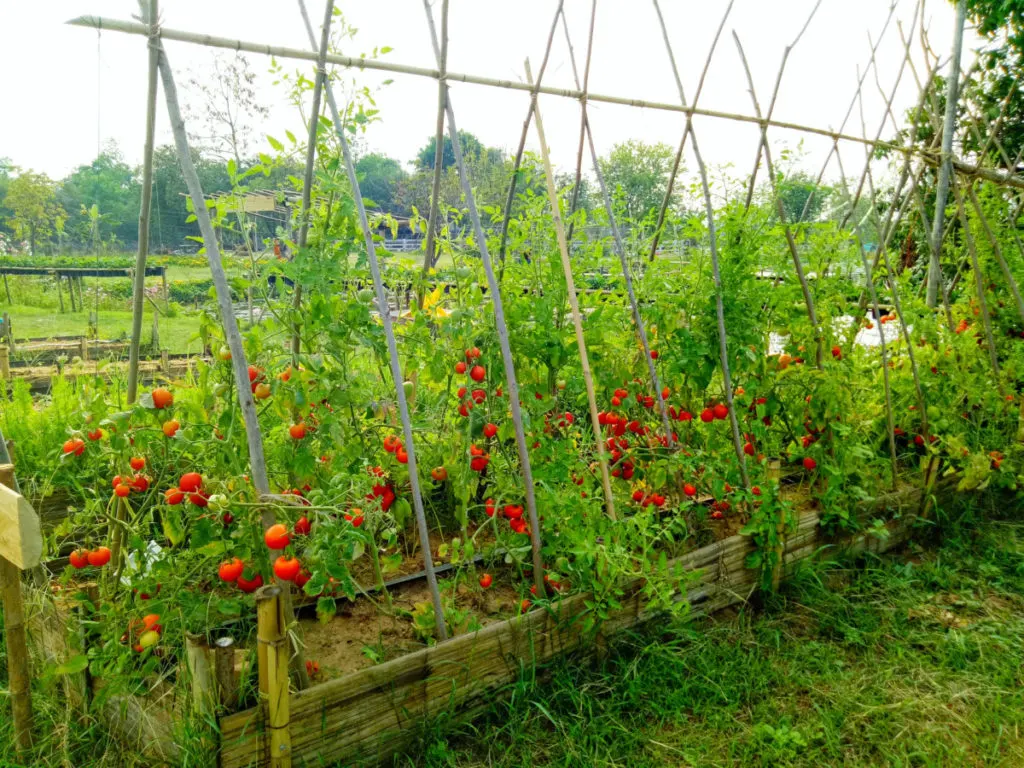
But oh, when you get that perfect year where you’ve done everything right, that year where the pests congregated in someone else’s garden and mother nature blessed you with the perfect amount of rain and sun.
You end up with jars of diced tomatoes and tomato juice lining your shelves. Fresh, spicy salsa is ready to be enjoyed all through the winter. And pint-sized jars of ratatouille stacked two high and four deep that you tell yourself you’re going to savor and make last to February this year. (Ha! Who am I kidding? I’ll be lucky if I have any left in November.)
Oh, those years make it all worthwhile.
And to help you get more of those perfect tomato years, we’re going to tackle a word that strikes fear into every tomato gardeners’ heart – blight.

Nothing spells the end of a tomato season faster than finding your plants infected with any of these blights.
So, we’re going to take a good hard look at them and discuss what they are, how to spot them (ha, pun intended) and most importantly, what to do if you find blight in your garden.
There are three different types of blight you need to keep an eye out for.
Let’s take a look.
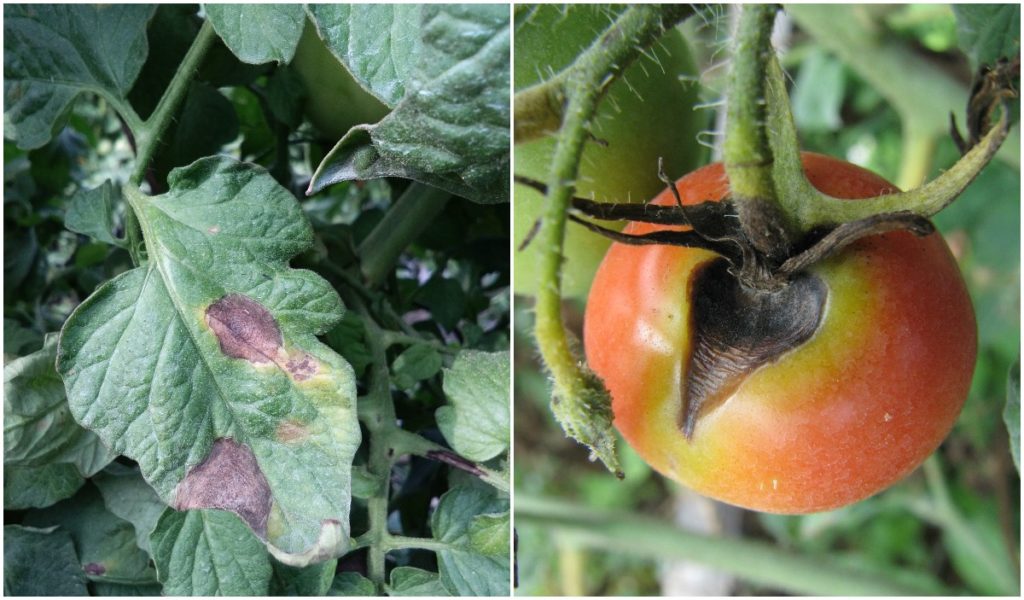
Early Blight
I’m sure you’ve already guessed by its name that early blight is the first of these on the scene each year.
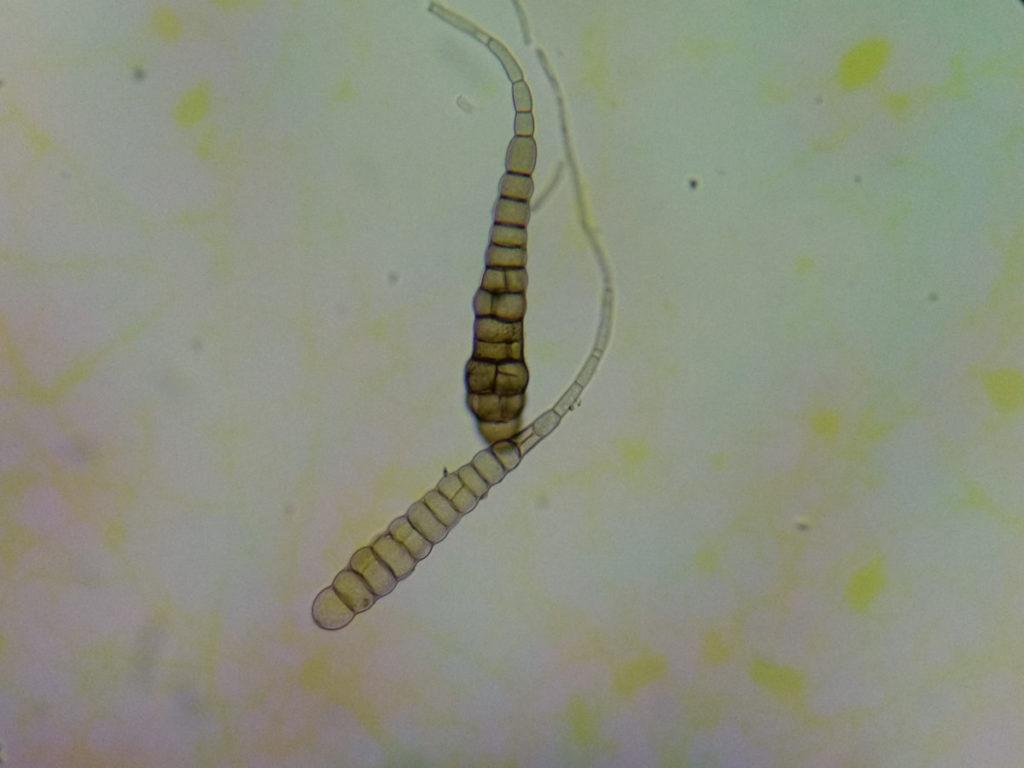
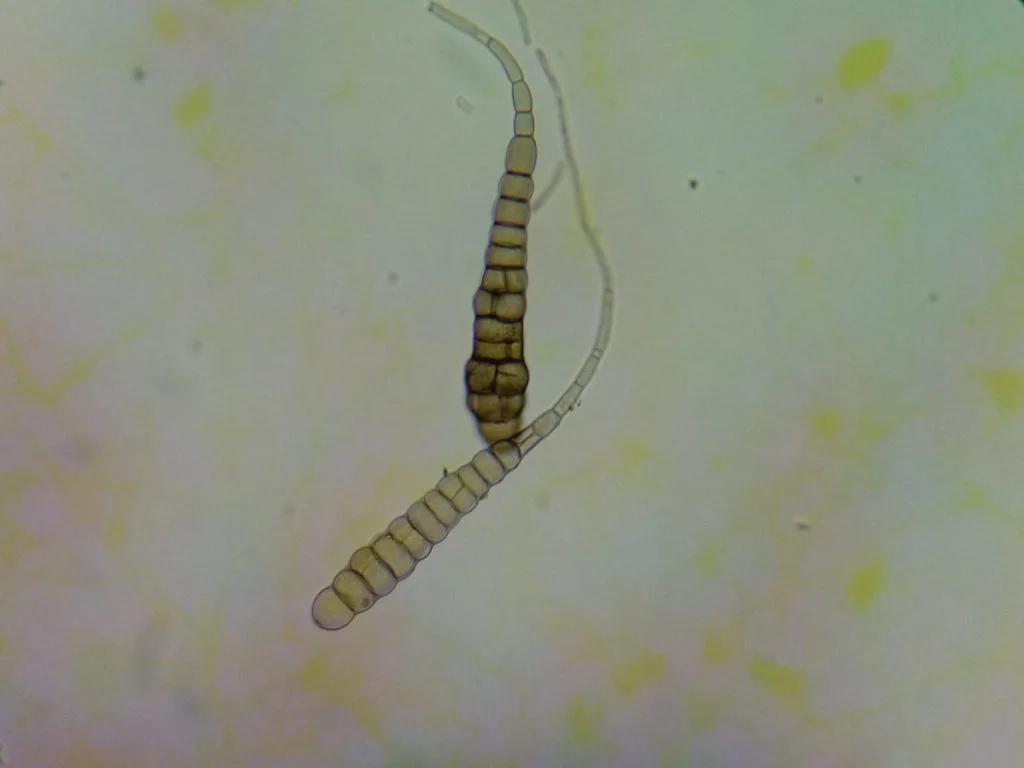
Early blight is a soil-born fungus, Alternaria solani. It hangs out in the ground over the winter, waiting for the right weather to attack. After the first infection, it can also find safe harbor in nearby weeds or volunteer plants which can then infect your beautiful tomatoes.


And the right weather happens to be a nice stretch of rainy weather when it’s warm and humid out.
After a period of heavy rain, the spores infect the plant, and within a matter of days, you may begin to notice symptoms.


It’s important to note that after that initial infection, subsequent infections can happen via splashed dirt from rain or overhead watering or spores spread by the wind.
This is why it’s so important to catch blight early on.
Early blight can show up at the beginning of the season right up to the middle of the growing season.
Identifying Early Blight
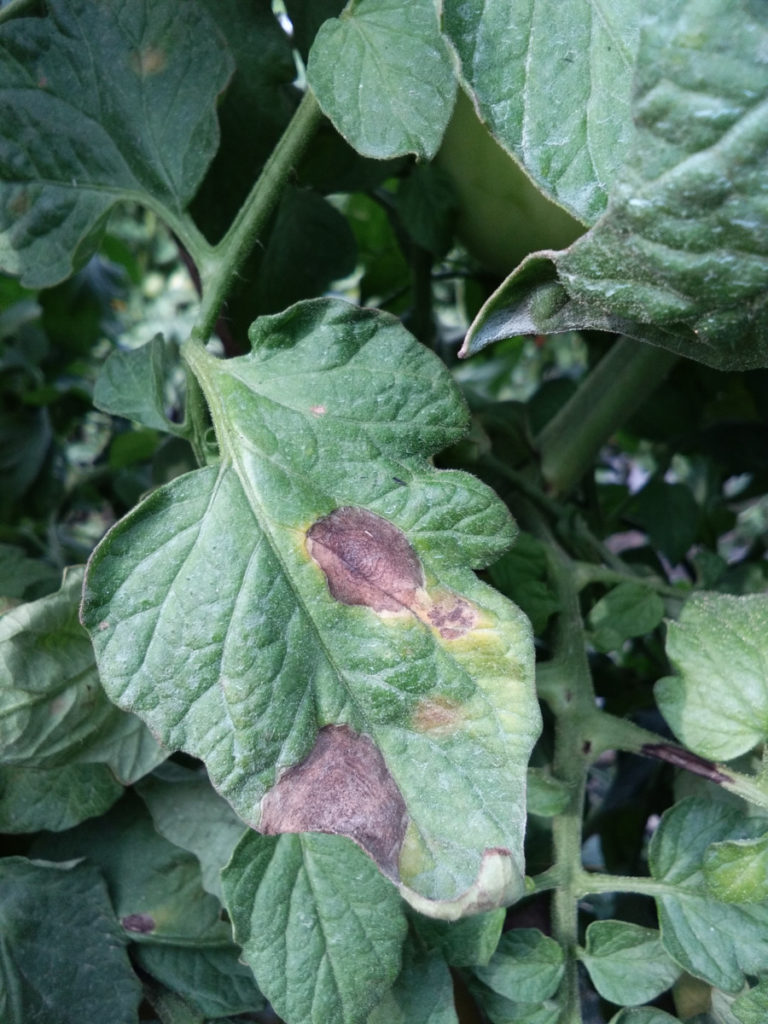
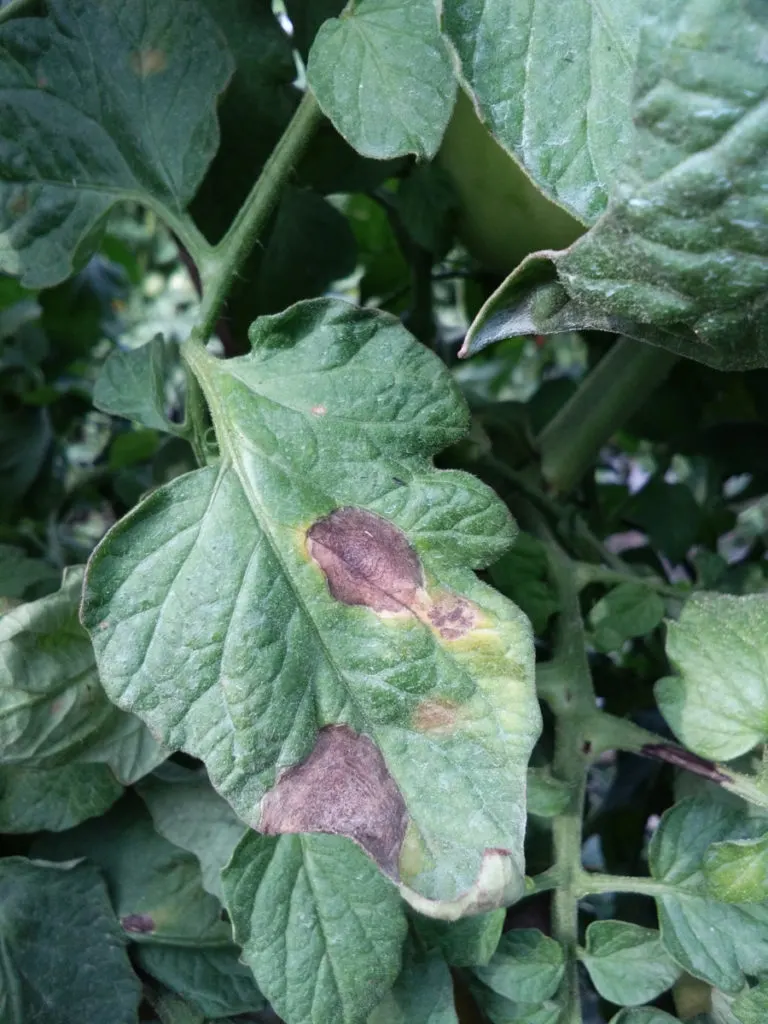
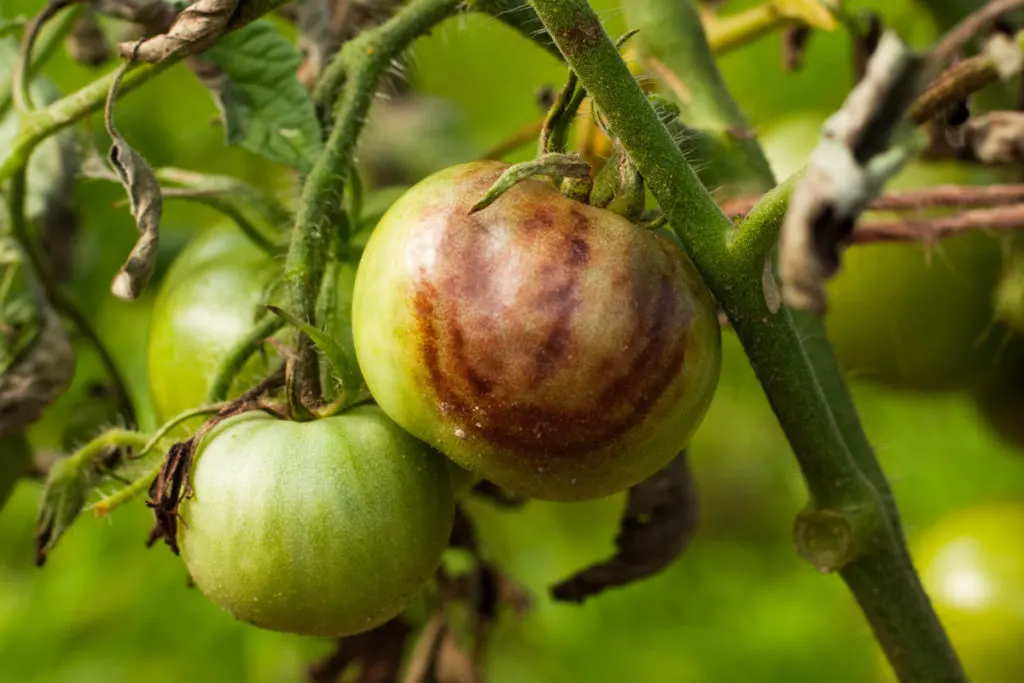
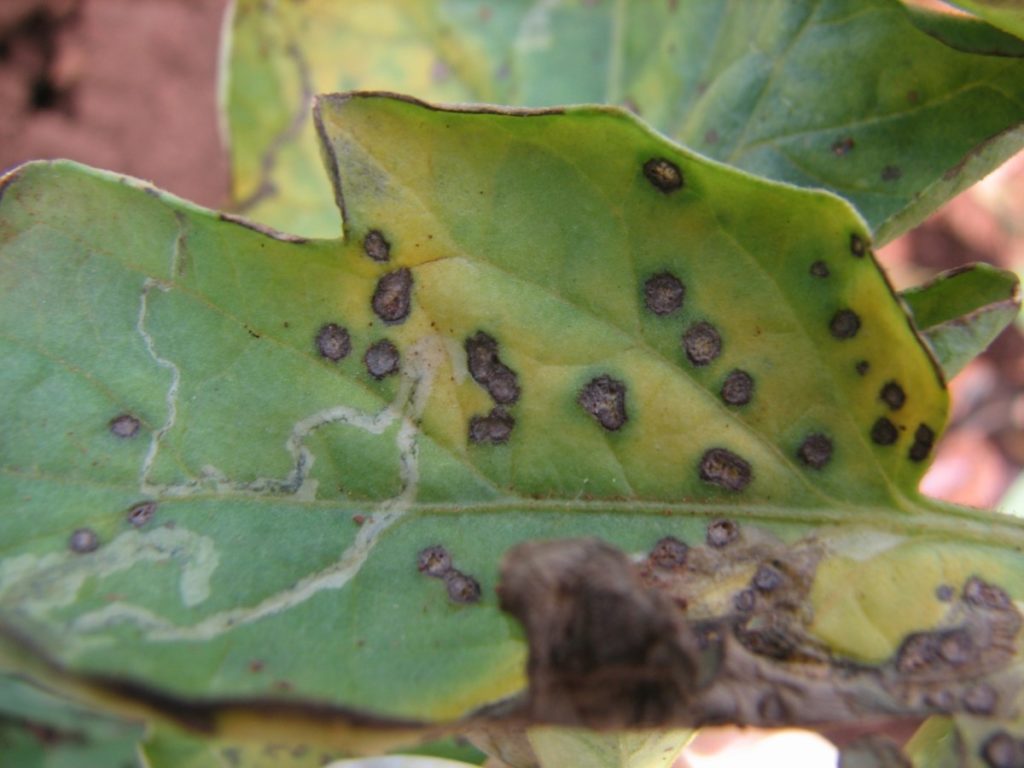
- Bullseye – early blight has a very distinct rotting pattern on the leaves, stems, and fruit of the plant, which looks like a bullseye or a tree’s rings.
- Yellow Ring – the very outer edge of the spots may have a yellow ring around them.
- Leaves Fall – infected leaves may fall off the plant quickly, leaving the developing fruit open to sunburn.
- Sunken Stems – stems of the plants will also develop brown rings with the bullseye pattern. These are usually sunken.
- Dropped Fruit – Tomatoes usually fall off the plant. They can also develop spots with the tell-tale bullseye.
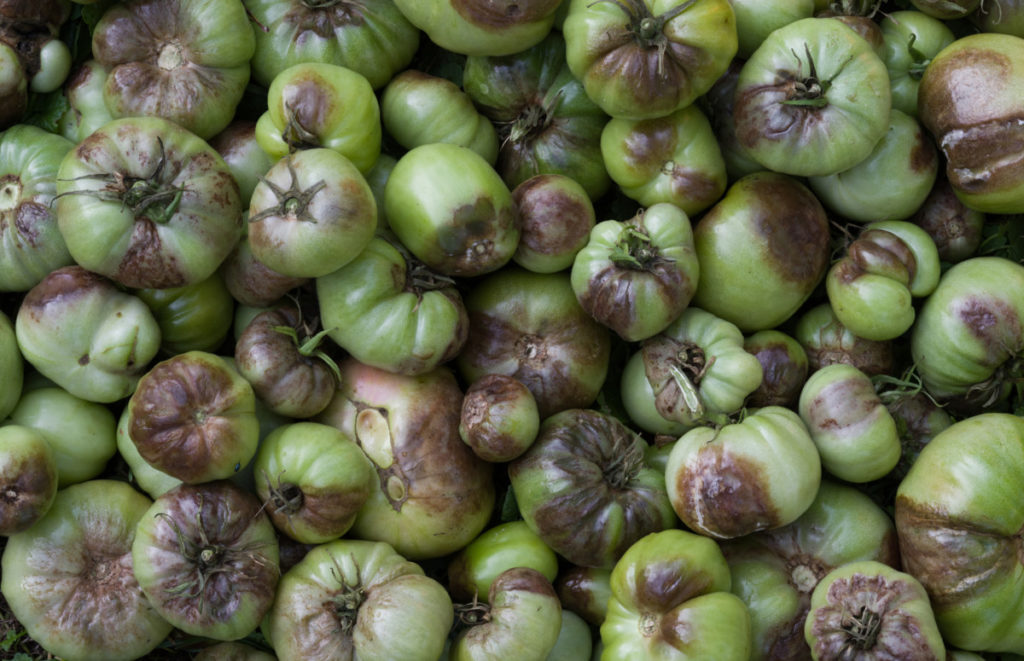
Late Blight
Late blight, or Phytophthora infestans, is a fascinating form of blight. Its Latin name translates to Plant Destroyer, just to give you an idea of how nasty this stuff is.

It infects tomatoes and potatoes and was responsible for the horrific Irish potato famine in the mid-1800s. Phytophthora infestans were originally thought to be fungus but have since been reclassified as a water mold or oomycete.
Late blight is really tricky to deal with as it spreads in the soil via infected plants and potatoes and spores floating in the air.
Identifying Late Blight

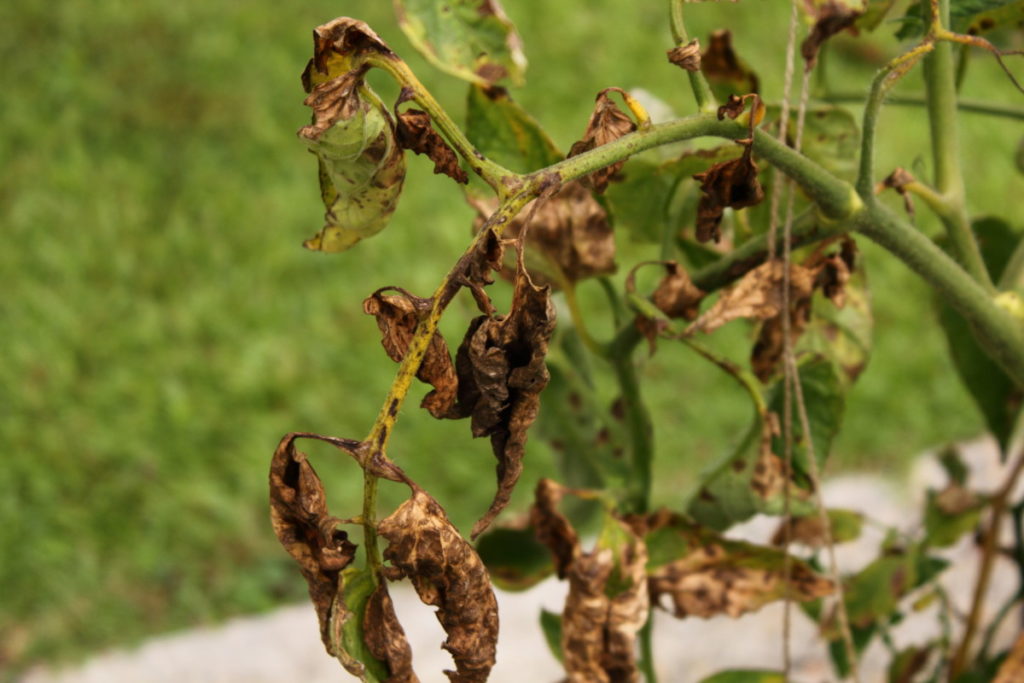
- Blue-Gray Spots – leaves will show spots that start out as a blue-gray color and turn brown before falling off. This blight moves fast and can completely defoliate a plant in about two weeks.
- Greasy-Greenish-Spots – like something out of a Dr. Suess book, the tomatoes can develop greasy, olive-green spots and eventually fall from the plant.
- Cottony Mold – both the leaves and the fruit can develop a fuzzy ring of mold around the darkened spots.
Much like early blight, late blight prefers damp weather and shows up as the temperatures begin to cool from mid to late-season each year.
Did You Know?


There is some speculation that the global spread of late blight today is due to seed potatoes. Infected potatoes get shipped as seed potatoes, carrying the disease with them and infecting soil wherever they’re planted. I can’t think of a better motivator to begin to save and chit your own potatoes each year rather than relying on commercial seed potatoes.
Treat or Destroy?
Late blight has become a global issue, and due to its prevalence in the past few years, there is a growing movement urging both commercial and home gardeners to destroy plants with late blight rather than trying to treat it. Once infected, the spores become airborne and can easily spread to other plants in your garden as well as neighbors.
Many of us rely on the food we grow, and this is a tough decision to make; however, it’s best to destroy one season’s crop than to spread the blight onto neighboring land and have to deal with it in your soil year after year.
Septoria Leaf Spot
Another fungus, Septoria lycopersici, causes Septoria leaf spot. This tomato blight can show up anytime during the season, but you see it more frequently early on. And it also favors wet, humid weather.
Identifying Septoria Leaf Spot

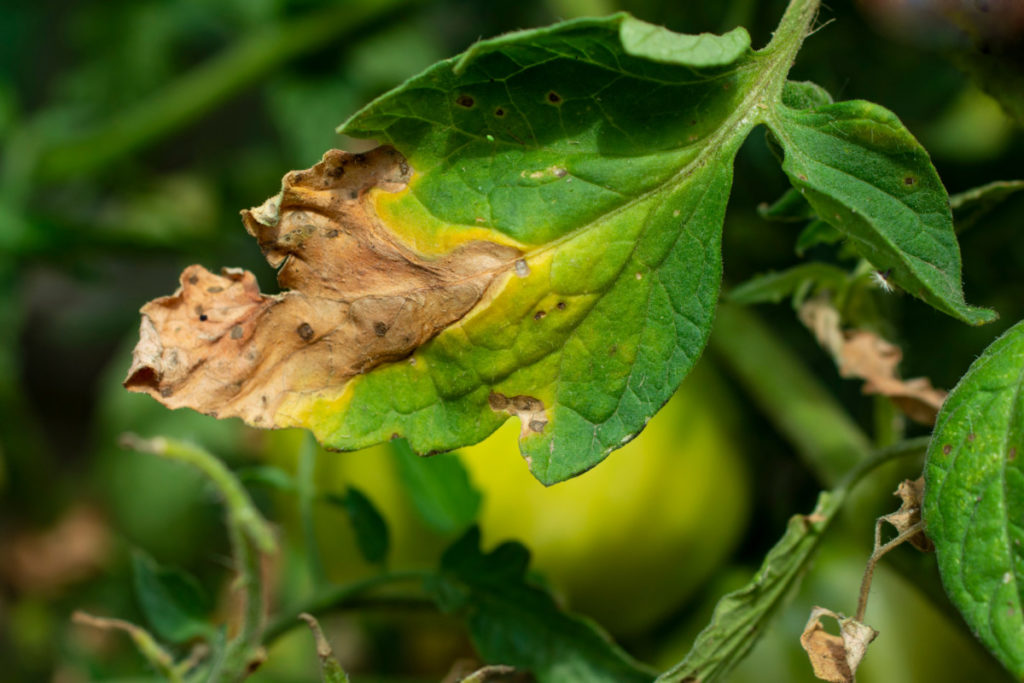
- Bottom to Top – Septoria leaf spot starts at the bottom of the plant and works its way up. Yellowish spots begin to show up on the leaves’ undersides, slowly making their way through the plant to show on the topside.
- Only the Leaves – rarely affects the fruit of tomato plants, so if you have yellow, spotty leaves and the fruit looks fine, you’re most likely dealing with this form of blight.
- Defoliation – the leaves eventually turn brown and fall off, leaving you with a stick-like plant full of fruit that won’t mature.
- Tiny Dots – the center of the spots can have tiny dark specks on them.

Treatment and Prevention of Tomato Blight
Prevention
Everyone knows the old saying an ounce of prevention is worth a pound of cure, and where blight is concerned, this is the gold standard. Follow these nine tips to prevent blight in your tomatoes.
1. Rotate Your Nightshades
Don’t grow tomatoes in the same area where other Solanaceae family members have been grown in the past two years – tomatoes, eggplants, peppers and potatoes.
2. Choose Blight-Resistant Hybrids
If blight is a regular occurrence in your area, you may wish to consider switching to a blight-resistant hybrid variety.
3. Social Distancing for Tomatoes
When you plant tomatoes, give them a bit of extra room from other plants and each other. You want to encourage air circulation, so the leaves and ground dry quickly.


4. Stake Tomatoes
Keep that foliage up off the ground. Stake your tomatoes and consider trimming lower stems so they aren’t lying in the dirt.
5. Mulch
Prevent soil from splashing up onto your tomatoes by mulching. The most effective mulch for this purpose would be landscaping cloth; however, natural mulches will help too.
6. Water Below, Not from Above
To prevent damp conditions that can kickstart blight and keep water droplets from splashing spore-inoculated dirt up onto your plants, you should water the soil directly. A soaker hose is a great option, or even something as simple as a cup and a bucket of water. The idea is the same, gently soak the ground rather than the whole plant.
7. Raised Beds

Consider growing your tomatoes in a raised bed. Raised beds tend to have better drainage because they dry out quicker than a traditional garden bed.
8. Remove Host Weeds and Volunteers
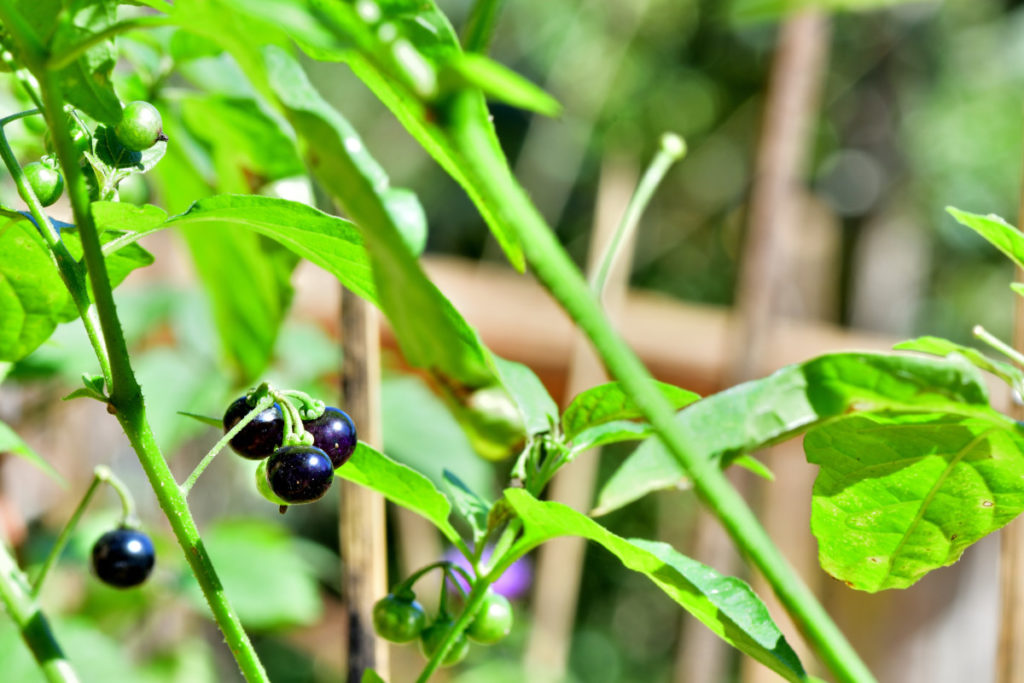
Blight likes to hang out on plants of the Solanaceae family, whether they’re in your garden or not. Remove weeds such as horsenettle or nightshade from your property. If you have volunteer plants that have popped up in your garden or compost pile from last year’s plants, remove those as well.
9. Follow a Blight Tracker
There are some excellent online trackers you can use to find out if blight is headed your way. A simple internet search for a blight tracker in your country will set you on the right path. With the heads-up gained from checking a blight tracker, you can spray your plants with copper spray before blight reaches your area as a preventative.
Treatment
To effectively treat blight, you need to catch it very early on.

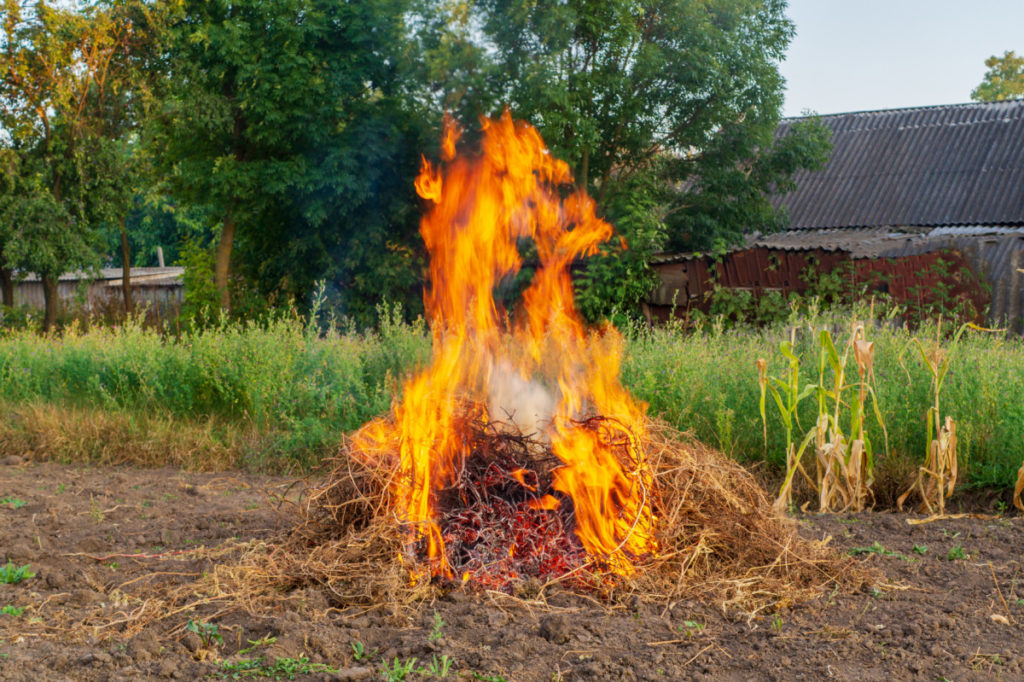
- Trim away and burn or throw in the trash all infected leaves and fruit. It’s important not to compost or move infected debris to another section of the yard.
- Wash your hands or gardening gloves thoroughly after doing so and any tools you may have used for trimming.
- Fungicides are used to treat blight. Copper spray is a popular and effective natural treatment. Or give a bio fungicide a try – fight microscopic beasties with your own microscopic beasties.
For these treatments to work, you have to catch blight very early, as once it’s started, it will keep reinfecting and spreading.
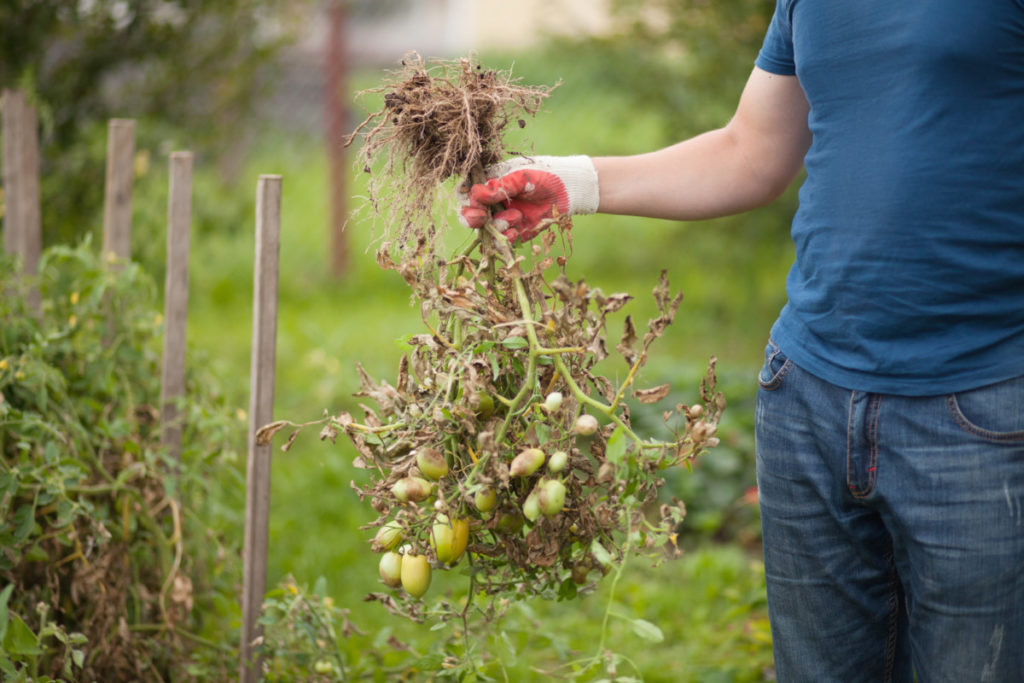
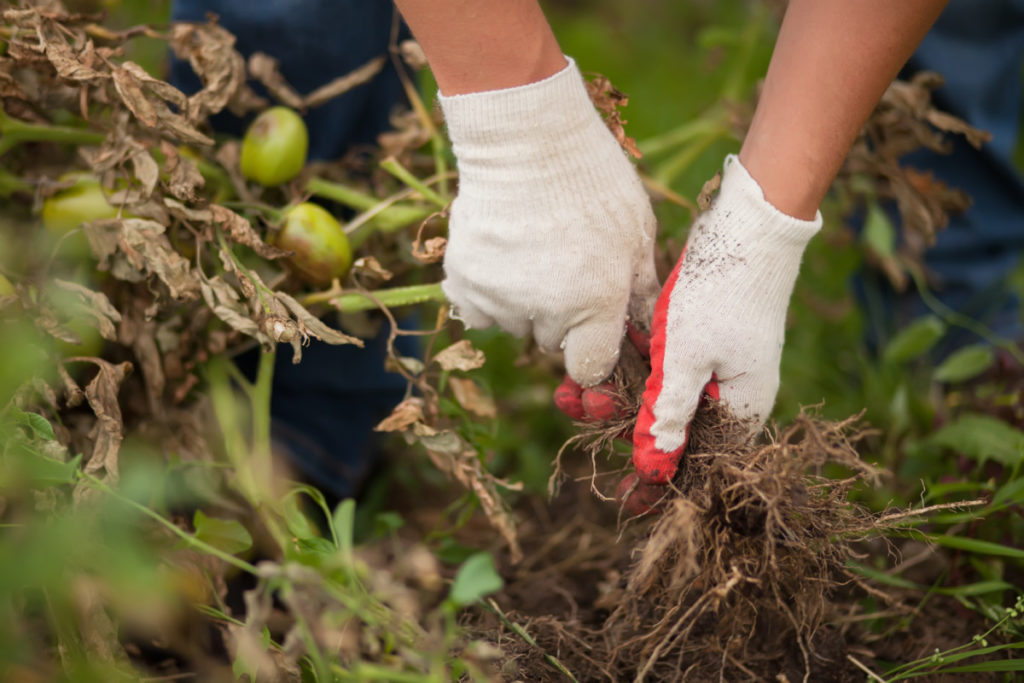
If the infection gets out of hand, it may be best to cancel your tomatoes for the year.

Pull up all of the plants and burn them. Add a bio fungicide to the soil, and don’t plant any nightshade veggies in the same area for two years.
Can I Still Eat It, Can I Still Can It
Yes, if you remove the spots, you can safely eat tomatoes infected with blight. But as my grandmother always said, “Just because you can do something doesn’t mean you should.” Infected fruit could be harboring other diseases which could make you sick or, at the very least, make the tomatoes taste bad.
You should never use these tomatoes for canning.
The fungus can change the pH of the fruit, making them unsafe for canning.
Now that you’re armed and ready, I hope you never have to put this information to use. But as any experienced gardener will tell you, you probably will.
In the meantime, I’ll leave you with these well-wishes – May your tomatoes be disease-free and bigger than your neighbors, and may your harvest fill your pantry shelves.

Get the famous Rural Sprout newsletter delivered to your inbox.
Including Sunday ramblings from our editor, Tracey, as well as “What’s Up Wednesday” our roundup of what’s in season and new article updates and alerts.