


Don’t you love easy food? There’s something so satisfying about saying, “I made it from scratch,” and knowing that it took you all of five minutes to make.
Honey-fermented ginger is like that. It’s one of those foods that sounds so impressive. But in actuality, it’s so easy.
Look, just don’t go telling everyone, okay? We fermenters have a reputation to uphold.
I think there seems to be this prevailing notion that fermented stuff is hard to make.
That just isn’t the case. In fact, fermented foods are one of my favorite things to put together and experiment with, mainly because once you get it in the jar, you just stand back and wait. It doesn’t get easier than that. Well, you know, except ordering pizza.

And today’s recipe is no different.
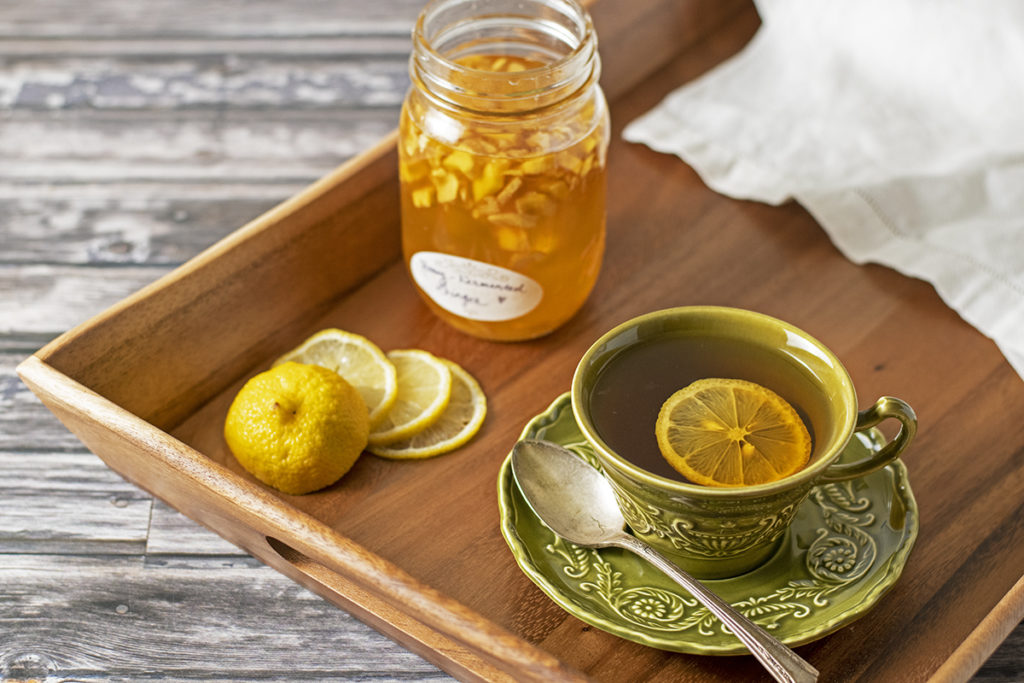
We’re going to take two incredibly nutritious foods with incredibly wonderful flavors and ferment them together to make honey-fermented ginger. The result is a delectable and zippy fermented syrup that you’ll find yourself drizzling on anything that needs a sweet little kick. And once you’ve had honey-fermented ginger in your tea, you won’t want a cup without it.
I also have a life-changing kitchen hack for you later in the article too. Trust me; it’s worth it to hang around.
But first, let’s talk a little bit about honey ferments.
Raw honey has a whole host of natural yeast and bacterial colonies that live quite happily within it. And given a tiny bit of water, honey will begin fermenting all on its own. That’s basically how you make mead, only with a great deal of water.
The natural sugars in honey cause the fruit cells to release the water inside them. Once the water from the fruit mixes with the honey, fermentation will begin, thus preserving the fruit in the honey. Now, if you’ve ever made mead or hard cider, or other foods, like fermented carrots, you’re probably thinking about bubbling containers with airlocks and fermentation weights.
Not so with a honey ferment; this is easy, remember? You don’t need any of that. Because there is so little water and so much sugar, it’s a much, much slower and gentler ferment.
There will be no burping of jars or escaping gasses that need tending to for this fermentation project.
Not to mention you’ve got all the health benefits of raw honey and ginger in one jar, ready to go. Feeling a little run down? Use this honey in your morning smoothie for a healthy anti-inflammatory, probiotic boost. Or take a tablespoon to help soothe a scratchy throat and quiet a dry cough.
The health benefits of both raw honey and ginger are well documented. It only makes sense to combine the two into a super fermented food that’s just as good for you as it is tasty.
Shall we give it a go?
Making Honey-Fermented Ginger
Ingredients
- Raw honey, at least one cup
- Organic ginger, peeled and roughly chopped

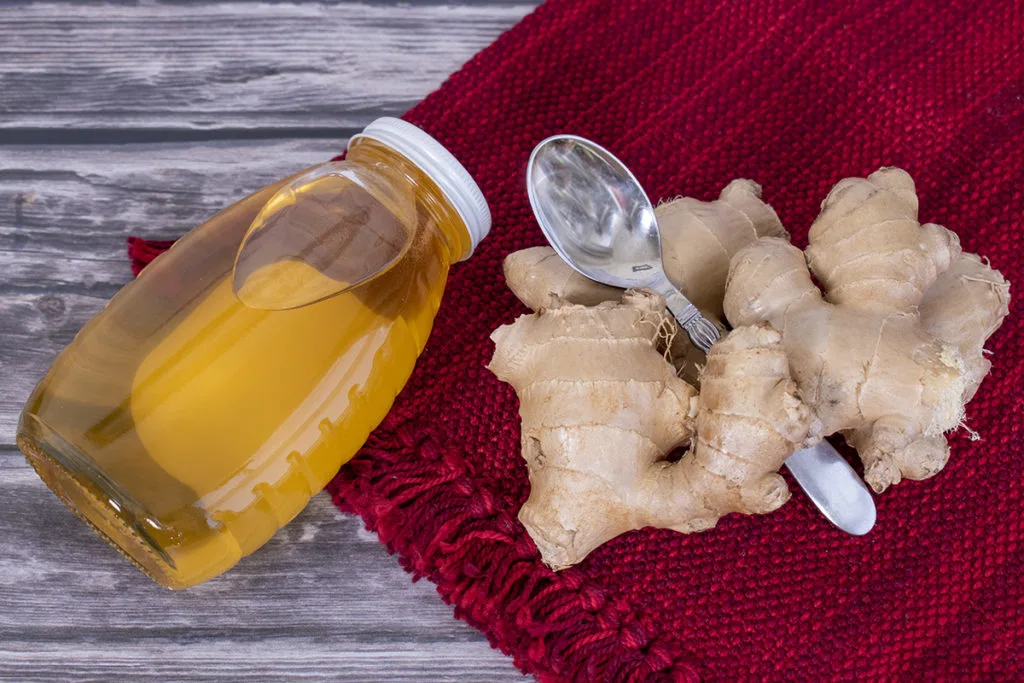
Equipment
- A sterilized pint jar with a lid
- A knife and cutting board
- And a spoon
A quick note about your ingredients.
You have to use raw honey when fermenting because pasteurized honey, well, won’t. Most commercial honey is pasteurized to keep it shelf-stable, which destroys the natural bacterial and yeast colonies living within it. This means no fermentation.
Likewise, it’s important to use organic ginger for our ferment. Non-organic ginger is often irradiated, which means no happy little yeast on it. Choose the freshest ginger you can get your hands on, as it will still be nice and moist too.
Even better, why not grow your own ginger? You don’t have to live in the tropics to grow it, as Elizabeth explains here.
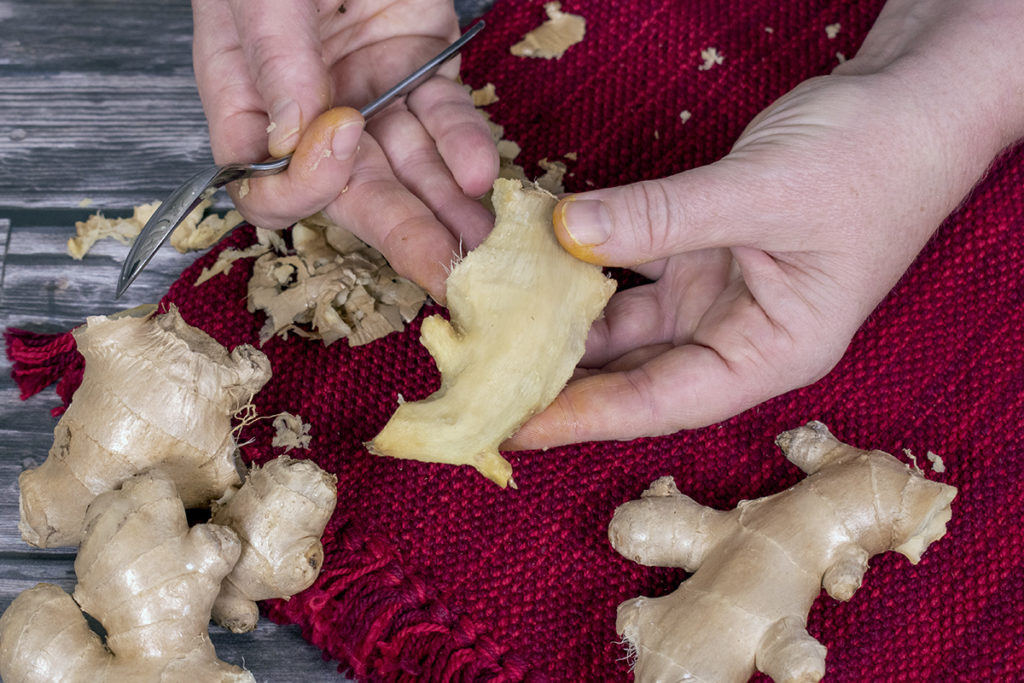
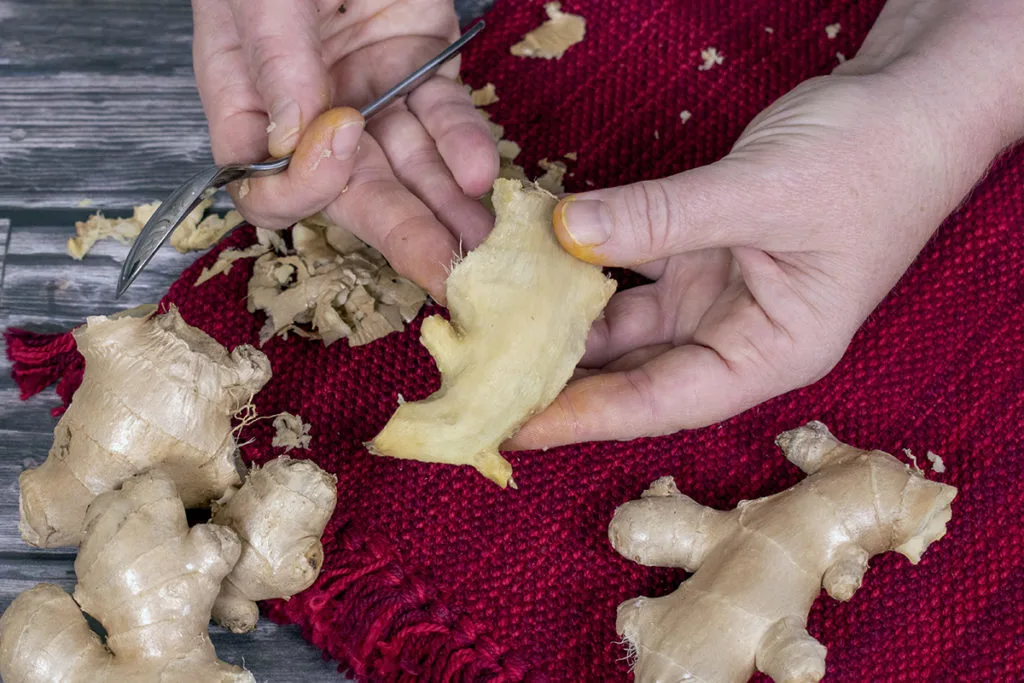
The first thing we’re going to do is peel our ginger, and oh my gosh, do I have the coolest trick to share with you guys.
How to Peel Ginger Without Losing Your Mind
For years every recipe that called for “peeled and grated” ginger made me want to weep. Not the grating part, that’s easy; I’ve got a great Microplane that makes grating a cinch.
It was the peeling of the ginger that would have me in tears.
I would pull out my trusty vegetable peeler or a paring knife and spend the next ten minutes hacking large chunks off of my ginger just trying to get the skin off.
Lord knows how many times I nearly took a finger off, trying to peel ginger.
And then, one day, a dear friend watched this Battle of the Ginger go down in my kitchen while I was cooking dinner for us. She said, “What on earth are you doing?” At least I think that’s what she said; she was laughing pretty hard.
I said, “I’m trying to peel this ginger for the chicken.”
“Stop, stop, stop before you hurt yourself,” she said, walking over to my silverware drawer.
She reached in the drawer and then handed me a spoon.
Yup, a boring old regular spoon.
“Try this,” she said, “Use the side and scrape.”
“Um, yeah, right. I can barely cut through this skin with a vegetable peeler or a sharp knife, and I’m just going to scrape it off with the side of a spoon?”
Yes, actually. That’s precisely what I did.
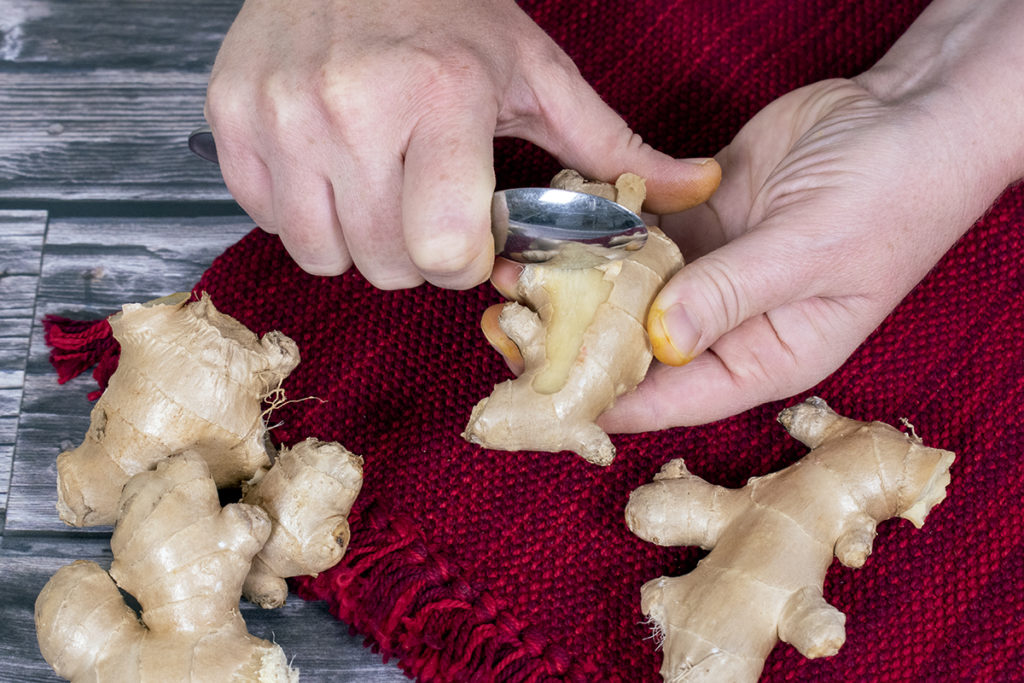

Using the side of the spoon to scrape down the ginger, the skin easily peeled right off. I was shocked and amazed. I stood there speechless for a moment (which is unusual for me). But then I was so impressed I continued peeling every last piece of ginger I had in my fridge.
Some kitchen hacks are life-changing; this is one of those hacks.
Grab a spoon and give it a try. It works so well. You can even get the skin around the small knobs of ginger, right down to where they meet up with the larger chunk.
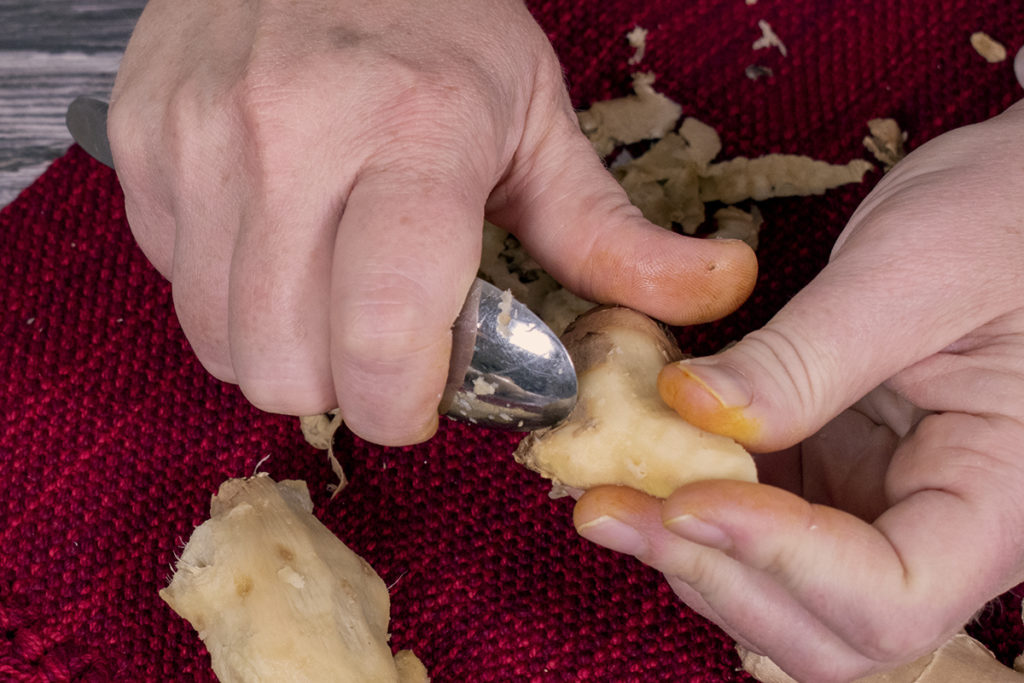

(Please excuse my fresh turmeric-stained fingertips, I was making Fire Cider before this.)
My life has become infinitely easier because of this tip. Well, my ginger-peeling life anyway.
We now return you to your previously scheduled tutorial.
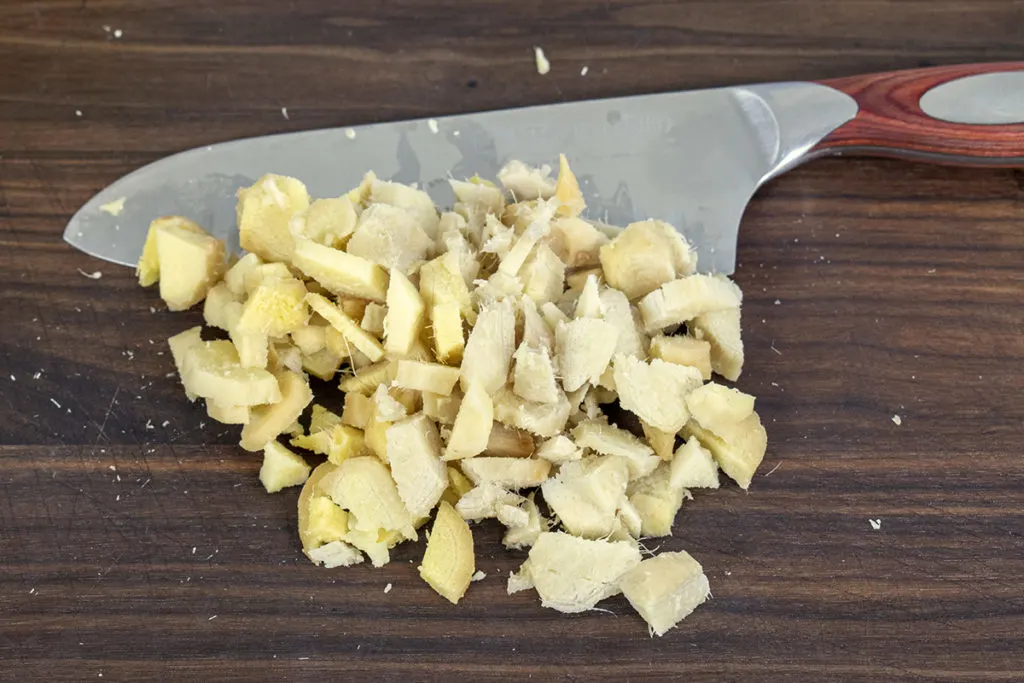
Now that you’ve got your ginger peeled with your new kitchen superpowers, roughly chop the ginger. We want to expose as much surface area to the sugar in the honey as we can to extract enough water to get the fermentation going.

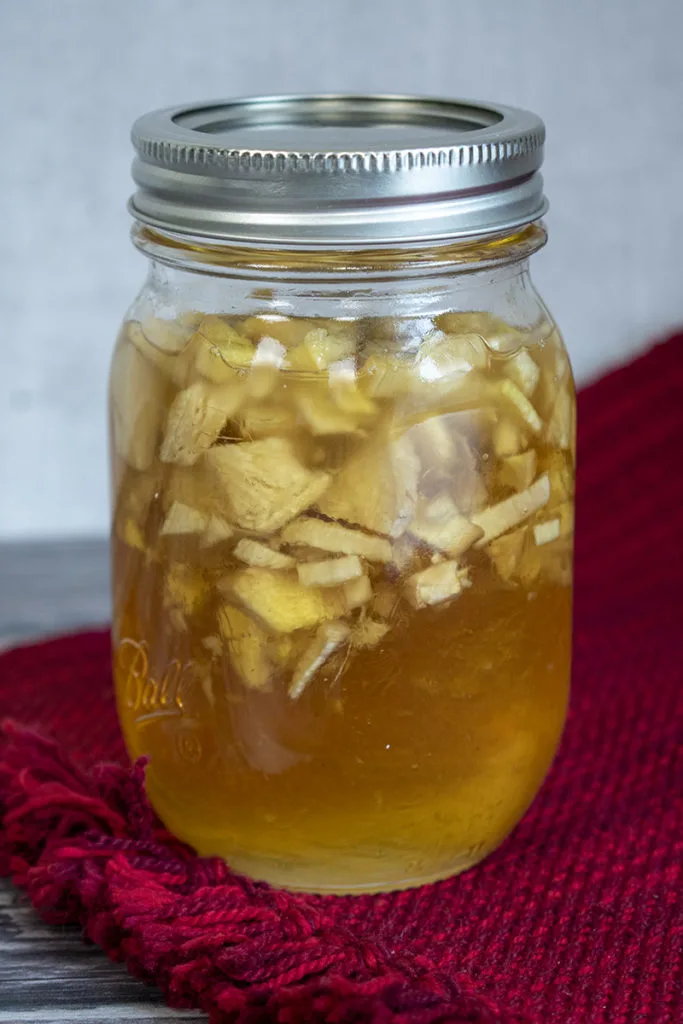
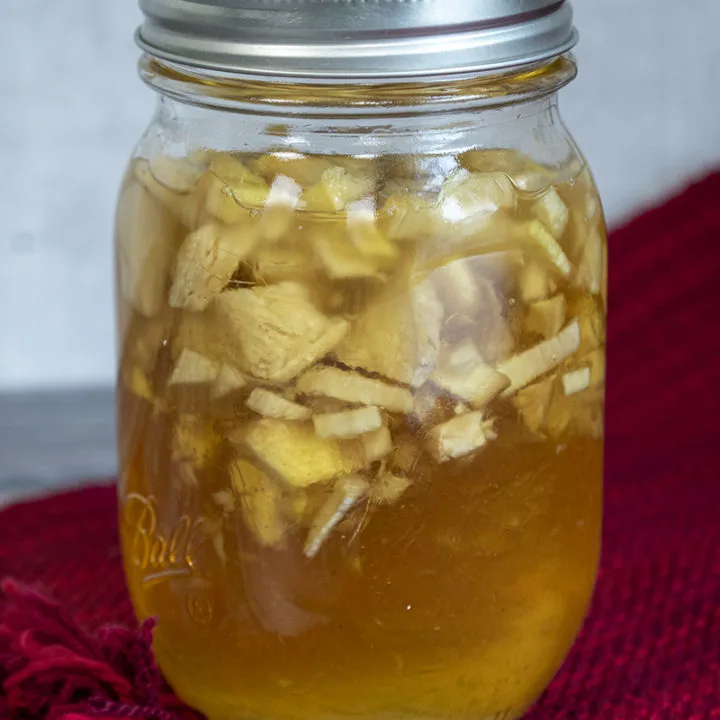
Place the chopped ginger in the sterilized jar. You want enough to fill the jar halfway.
Now slowly pour the honey into the jar. You want to make sure it filters down over the ginger into the bottom. Keep pouring until the honey covers the ginger, plus an inch.

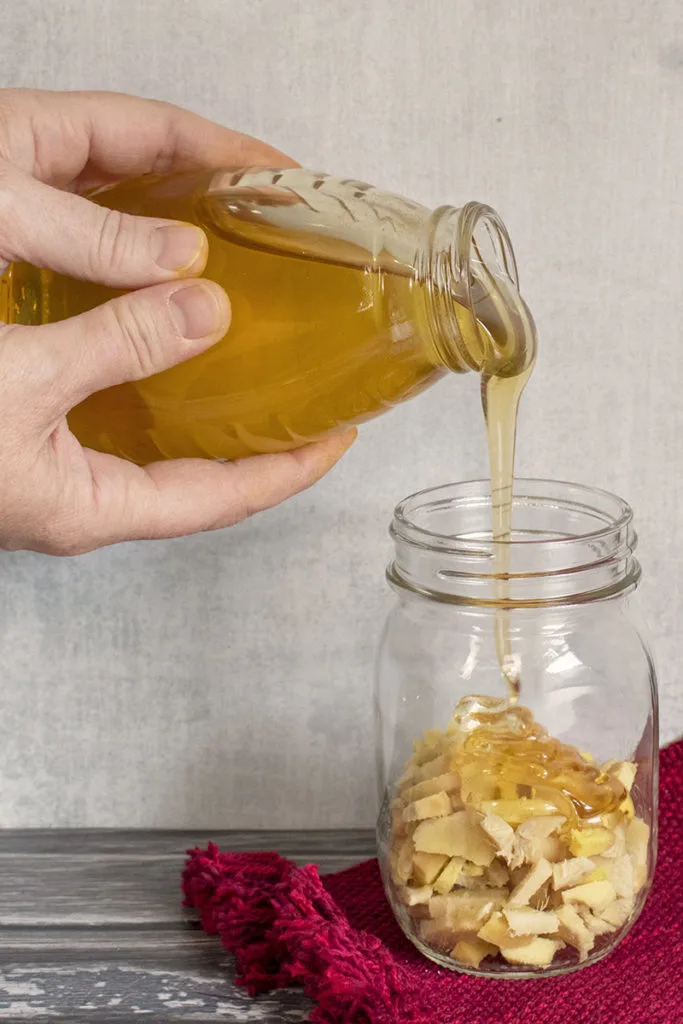
But be sure you leave a couple of inches of room at the top of the jar. As water is released from the ginger, it will raise the level of liquid within the jar.
At this point, the ginger will float on the top of the honey; that’s exactly what we want. Go ahead and screw the lid on the jar.

You’re going to stir the jar with a clean wooden spoon every day for the next two weeks.
After two weeks, you’ll begin to notice the ginger is darker in appearance and is starting to float below the honey in the jar. You’ll also notice that the honey is less viscous and has become more fluid. You may (or may not) even notice super tiny bubbles at the surface of the honey.
These are all good signs that you have an active honey ferment.
After two weeks, dip a teaspoon in there and give it a taste. If you like it as is, seal it back up, pop it in the fridge and use it as often as you like. By keeping the honey ferment in the fridge, you will slow the fermentation almost to a stop. It will keep quite well in the fridge.
Like with any fermented food, keep an eye out for mold, a bad smell or other signs of spoilage. Though honey is a natural preservative, and fermentation discourages other organisms from growing, you can have a batch go bad from time to time. If you suspect your honey ferment has gone bad, pitch it and start a new one.
And of course, never give honey to infants.
If you want a stronger taste, you can leave the honey-fermented ginger out on your counter for another couple of weeks or even months. I like a strong ginger flavor that bites a bit. You no longer need to stir it at this point. Just taste it now and then using a clean spoon.

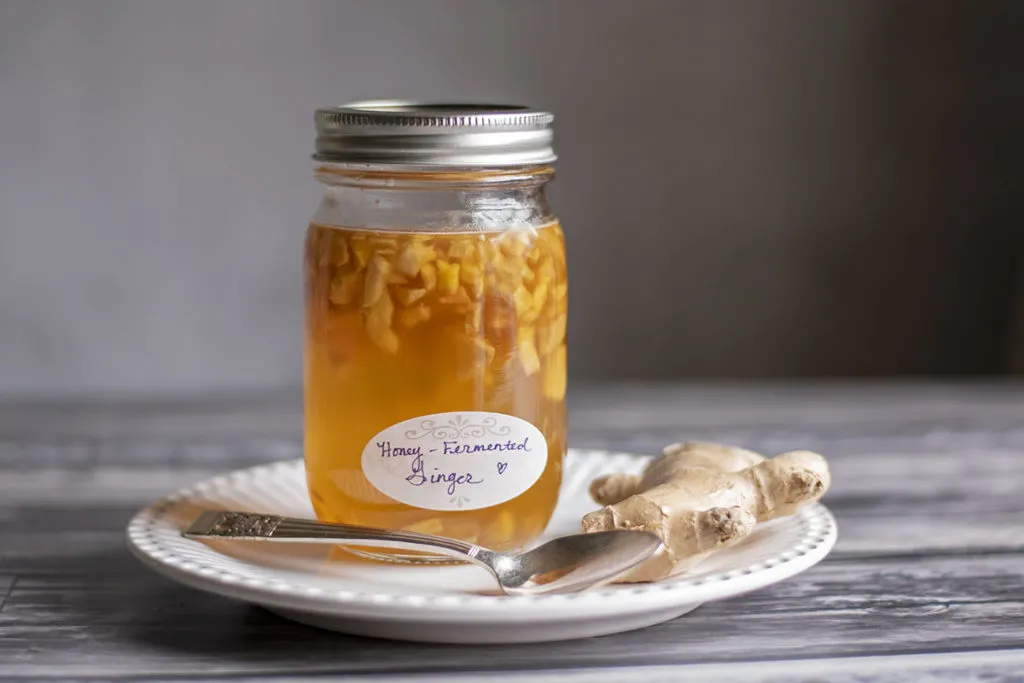
When it reaches a flavor you like, store it in the fridge. Or don’t, it’s really up to you.
You will slow the fermentation down by keeping it in the fridge, but as I said, it’s a very slow ferment, to begin with. To be honest, I rarely put my honey ferments in the fridge, mainly because they get used up so quickly. Then it’s time to make a new batch.
And honey-fermented ginger is one of those things that I always keep a batch of going. I like to have it on hand when I’m cooking. The flavor combination works well with so many foods. It’s great in salad dressings, marinades, smoothies. Use it to baste a roast chicken for a bird you won’t soon forget.

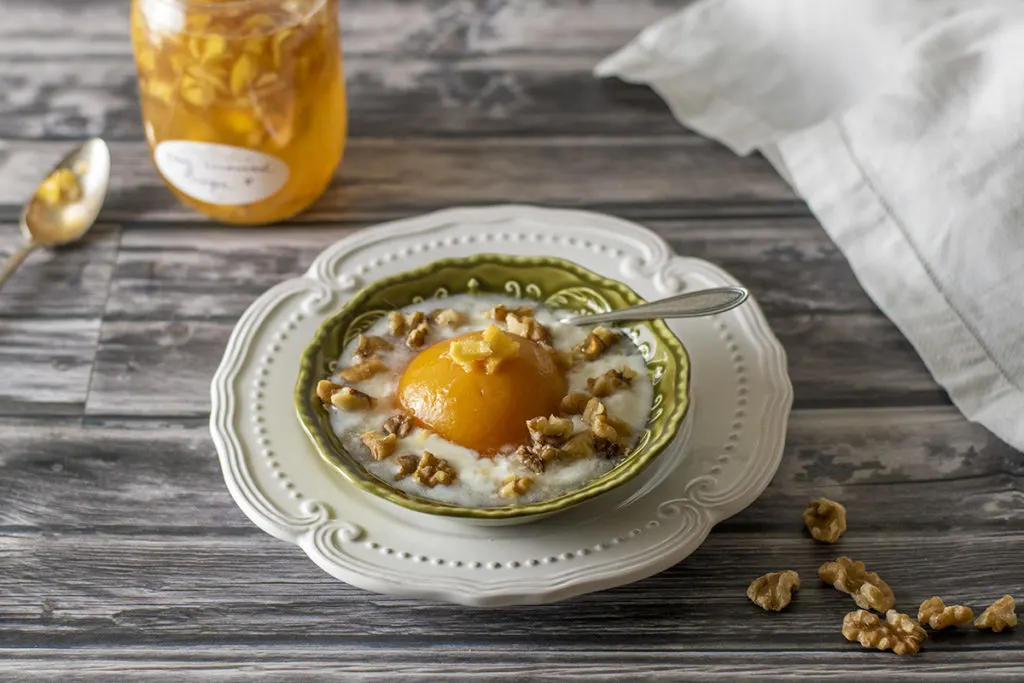
This delightful syrup is marvelous as a cocktail mixer, too, especially in Hot Toddies, when you’re feeling miserable with a cold. Drizzle some honey-fermented ginger over ice cream, yogurt, or oatmeal. Stir a little into your next batch of apple crisp. Sweet or savory – the possibilities are nearly endless when it comes to honey and ginger.
Other Honey Ferments
You can do this with more than just ginger; that’s the cool thing. The natural yeast on the outside of fruit and yeast colonies in raw honey are just raring to go.
Once you get a jar of honey-fermented ginger going, you can use the same process to start other honey ferments. As long as what you intend to ferment is fresh and moist, you can ferment it. Just be sure to chop up larger, less porous fruits to give the honey more surface area to pull the water out of the fruit cells.
Some great fruits to make honey ferments with
- Peaches
- Cherries
- Blueberries
- Pomegranate
- Elderberries
- Apples
- Rosehips
- Pears
- Cranberries
- Blackberries
- Raspberries
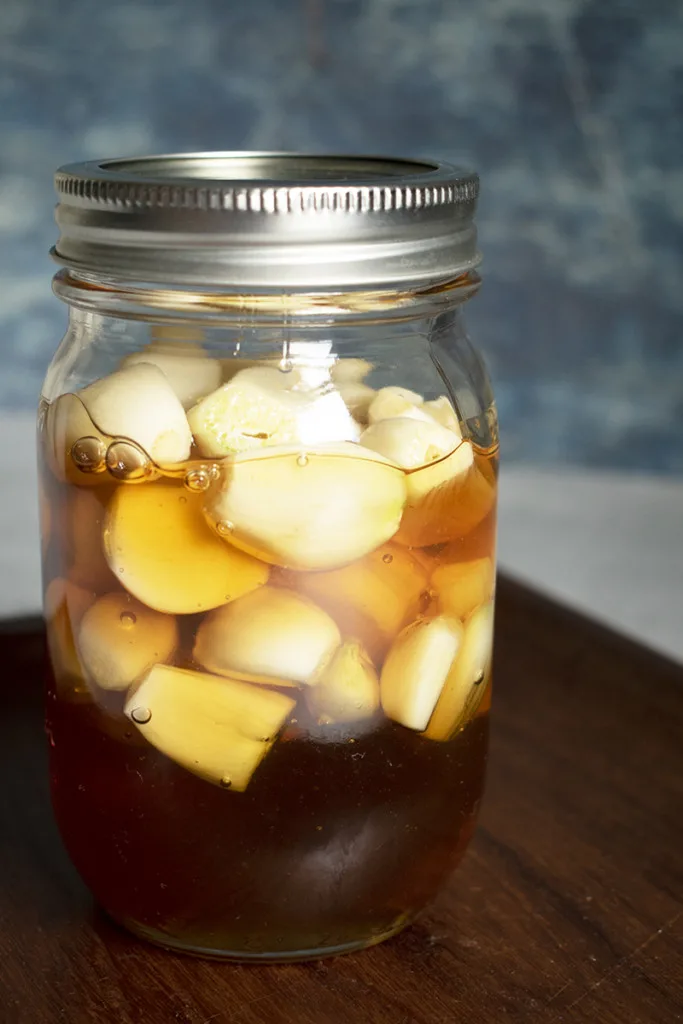
And if you want something really fun to cook with, give honey-fermented garlic a try.

Or for a honey ferment with heat, chop up jalapeno, Thai dragon, or other hot peppers.
Once you make a couple of honey ferments, you’ll quickly see how useful they are in making even the most boring dishes come to life. Make some honey-fermented ginger, and I’m sure another honey ferment will be joining it in your refrigerator in no time.
Or perhaps you’d like to give Cheryl’s recipe for canning cherries in honey syrup a try, no fermenting required.

Honey-Fermented Ginger
We’re going to take two incredibly nutritious foods with incredibly wonderful flavors and ferment them together to make honey-fermented ginger. The result is a delectable and zippy fermented syrup that you’ll find yourself drizzling on anything that needs a sweet little kick.
Ingredients
- Raw honey
- Organic ginger
Instructions
- Peel your ginger using the side of a spoon to scrape off the skin. Chop the ginger into small pieces.
- Place the chopped ginger in a sterilized jar. You want to fill it half way.
- Slowly pour the raw honey into the jar. You want to make sure it filters down over the ginger into the bottom. Keep pouring until the honey covers the ginger, plus an inch.
- Screw the lid on the jar.
- Every day for two weeks, use a clean wooden spoon to stir the jar.
- After two weeks, your honey fermented ginger should be ready. Pop it in the fridge to slow the ferment and enjoy.

Get the famous Rural Sprout newsletter delivered to your inbox.
Including Sunday ramblings from our editor, Tracey, as well as “What’s Up Wednesday” our roundup of what’s in season and new article updates and alerts.