


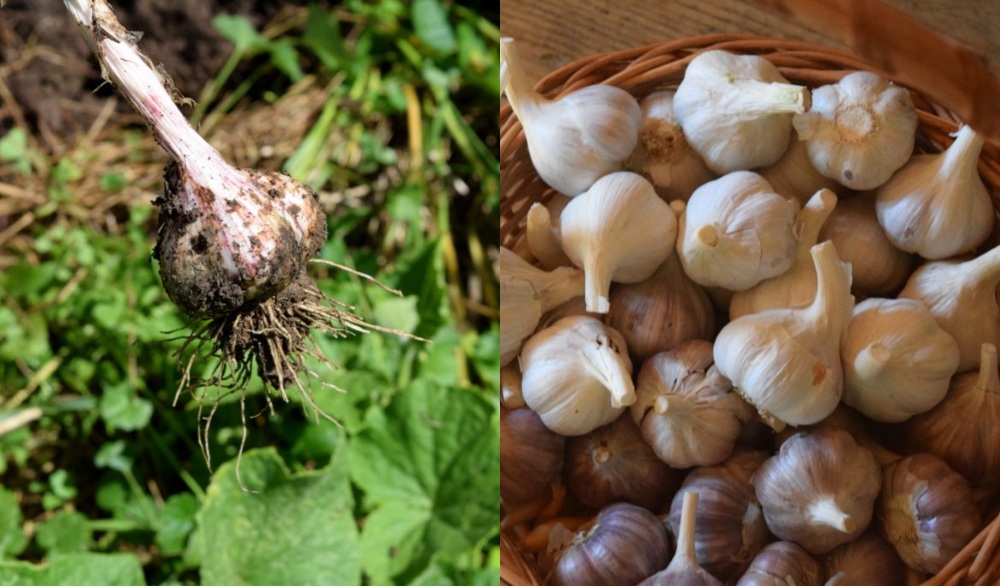

Garlic seems to be the one crop, other than zucchini, that grows in our garden on a reliable basis year after year.
Even if we do not plant it, or unsuccessfully manage to dig up every head of garlic, there will always be some rogue garlic cloves ready to emerge the following spring.
In this way, garlic almost acts as a perennial. It is a very forgiving garden plant.
If you really want good looking garlic however, you shouldn’t rely solely on the “sit and wait to see what happens” method.
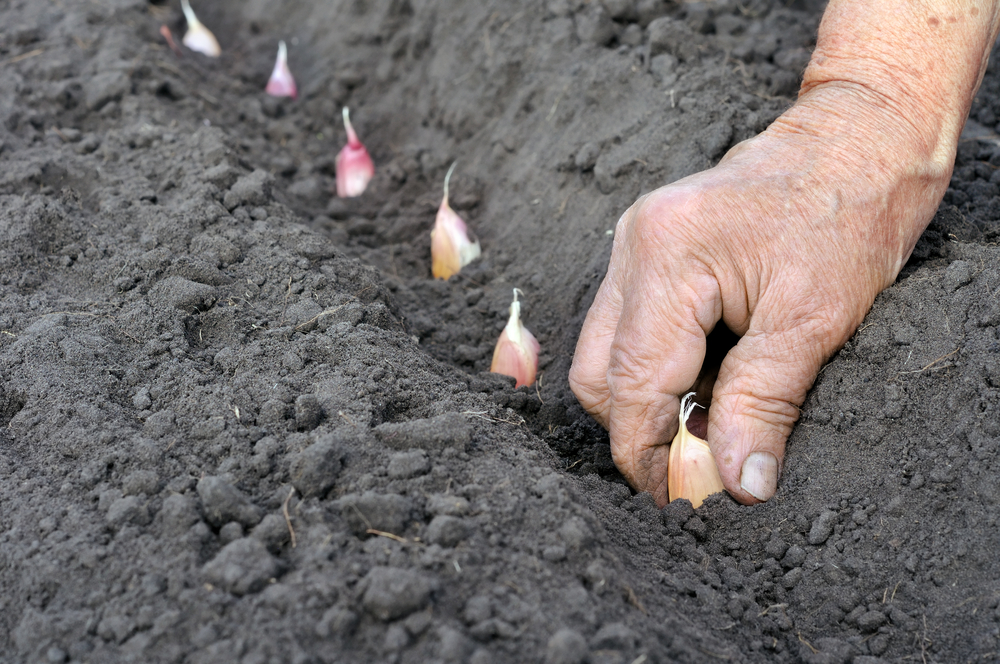
In order to harvest the best garlic crop possible, you also need to plant it in good time. For most gardeners, fall planting of garlic is the moment when you need to take action.
When garlic is planted in orderly rows and covered with a layer of mulch, it is nearly impossible not to have a harvest, no matter how big or small.
9 reasons to grow garlic in your garden
There are potentially more than nine reasons to grow your own garlic and to add to this thought, food security comes instantly to mind.
Plus, growing garlic is both easy and fun – which makes learning to grow it a wonderful skill to pass on to others.
If you happen to be someone who loves cooking from scratch, it makes perfect sense that you have access to locally grown garlic. From the backyard is best!

There is something wonderful about knowing the origins of your food. So, when you are out shopping for garlic at the store, note the country of origin. Do you really need to buy garlic from hundreds, if not thousands of miles away, when you can harvest from just a few feet? Perhaps with the ability to grow enough to make a side income from home too?
1. Garlic is downright hardy.
At least in cold temperatures.
Garlic can be planted in fall just before the soil freezes, which leaves you with a crop in the soil before winter arrives.
It makes you feel like you are ahead of the planting game – and with one plant that is sure to emerge with warmer temperatures in spring.
2. Garlic is a low-maintenance crop.
A little bit of mulch over your growing garlic will go a long way in terms of water retention in the soil. Couple that with the fact that garlic needs minimal water, and you will quickly come to see that raising garlic takes little care from your part.
In just nine short months, your garlic will grow up, for the most part all on its own. The only thing you really have to do, is to keep it free of weeds. That should be easy enough.
Bottom line, garlic doesn’t take weekly attention. It is enough to check on it occasionally, which makes it a perfect plant if your garden is not directly in your backyard, rather at a community garden or in a friend’s outdoor space.
3. Garlic is space efficient.

What this means, is that you can grow a significant amount of garlic in a very small space.
Possibly even growing all you need for an entire year (plus for replanting again next fall).
Garlic can also be planted in containers, including a 5-gallon bucket. If maximizing your garden space is important, be sure to add some garlic to your to-plant list.
4. Garlic has minimal diseases and pests.
Anyone who has ever grown tomatoes knows that it comes with its own set of challenges.
Germination is iffy, the plants need support and they are just as attractive to you as they are to many other garden insects and diseases.
By contrast, garlic is very independent.
Simply plant the bulbs (with the right part sticking up) and wait for them to emerge.
Of course, you will still need to keep an eye out for random garlic pests.
5. Garlic is an early riser.
Since most garlic is planted in fall, it is also one of the first plants to emerge in spring, along with perennial chives and strawberries.
So early in the season, it already shows that it is reliable.
If you can count on one crop to grow, besides zucchini, know that you can trust in garlic. No matter how small the cloves grow, you will most always have something to harvest.
Something, as is the case with homegrown food, is always better than nothing.
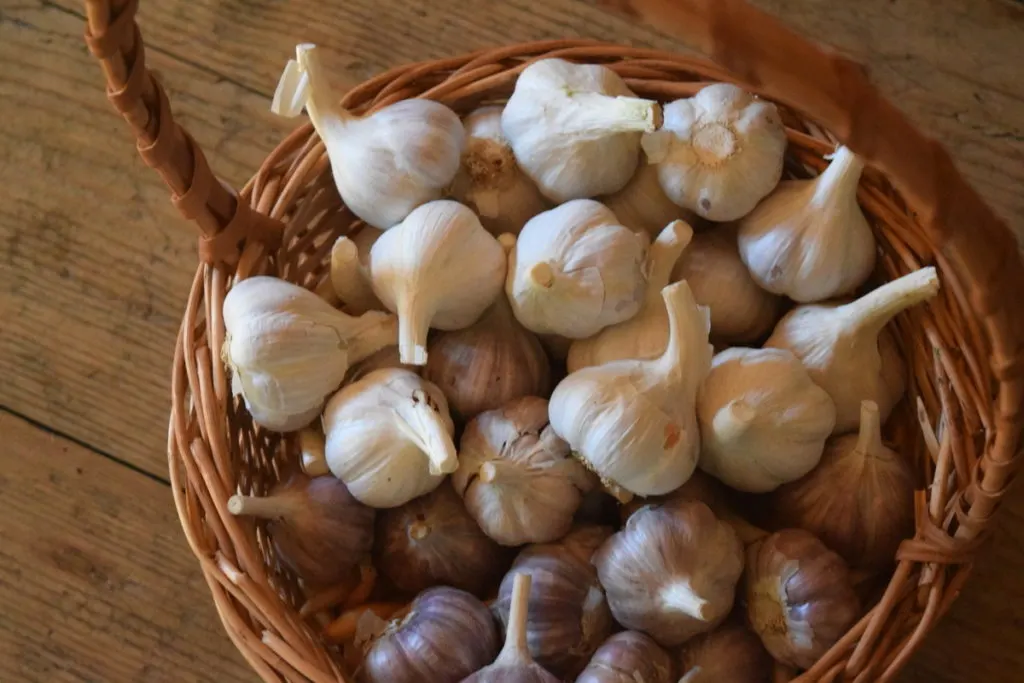
6. Garlic is easy to store.
Sometimes gardeners get worried about storing their crops.
Onions can sometimes get bruised and go off. Just as one bad apple can spoil the whole bunch.
Garlic, on the other hand, is easy to cure and store. There simply is not a lot that can go wrong, other than the fact that they receive too much light, or they freeze in winter.
You’ll find more details about storage options for garlic below.
7. Garlic scapes.
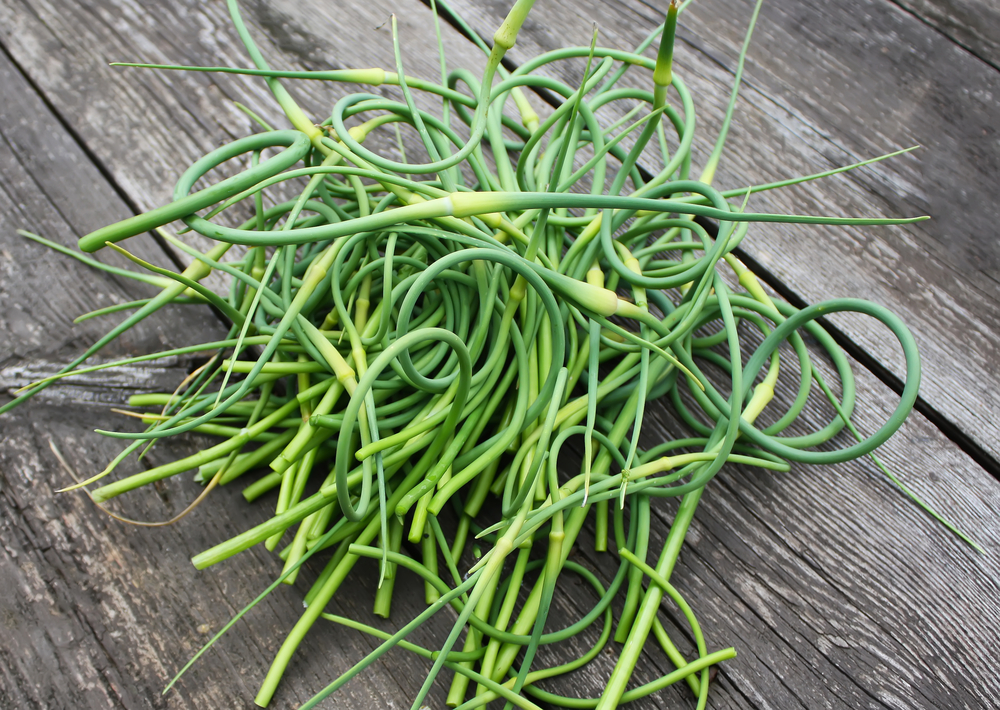

Anytime a plant has a secondary crop, you know it has to be good.
If you are not yet familiar with garlic scapes, make sure to become informed, especially if you like to experiment in the kitchen.
You can turn garlic scapes into a delicious pesto, work them into your hummus, grill them alongside your burgers, or even toss them into a hearty and nourishing garlic scape soup.
Here’s our total guide to harvesting garlic scapes and fifteen brilliant recipes to try.
8. Garlic is healthy.
Both for you, and as a companion plant in the garden.
As if you needed more reasons to eat garlic…
- garlic is medicine
- it can boost your immune system, helping you to fight off the common cold
- garlic can help reduce blood pressure
- it is loaded with essential vitamins and minerals, including vitamin B6, manganese, selenium, iron and copper
- garlic is anti-inflammatory
- it fights fungal infections as well as allergies
- garlic also aids digestion, no matter whether you eat it raw or cooked
Plus, it makes many dishes taste absolutely amazing. That is, if you like garlic. Even if you just like the idea of garlic, plant it anyway. The flavor may just grow on you.
9. Variety is the spice of life.
How many kinds of garlic can you buy from the store? One? Two?
It turns out that there are more than 300 varieties of garlic grown worldwide!
Embrace a taste for biodiversity and find one, or more, varieties of garlic that grows well near you. In time, you will realize that not all garlic tastes the same, and that there is such a thing as softneck and hardneck varieties to choose from.
Growing garlic
Garlic is a long season crop that is best grown in well-draining soils. Too much water in the soil and high humidity around the foliage promotes disease.
Keep in mind that garlic thrives in full sun, with an absolute minimum of 6-8 hours of sunlight per day.
When you are careful about where you place garlic in the garden, you can be rewarded with a bumper crop! Even in small spaces you should be able to grow enough for your own needs.
But the real trick to growing, eating and enjoying your garlic is in knowing when to harvest it.
If you pull it too early, the cloves may not be distinctly separate yet. Harvest too late, and the paper surrounding the bulbs will have begun to decompose in the soil, leaving you with less than ideal bulbs for storage – yet, still suitable for fresh eating.
3 quick steps to harvesting garlic
Once the lowest leaves of the garlic stem have begun to turn brown, you have a short window of time for harvesting – about 2 weeks.
To be absolutely sure it is the right time, dig up a test bulb from here and there to see how it is progressing.

Then follow these 3 simple steps to harvest your entire bed of garlic:
1. Stop watering.
When harvesting garlic, it is best to dig in drier soils. Not only does this reduce moisture levels around the bulb, allowing your garlic an opportunity to cure faster, it cuts down on chances of fungal growth.
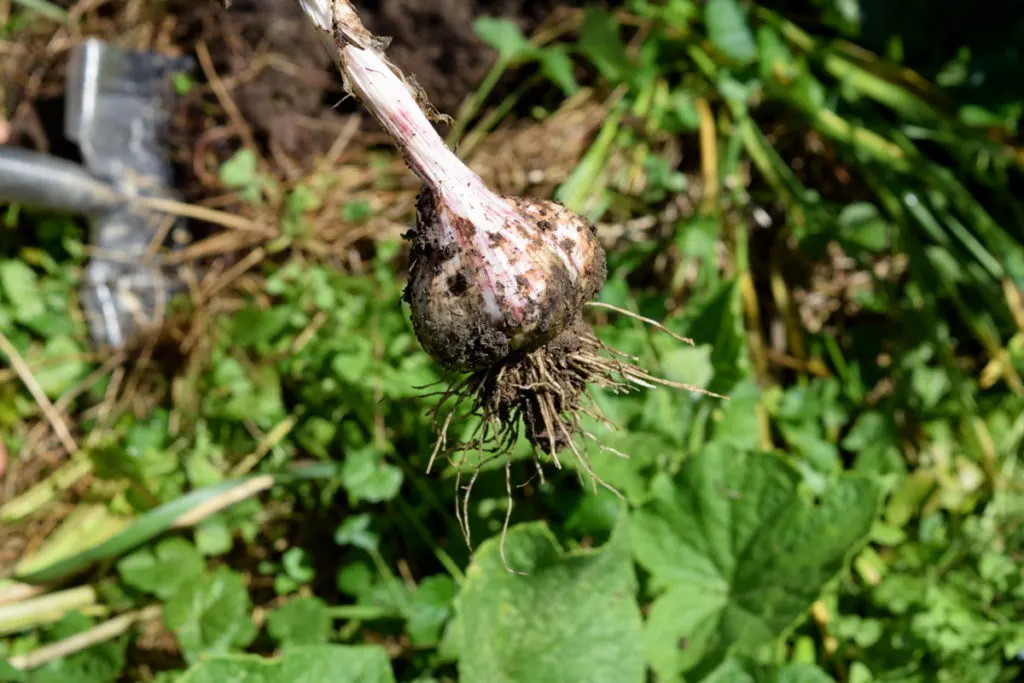
2. Dig your garlic with care.
Going row by row, loosen the soil with a spade or fork, staying far enough away from the bulbs.
Watch out! Some may grow larger than you expect – as is the case with growing elephant garlic. Shake off the soil and set them aside to dry.
3. Dry the garlic before curing.
All it takes to dry off the excess soil, is a day or two, in an out-of-the-way outside area that receives airflow, as well as shade and sun. It is ready for curing when the dirt can be rubbed off easily by hand.
When to harvest garlic?
If you had the chance to plant your garlic in fall, it will be ready to harvest in early to mid-summer.
Spring-planted garlic will be ready to harvest a bit later, from mid-summer to early autumn.
If you are into preserving your own garden crops, canning and making the occasional batch of dill pickles with garlic, the sooner you can harvest the better. It is a wonderful feeling when it all comes from your own backyard!
Back to the harvesting of garlic: besides figuring on a mid-summer harvest date, there is another way to tell when your garlic is ready to harvest.
Watch for signs of the outer leaves turning brown and dying back. In general, the bottom 2-3 leaves should be brown and the rest will still be green, this is the best time to harvest.
An even better indicator is to actually dig up a random sample, or three or four, depending on the size of your garlic plot.
Carefully digging up the garlic
When the timing is right, you have to pick your harvesting tool of choice.
Spades and pitch forks both work well for harvesting garlic, though it depends on how much mulch you have applied, as well as the strength of your soil.
Heavily mulched beds and no-dig gardens tend to have looser soils, whereas conventionally dug gardens have more compact soils. This of course, also depends on your soil type, ranging from hard clay to loose sand.
With a spade or fork, dig into the ground, just far enough from the garlic not to touch it, and gently lift with foot and hand on the stem, at the same time.
This loosens the roots, allowing it to come free.
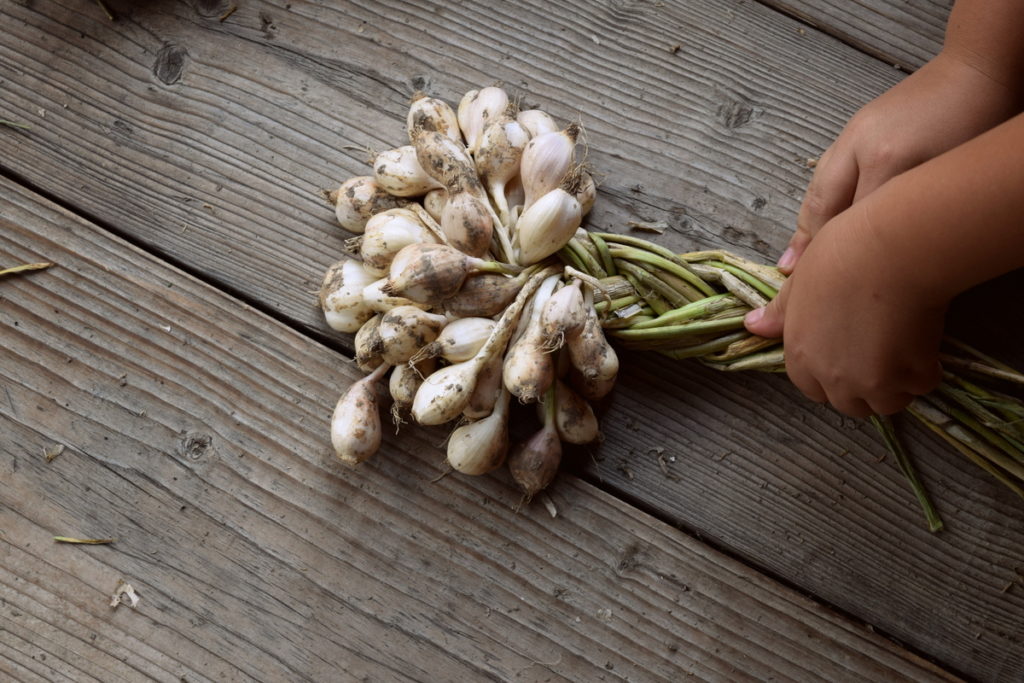
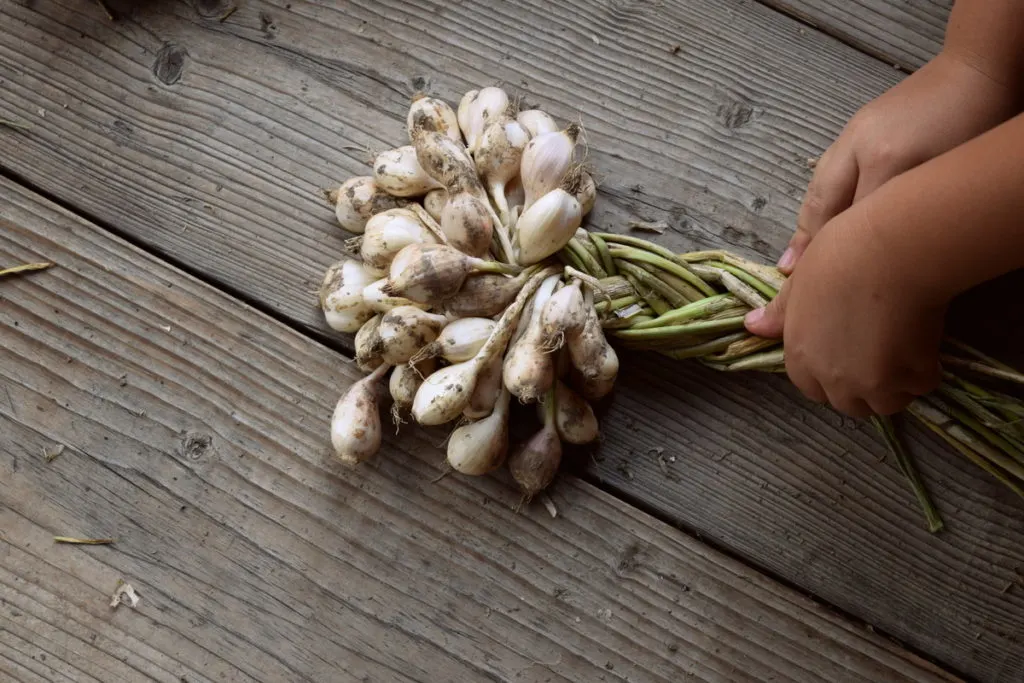
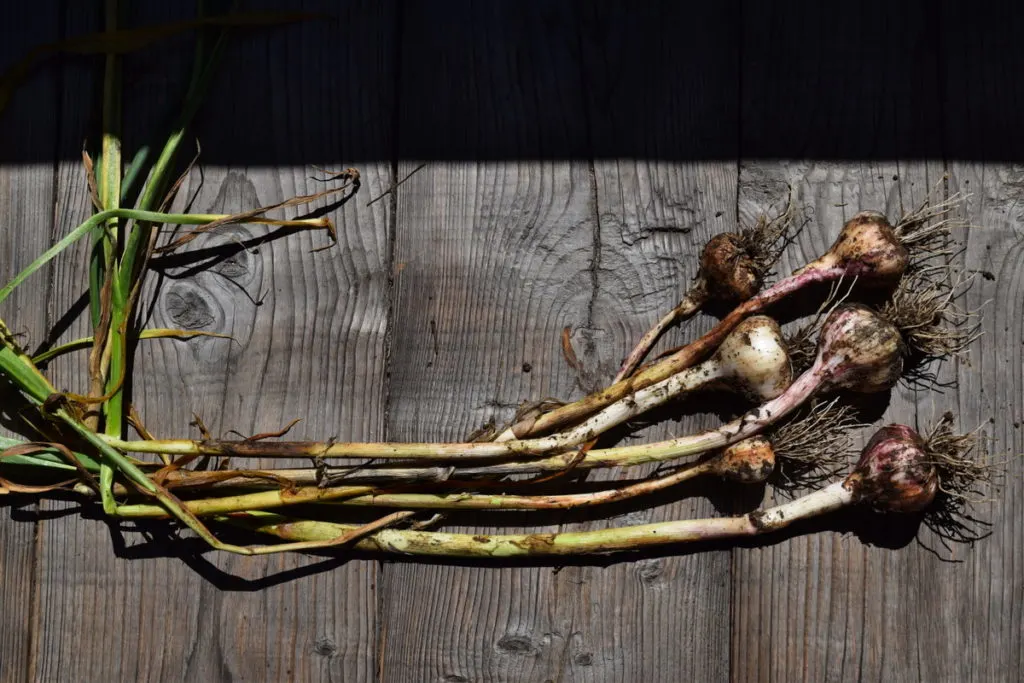
Give each bulb a shake to remove excess soil and make a pile for curing.
One thing is for sure, you will want to handle the harvest of your garlic mindfully, taking care not to bruise or cut into any cloves. If you do damage a few, go ahead and clean those, then eat them fresh.
Don’t bother about trying to cure or store damaged garlic – make dried garlic powder or pickle them instead.
Curing garlic
Once you have dug up as many heads of garlic as you can find (the stems will be indicators, unless you are very late in harvesting in which case they will have already rotted) it is time to cure them before storage – that is, to properly dry them out.
Curing garlic allows the cloves to dry out, along with the paper wrappers, it is nature’s perfect seal.
The best place to cure garlic is outdoors, in a dry space and out of direct sunlight with plenty of airflow.

Attics are often hot and stuffy, basements usually too humid (unless you have a dehumidifier). Neither are ideal places for curing garlic. Refrain from bringing it indoors until it is completely dry.
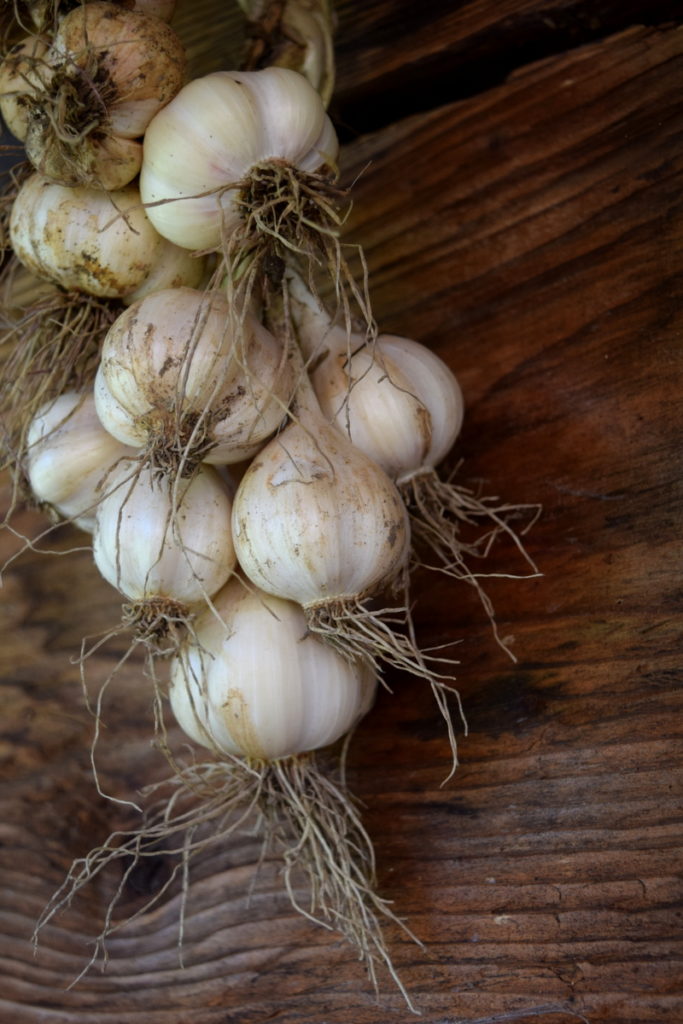
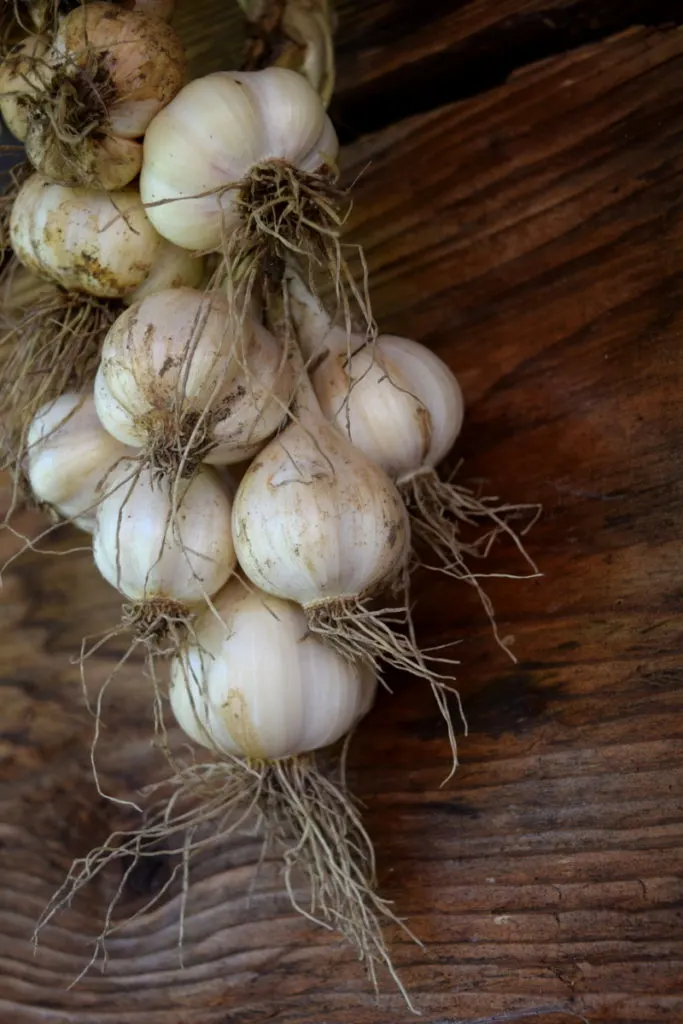
Garlic can be cured either in single layers over a sheet of wire mesh or on a drying rack, or by means of braiding the stems and hanging until it dries.
The second version is such a space saver! And beautiful to look at as well.
We leave our braids of garlic outside next to the front door, under the eaves to be out of the rain and sun, at the same time exposed to all the breeze they can handle.
Garlic takes a minimum of two weeks, up to a month or more, to properly cure for storage.
Checking to see if garlic is cured
Outside of approximating time, which is best done with years of experience, there are two more ways to test if your garlic is properly cured for storage.
The look test. Garlic is cured when the skins become papery and when the green stems turn completely brown. In essence, it looks like what you buy from the market, or store.
The cut test. To be completely sure your garlic is ready for storing, cut the stem about an inch above the top of the bulb. If there are any signs of green, or moisture, then it is not ready yet. Leave it another few days and check again. The stems must be completely dry before setting the garlic aside for winter.
Storing garlic
Now, that you’ve spent so much time and effort of getting to this stage, you won’t want to lose it all.
So, let’s do it right the first time!
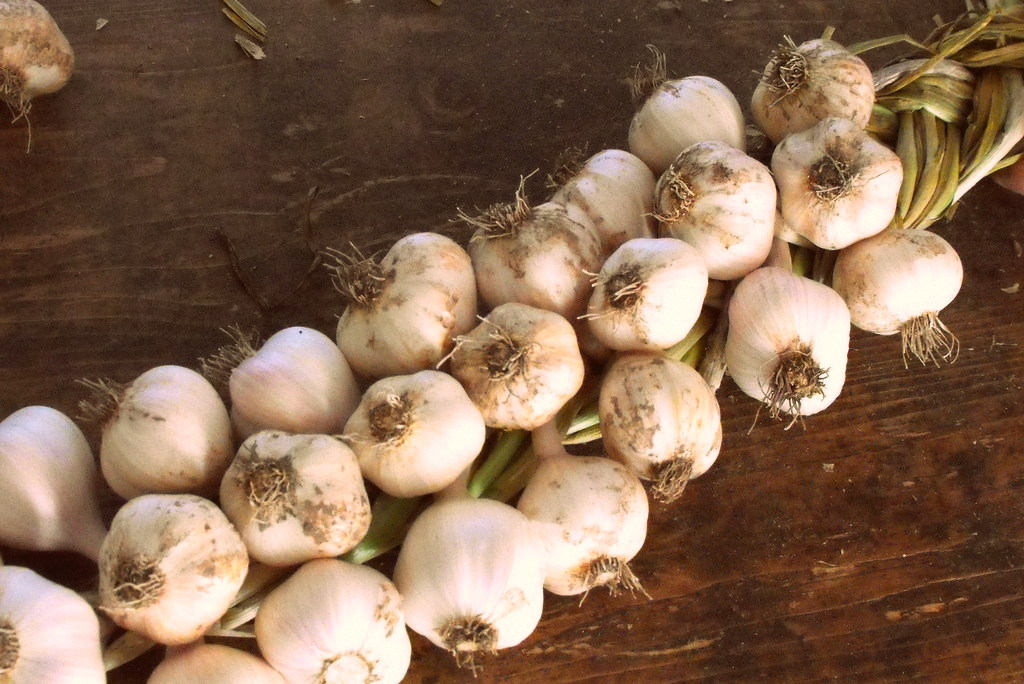
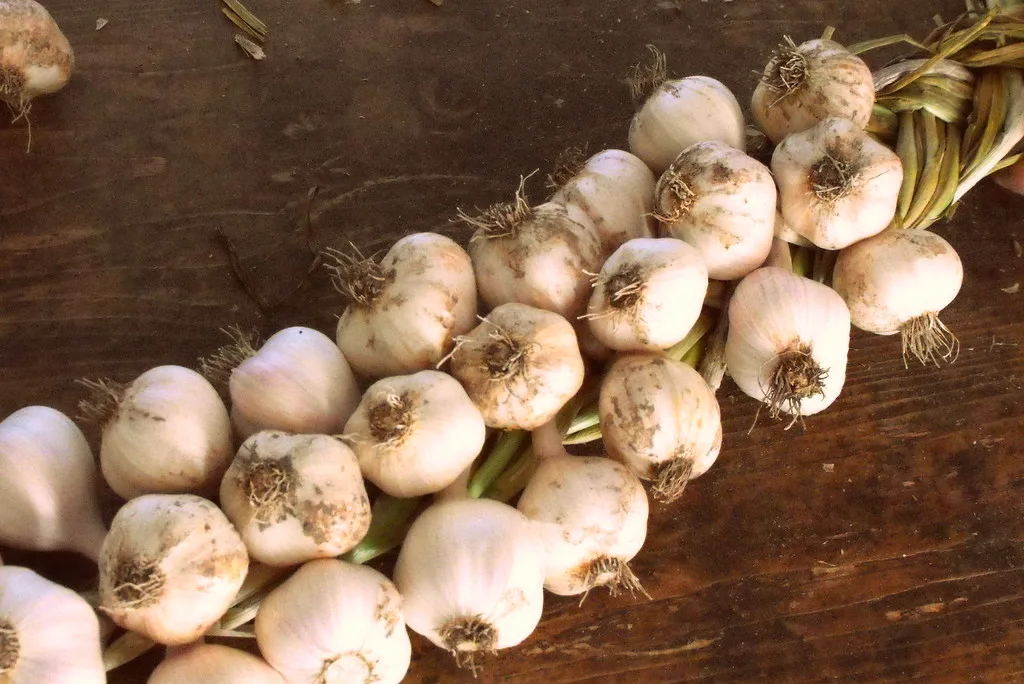
Clean the garlic before storing. By now, a garlic bulb will have been handled several times, but it is not over yet.
To clean the garlic bulbs, you will want to take them outside, as it is a bit of a dusty job. Rub off the excess soil with your fingers and trim back the roots with scissors or pruners. At the same time, you can also cut back the thick stems.
Take care to not pull off more than the outer layer of papers – the garlic needs those for long-term storage.
As you clean and trim the garlic, be sure to sort through it. Feel for signs of soft cloves and set them aside for quick eating. Anything that is moldy, is destined for the compost pile. Only save the best, most firm heads of garlic.
Loosely stored in containers
Once your garlic bulbs are thoroughly dry, you can now store them in baskets, or light cloth bags.
The most important thing is that you leave the heads whole, until you are ready to use them for cooking in the kitchen. As soon as you start removing cloves, be sure to eat them up fast, keeping in mind that light and moisture are two things that garlic does not like.
Refrain from storing garlic in the refrigerator, as the cloves may start germinating after just a few days. Cold + moisture is what sets it off on a growing spree. It will still be edible, only a little less enjoyable.
If you live in a warm environment, your garlic may also choose to sprout, much sooner than later. In that case, you may want to preserve your garlic in other ways.
In braids
Garlic can also be stored in braids, then hung in a dark pantry or closet for several months. Well-cured garlic should store for 6-8 months, or longer.
When you are ready to use a head of garlic, simply pull it off, starting at the bottom. By this time the stems will have become paper-like and the garlic heads easy to remove by hand.
As for how to make the braid, this article is a fantastic place to start, with plenty of pictures to guide you along the way.
Being able to braid garlic is one of the joys of being a gardener, that should fill you with pride for a job well done.
Pickled garlic
If you managed to damage some cloves along the way, but are still keen on saving every last bite, pickled or dehydrated are the ways to go.
To pickle them, you don’t even need to have canning skills or experience, though it never hurts to have the knowledge of saving food for longer.
Check out this article for Easy Pickled Garlic for refrigerating or canning to get the full recipe.
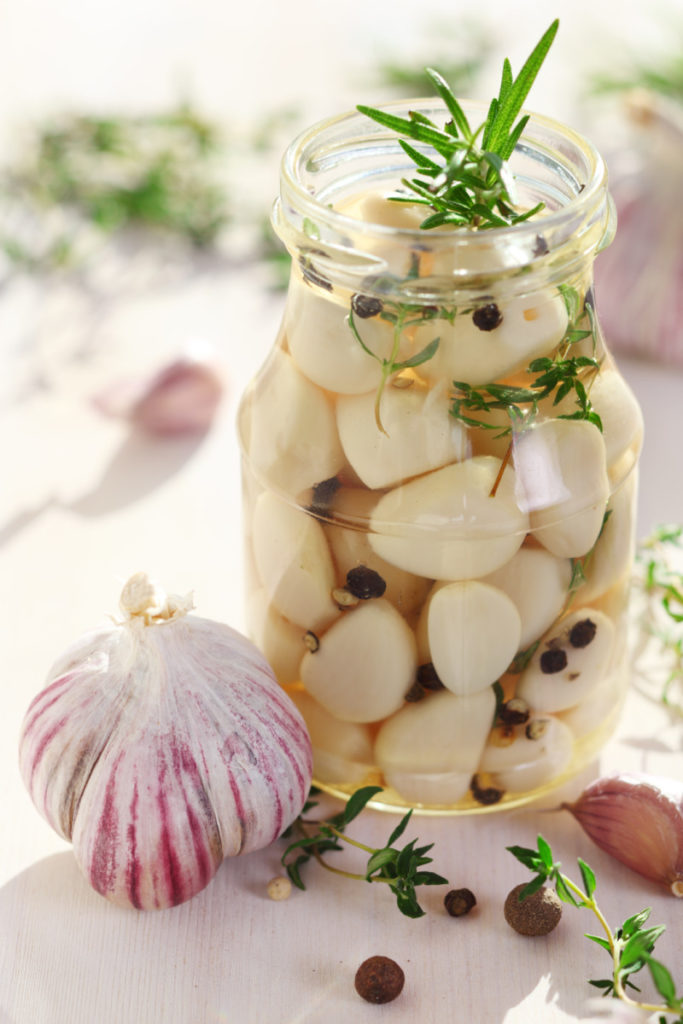

If your garlic harvest happens to coincide with your cucumber or zucchini harvest, go ahead and use any leftover garlic cloves in your pickles too.
Garlic powder
Outside of adding garlic to your canned goods, homemade garlic powder is among one of the best, most intense flavors you can get from your garden.
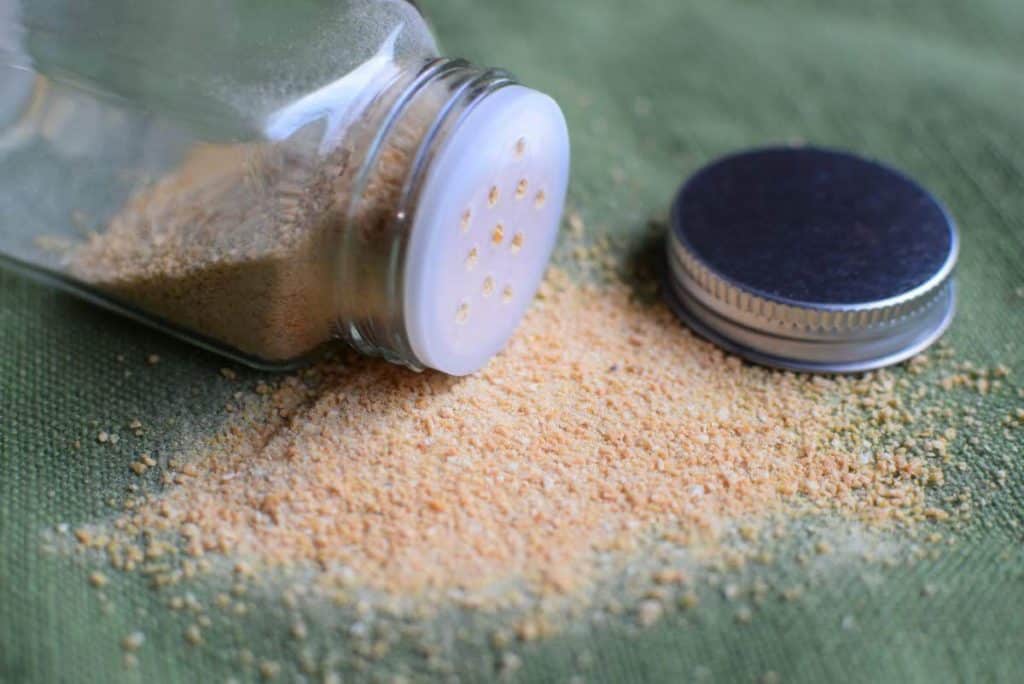

Peeling and chopping takes some time, but waiting for the dehydrator, or the oven, to finish their drying business is intense. Oh, the aromas that are to be found in slowly dehydrating garlic…
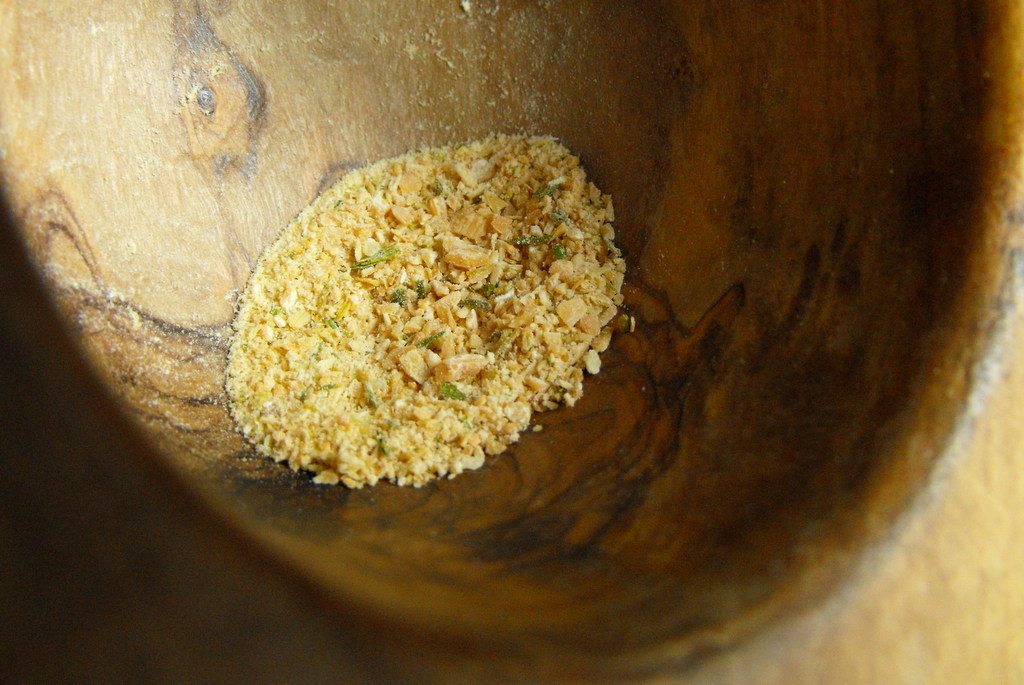

Once they are dry, run them through a spice grinder, or roughly break them up in a mortar and pestle for a rustic feel. Either way, they will taste amazing.
After all, that is what growing great garlic is all about – the flavor.
Once you know how to plant, grow, harvest, cure and store garlic, you will never have to buy it again.

Get the famous Rural Sprout newsletter delivered to your inbox.
Including Sunday ramblings from our editor, Tracey, as well as “What’s Up Wednesday” our roundup of what’s in season and new article updates and alerts.