


What’s your favorite way to eat potatoes?
- Mashed?
- French fries?
- Hashbrowns?
- Baked?
- The delicious filling of a pierogi?
No matter how you enjoy them, potatoes always taste better when they come out of your garden.
Growing potatoes is a lot different than growing other root crops like carrots or beets, where you pull up one veggie per plant.
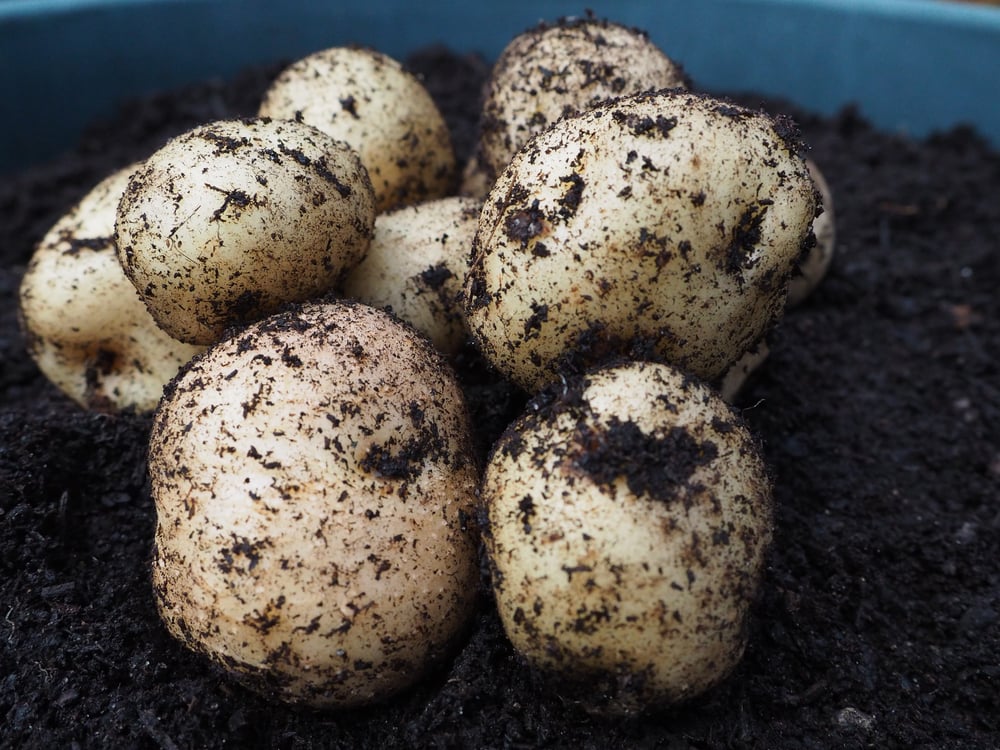
One potato plant can produce around ten potatoes. So, it’s always a surprise to dig them up and see your end result.
Ta-dah! Look at all those spuds!
And when it comes to container gardening, potatoes do exceptionally well.
Growing vegetables in a container means they’re less likely to be infected by a soil-dwelling pest, and you can control the soil and nutrients they receive.
Grab a five-gallon bucket or two and grow yourself some future French fries.
Potato varieties are categorized by how long it takes them to grow.
First earlies – such as the Yukon Gold (which I’m planting here), take around 10-12 weeks. Second earlies – like Kennebec or French fingerling potatoes, take approximately 12-14 weeks. And finally, main crop potatoes – these include russets and blue potatoes, and these can take up to 20 weeks to grow.
Sunlight
Potatoes need a lot of bright sun, around 7-10 hours a day. And because they grow underground, potatoes can handle the bright direct sun. Keep that in mind, when choosing a location for your containers.
Watering and Drainage
Because they’re a root crop, potatoes are susceptible to root rot. It’s important to drill holes into the bottom of your growing container. Your goal is to keep the soil damp, but not saturated. To do this, you may need to water them every day.

Keep in mind that in extra hot weather or on windy days, container gardens can dry out quicker than usual. You may need to water twice a day under these conditions.
Check your spuds at least once a day and water them when the soil is dry to about 2”. This will ensure happy little spuds.
It’s also a good idea to set buckets up on a couple of 2x4s rather than directly on the ground. This makes it harder for pests living in your yard to climb into the buckets from the holes in the bottom and eat your potatoes before you can. Of course, this is less of a concern if you’re putting the buckets on say a patio or a rooftop.
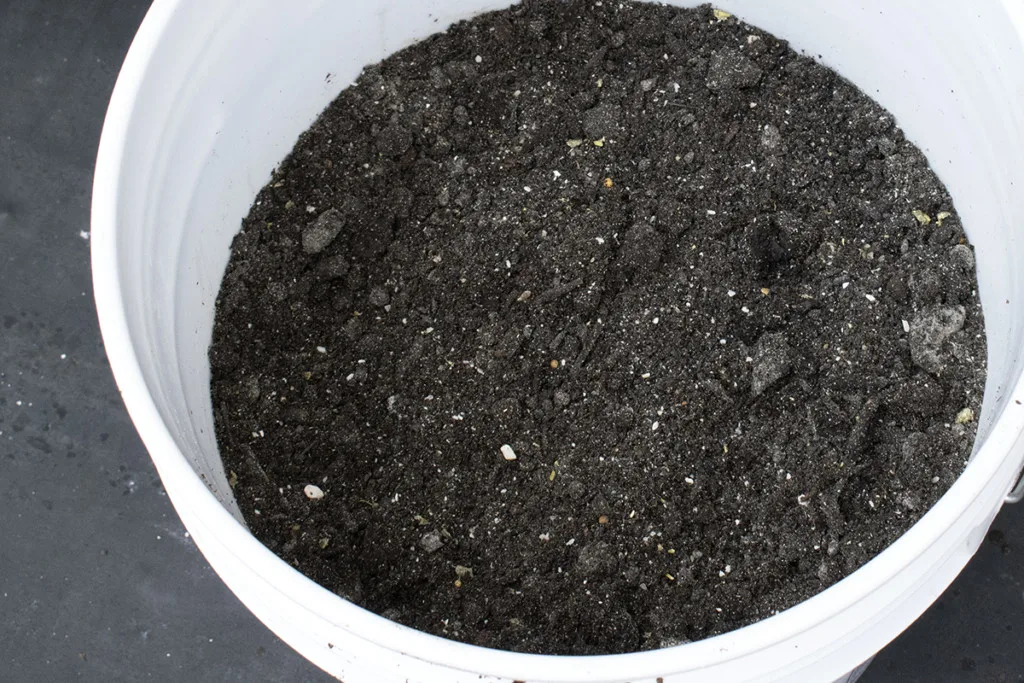
Soil Requirements
As far as soil goes, you want to choose something that will drain quickly but retain moisture and doesn’t compact too much. Most generic potting soils will do the trick. You can even try one of the moisture-control mixes, as it will stay damp longer. Just be sure you have a good number of drainage holes in the bottom of your bucket.
Or, you can also create your own mix using a 1:1:1 ratio of gardening soil, peat moss, and compost.
Because you’ll be watering the soil more frequently, you’ll be washing nutrients out quicker than if you were growing potatoes in the ground.
To that end, it’s essential to start off with a good fertilizer when you plant your potatoes. And then fertilize them regularly throughout the growing season.
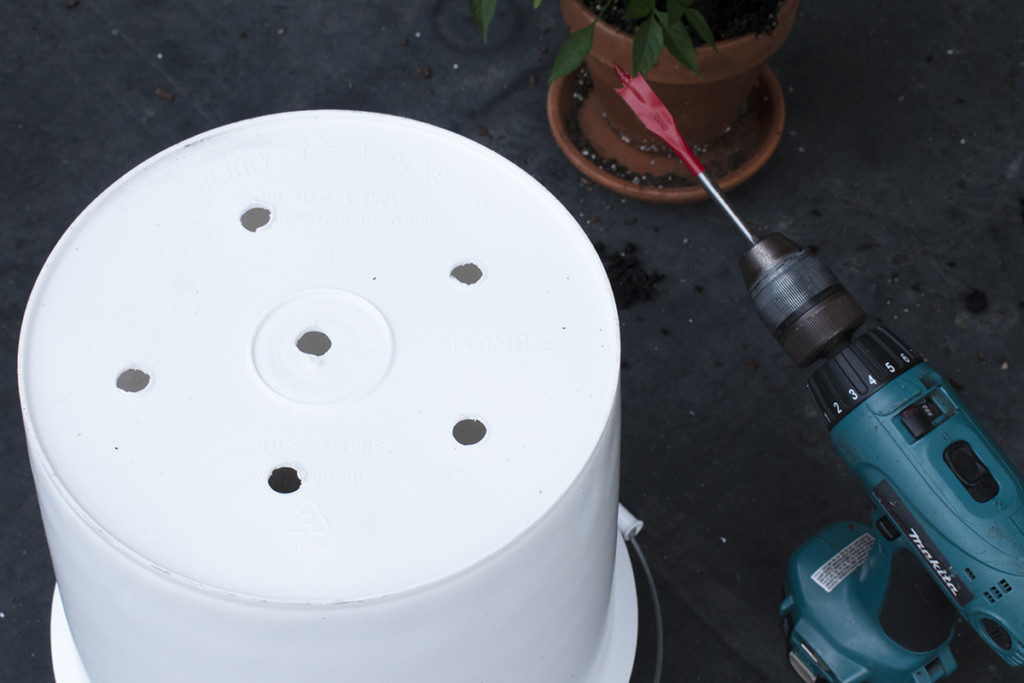
When choosing a container to grow food in, remember to pick a food-safe plastic.
Check the bottom of the bucket for the little recycling triangle. 1, 2, 4, and 5 are all food-safe plastics. Always use either a new container or something that previously had food in it. You don’t want to use, say a bucket that held driveway sealant in it.
It’s pretty easy to get free food-safe 5-gallon buckets to use for container gardening.
Ask around at a few local restaurants, delis, or bakeries. Many bulk food items come to establishments like this, such as pickles and icing in 5-gallon buckets. Ask them to save a few for you and be timely in picking them up, and I’m sure you’ll never have to buy another 5-gallon bucket again.
On to the actual potato growing!
You’ll need to purchase seed potatoes. Seed potatoes are a bit different from what you would find in a grocery store.
Seed potatoes are certified to be disease-free and generally aren’t treated with a sprout-inhibitor. Which is good, because that’s what you want them to do, whereas you don’t want to go to make mashed potatoes and find your spuds full of sprouts.
Once you have your seed potatoes, you’ll need to ‘chit’ them.

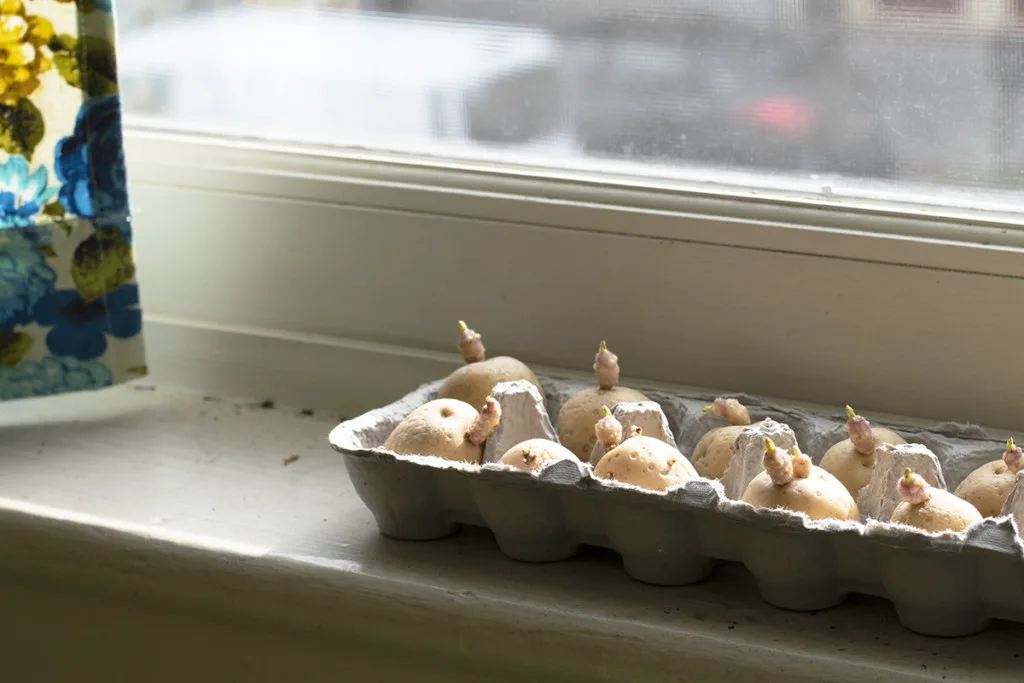
‘Chitting’ simply means you’re encouraging your potatoes to put out sprouts. This is easy to do with a little time and an old egg carton.
Put the potatoes in the egg carton, as if they were eggs, oblong-wise up, and place the carton somewhere cool and sunny. A windowsill works well. In a couple of weeks, you’ll have potatoes with sprouts that are around ¾” to 1” long.
Click here for a more in-depth tutorial on how to chit seed potatoes.
You don’t have to chit seed potatoes. You can just toss them in the dirt, but doing it this way will add a couple of weeks to your time to harvest.
Now, you’re ready to plant.
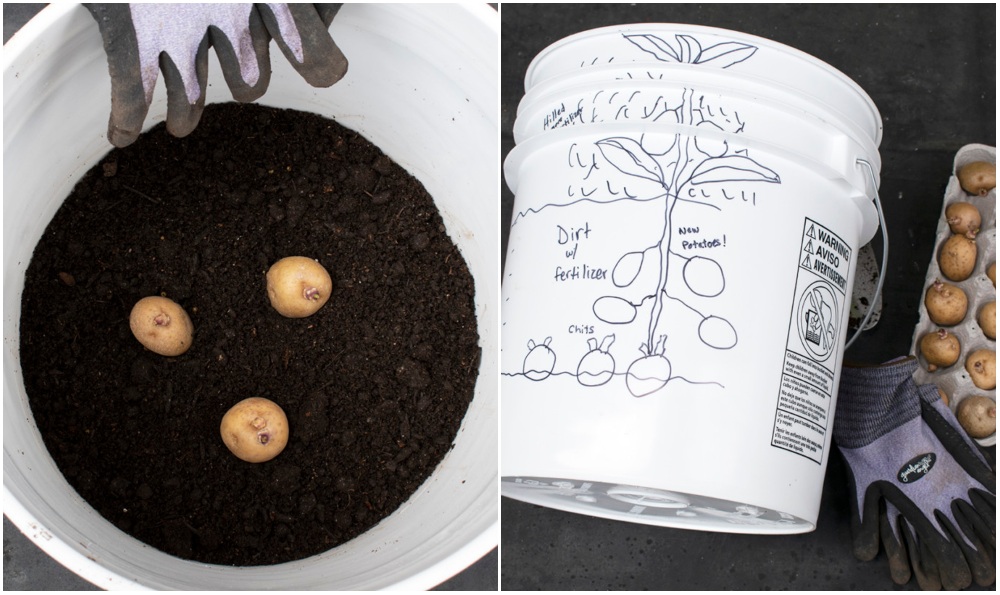
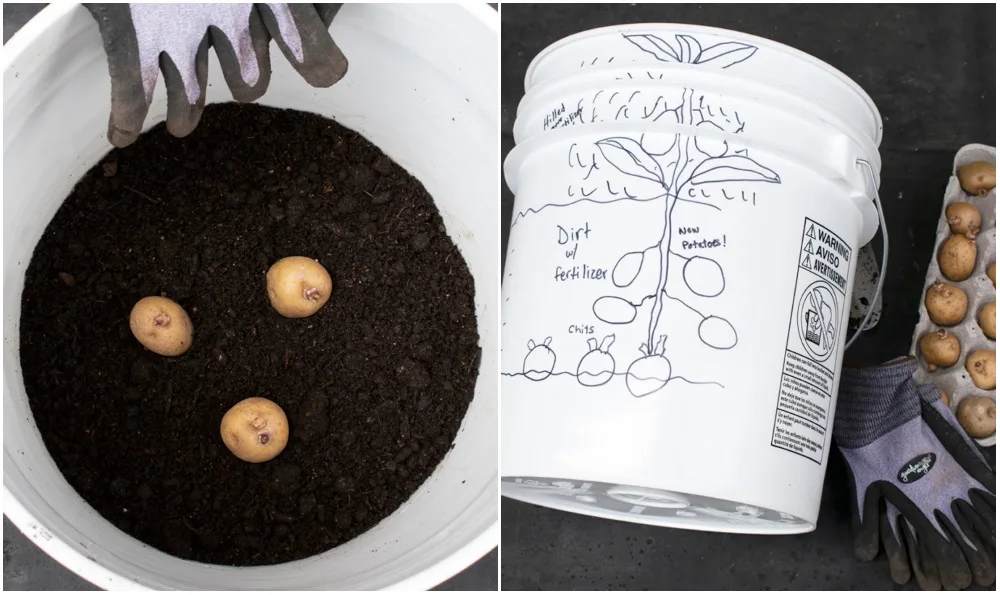
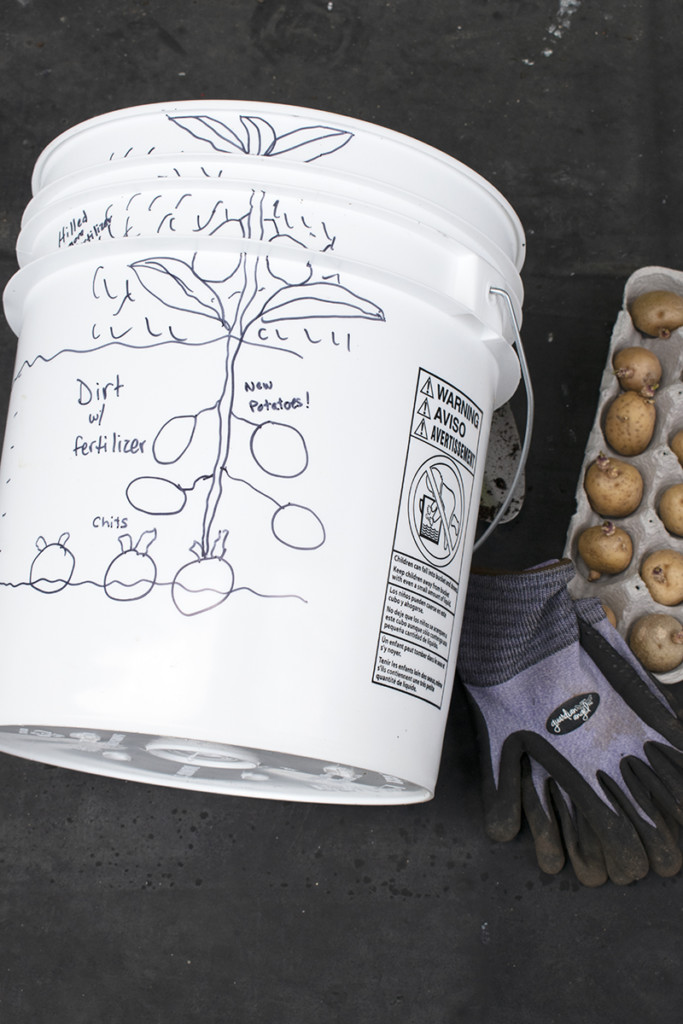
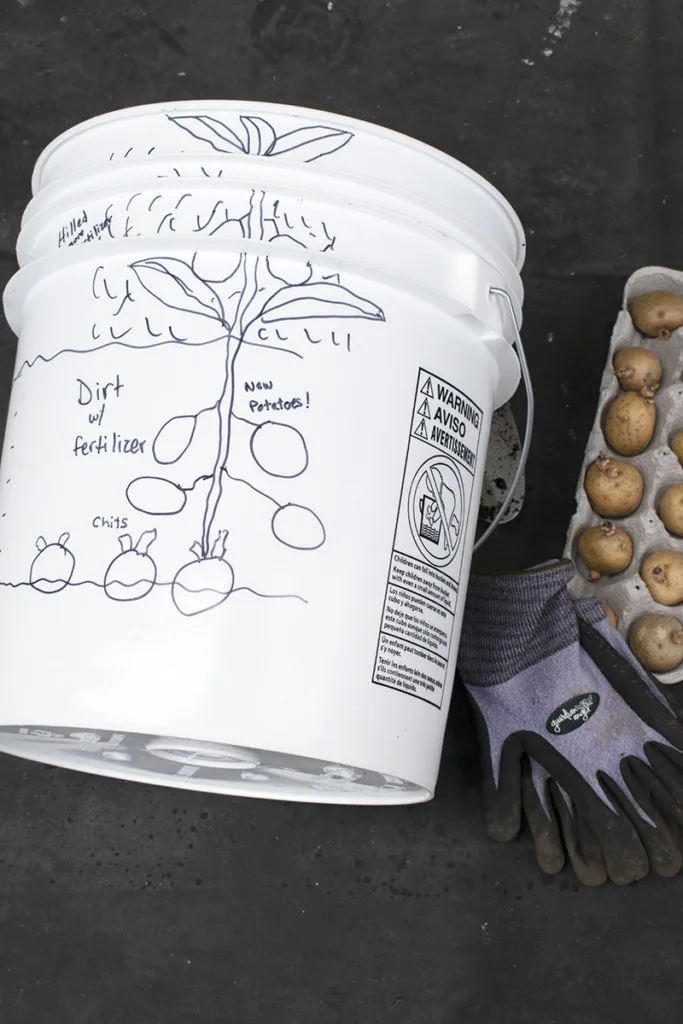
Planting potatoes in containers is a little different than other container gardening. You want to put a layer of soil down first, then your chits, then more dirt. The idea is to give the potatoes plenty of room in the dirt to grow those delicious tubers we all know and love.
You’re going to start by putting in about 4” of soil on the bottom of the bucket. Next, you’ll add three chits.
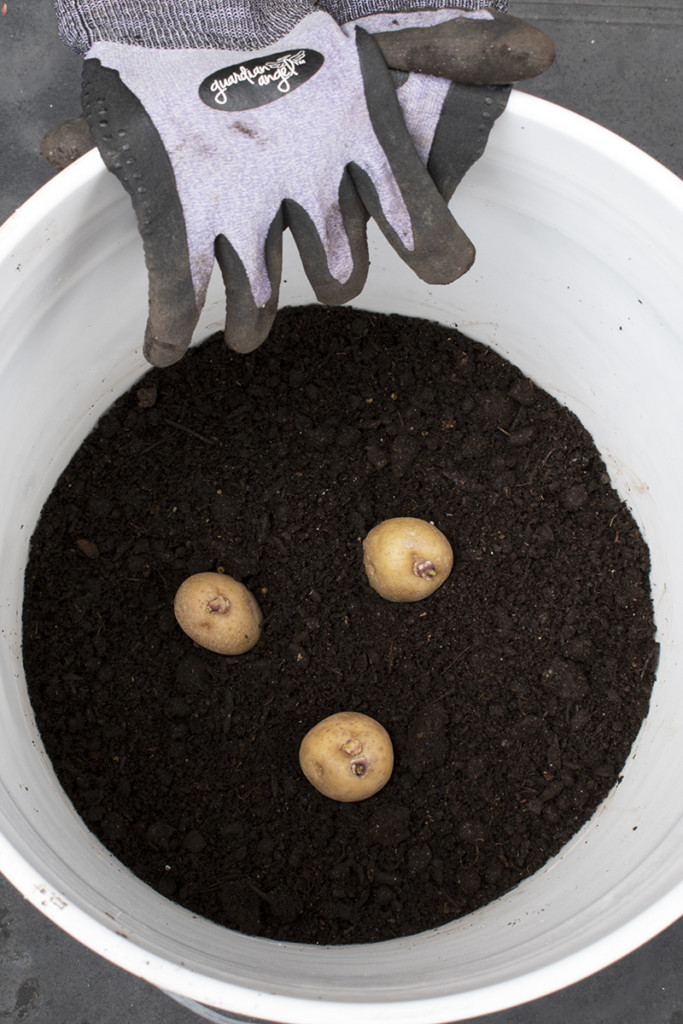
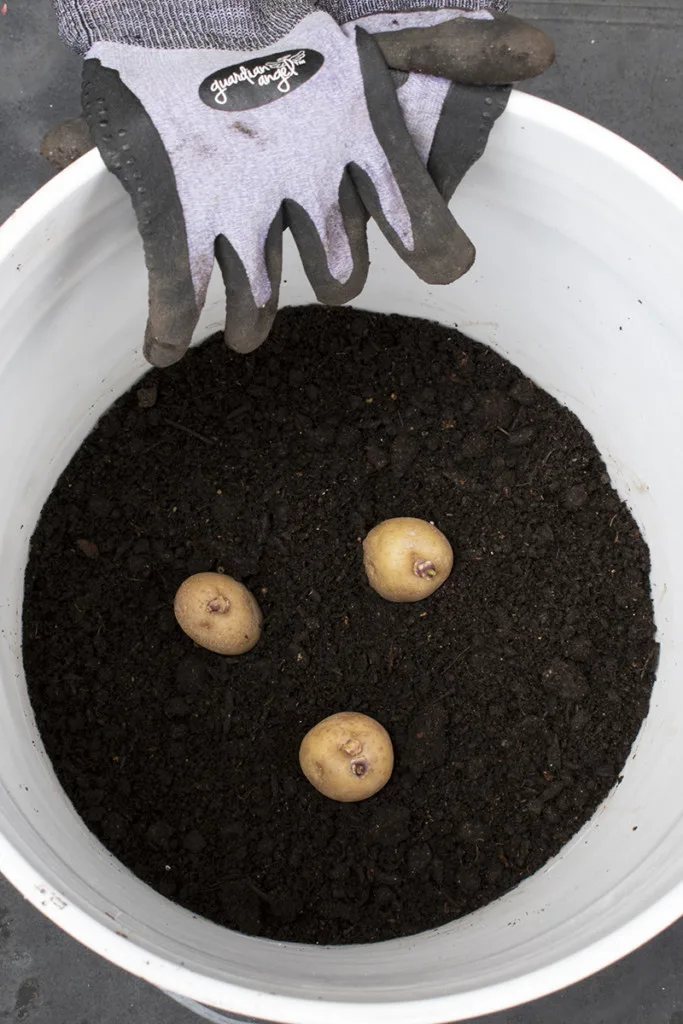
Cover them loosely with soil, adding an additional 6”. Measuring and drawing a couple of lines inside the bucket can help make this step easier.
It’s important to add a good fertilizer when you plant. Container gardens lost nutrients faster than planting directly in the soil.
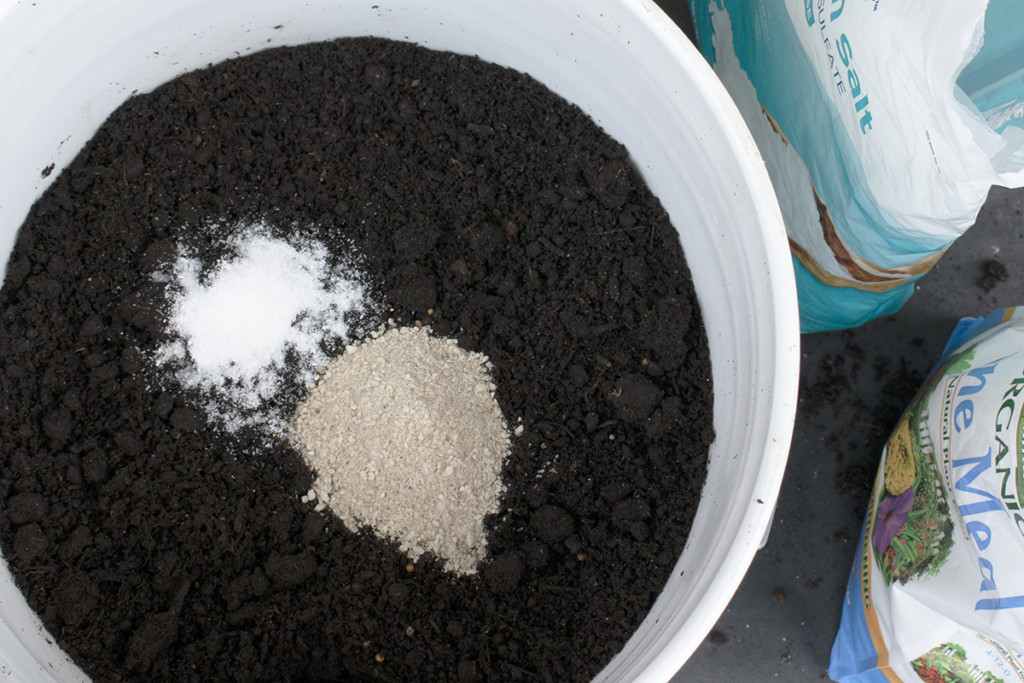
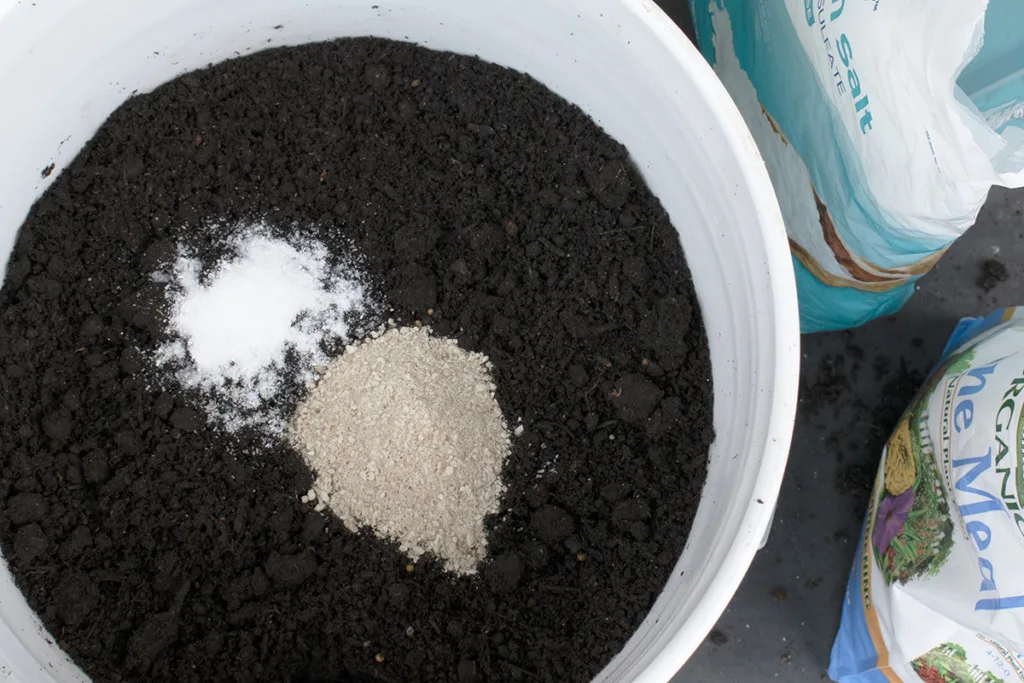
Mix about ¼ cup of bone meal and 1/8 cup of Epsom salt into the last 6” of dirt, this way, the fertilizer will soak down where it’s needed most each time you water. Mix it into that top 6″ of soil well.
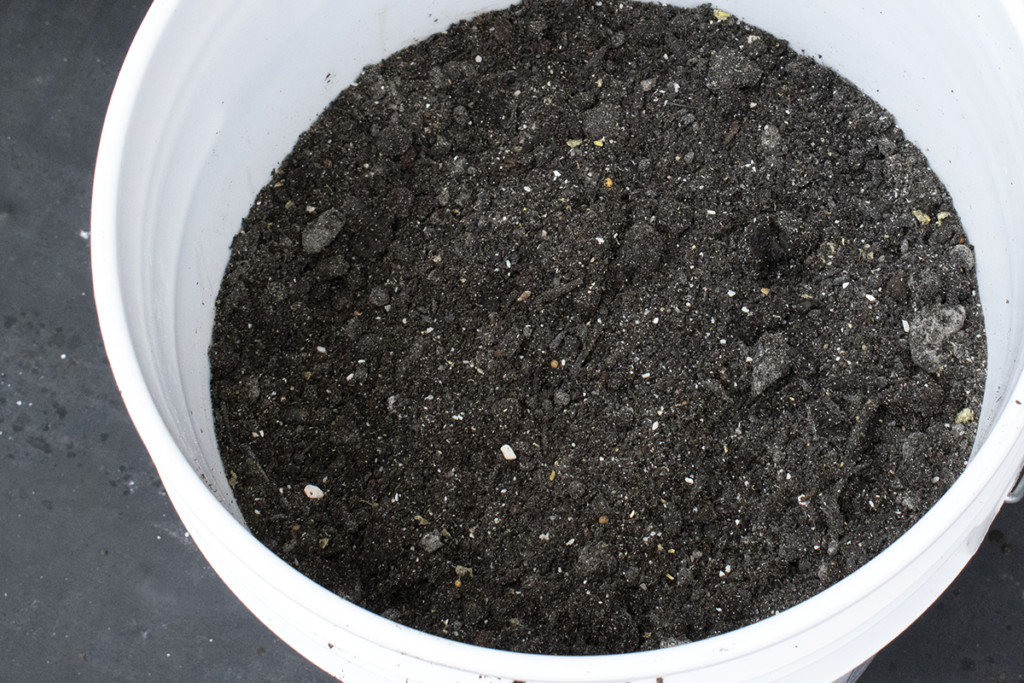
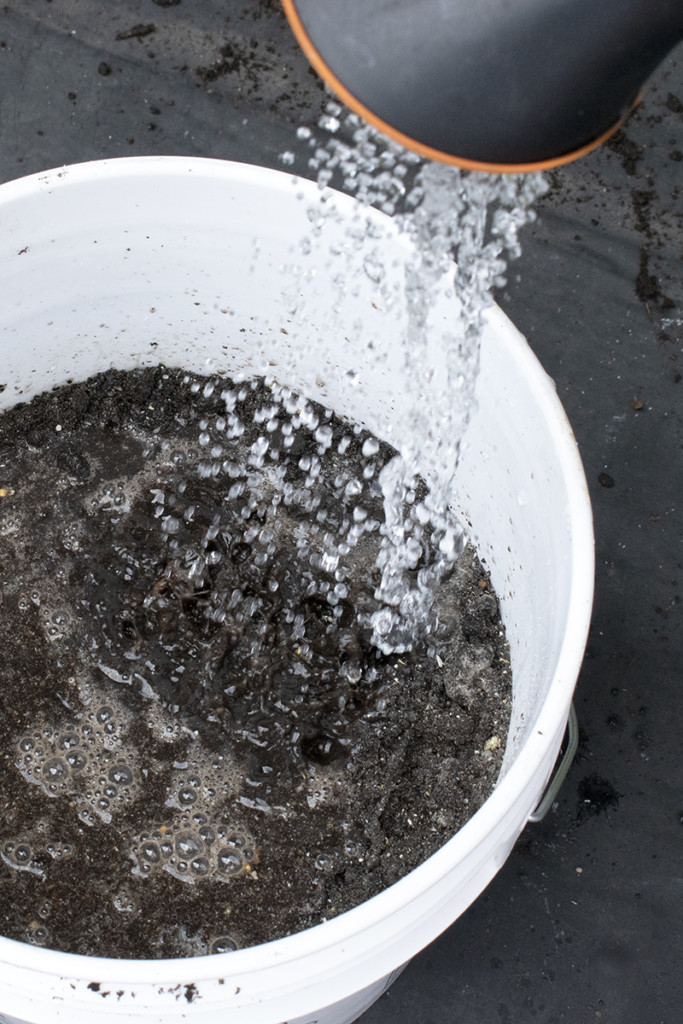
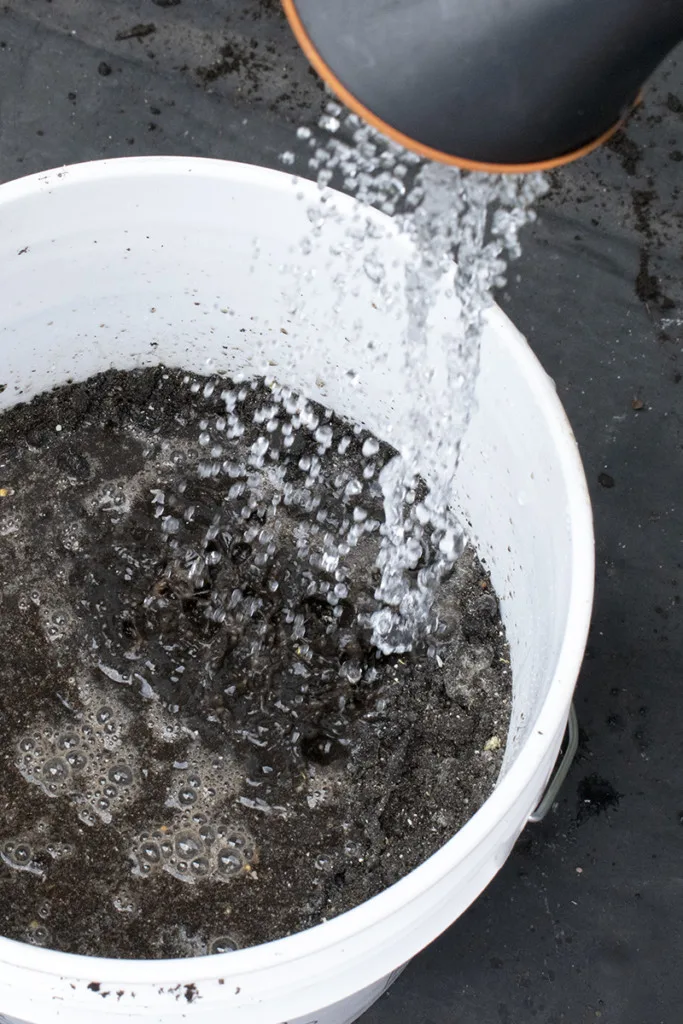
Now water in your potatoes. Give them a good soaking and put them someplace nice and sunny.
Hilling Potatoes
In about two weeks, the potato plant should be growing above the dirt. Once the visible potato plant reaches around 6-8” high, it’s time to hill your potatoes.
Hilling potatoes is exactly like it sounds – you’re mounding soil or another growing medium around the exposed plant.
It’s essential to hill potatoes, as the tubers grow out of the exposed stems. If the potatoes are left to grow above ground, they will turn green and green potatoes are inedible. The potatoes will produce chlorophyll (that’s the green) and solanine, which can cause paralysis if you ingest enough. Not what we’re after here.
You can use potting mix, mulch, hay, or coconut coir to hill potatoes.
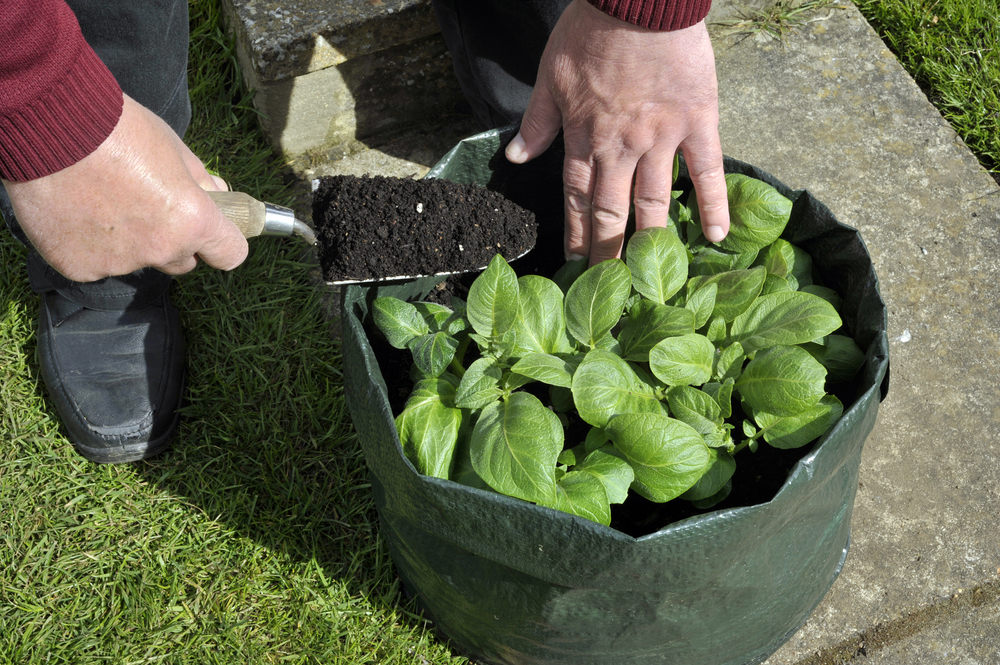

Now is also a good time to add another layer of fertilizer, bone meal, and Epsom salt. Gently mix it into the top layer of soil as you did when you were planting the seed potatoes.
After fertilizing, add whatever medium you’ve chosen to the top layer of soil right up to the top of the bucket or the top few inches of the potato plant.
Check your containers regularly and cover any potatoes that decide to pop up close to the surface.
I’ve drawn what’s going on below the dirt on the side of my bucket. You should have a better idea of what’s going on below the dirt.
Harvesting Your Spuds
You can harvest ‘new’ potatoes once the potato plants start flowering. If you want a main crop, don’t dig them all up yet. Put your garden gloves on and feel around below the dirt, pulling up as many new potatoes as you like. Leave the rest to continue growing. New potatoes are thin-skinned and won’t store long; they’re meant to be eaten right away.
Watch the plant later in the growing season, as it will clue you into when the main crop is ready. Once the plant dries up, give it another couple of weeks, and then you can harvest your potatoes.
One of the greatest benefits of growing potatoes in a container is you get a damage-free yield.
Since you don’t have to dig them up out of the soil, you won’t be nicking your spuds with your shovel.
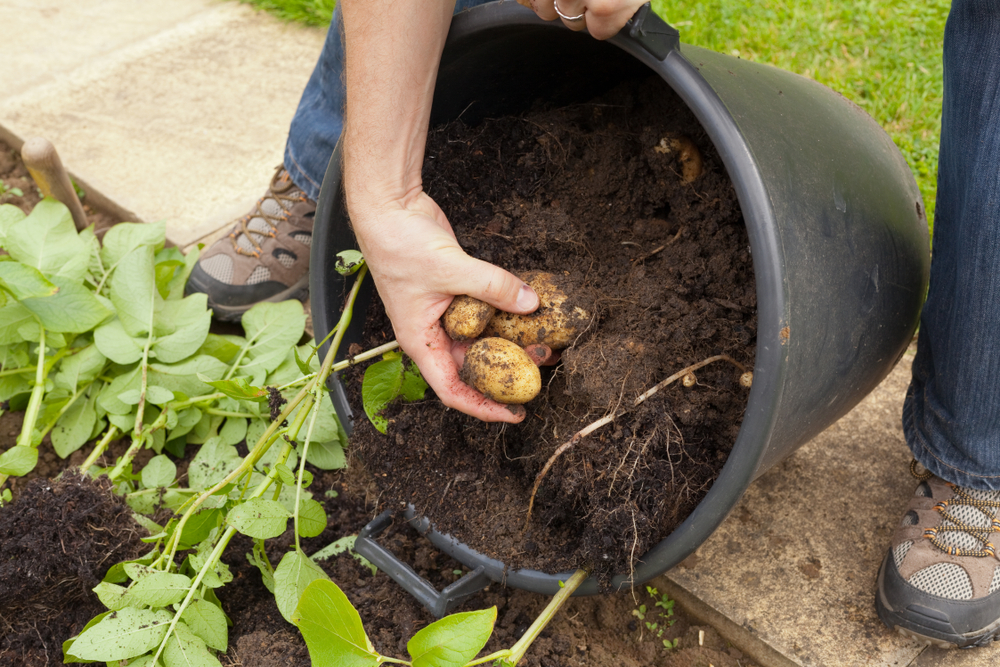
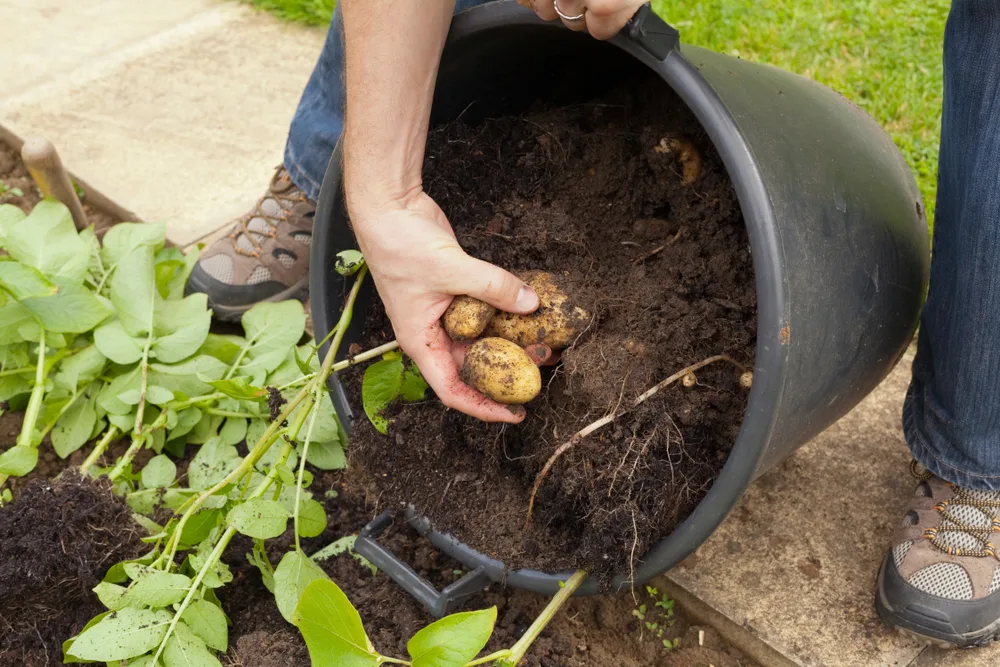
It’s always best to harvest your potatoes on a good, dry day. Moisture is going to lead to rotten potatoes, and that’s the last thing you want after all of your hard work.
It’s easiest to dump the bucket out onto a drop cloth or directly on the ground to collect the potatoes. Don’t clean them off just yet, brush off most of the dirt and then let them cure in the air for an hour or two.

Now that you’ve got all these delicious potatoes, you’re probably wondering how to store them. Well, we can help you out there too.
Check out 5 Ways to Store Potatoes So They Last for Months.
And if you get a bumper crop and run out of ways to cook them, check out 30 Unusual Uses for Potatoes You’ve Probably Never Considered.

Get the famous Rural Sprout newsletter delivered to your inbox.
Including Sunday ramblings from our editor, Tracey, as well as “What’s Up Wednesday” our roundup of what’s in season and new article updates and alerts.